The weather had been good for a few days, but I hadn’t had an opportunity to go hiking (aside from a couple of short hikes near Whistler – more on that here).
Saturday the 29th looked like the weather would start out fine, and end up showering by around dinner time – probably earlier in the mountains. So I decided to tackle a couple of peaks on the North Shore that I had never hiked before. They are relatively easy hikes, without any sort of technical difficulties, and very easy routefinding. That way, if the rains came early, I wouldn’t be stuck in a challenging situation.
The only issue with hiking these two peaks (Mount Strachan and Black Mountain) is that they are on the opposite sides of the parking area at Cypress Bowl – which means basically two out-and-back hikes, with no opportunity to traverse from one to the other. So: Gain all the elevation, lose all the elevation, and then gain all the elevation again!
I got a bit of a late start, not arriving at the parking lot until about 11:30. The place was packed! So many vehicles, so many people. Everyone wanted to take what might be one of the last not (yet) rainy weekends of the hiking season.
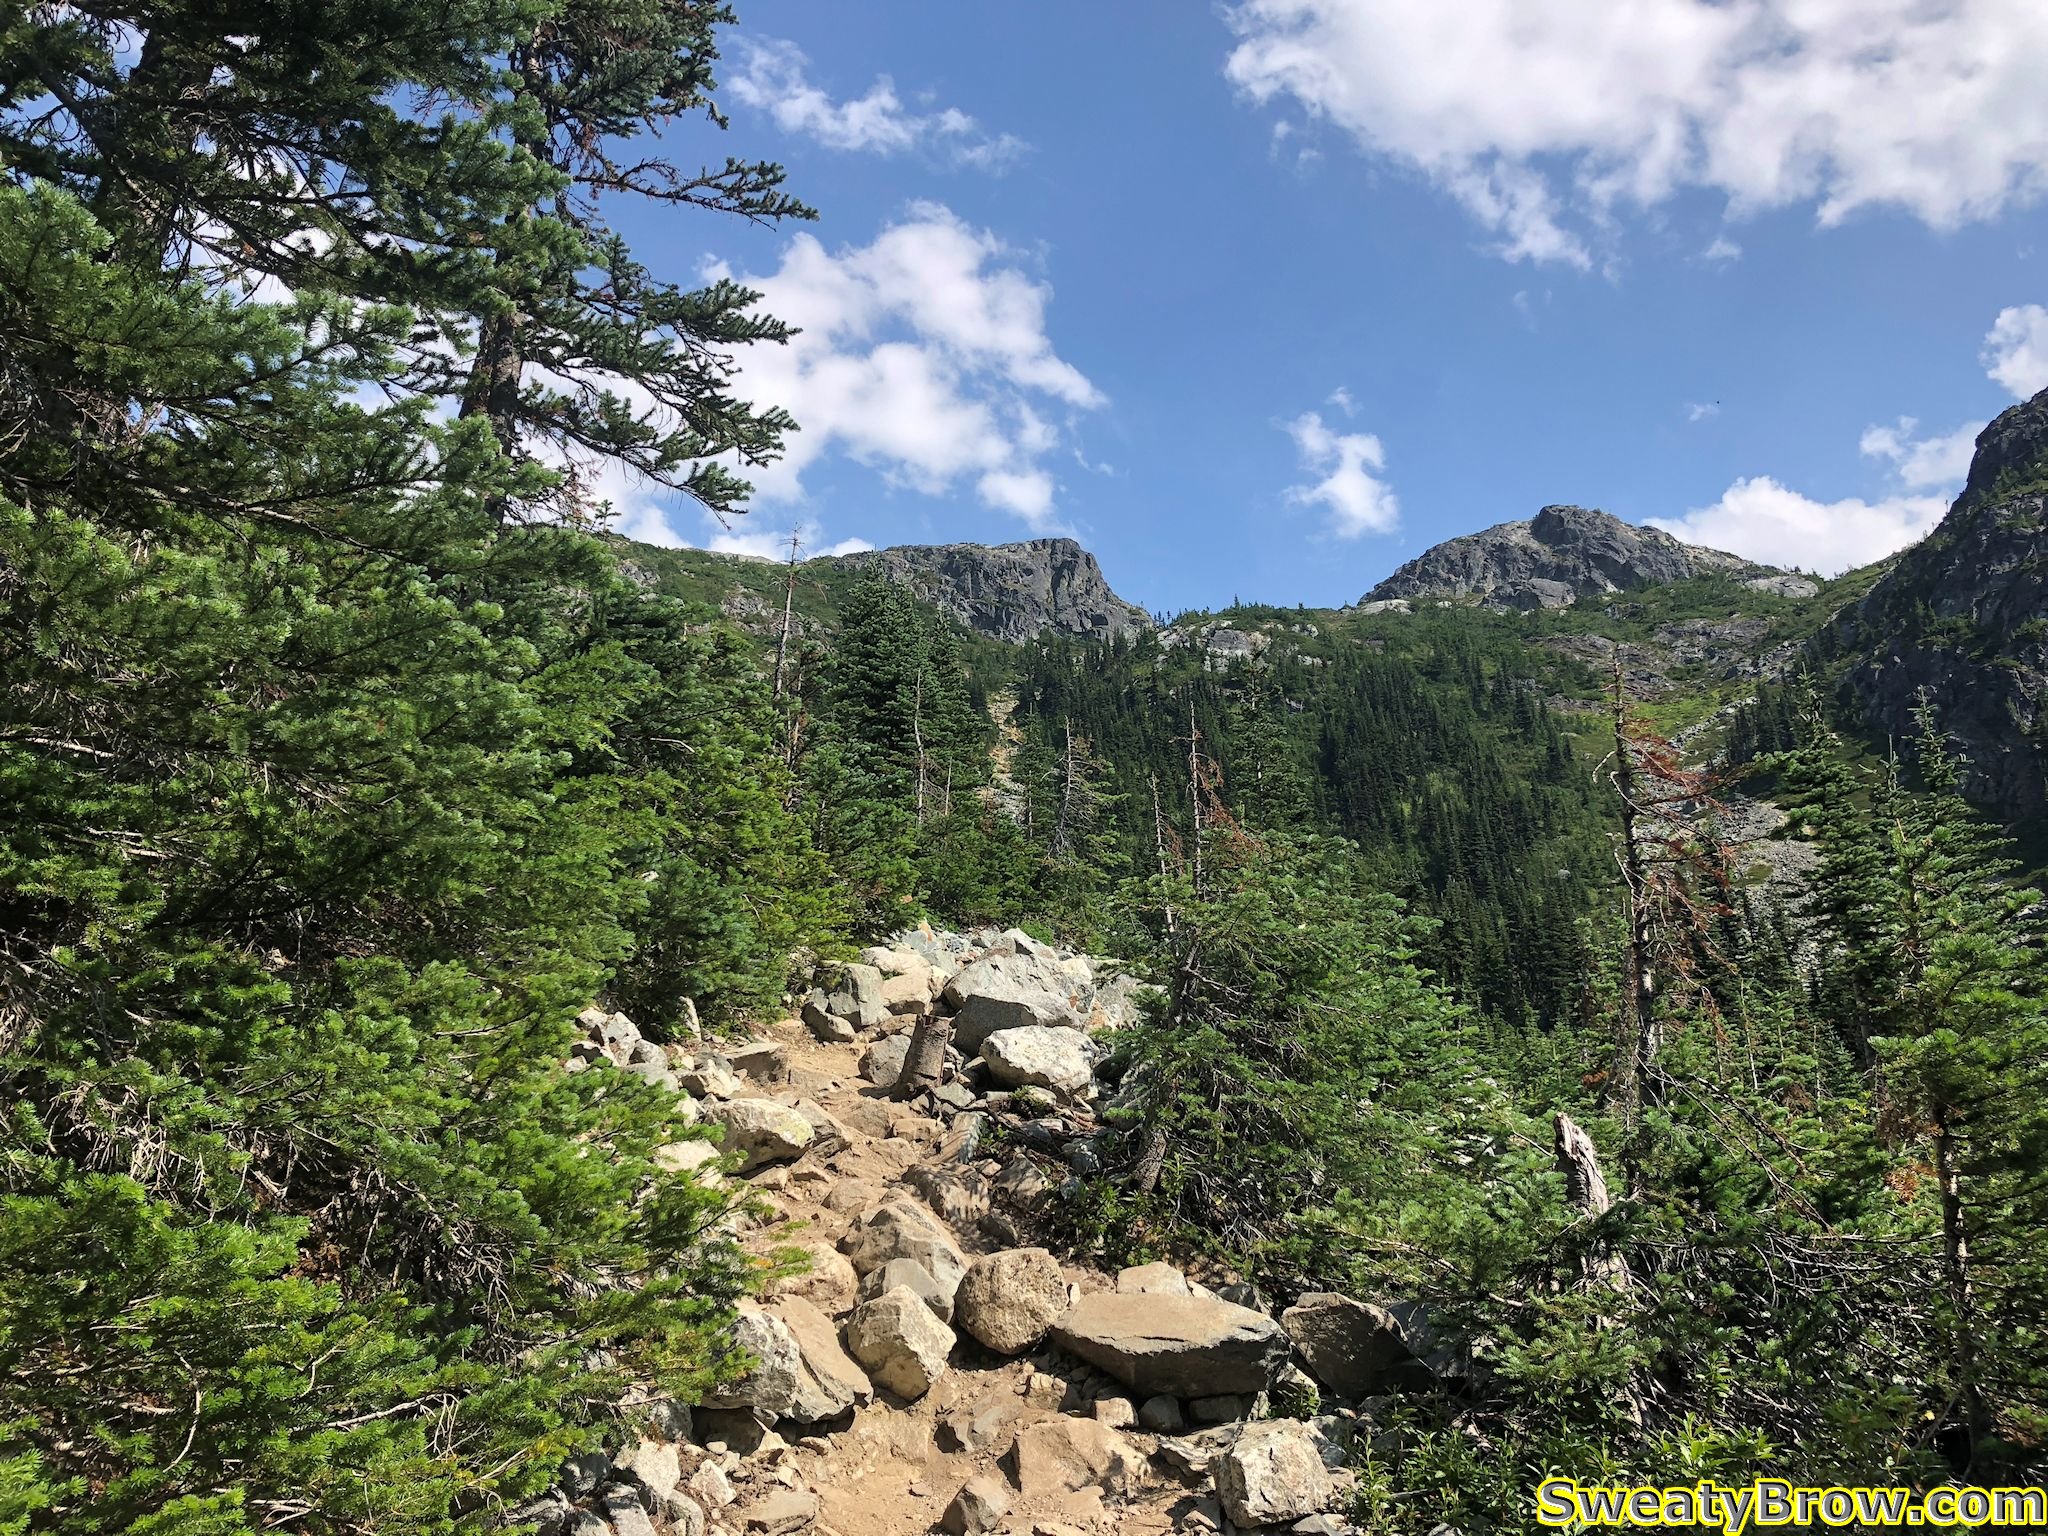
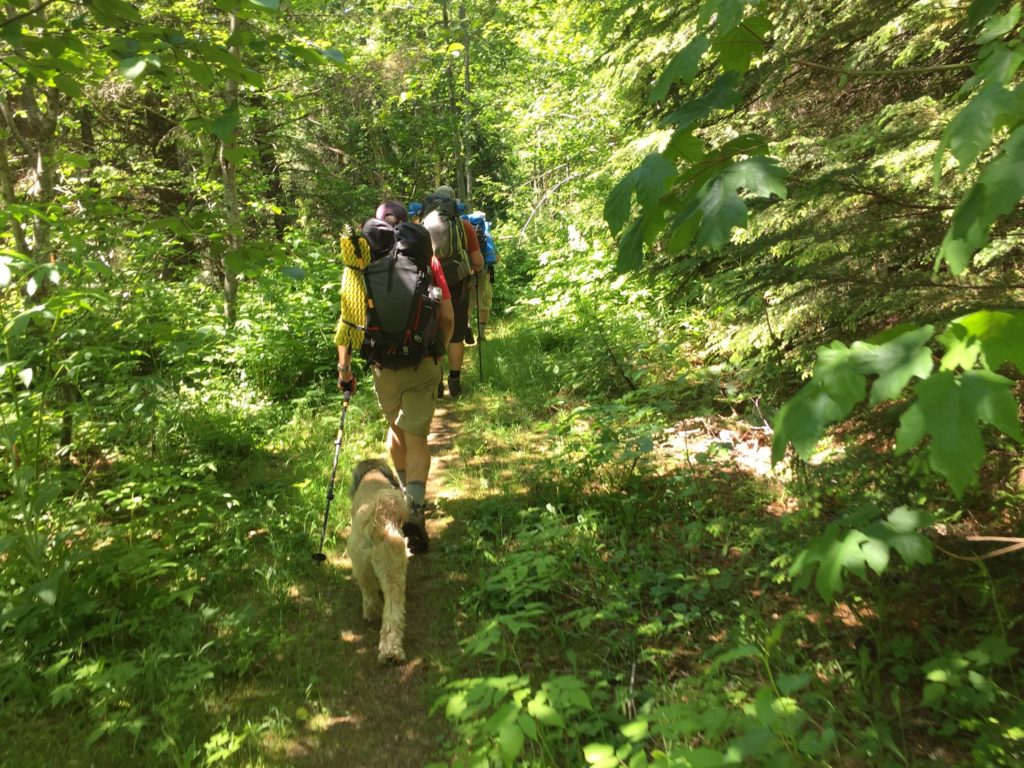
I started out heading east from the parking lot on the Baden-Powell Trail, and hiked right past the turnoff to head up the Mount Strachan Trail – it was well hidden by some logs and snags. I checked my GPS, and backtracked about 200m to find it; from there it was easy to follow.
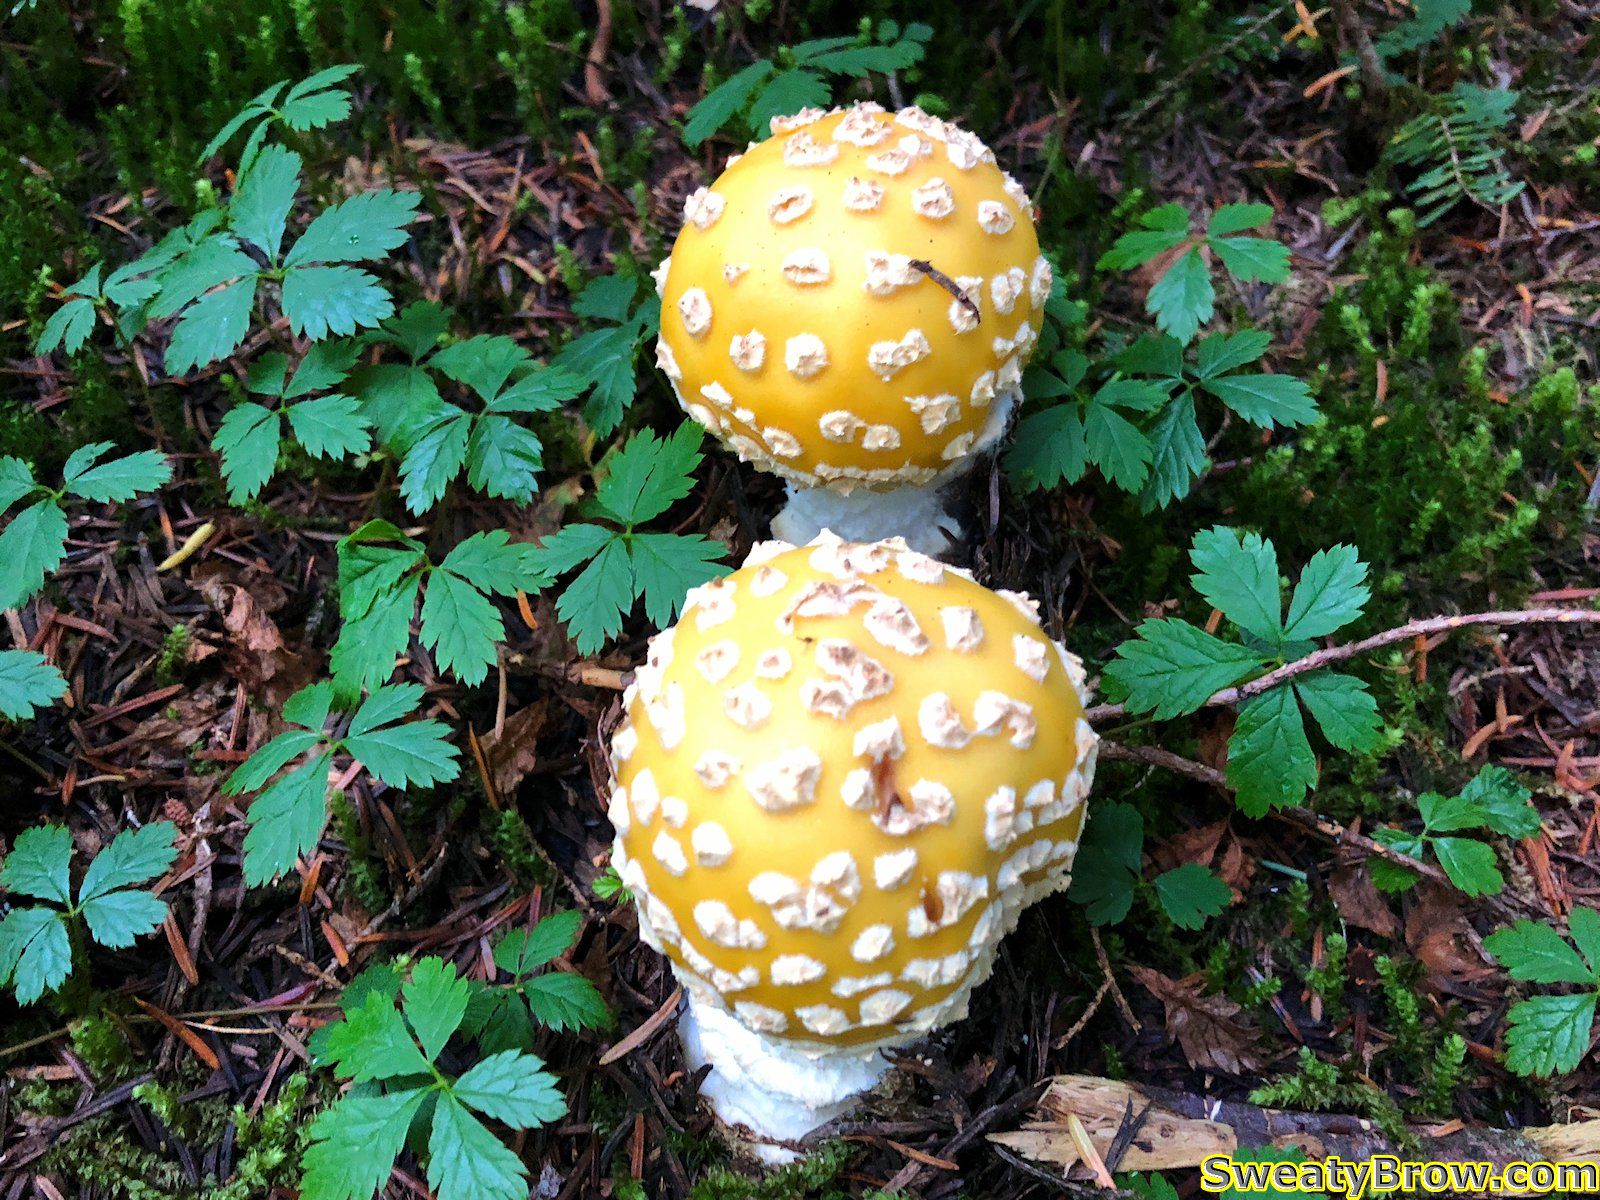
There were a few big, beautiful old growth trees along the way, as I climbed through the forest. Lots of delicious blueberries were on offer as well – I had a few, just to sample them. A few mushrooms were gaudily on display, too.
Some funky looking, but poisonous, mushrooms growing on the way up Mount Strachan. I’m pretty sure these are Fly Agaric (amanita muscaria) mushrooms, though they are usually redder in colour…
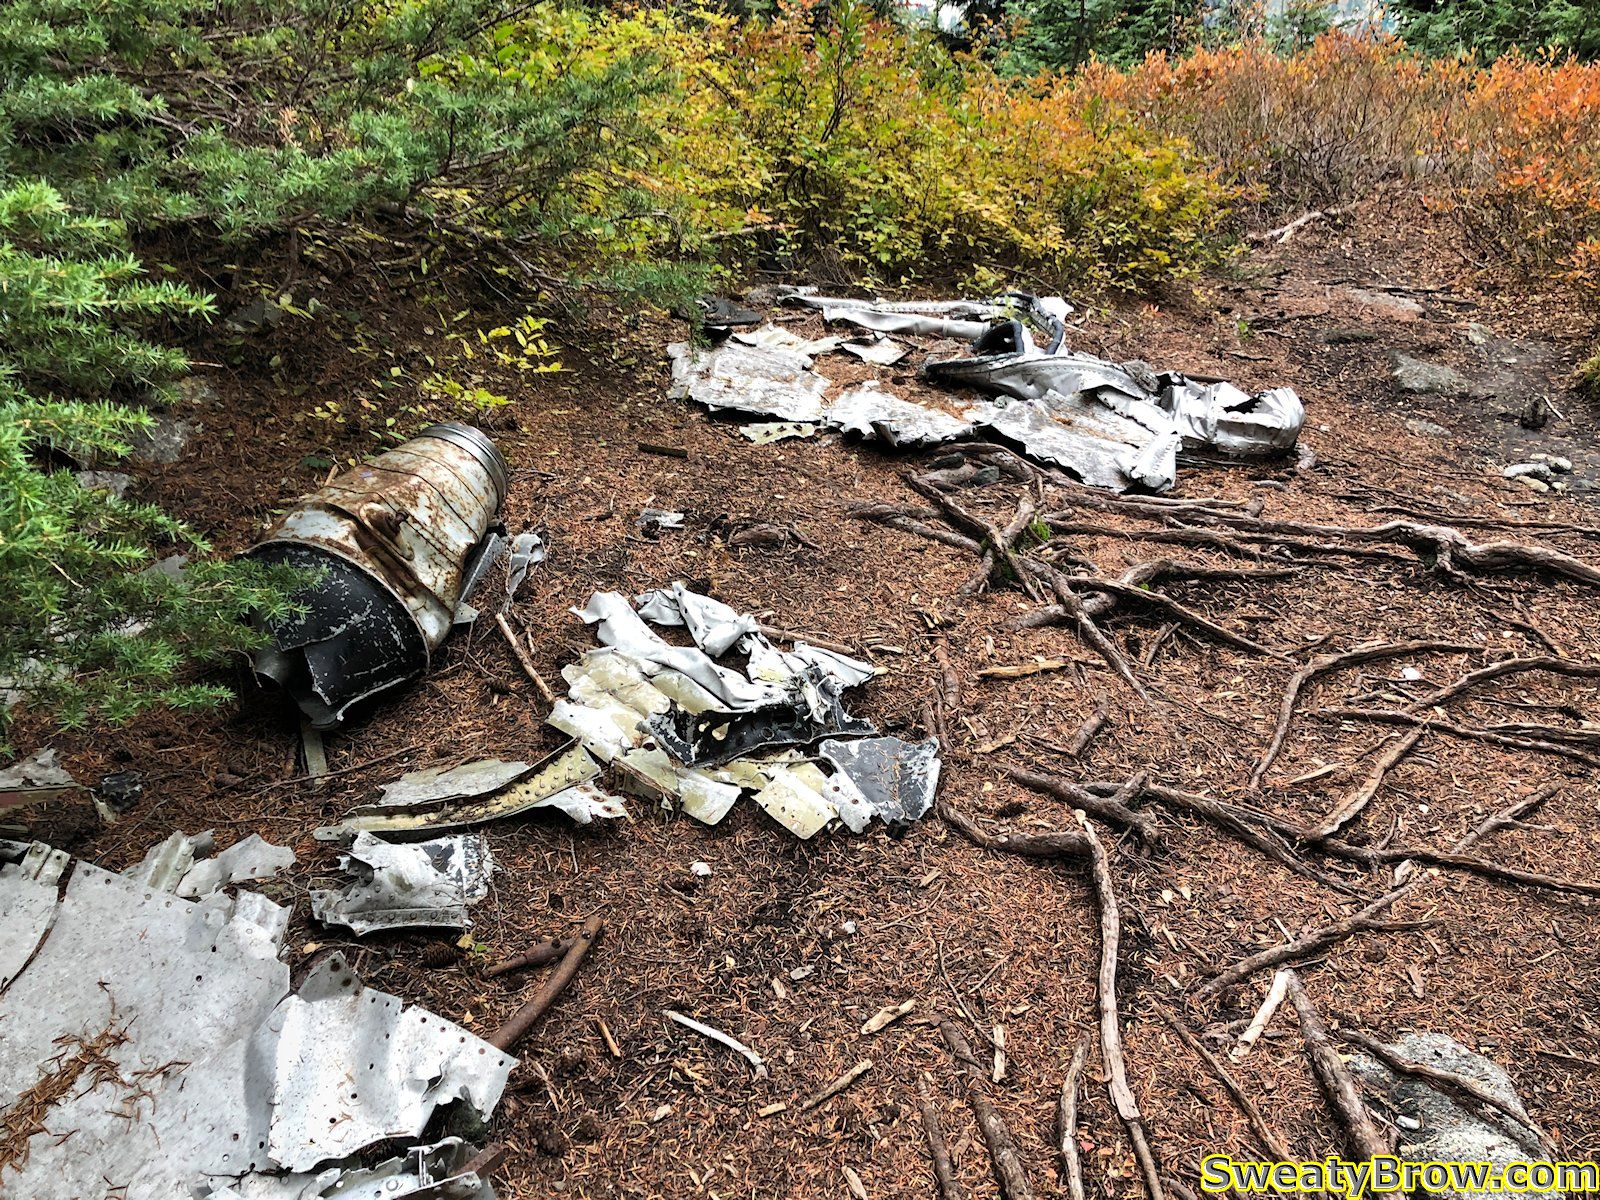
After about an hour on the trail, I reached the site of a 1963 plane crash. Debris from the aircraft, a small two-seater jet training aircraft, is scattered across the trail. Two members of the Royal Canadian Navy died in the crash, which wasn’t found until three days after the accident.
Some of the debris that remains from the Royal Canadian Navy T-33 that crashed on Mount Strachan, 23 November 1963.
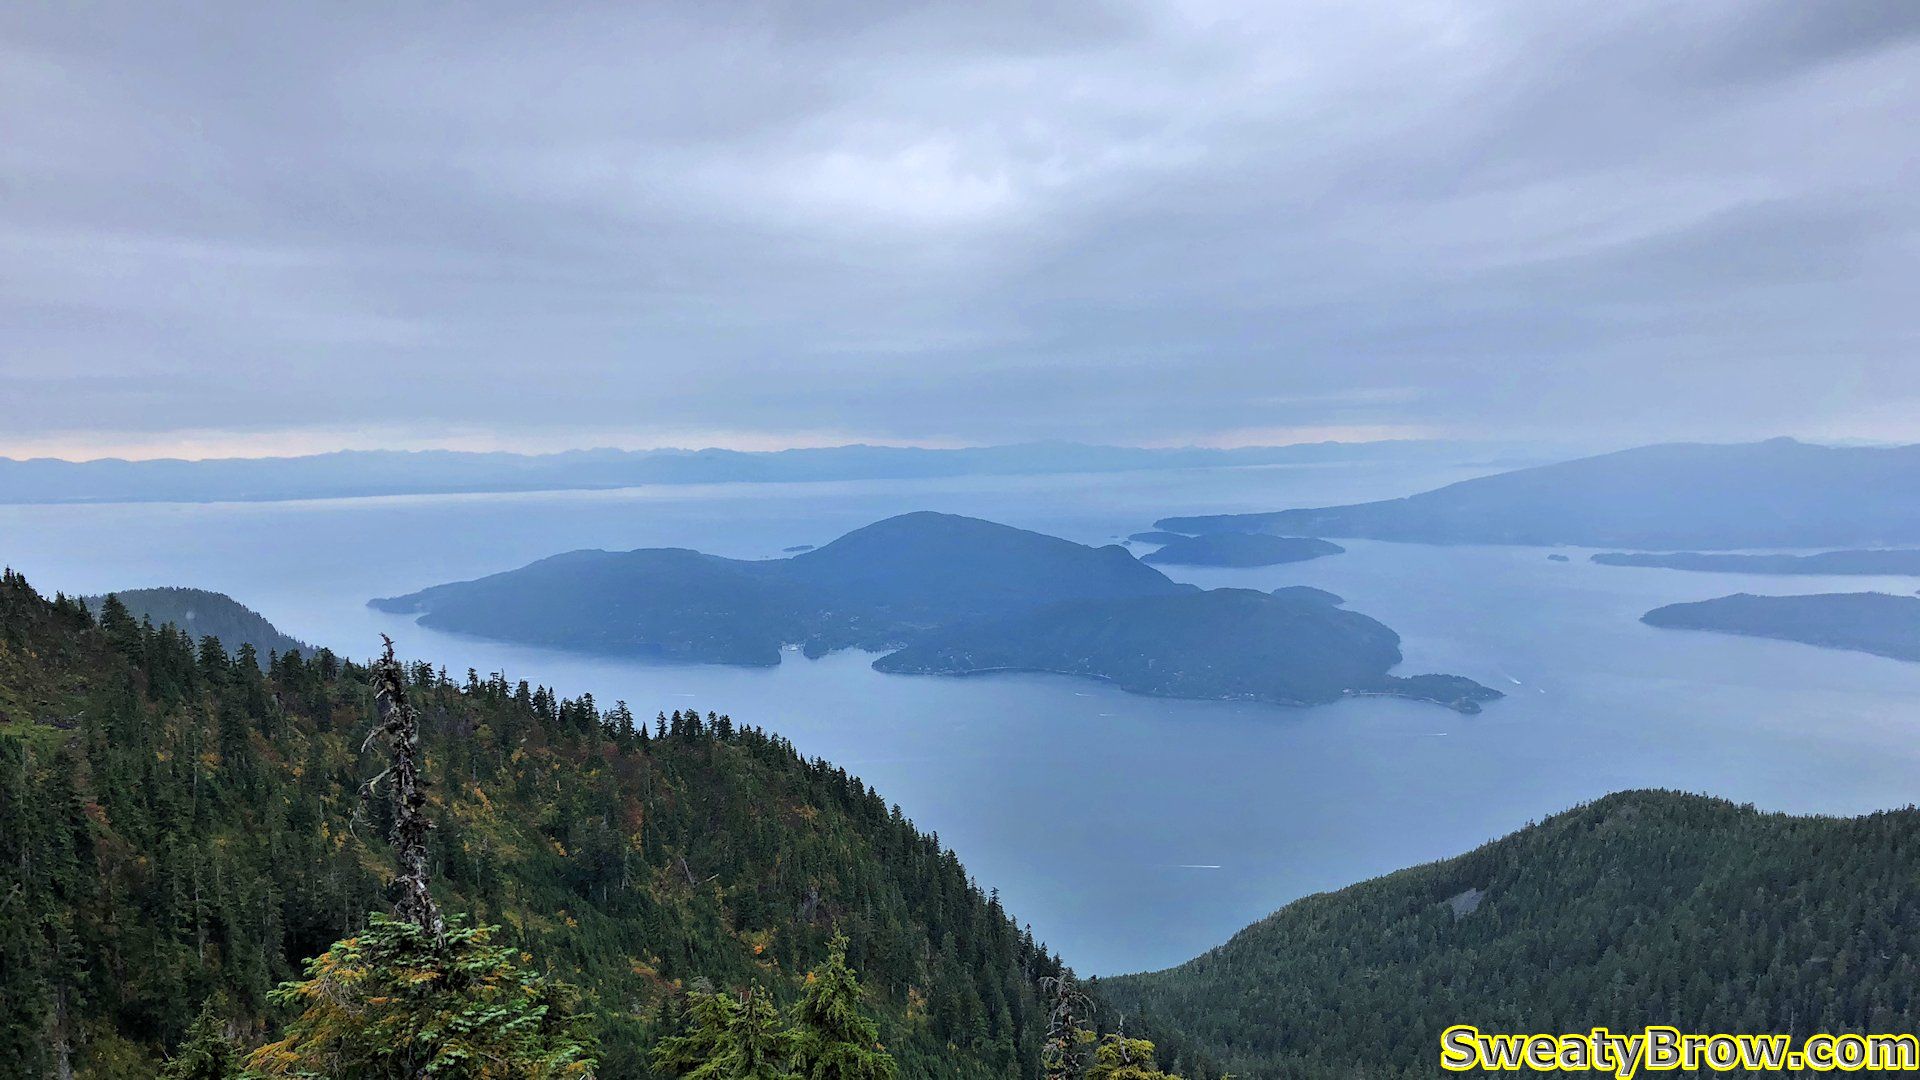
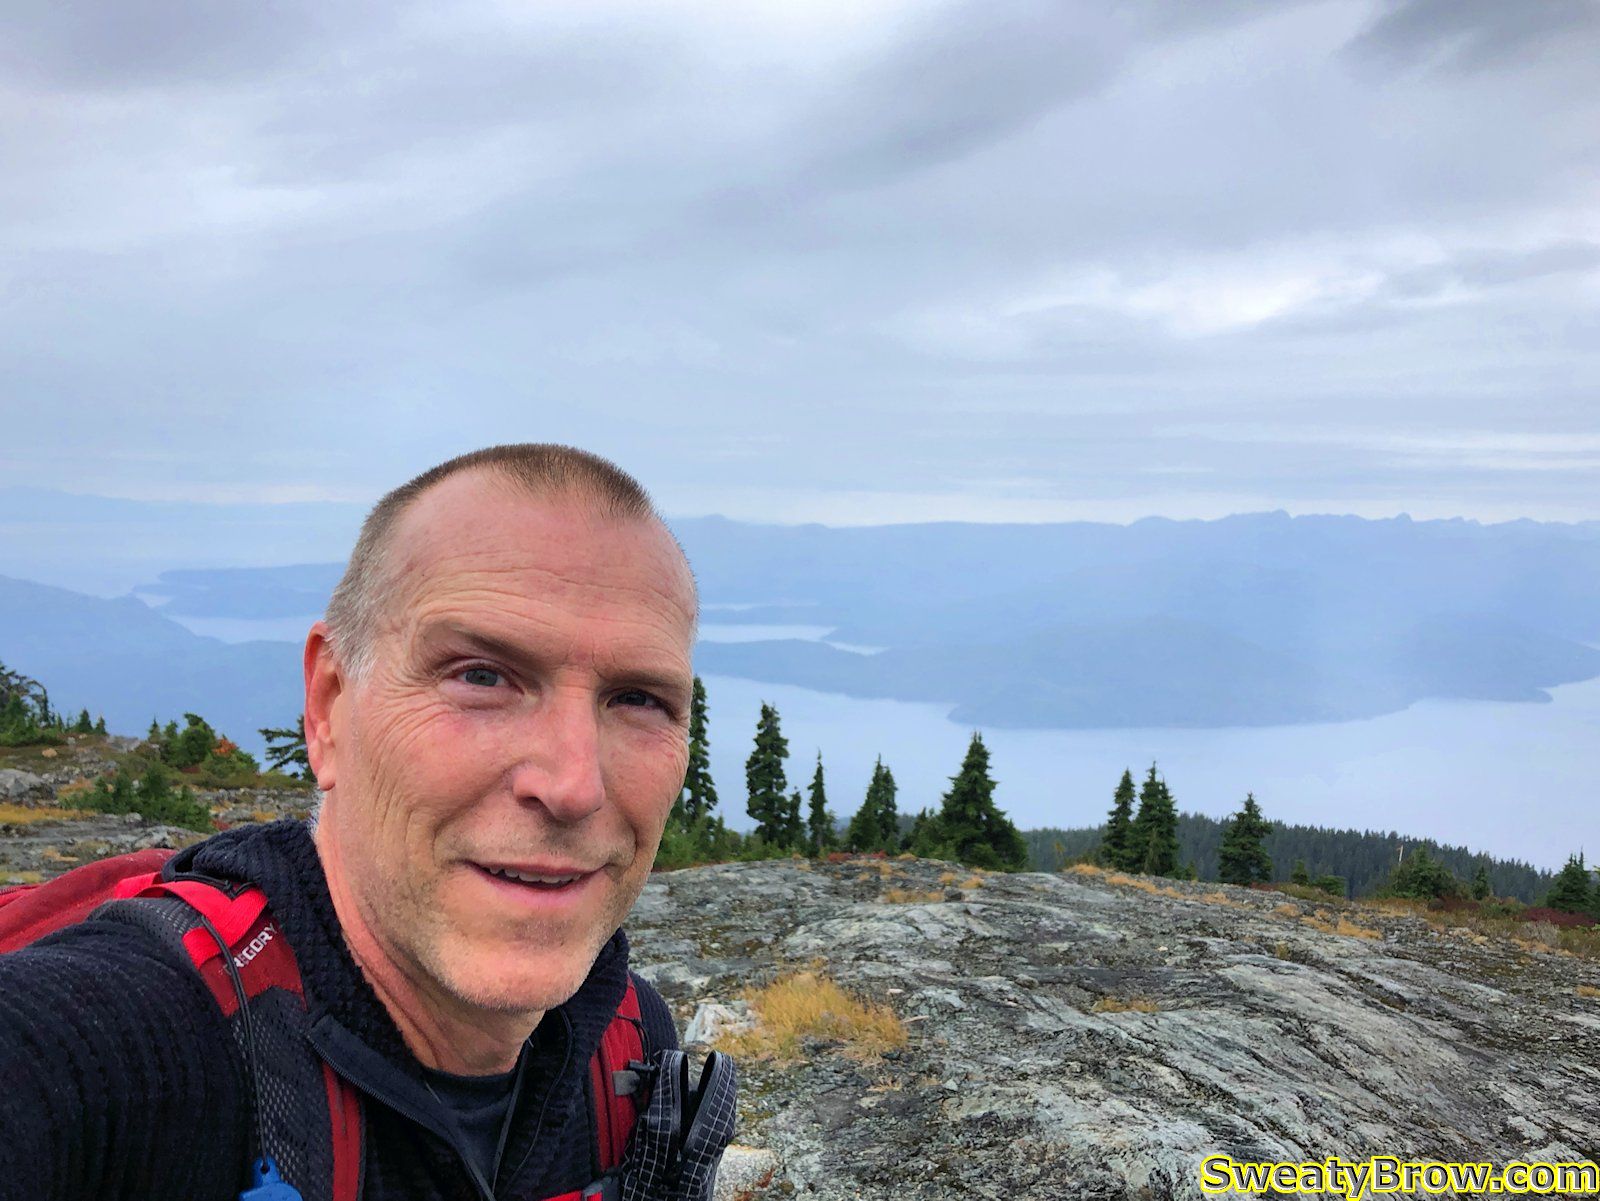
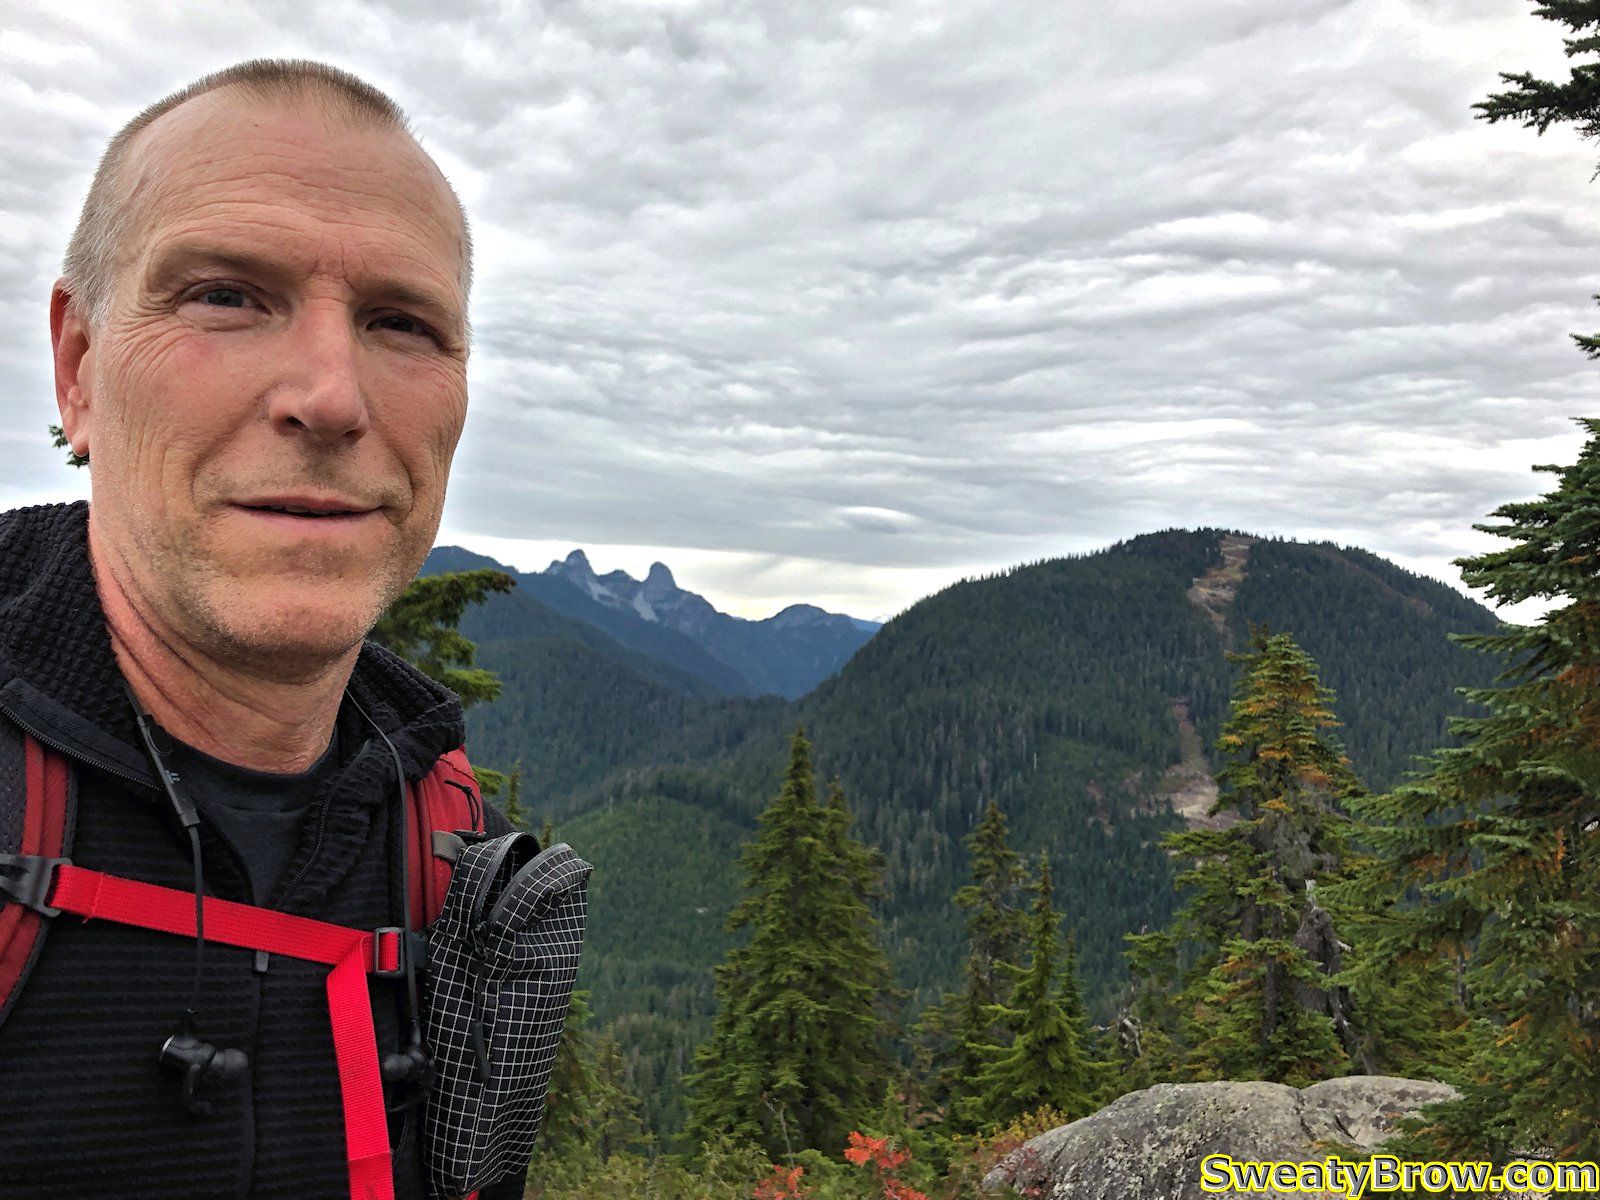
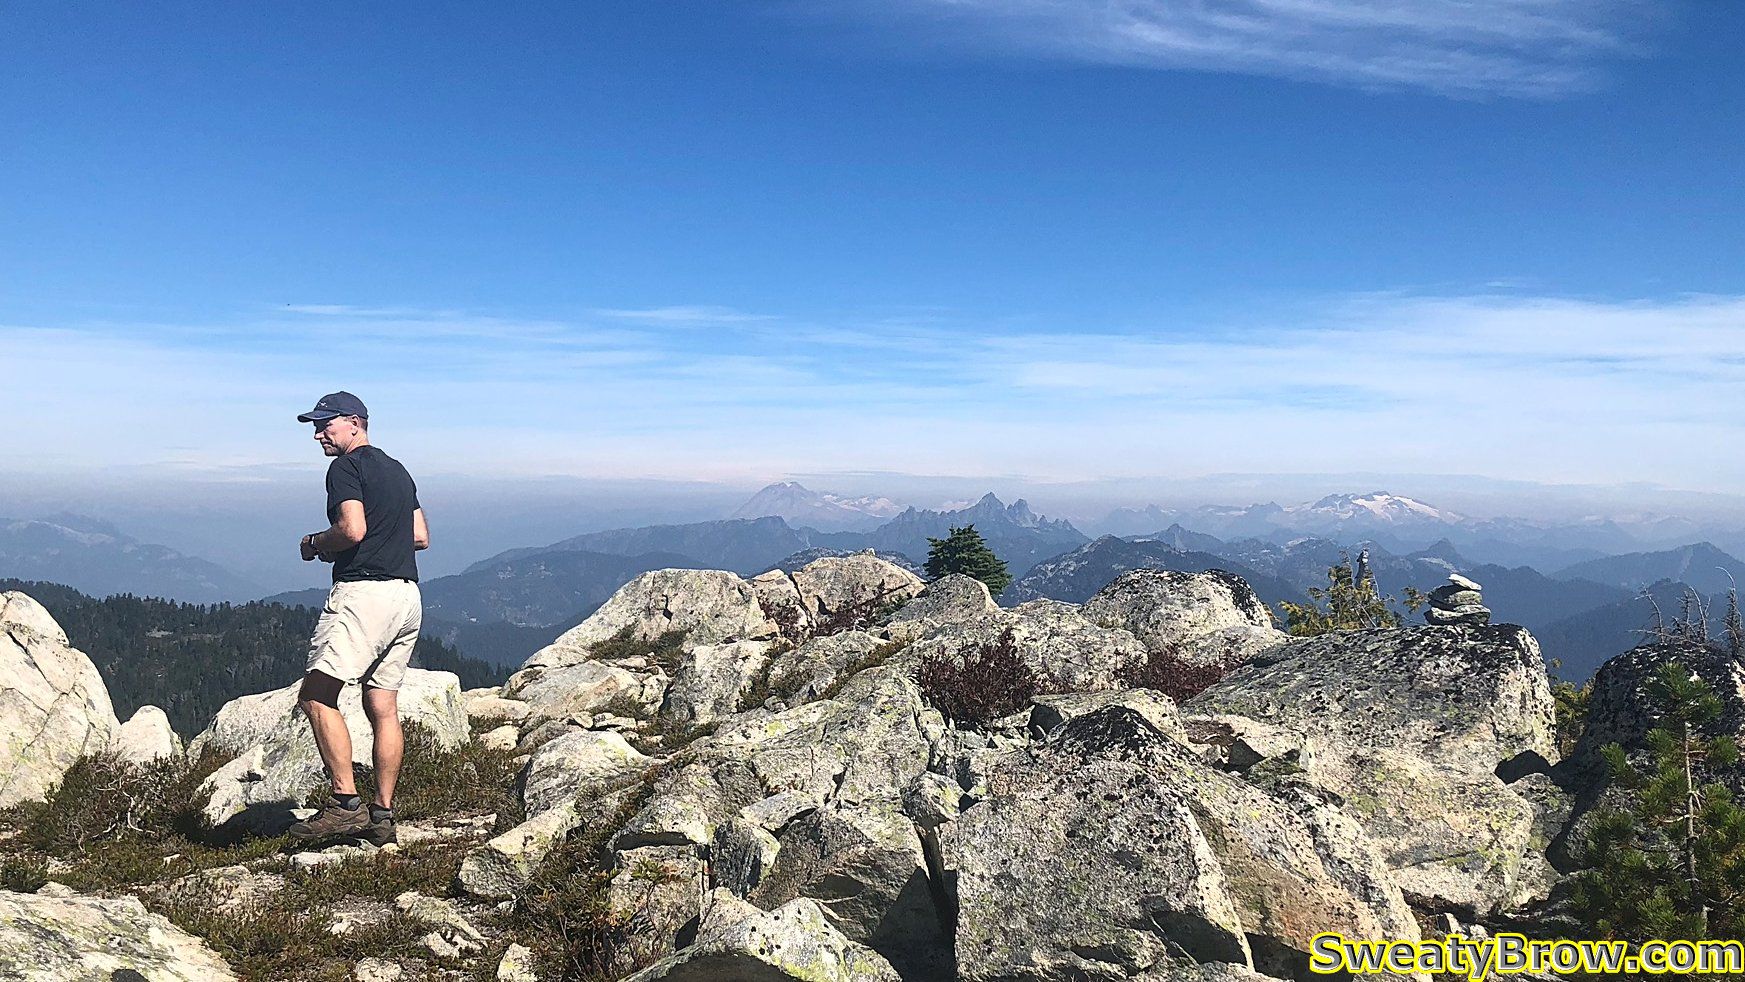
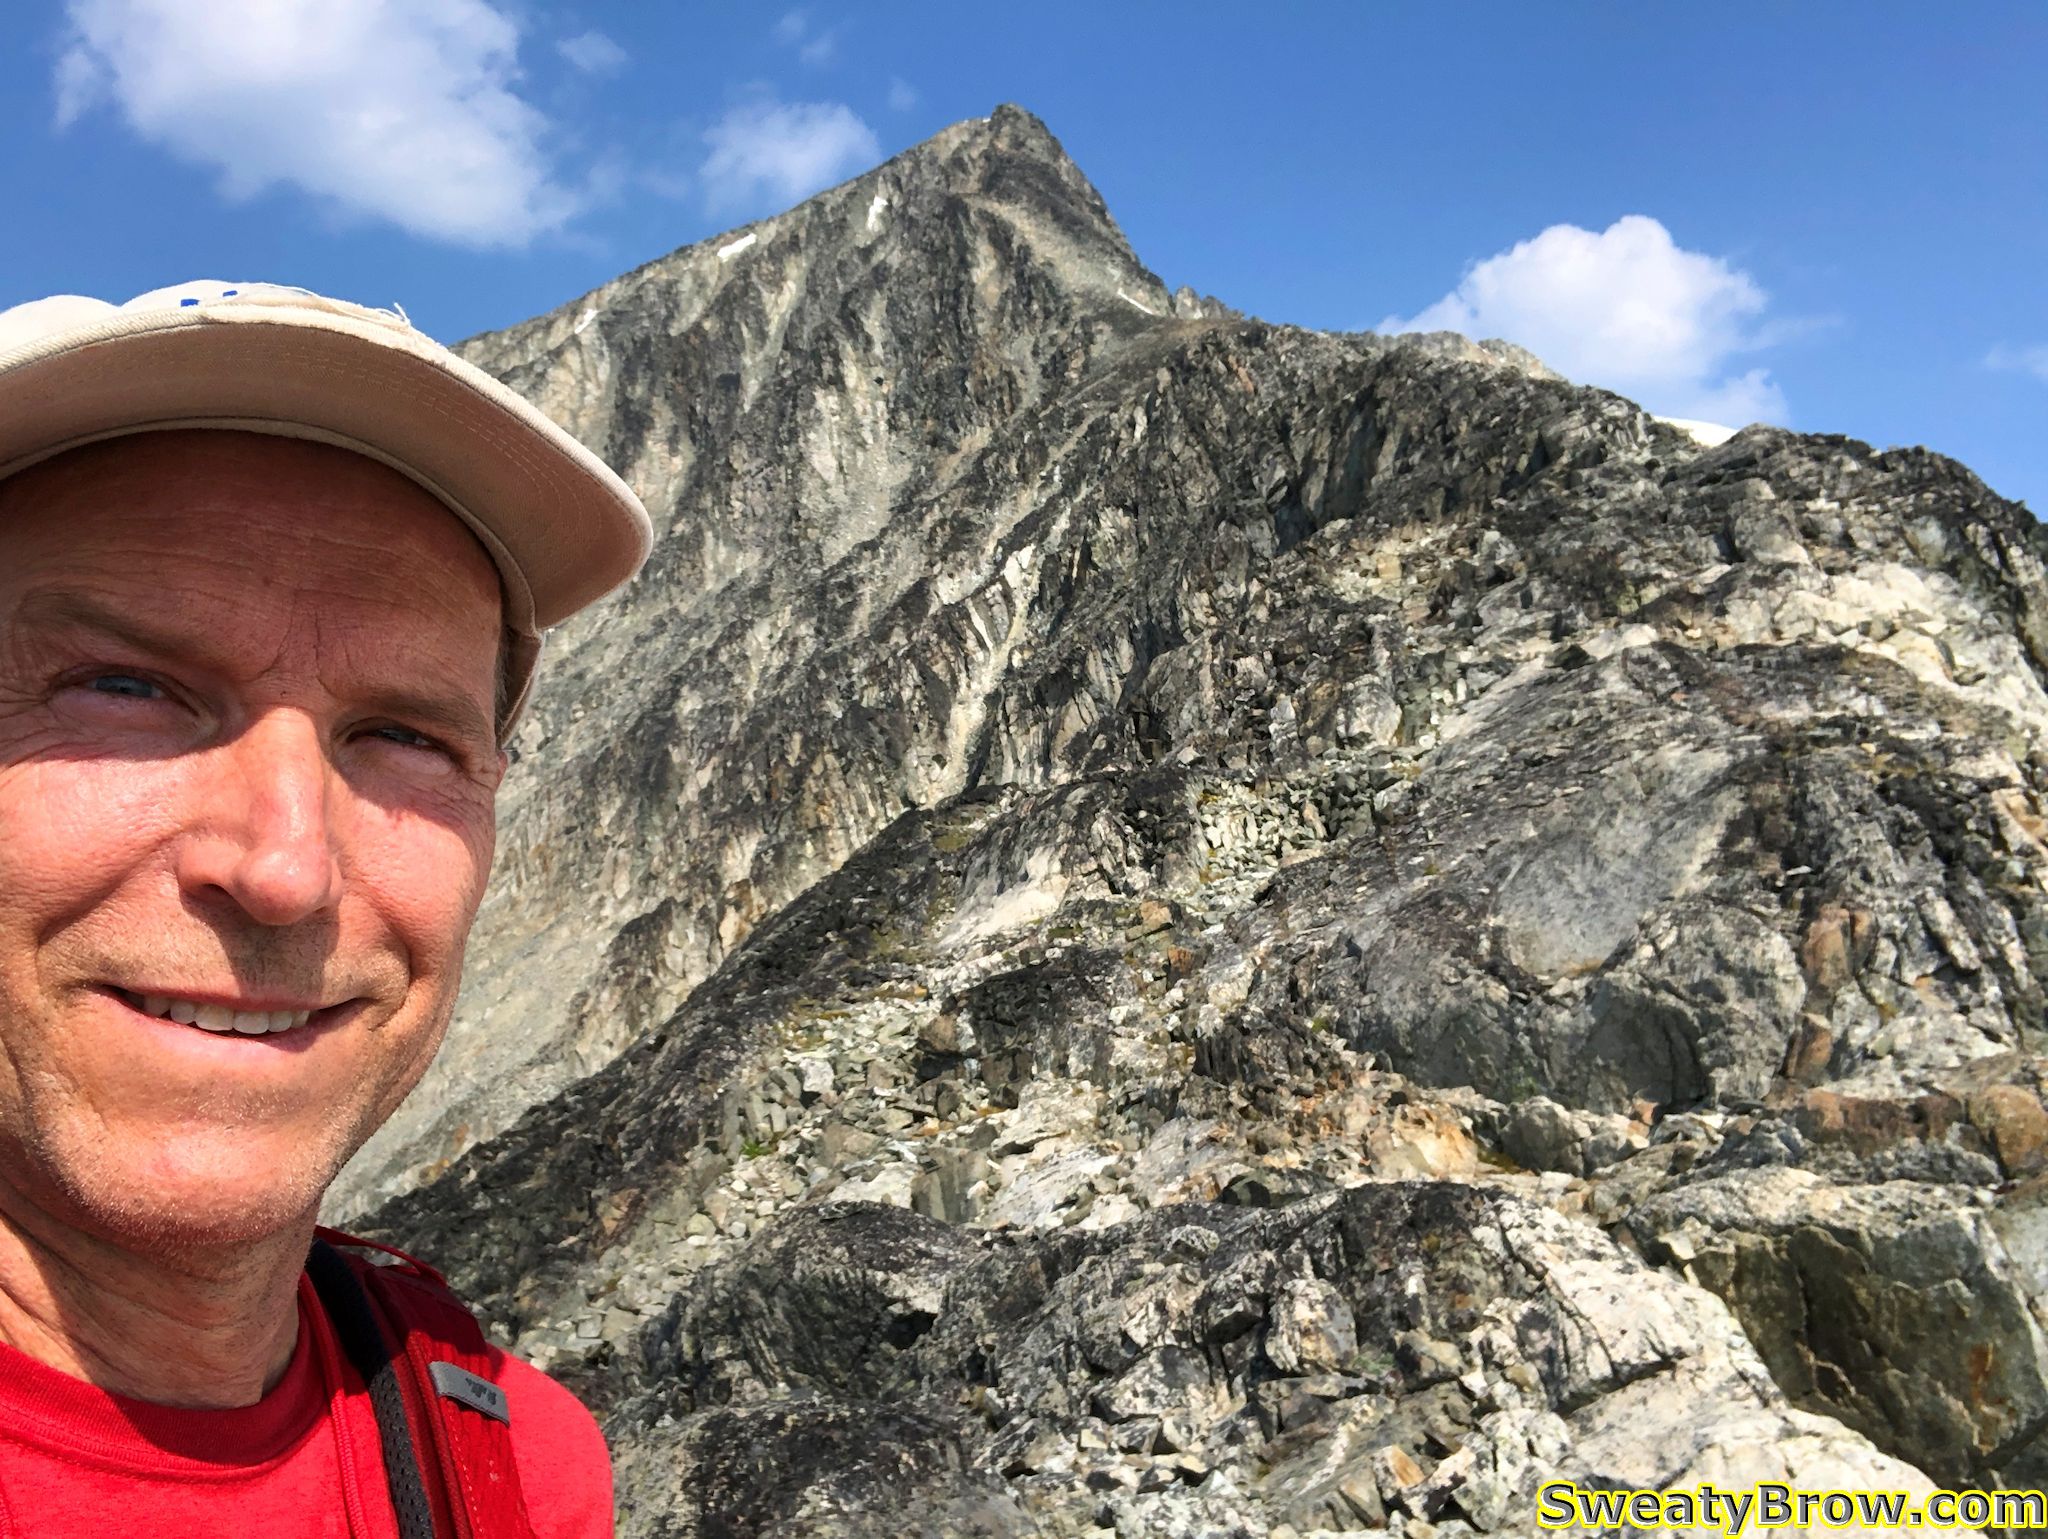
After this point, I began to feel occasional raindrops – the rain was arriving a little bit early! Fortunately, it didn’t come down heavily at all, and was quite intermittent. I reached the south summit after about an hour and a quarter. This is the peak that the Sky Chair ski lift reaches. It was a little windy, with occasional raindrops continuing to fall, but the view was pretty nice toward the southwest, looking over Howe Sound.
Selfie from the south summit of Mount Strachan, looking down over Howe Sound.
From here, there was a drop of about 30 meters or so, down into a saddle, then up the other side about 35 meters to reach the north, true summit of the mountain. In the saddle there were quite a few people taking a break, and enjoying the whiskey jacks that were flying around, cadging food.
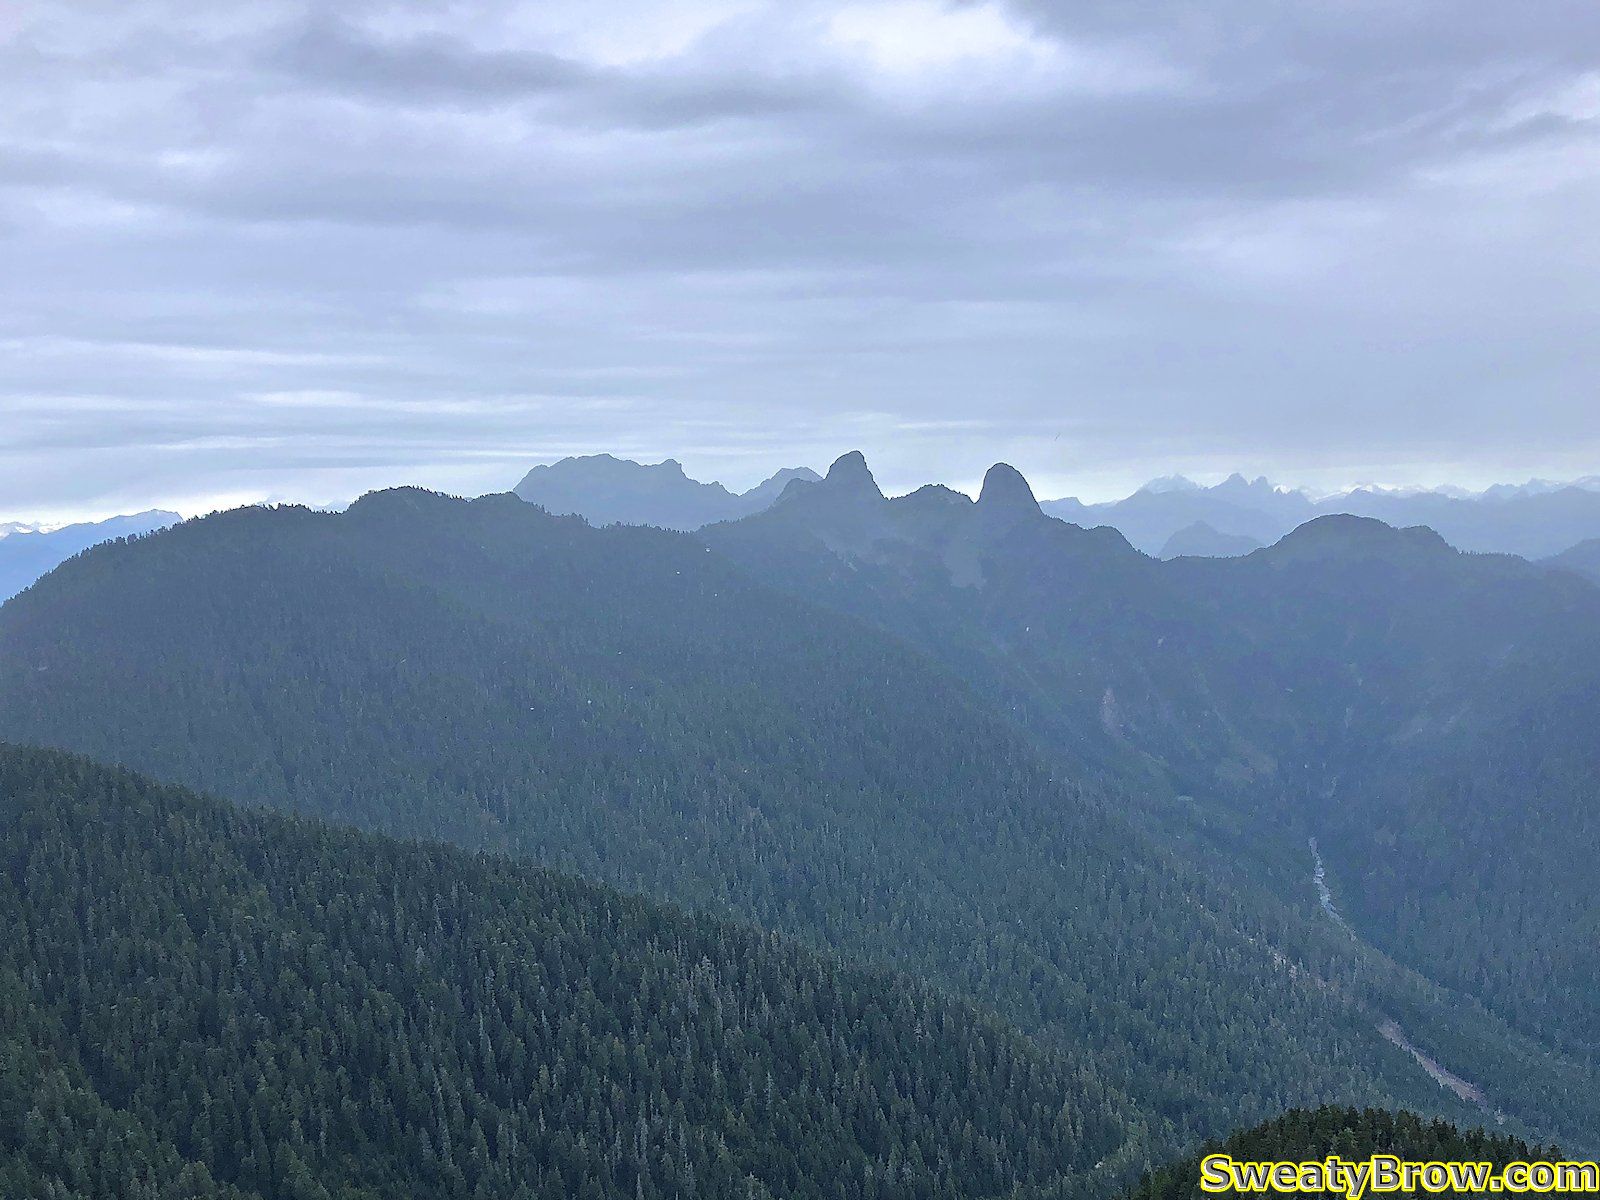
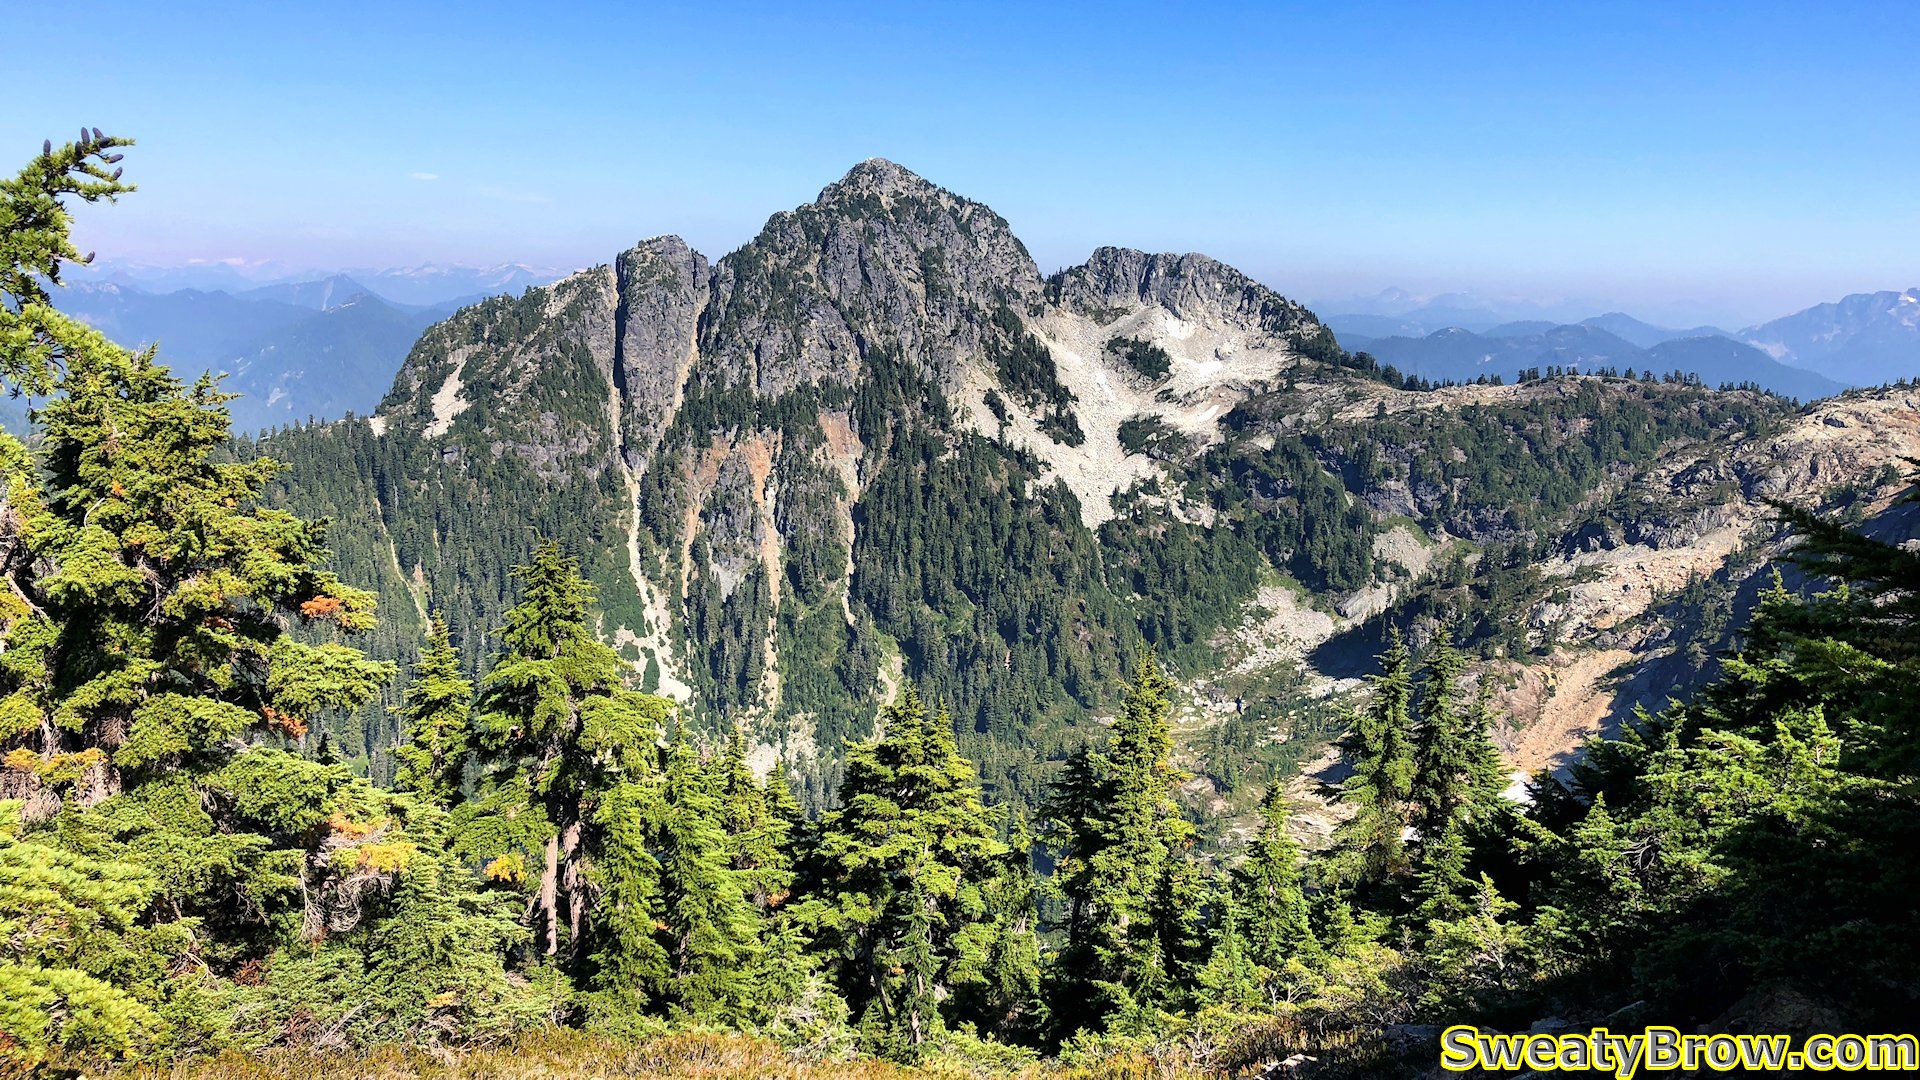
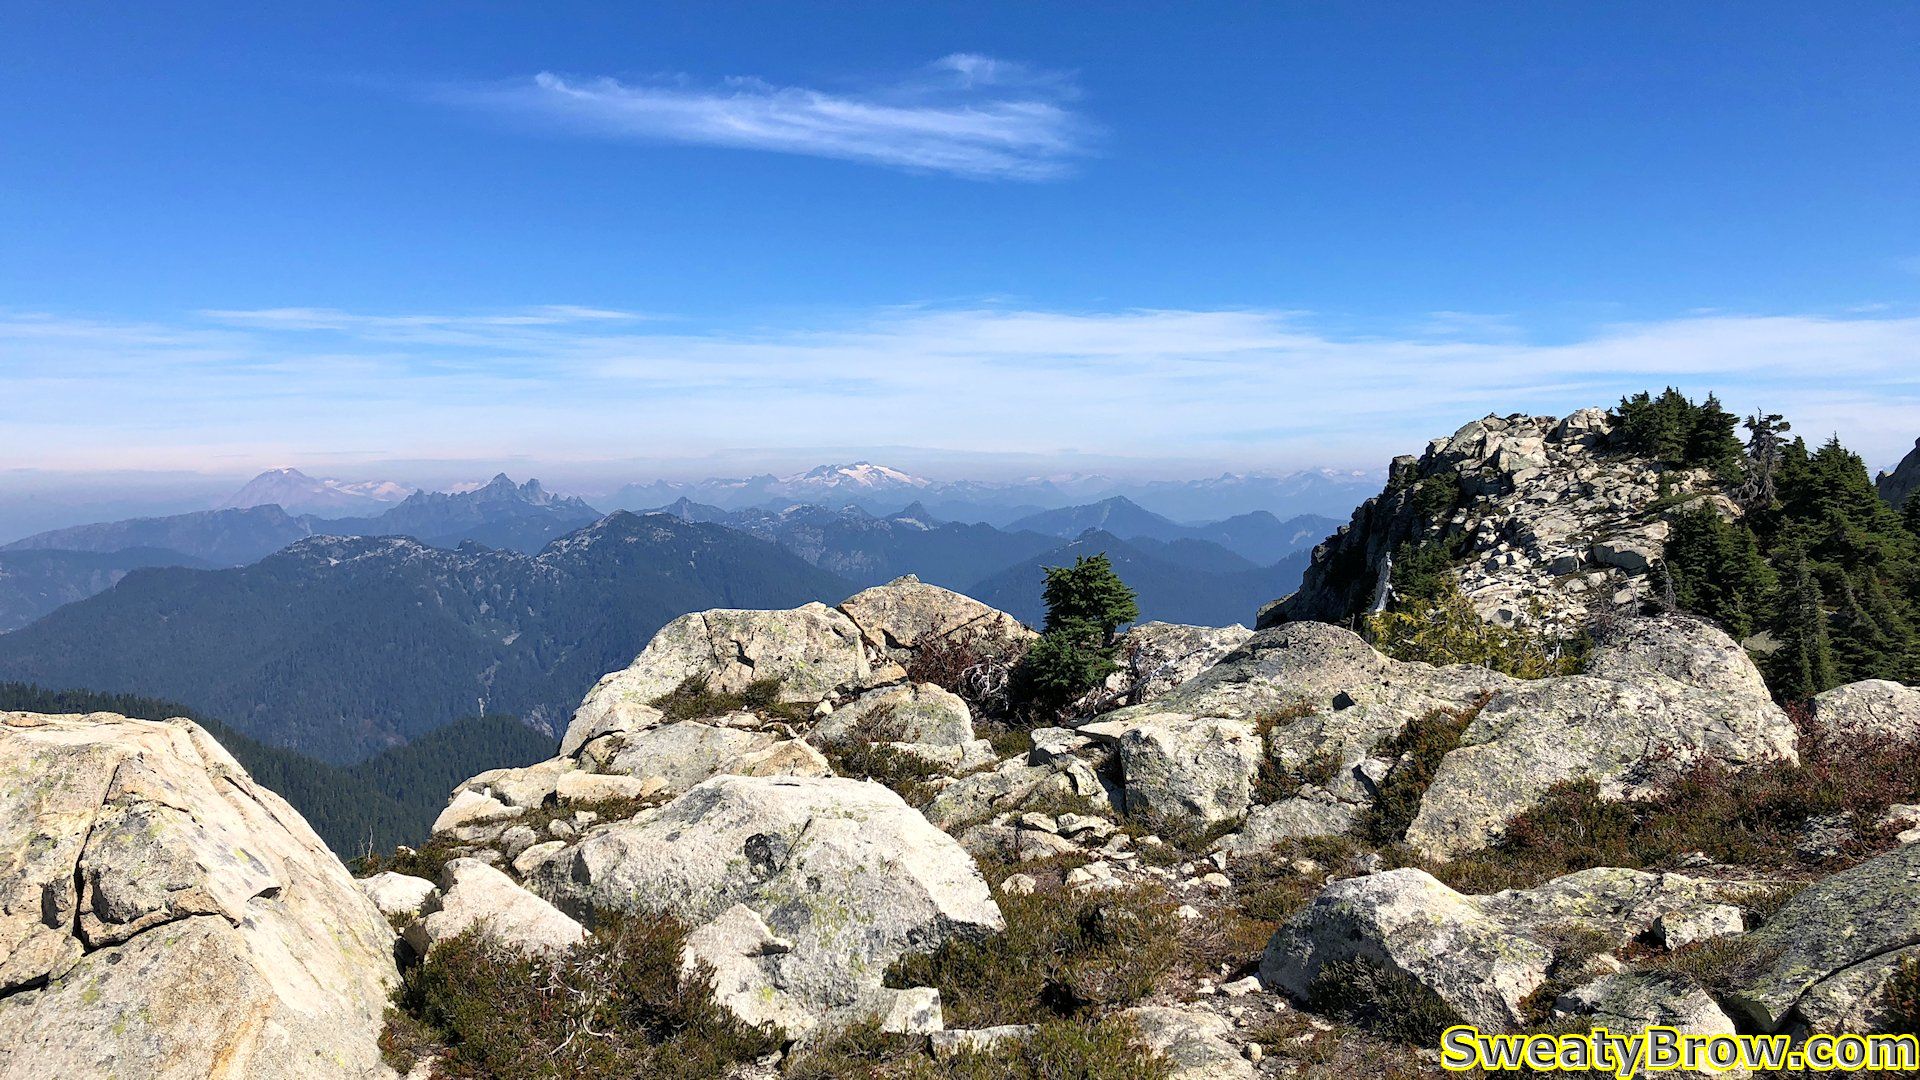
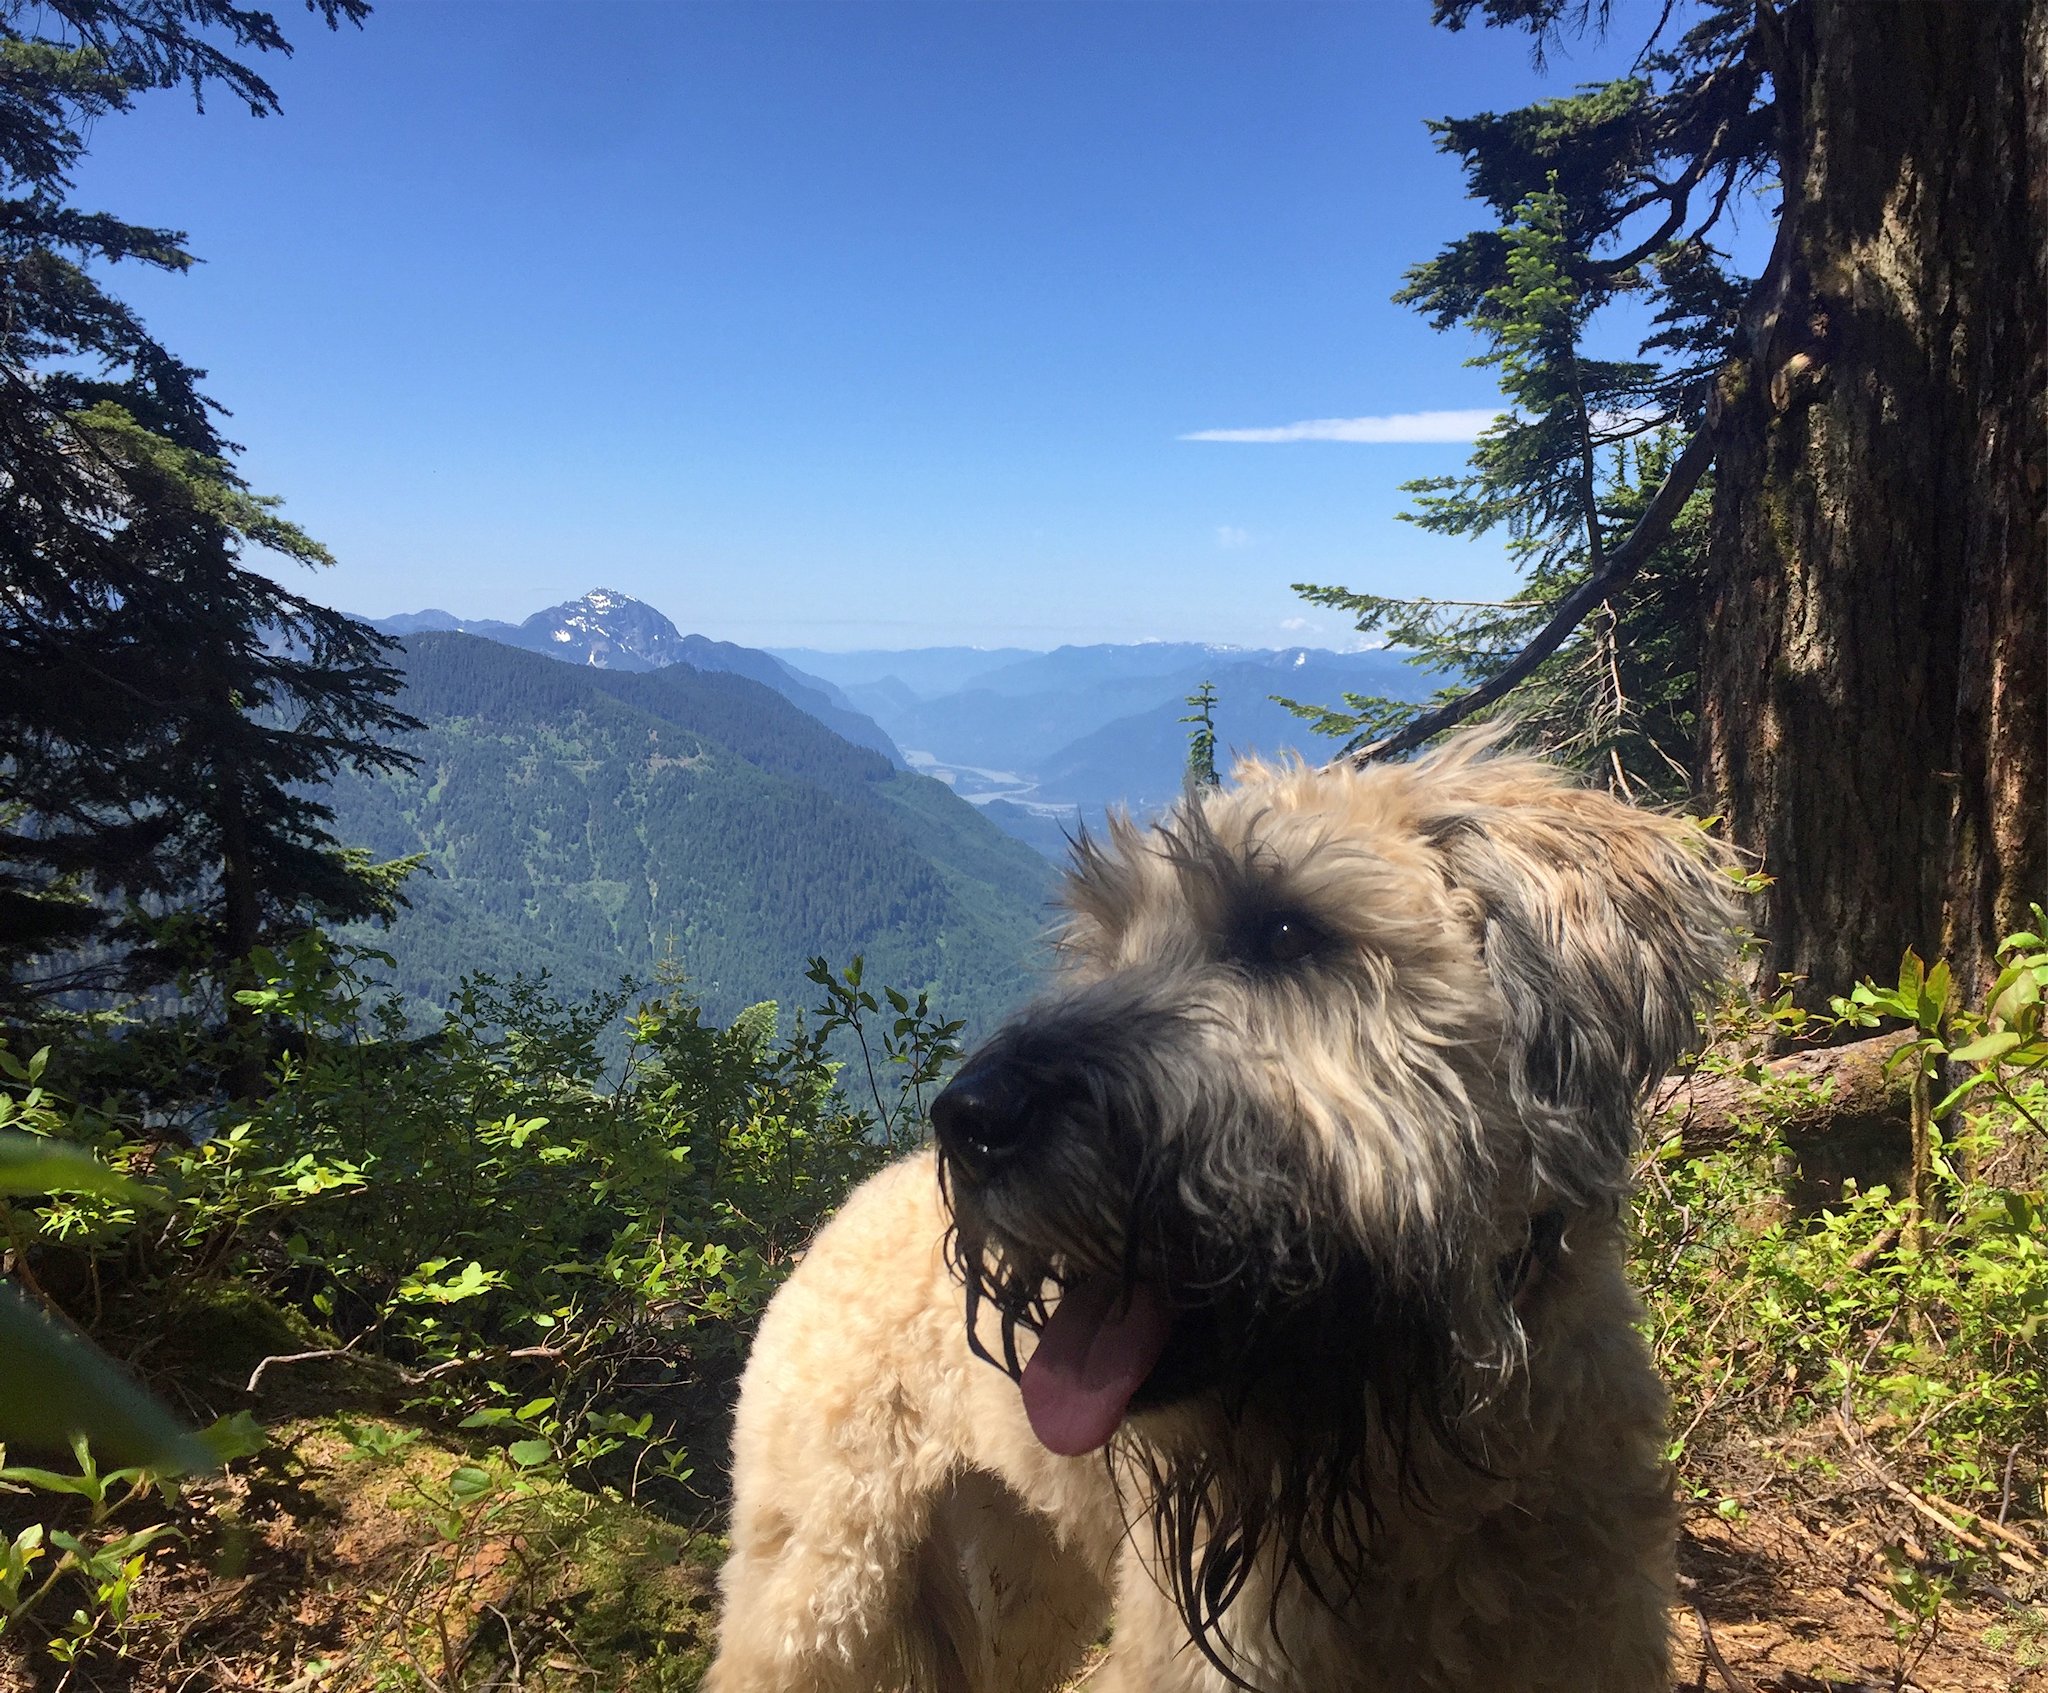
Quickly up the other side of the saddle, up some fun little slightly scrambly steps, and I was on the north summit. Considering the weather conditions, the view north was pretty good – it would be quite lovely in better weather! There were showers visible further to the east, but pretty clear looking toward Brunswick, The Twins (Lions) and the Sky Pilot group (Co-pilot, Sky Pilot, and Ledge).
The view north from Mount Strachan. Unnecessary Mountain, Brunswick beyond, a glimpse of Hanover, the Lions, and the Sky Pilot group way off in the distance.
A couple of minutes to look around, and I set off back down the trail. I still had another mountain to climb, and wanted to do it before the rain struck in earnest! I followed the trail until the vicinity of the T-33 crash site, then moved onto the service road, following it down to make better time. At this point the drizzle was fairly steady, but still light. It faded away before I reached the parking lot.
I was back at the parking lot at 2:05 PM, a little under two-and-a-half hours after setting out, and began to make my way up the Baden-Powell trail in the other direction – toward Black Mountain.
This trail is much more clear, maintained, and well-defined. There were a lot of people going up and down there!
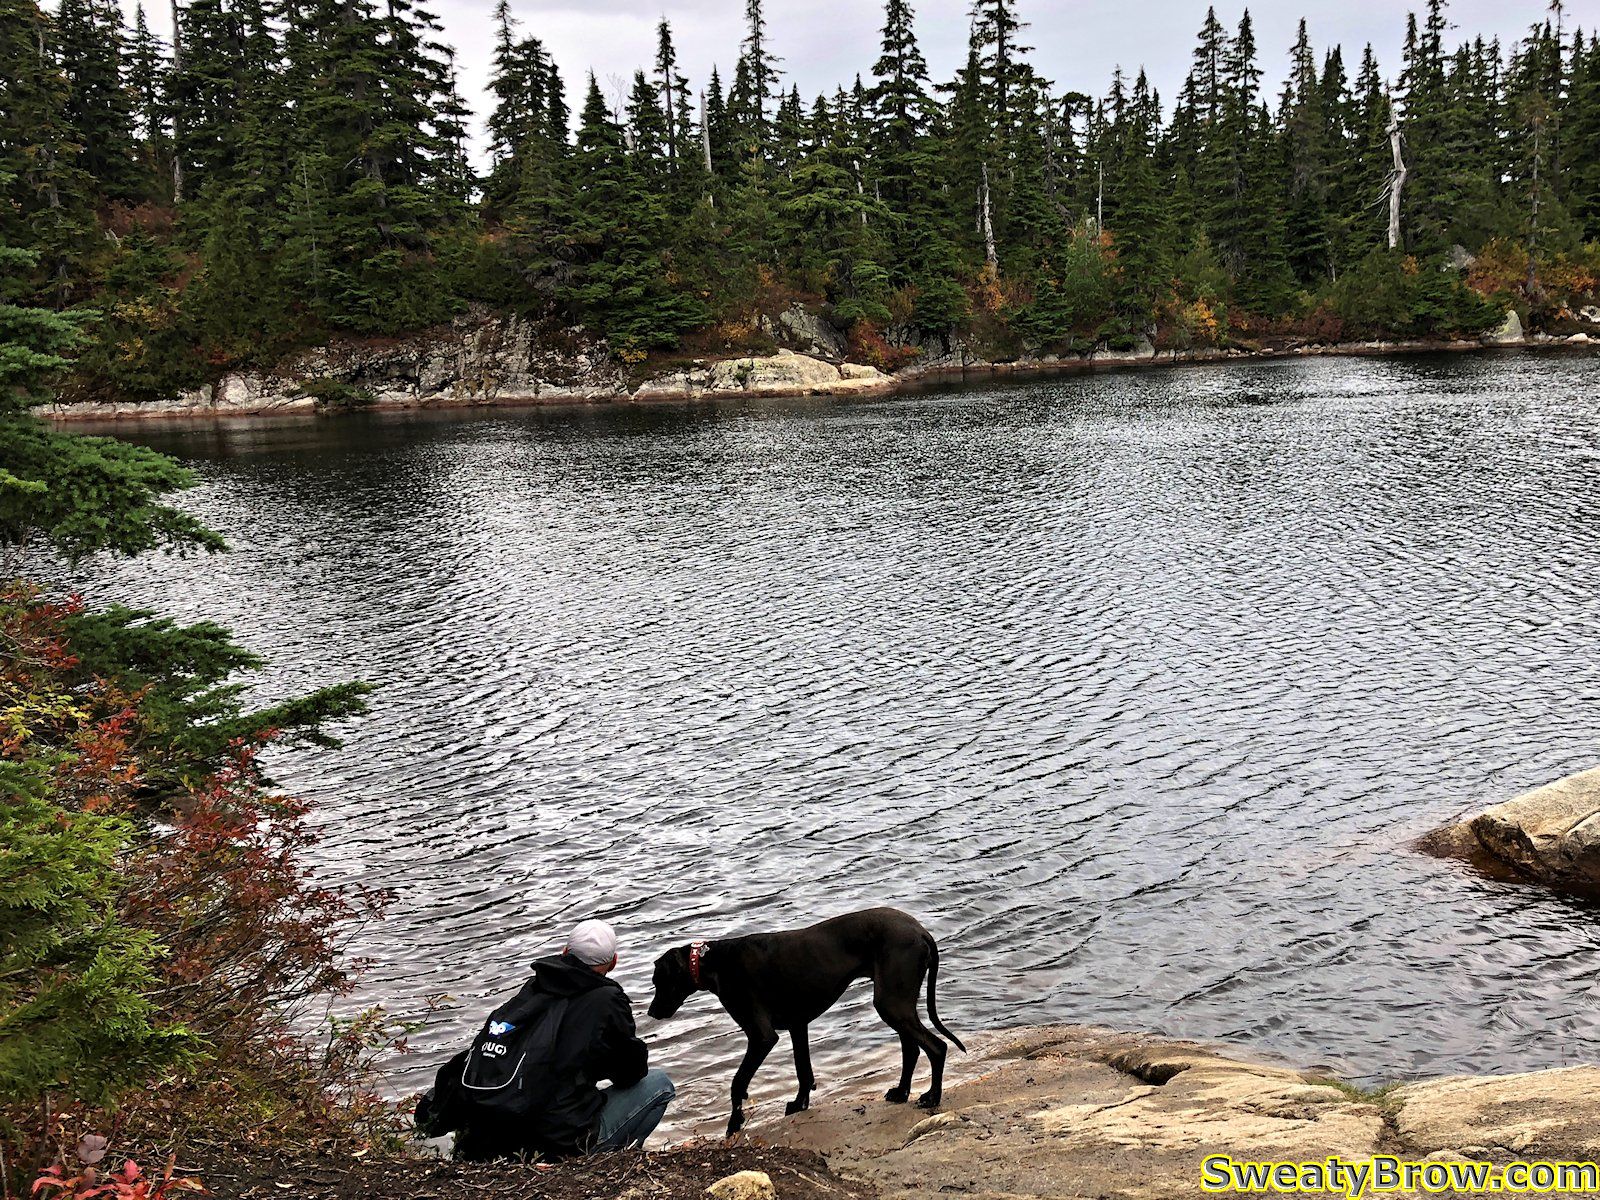
I reached Cabin Lake in about half an hour. Lovely little lake, that!
Cabin Lake, between the North and South summits of Black Mountain.A man and his dog, on the shore of Cabin Lake, Black Mountain.
I turned left and hiked to the south summit of Black Mountain in a few minutes. There were nice views over the city and Howe Sound, but I don’t think I took photos that way…
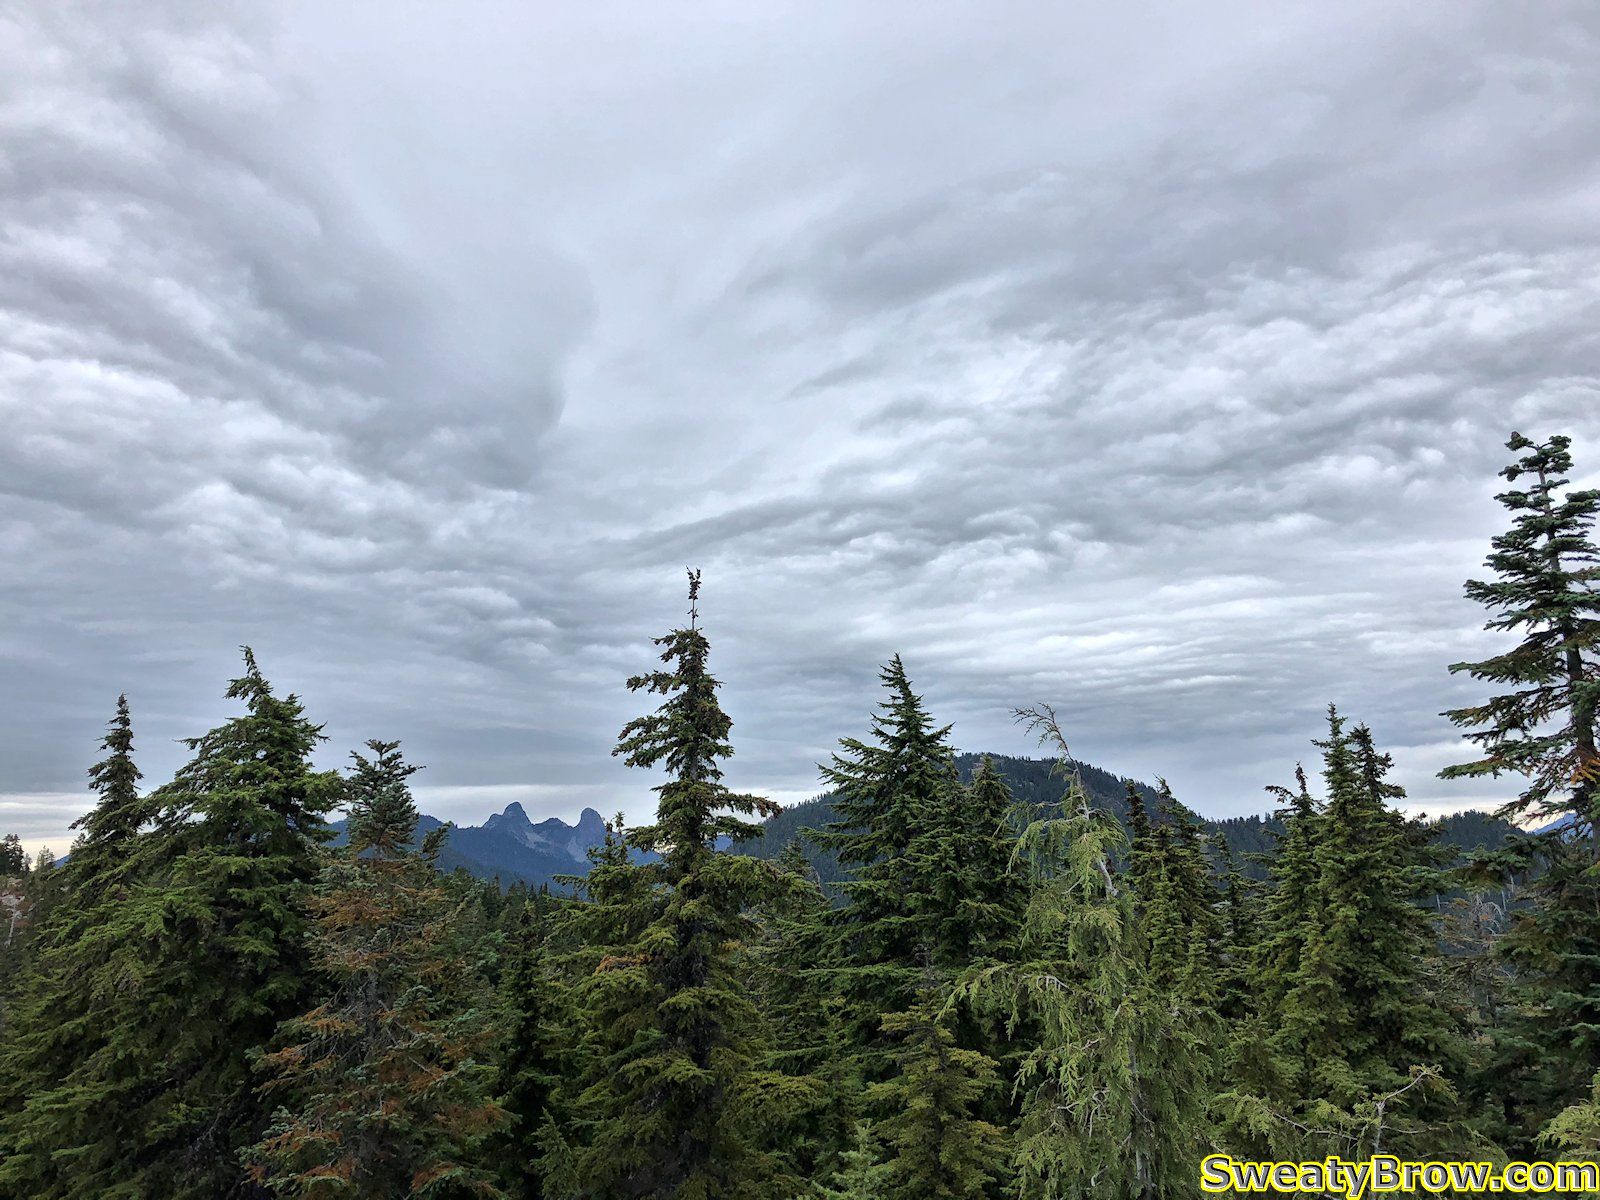
Dramatic sky north of Black Mountain.
I then returned to Cabin Lake, and set off toward the north summit, via a far less traveled trail, despite the fact that the north summit is actually the higher of the two. The views from the top, however, are not as dramatic as from the south summit.
North summit of Black Mountain, looking toward Mount Strachan (only the lower south summit is visible from here) and The Lions (The Twins) beyond.
After a couple of minutes, I returned the way I came, and was soon back at the car. The rain held off the entire time I went up and down Black Mountain – perfect!
Total of about 12 km hiked, and up/down a total of around 800 meters or so. All in a little less than four hours – and I was home in time for dinner!
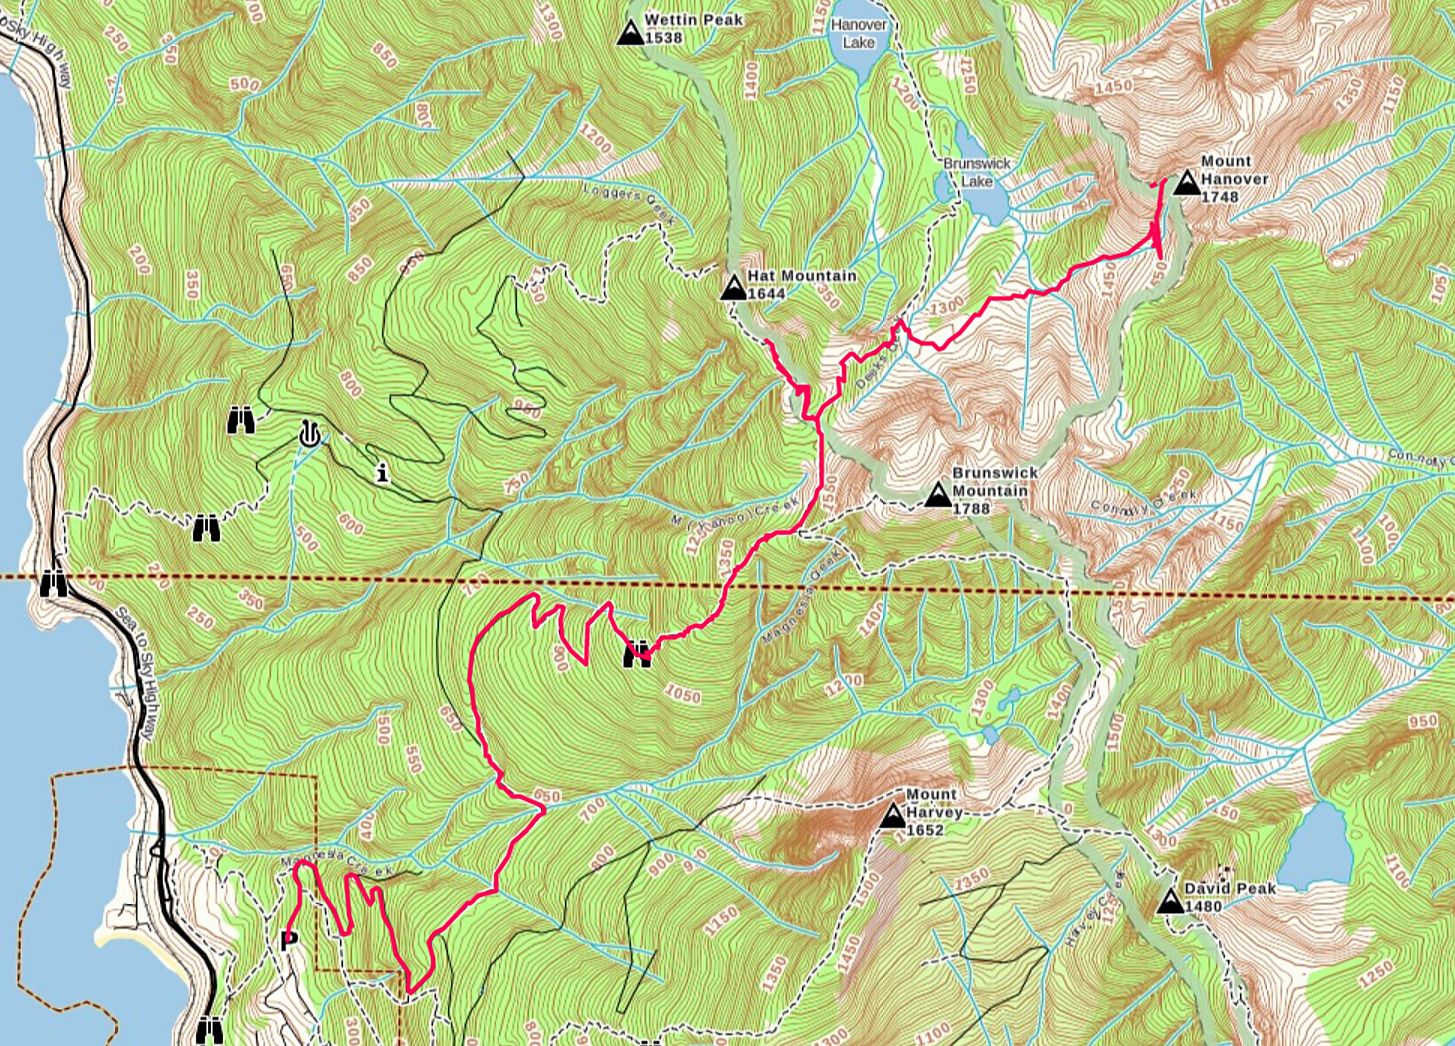
Thursday, 6 September was going to be my first of twelve days off, and the weather was looking really promising – to be followed by a rainy Friday. I decided I would get out and do a good, long hike for the day. Looking for ideas, I decided on one of the final mountains I needed to hike along the Howe Sound Crest, north of Cypress Bowl ski resort and the Lions.
I have hiked many of the mountains along this stretch, but still had a few more to hit – one of them being Mount Hanover, a little northeast of Brunswick Mountain. I read up on the mountain, and the route, and decided to give it a try. What I read was that the final ascent, up either of two parallel gullies to the summit, was fairly difficult, with a bit of exposure. I read that some people started up, and decided against it due to difficulty, but that others said it wasn’t so bad… I figured that if I decided to turn back, I would divert on the trip back, and climb Hat Mountain, a non-technical peak that I hadn’t yet climbed. And if things went well, and I felt up to it, I could also do Hat Mountain on the way back!
I arrived in Lions Bay at about 7:15. There were a couple of other vehicles there, and I chatted briefly with a fellow who was planning to climb Mount Brunswick – mostly we talked about the crappy parking machine, which would not connect and accept our credit cards. We both ended up downloading and installing the Whoosh app – of course, not the parking apps already on our phones – to pay for the day…
At 7:30, I was on my way. The route follows the Brunswick Trail up to the crossing of the Howe Sound Crest Trail, at which point I made a left turn and headed north through Hat Pass. The guy I chatted with in the parking lot left just a few minutes before me, and I never caught up to him on the way up – he was making good time.
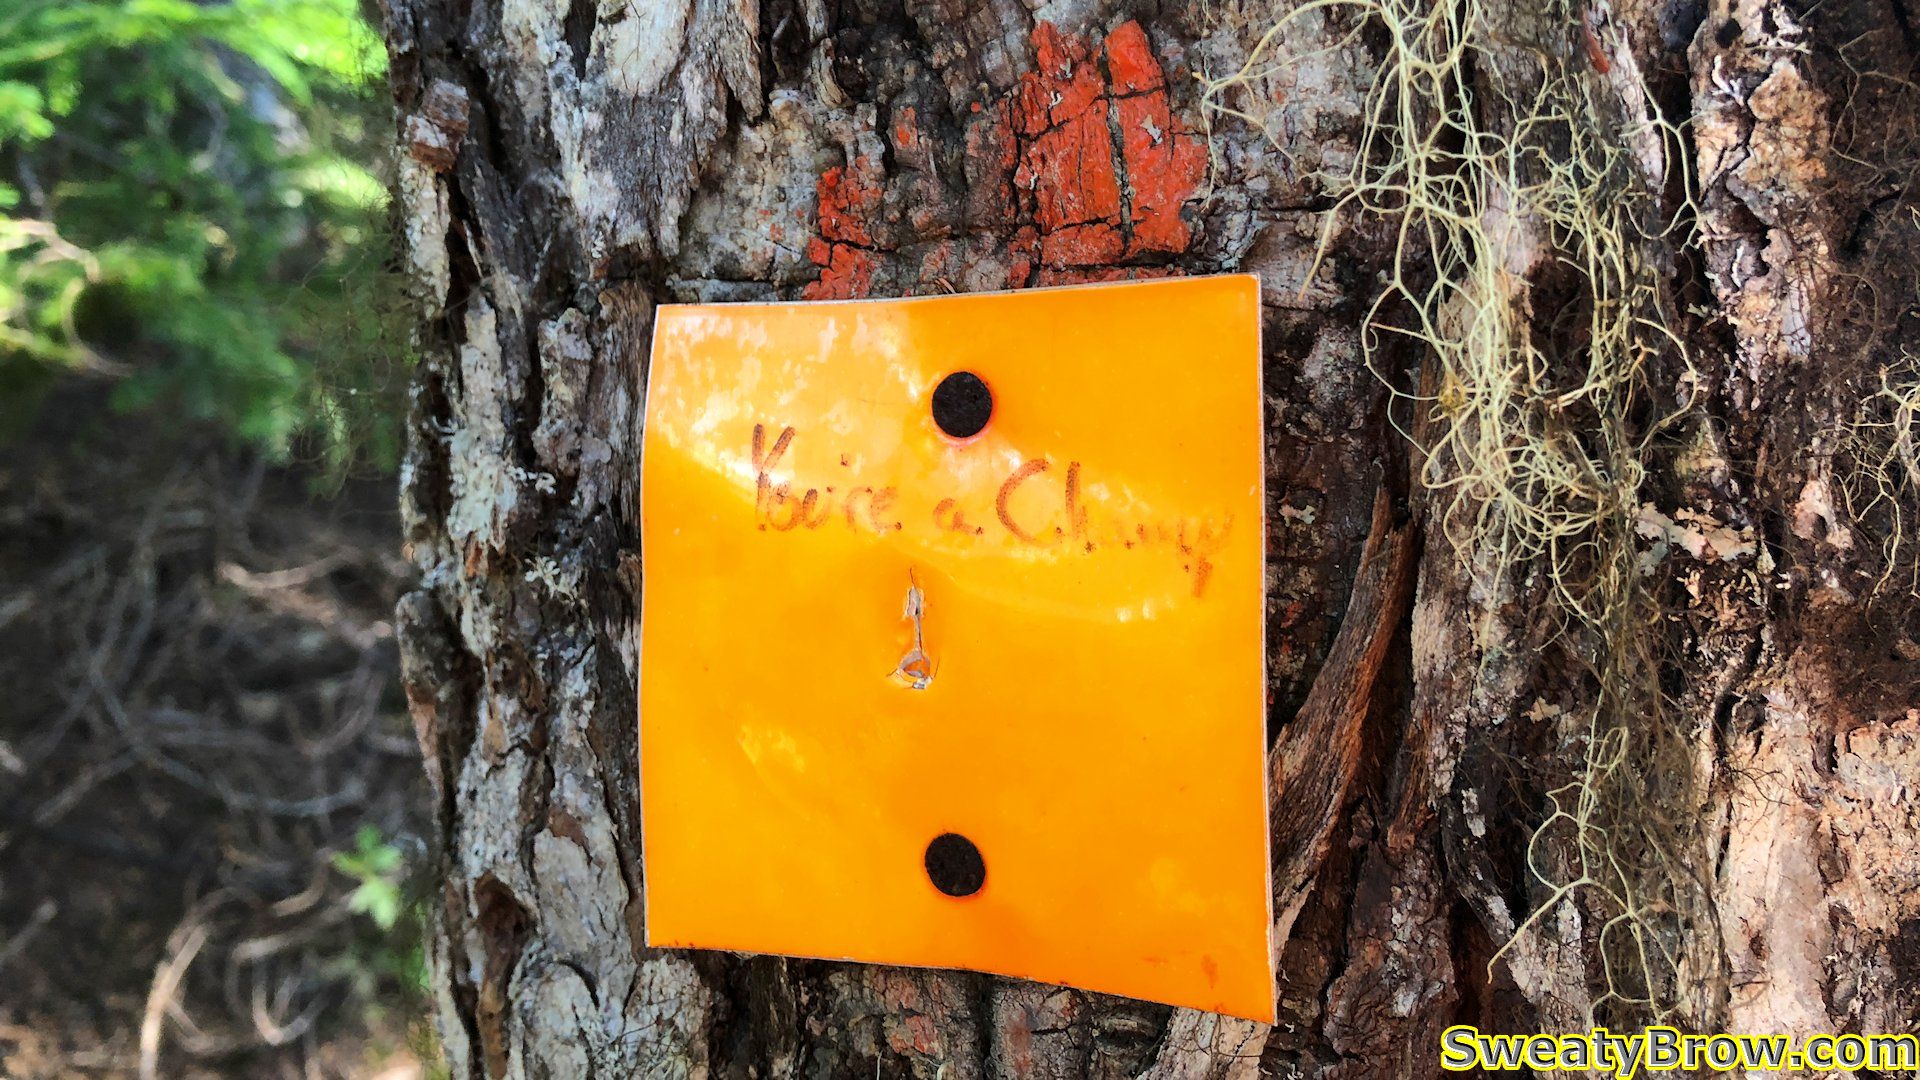
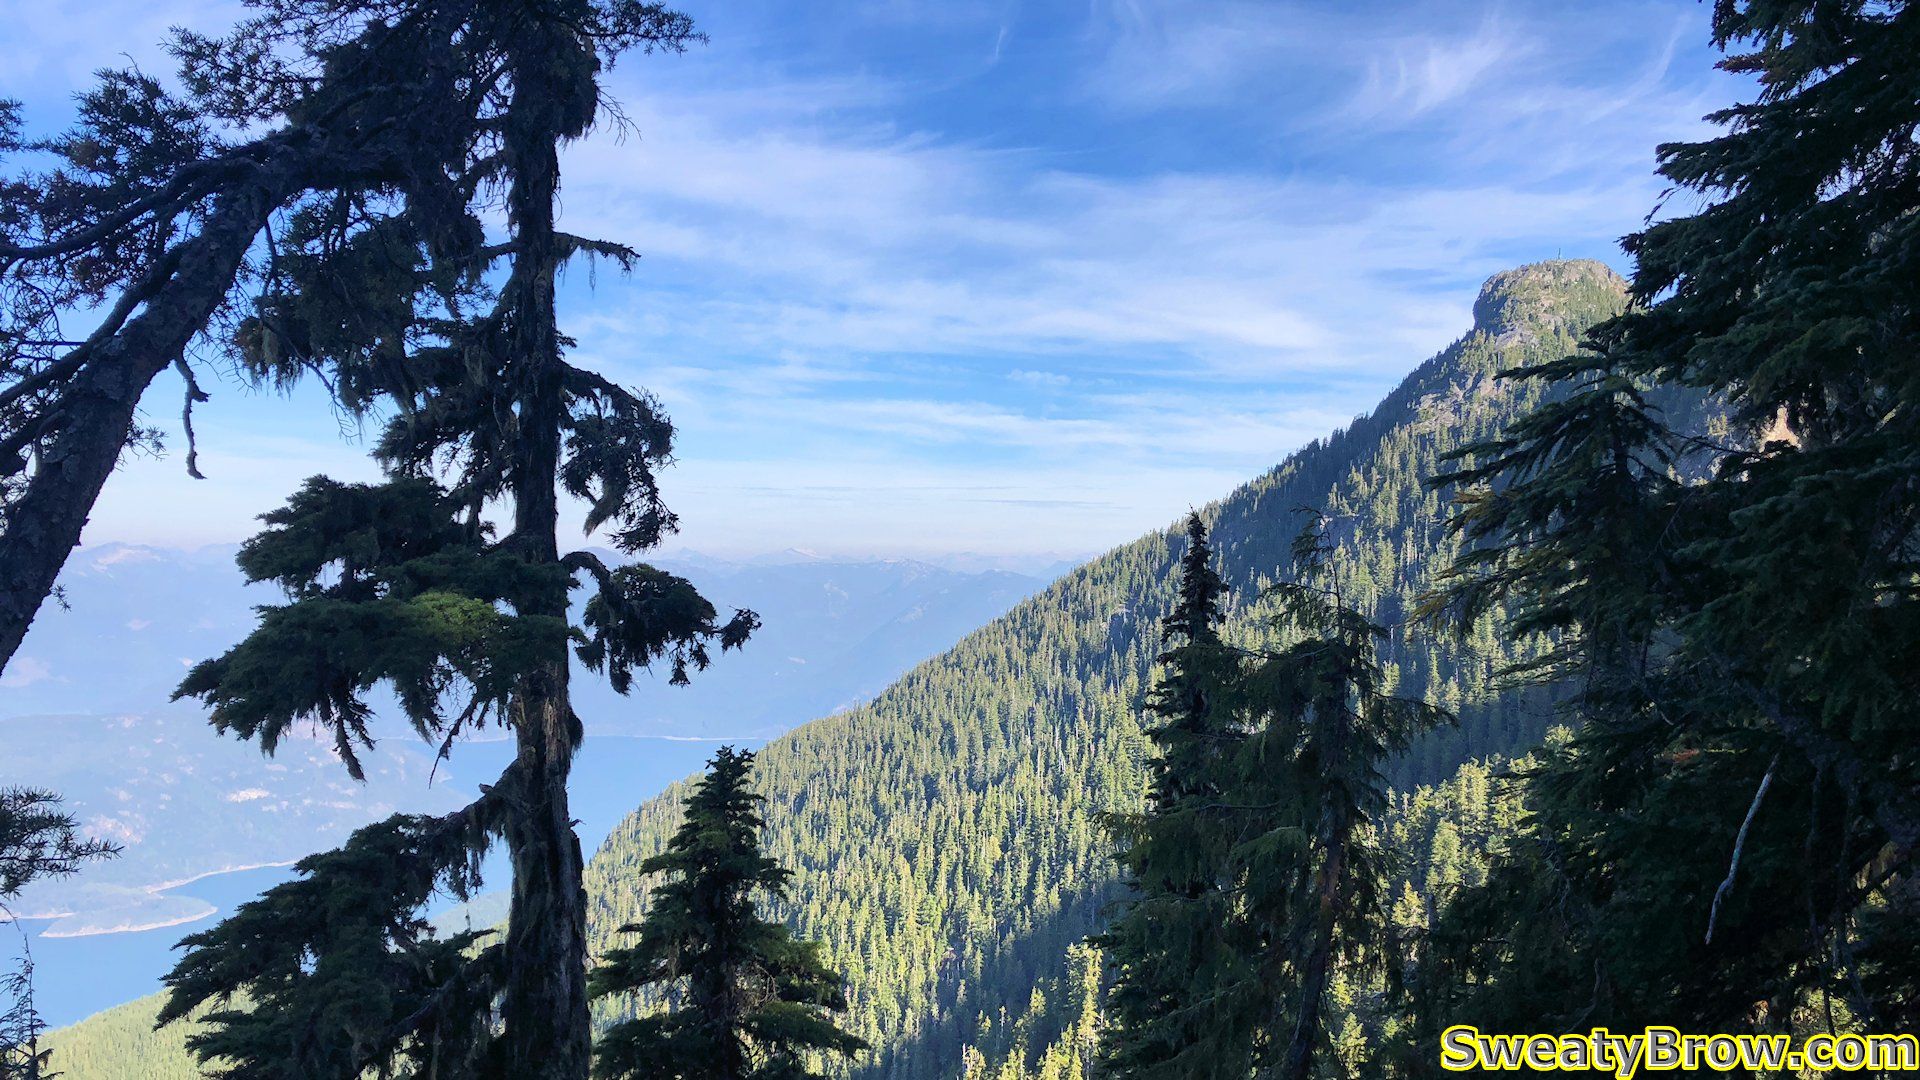
Motivational message on a trail marker: “You’re a champ!”A view of Howe Sound from one of the few viewpoints on the trail prior to reaching the Howe Sound Crest Trail.A little glimpse of Hat Mountain on the hike up. If all went well, I would be there later in the day…
I reached the HSCT at about 10:00, having seen no one else on the trail yet. Just as I was heading over Hat Pass, to begin the descent toward Brunswick Lake, I spotted a little tarn with a lovely reflection of my destination across the valley. As I stepped off the trail to take a photo, I was overtaken by a guy headed the same direction as me. We said hello, and he carried on while I took my photos.
(New friend) Jan hiking beside the tarn at Hat Pass.
I stayed just a little behind him for a ways, then lost sight of him. When I broke away from the trail to head across country toward the peak, I spotted him again ahead of me. Aha – so he was heading the same place as me!
A little further on, I caught up with him after he stopped for a drink. We chatted a bit, and decided to carry on together. His name was Jan (pronounced with a “Y” at the start) and we ended up hiking the rest of the day together. A very fine trail companion, although I felt a little bad about holding him up a bit!
Jan had started about an hour before me, and headed up the Mount Harvey trail, over the top of the peak, and down to the HSCT. He then caught me on the way to Mount Hanover. Fit and fast!
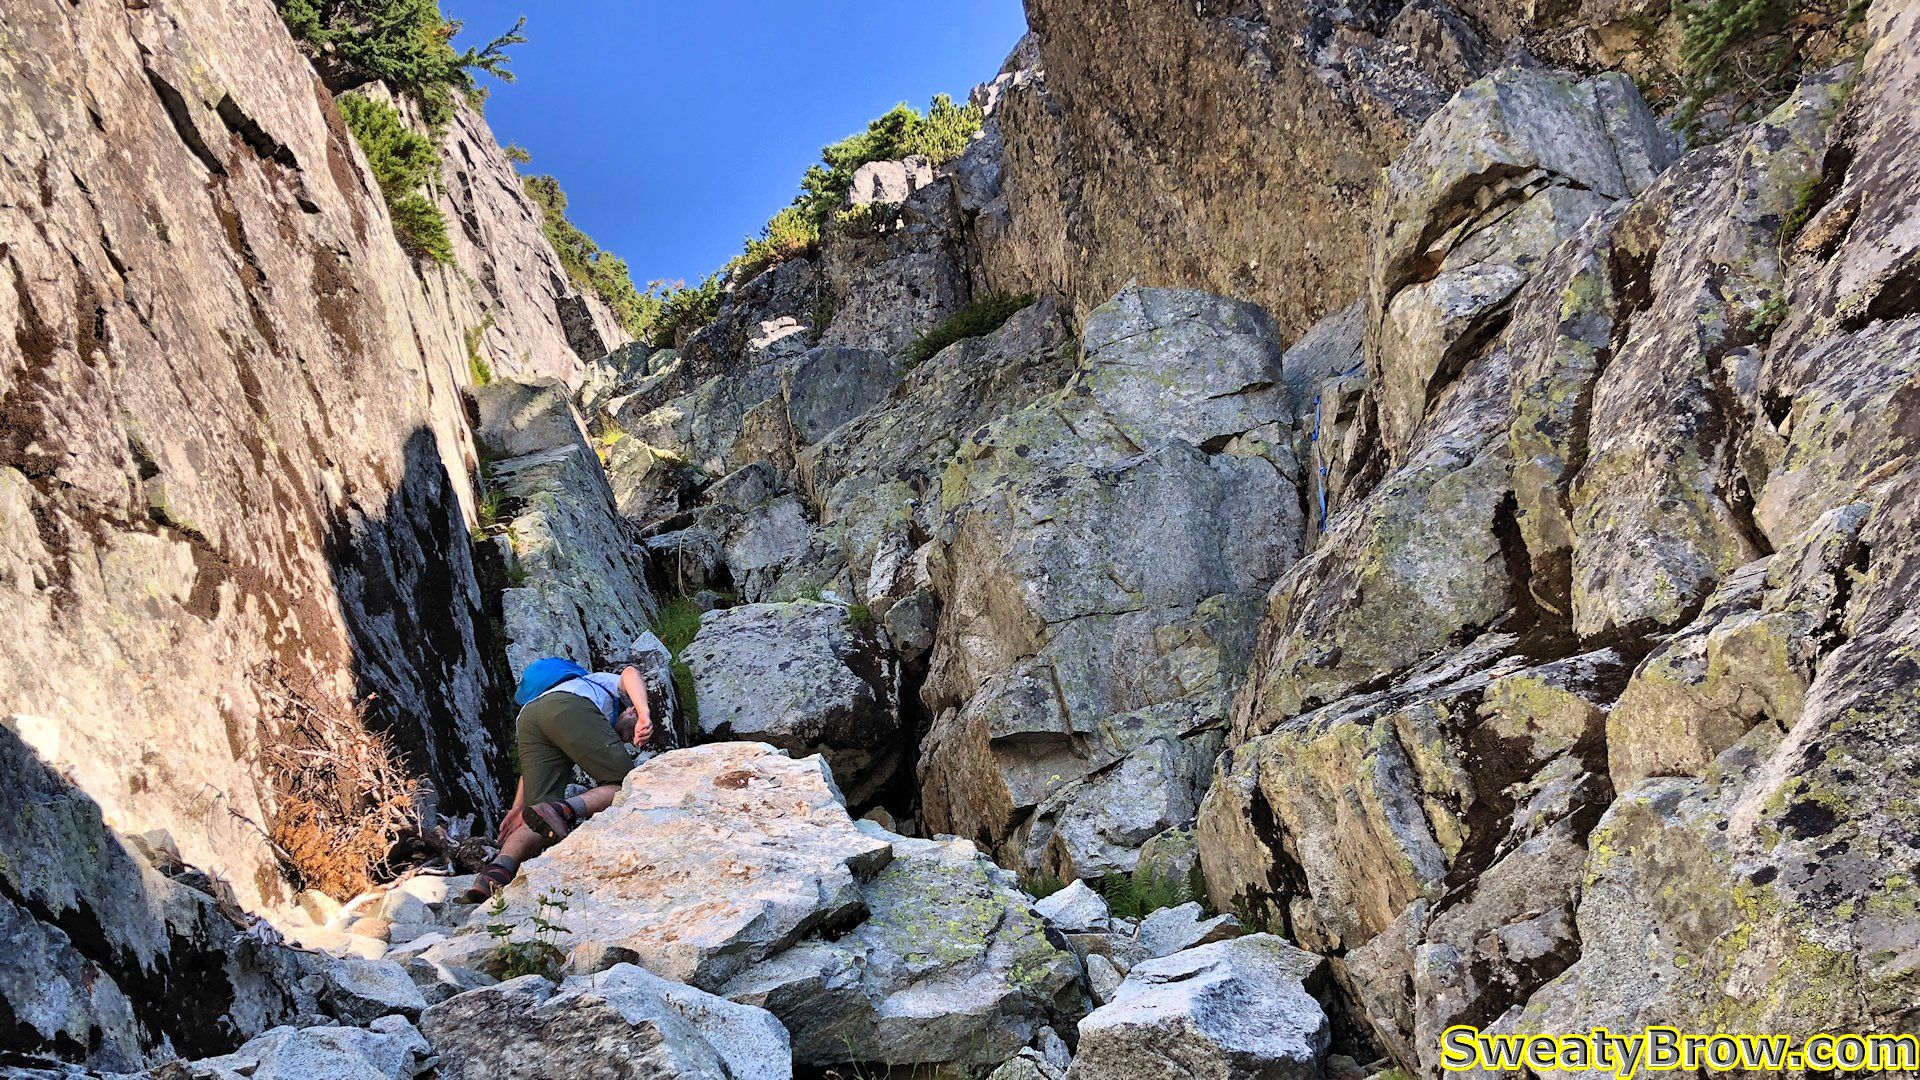
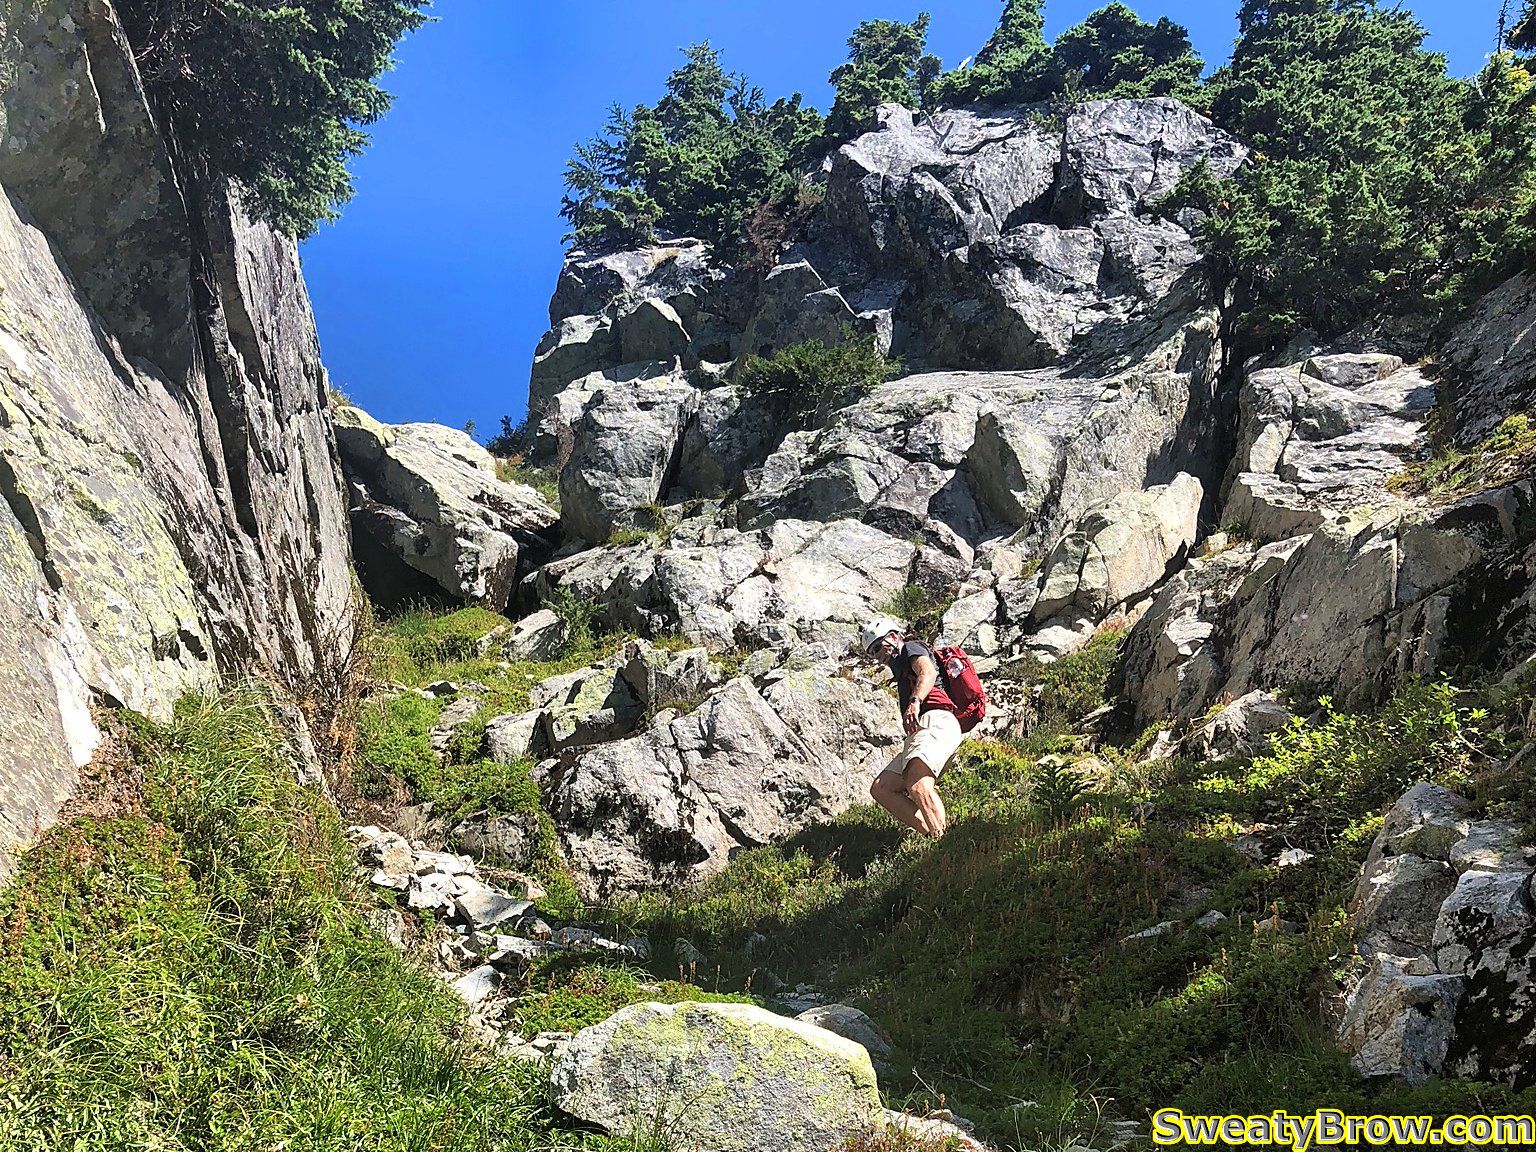
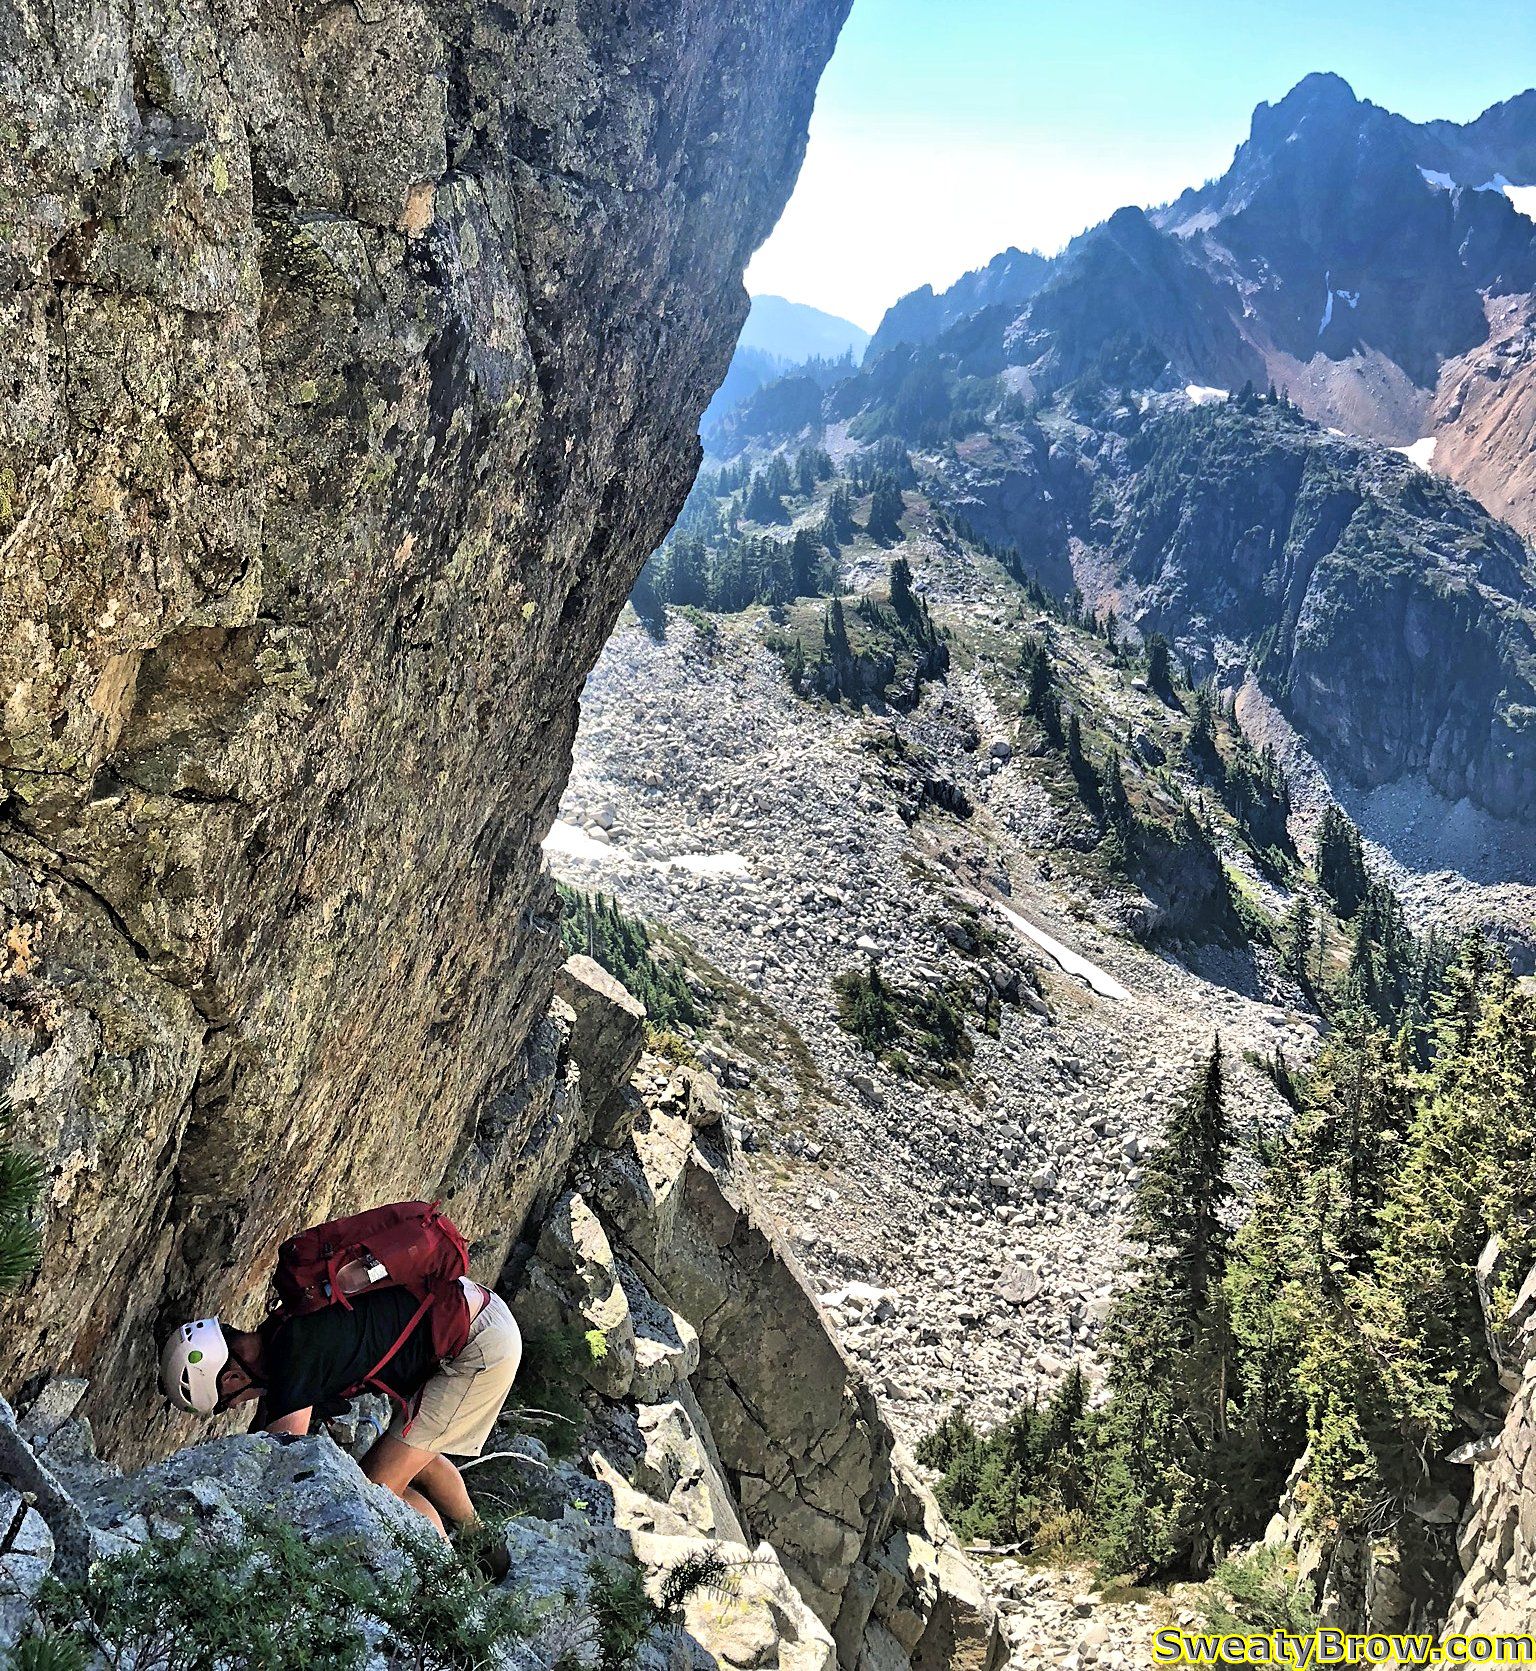
We found our way along the rolling terrain to the bottom of a gully that rose to a major boulder field above. We ascended the boulders (oh, I was lagging behind, despite some serious sweating!) to the base of the two parallel gullies rising to the summit. The online and guidebook consensus was that the left gully was easier, but more sustained, while the right side had a couple of harder, more exposed cruxes, combined with some easier terrain.
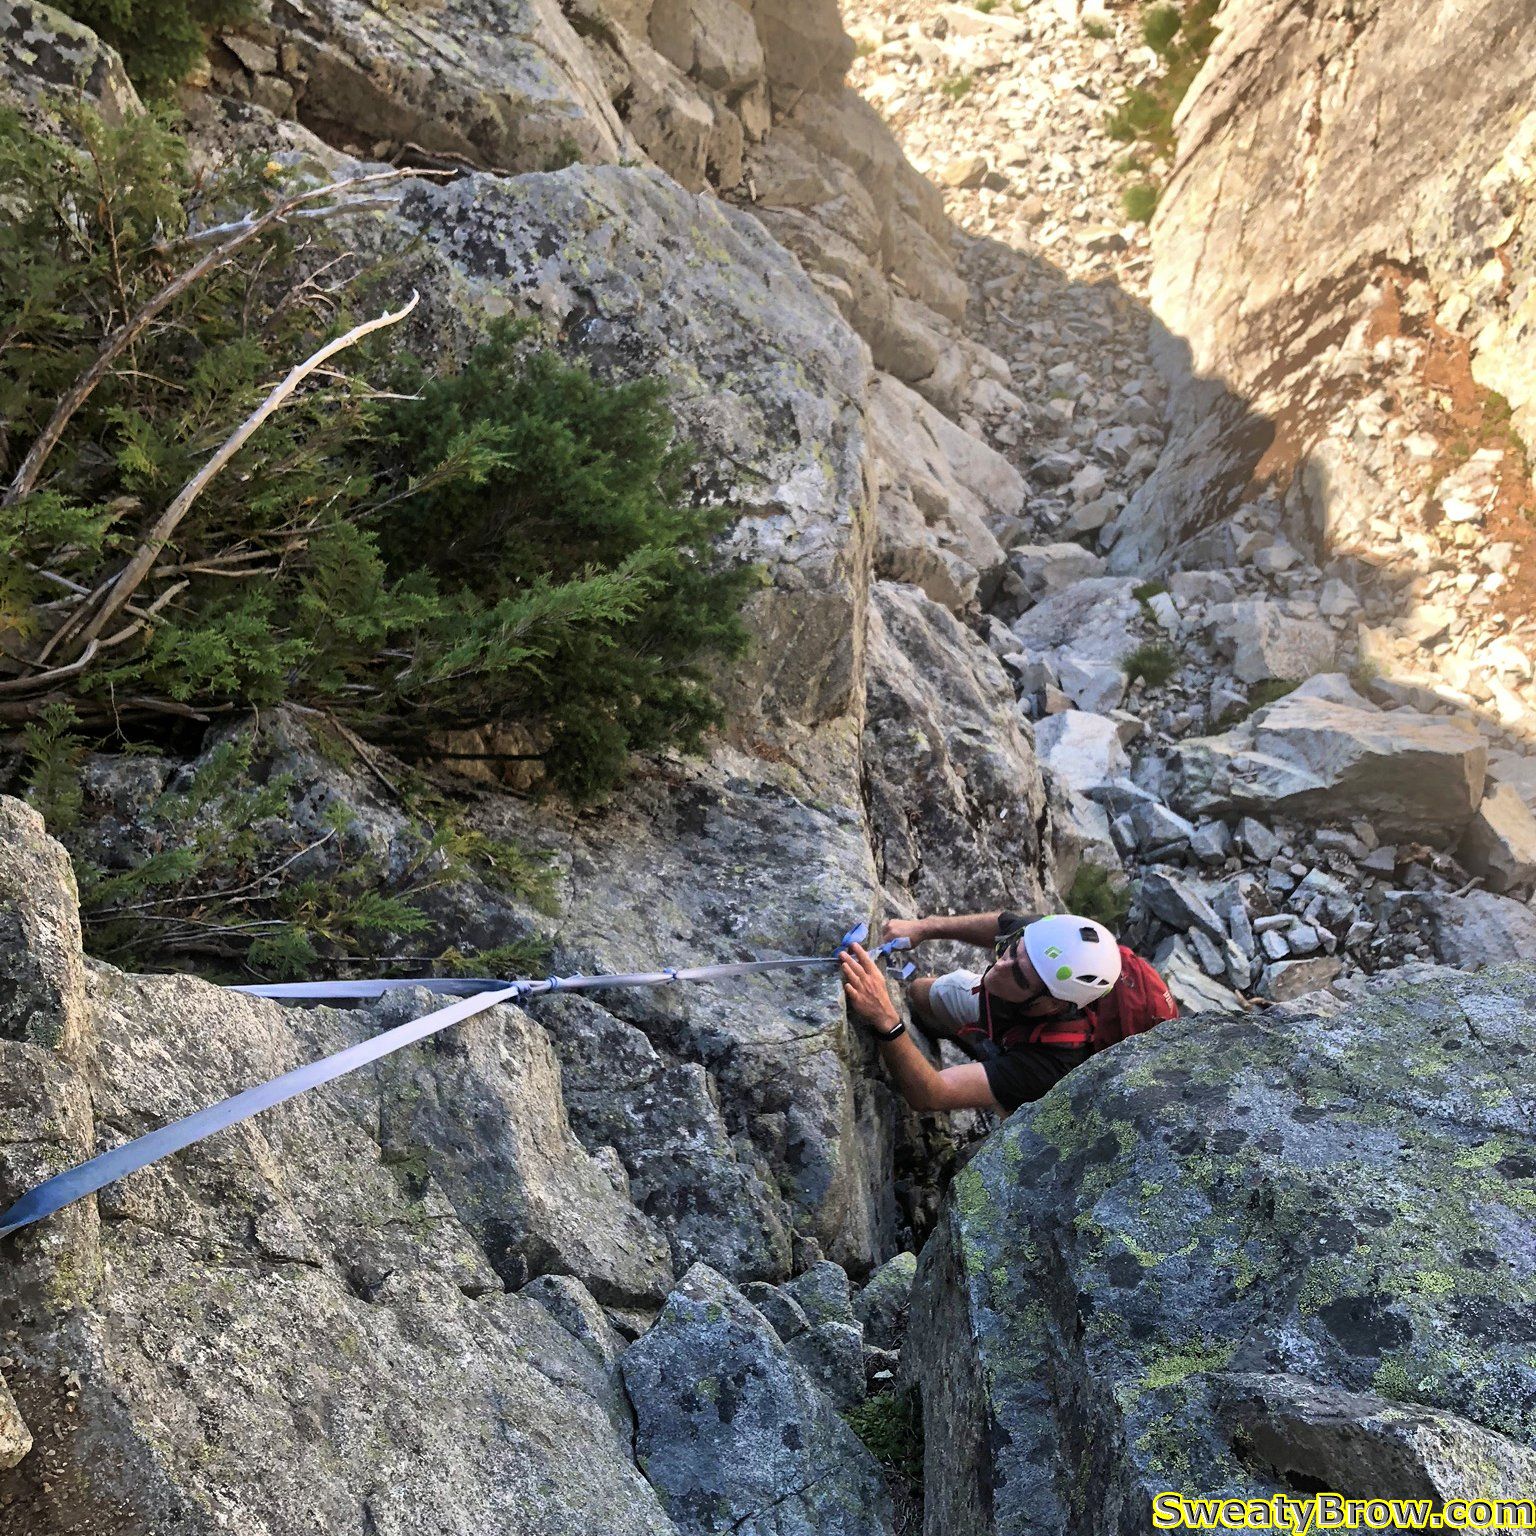
We agreed to take the left gully, and started up. Almost immediately, we reached a length of blue, knotted webbing hanging down from the right wall. Jan went up first, while I donned my helmet – just in case.
Starting up the Left Gully on Mount Hanover. Jan is traversing across to a length of blue webbing hanging from the rocks on the right.
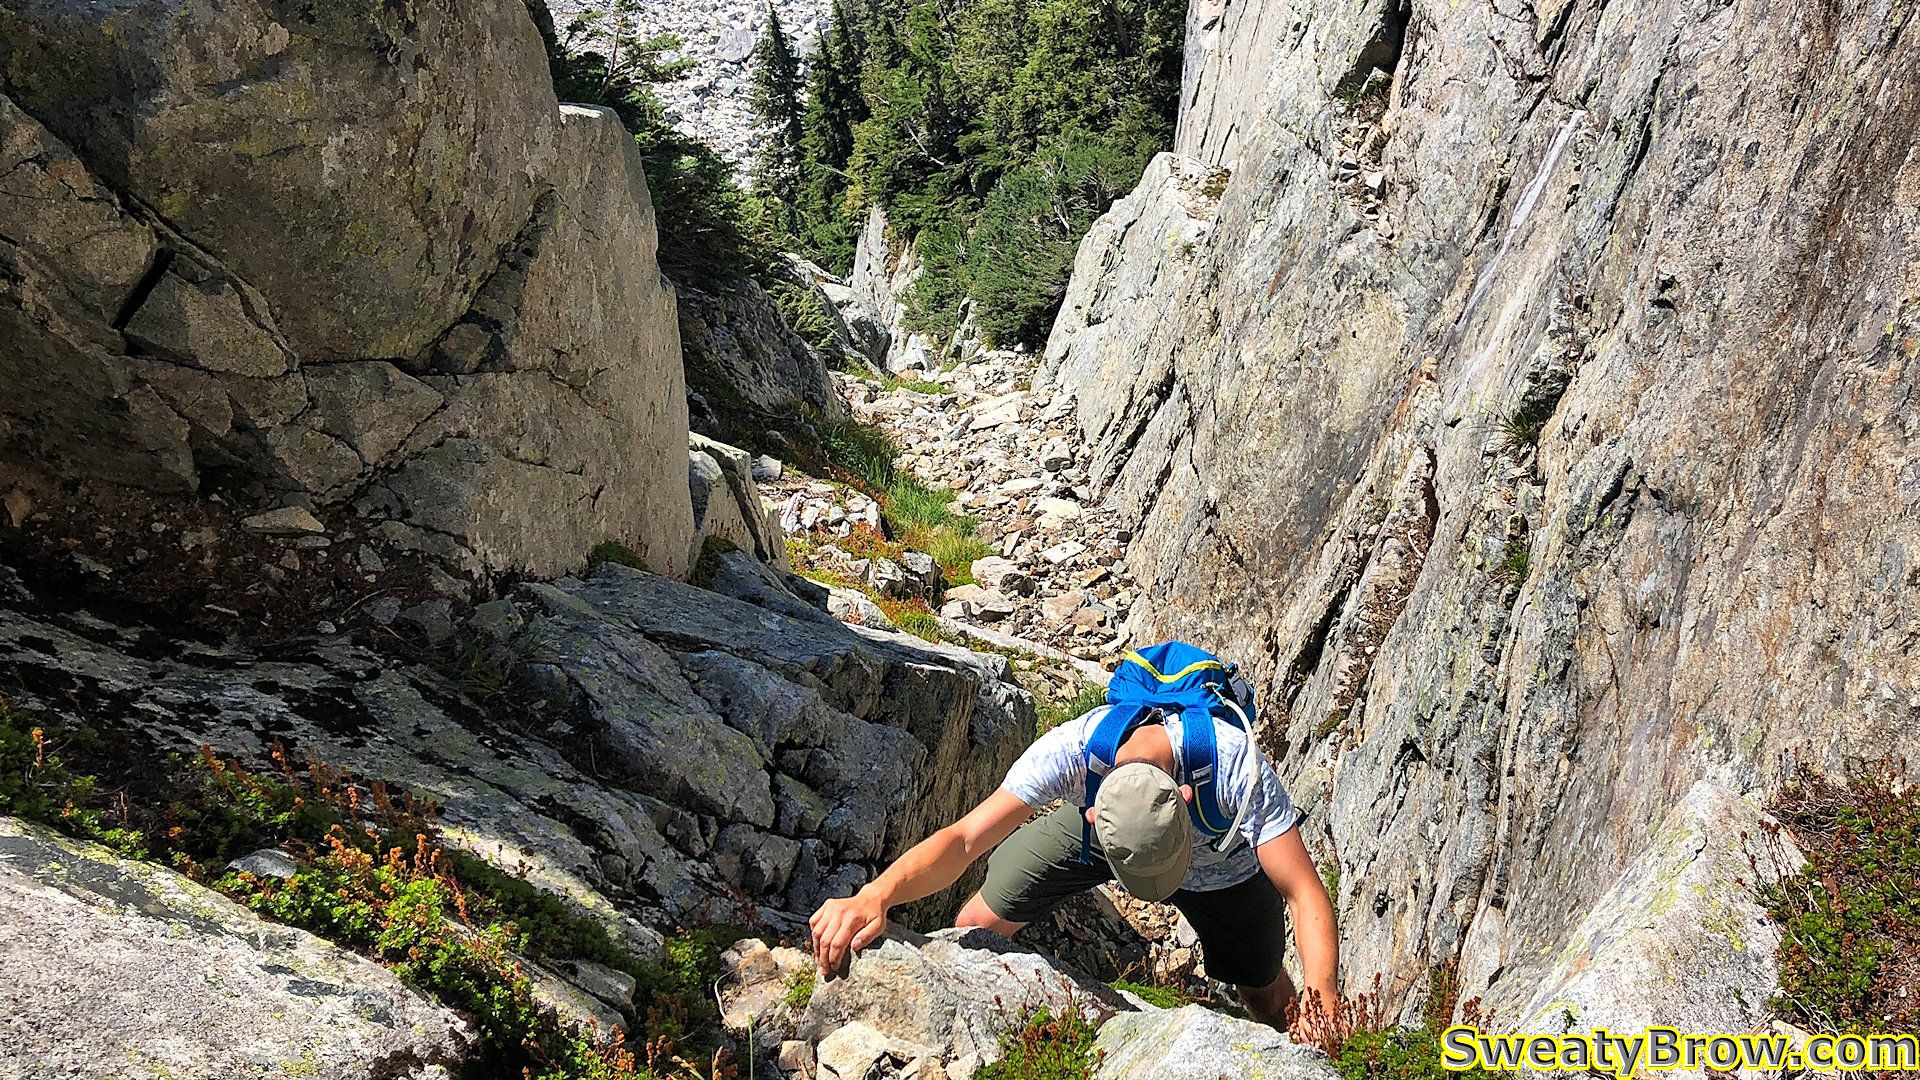
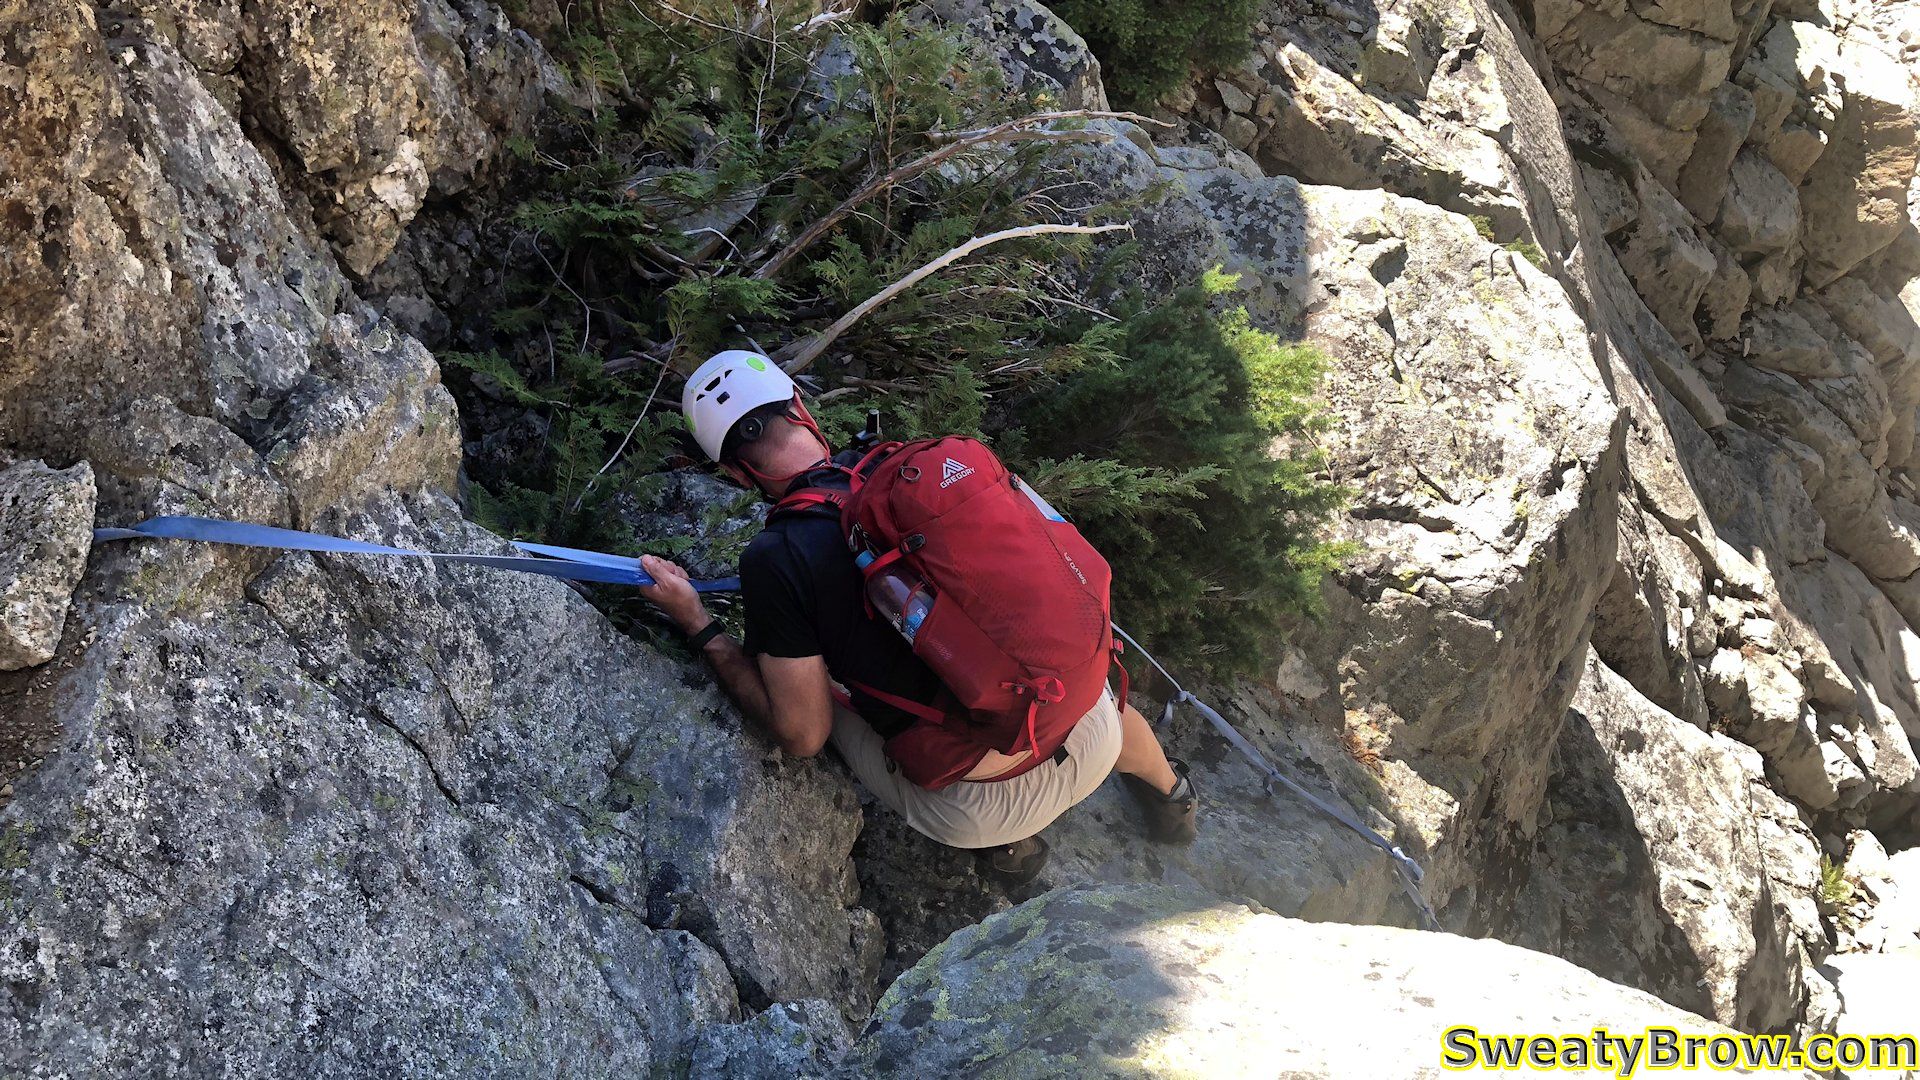
I followed him up, and we were soon at another obstacle, with a length of yellow rope hanging down. This time, I went first. There was a bit of hunting around here and there for the best route as we continued up.
Me following Jan up the fixed blue webbing.Heading toward the yellow rope just ahead.
There was one spot where I tried to decide the best option – an airy lower-angled slab with a few spaced out footholds, or a cramped, somewhat awkward scramble up a short narrow chimney. I opted for the airy slab, and at the top, we thought that it might be a bit challenging on the descent.
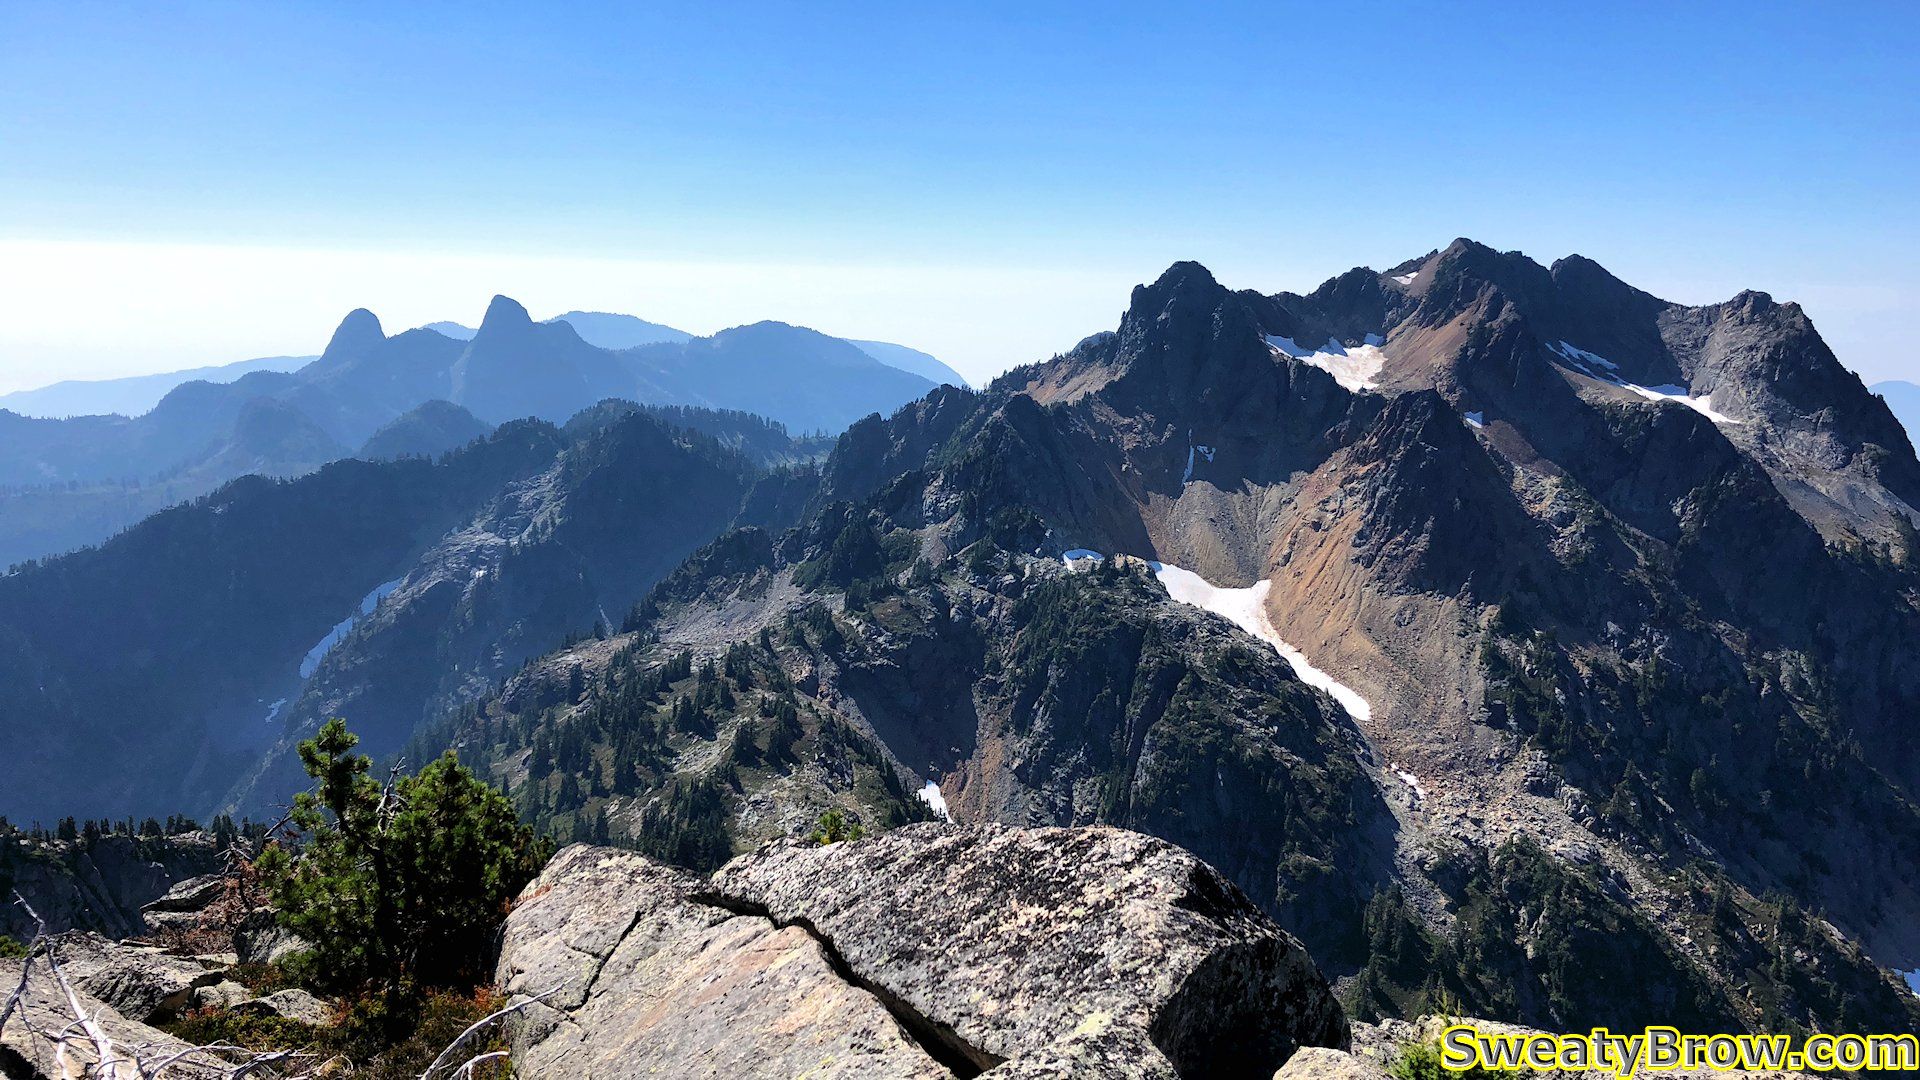
After a bit of bushwhacking near the top of the gully, we made it to the top a couple of minutes after noon. We turned left, to hit the summit, but when we got there, we realized that it was actually slightly lower than a right turn would have taken us!
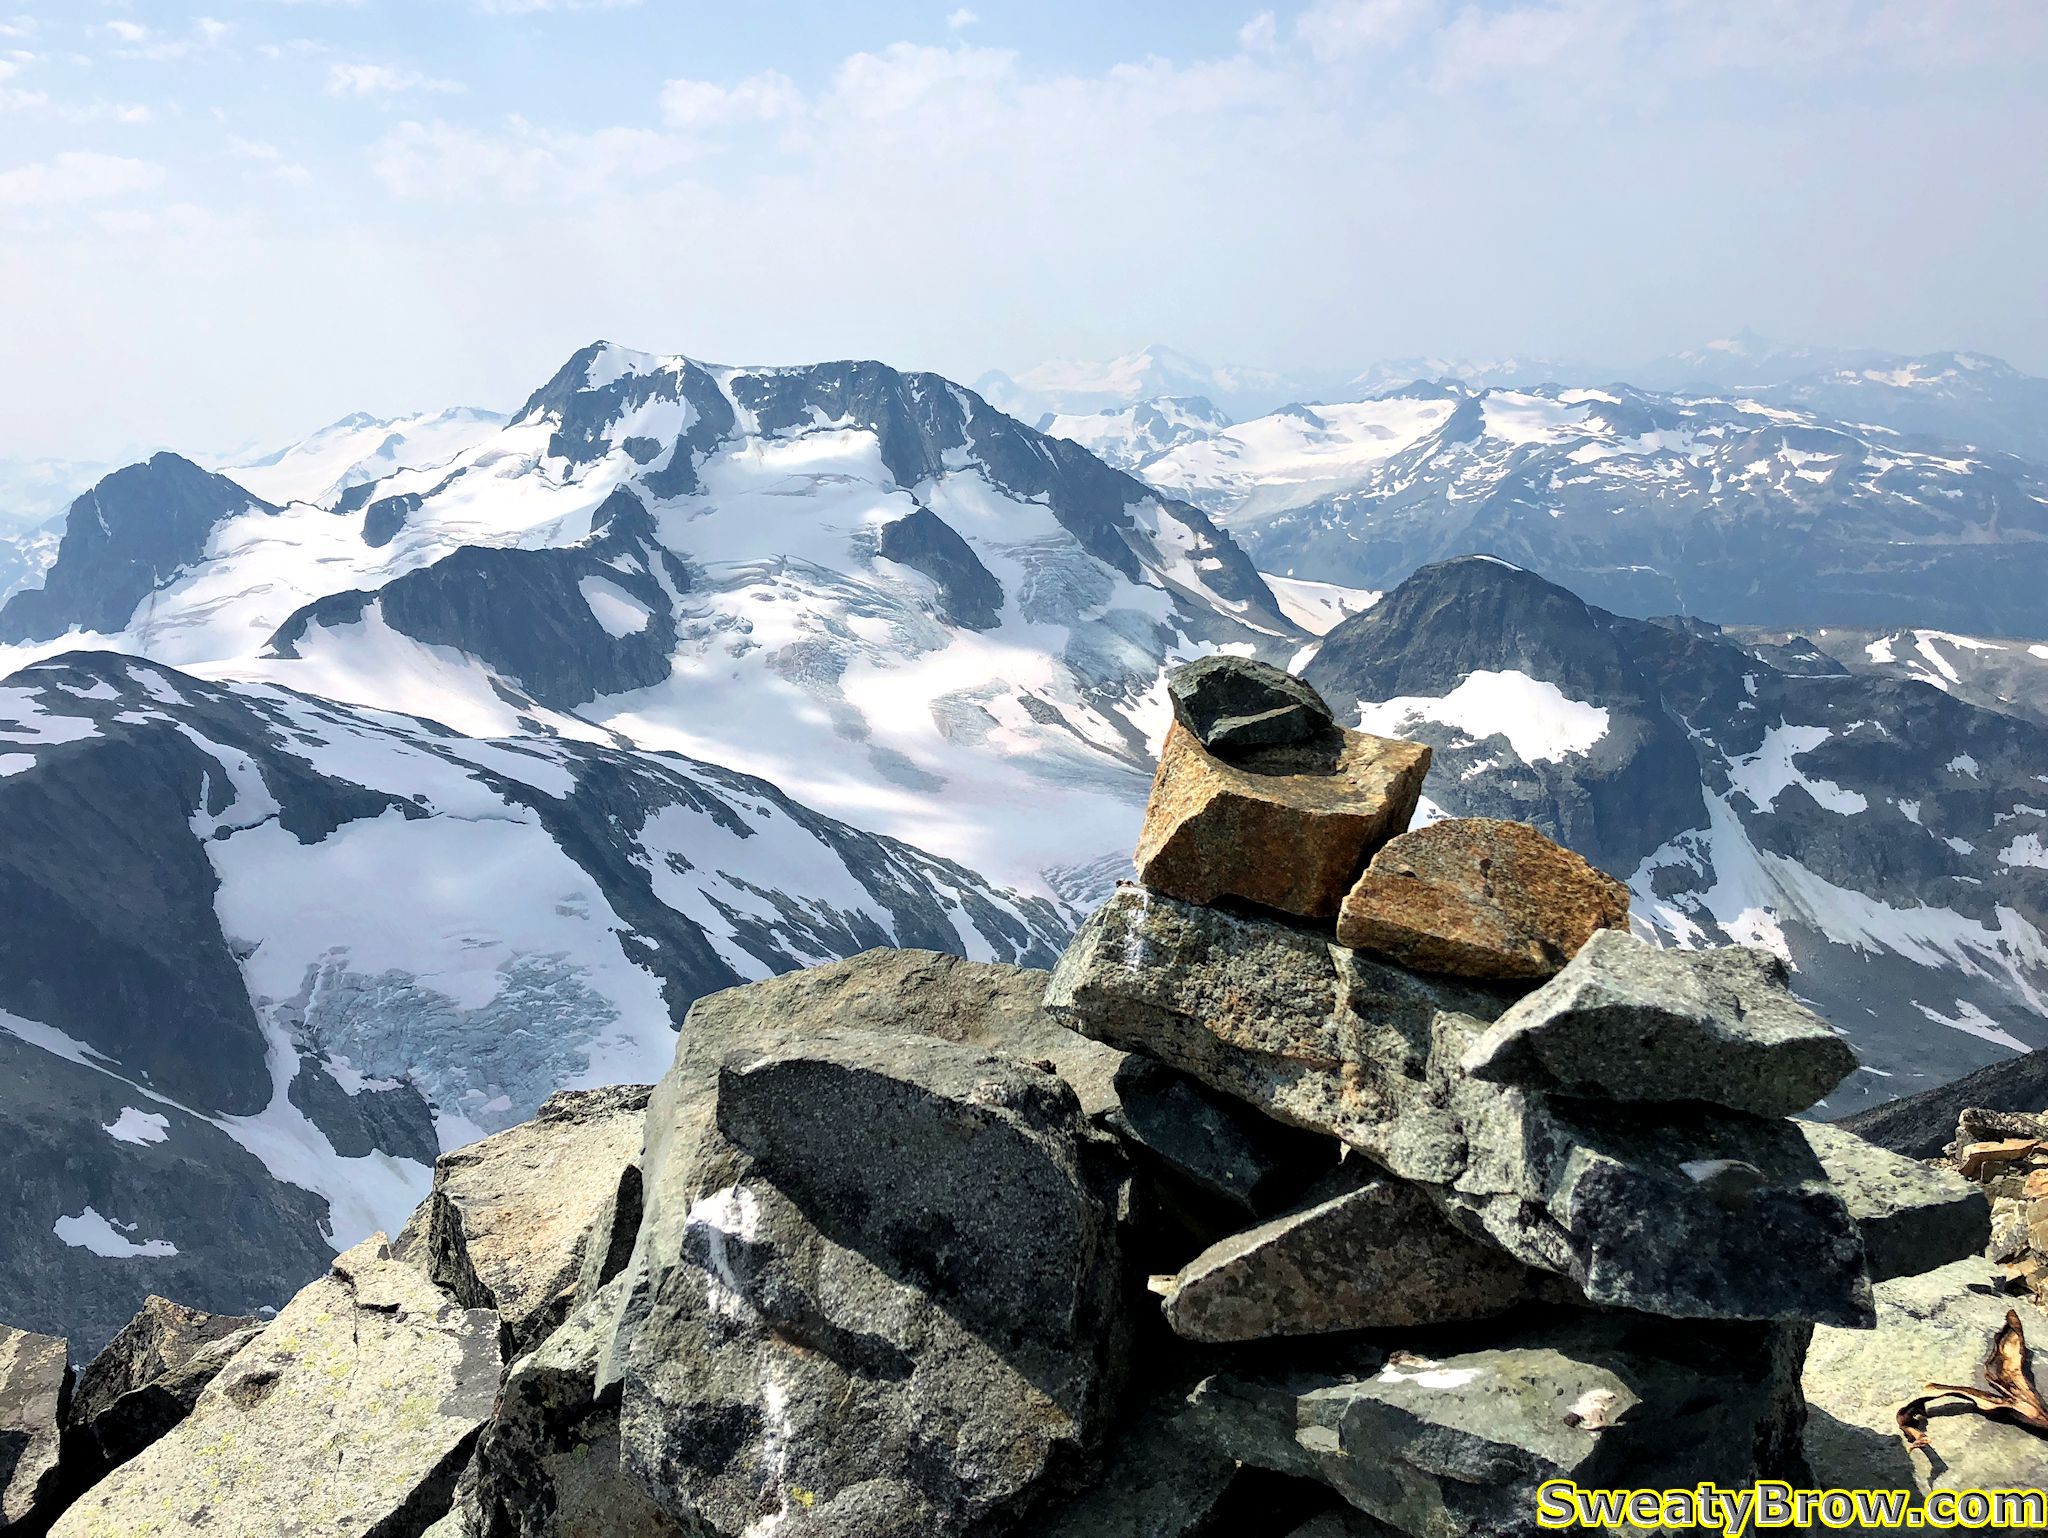
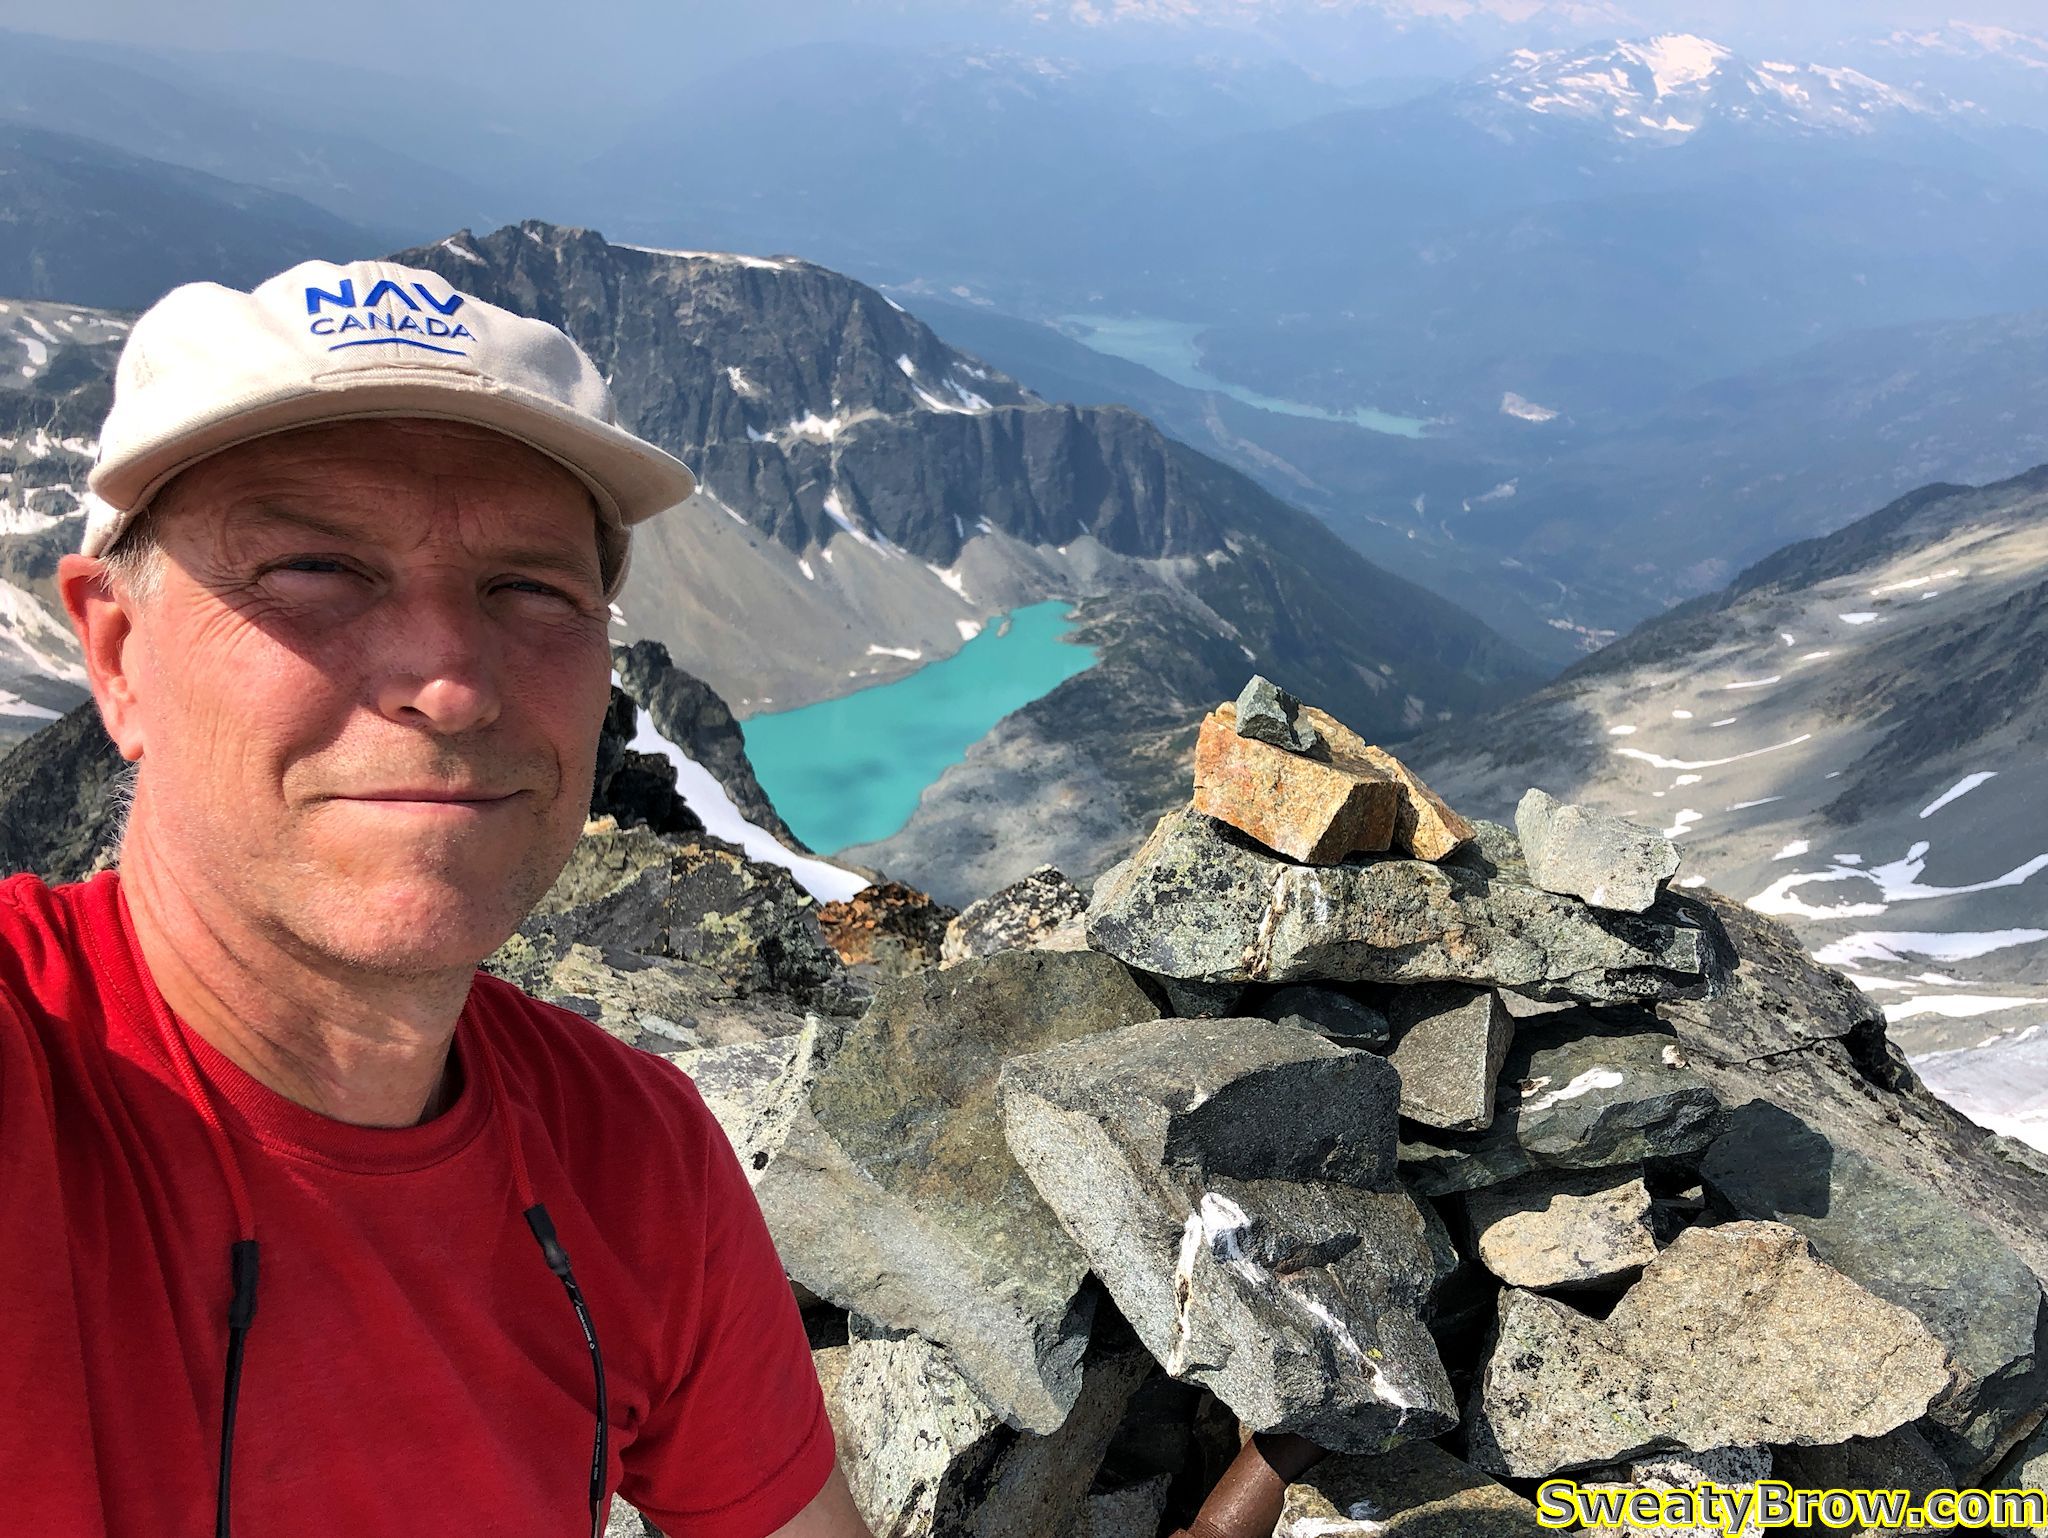
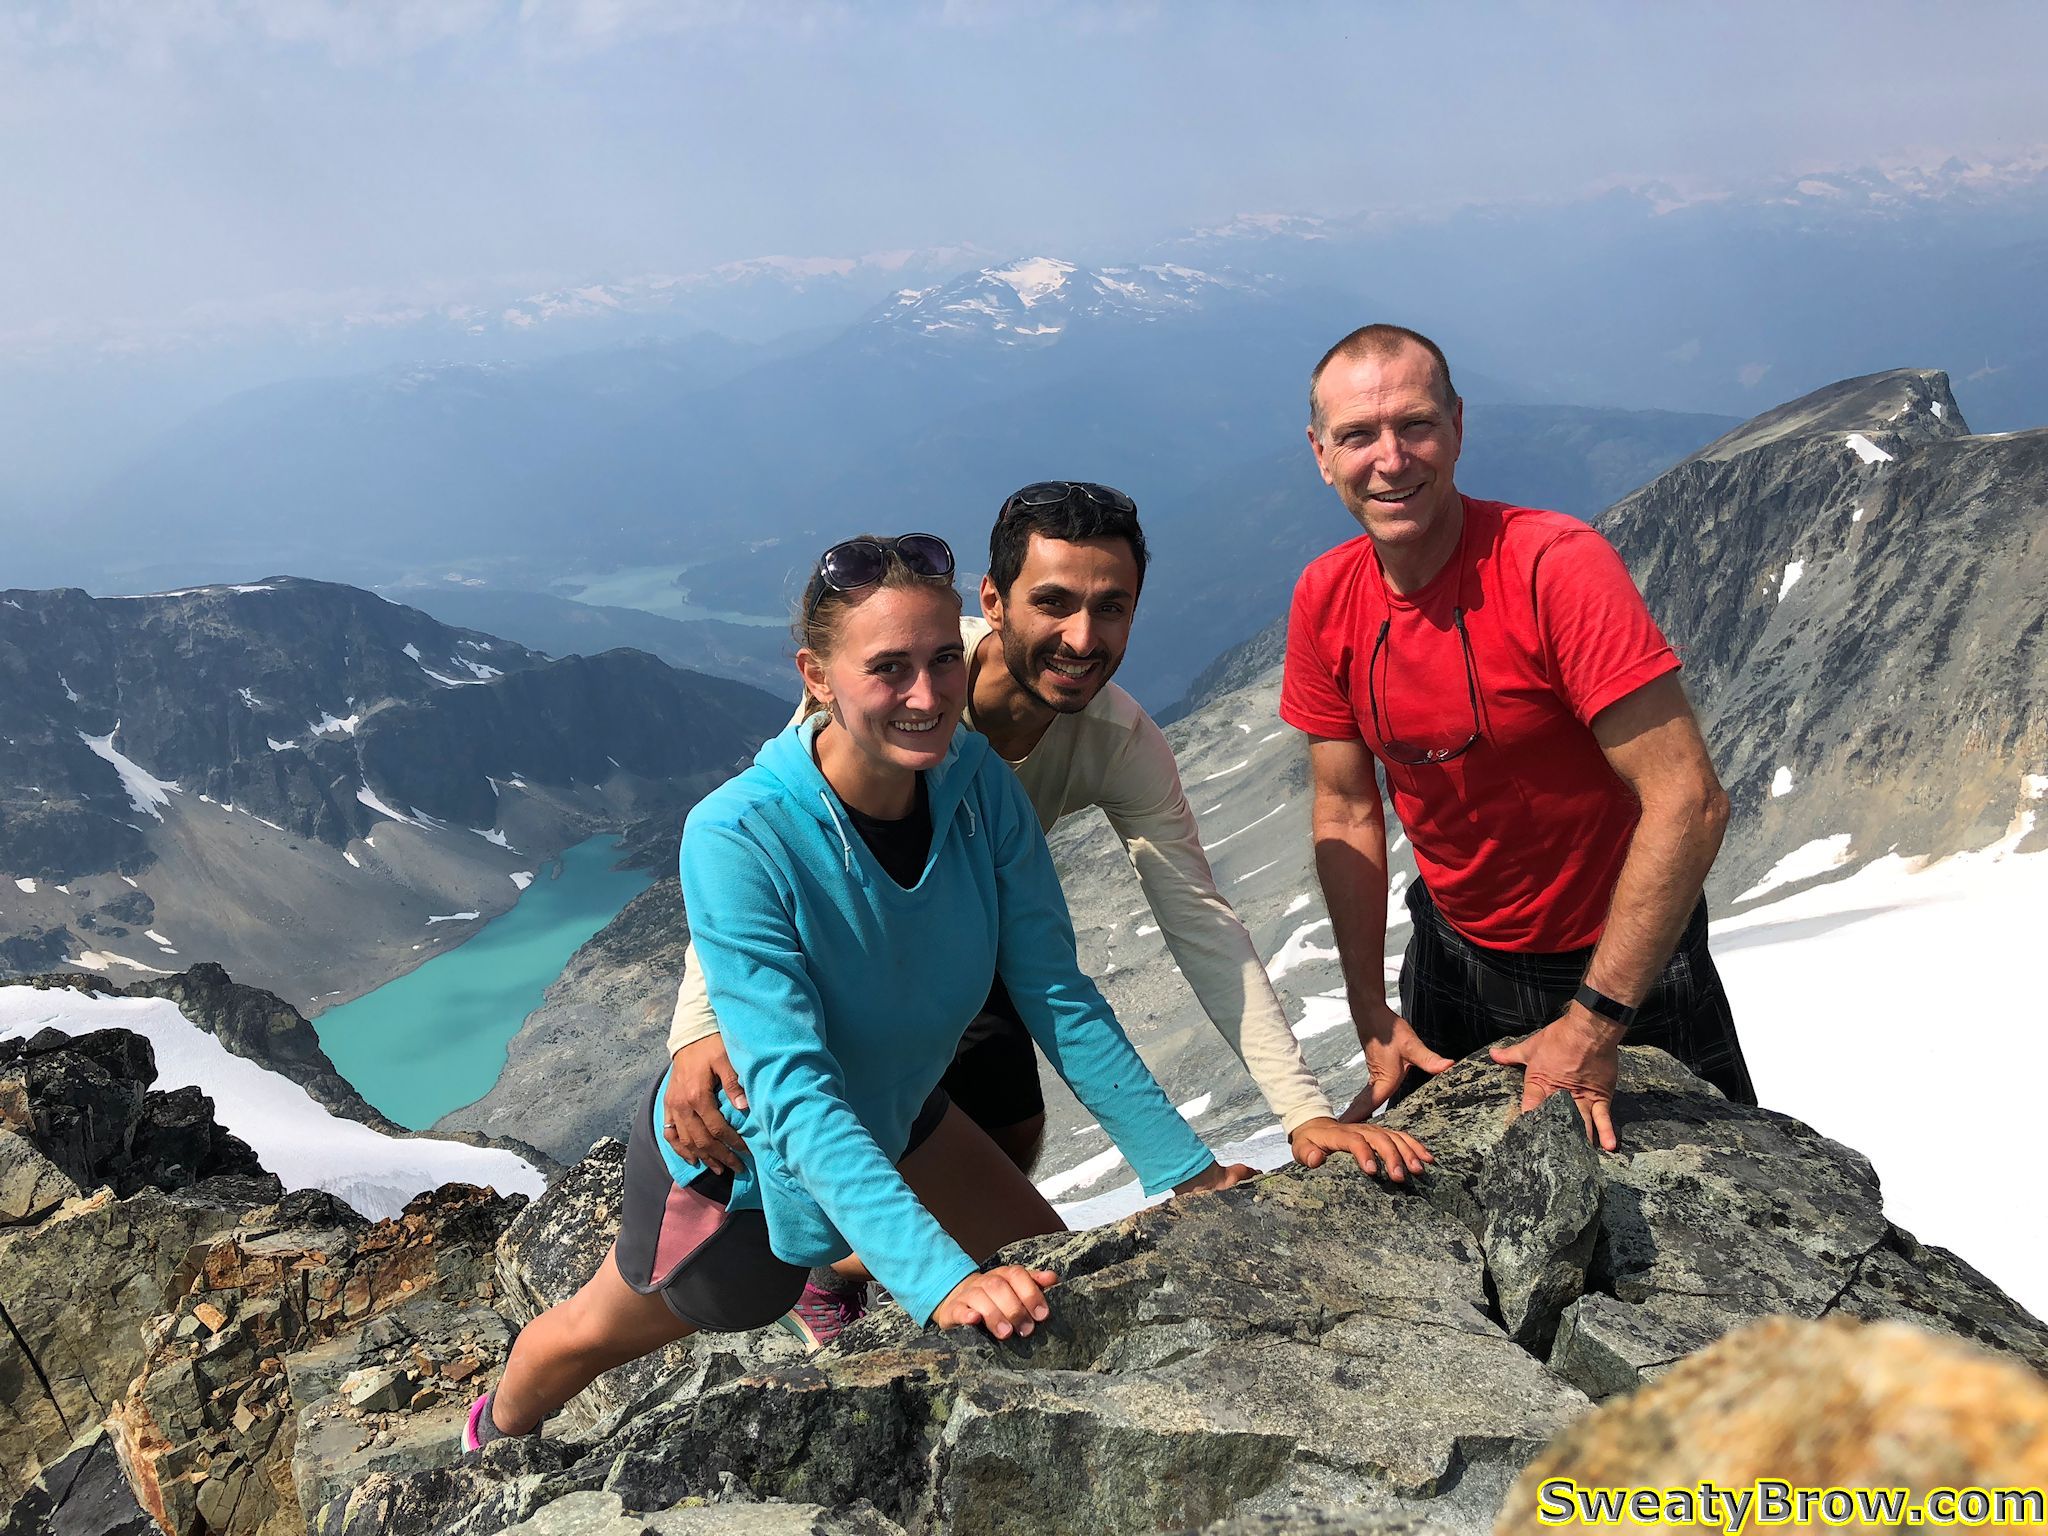
On the first summit we reached – looking at the *actual* summit.Me, unaware I’m in a photo, with Goat Ridge and the Sky Pilot group beyond.The Lions in the distance, and Brunswick Mountain nearby.Brunswick, Fat Ass Peak, and Hat Mountain from left to right. The gap between Fat Ass and Hat along the ridge doesn’t look nearly as formidable as it did later in the day… /foreshadowingThe view northwest down to Hanover Lake and Deeks Lake. Brunswick Lake is not quite visible, out of frame at bottom left.
We stayed a few minutes, hydrated, and took photos, then crossed over to the actual peak. After a short time on this summit, we started down around 12:30 or so.
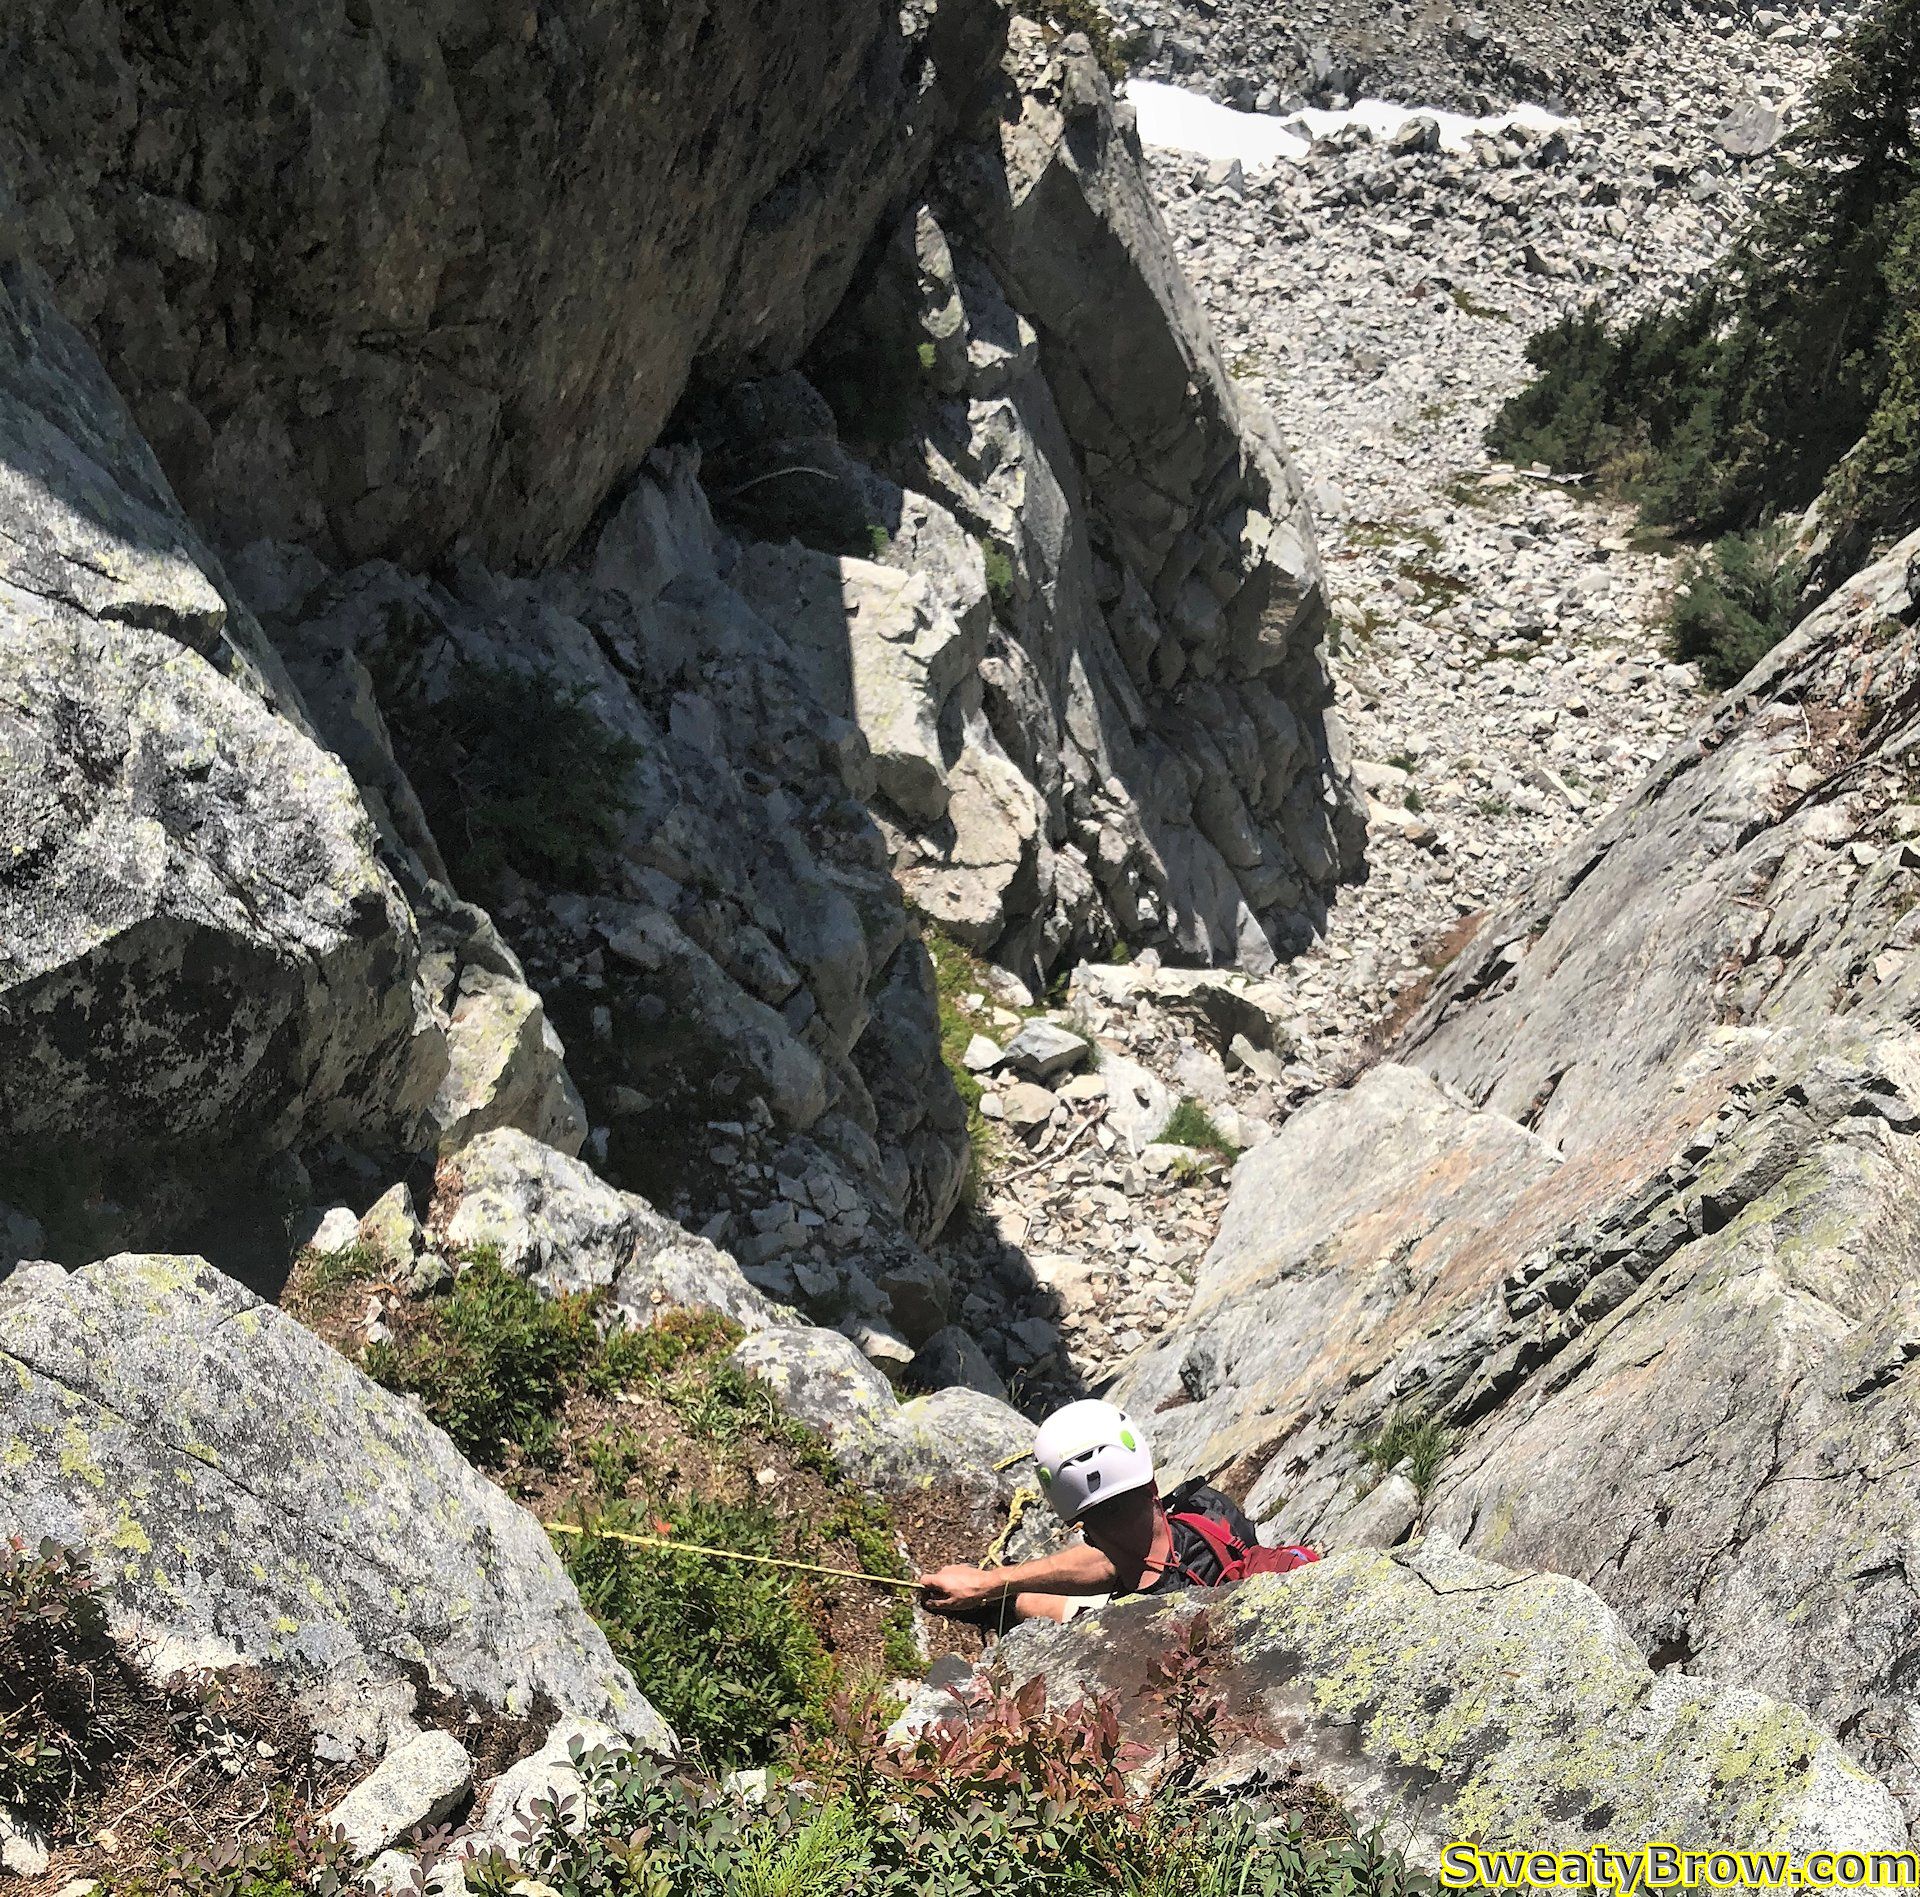
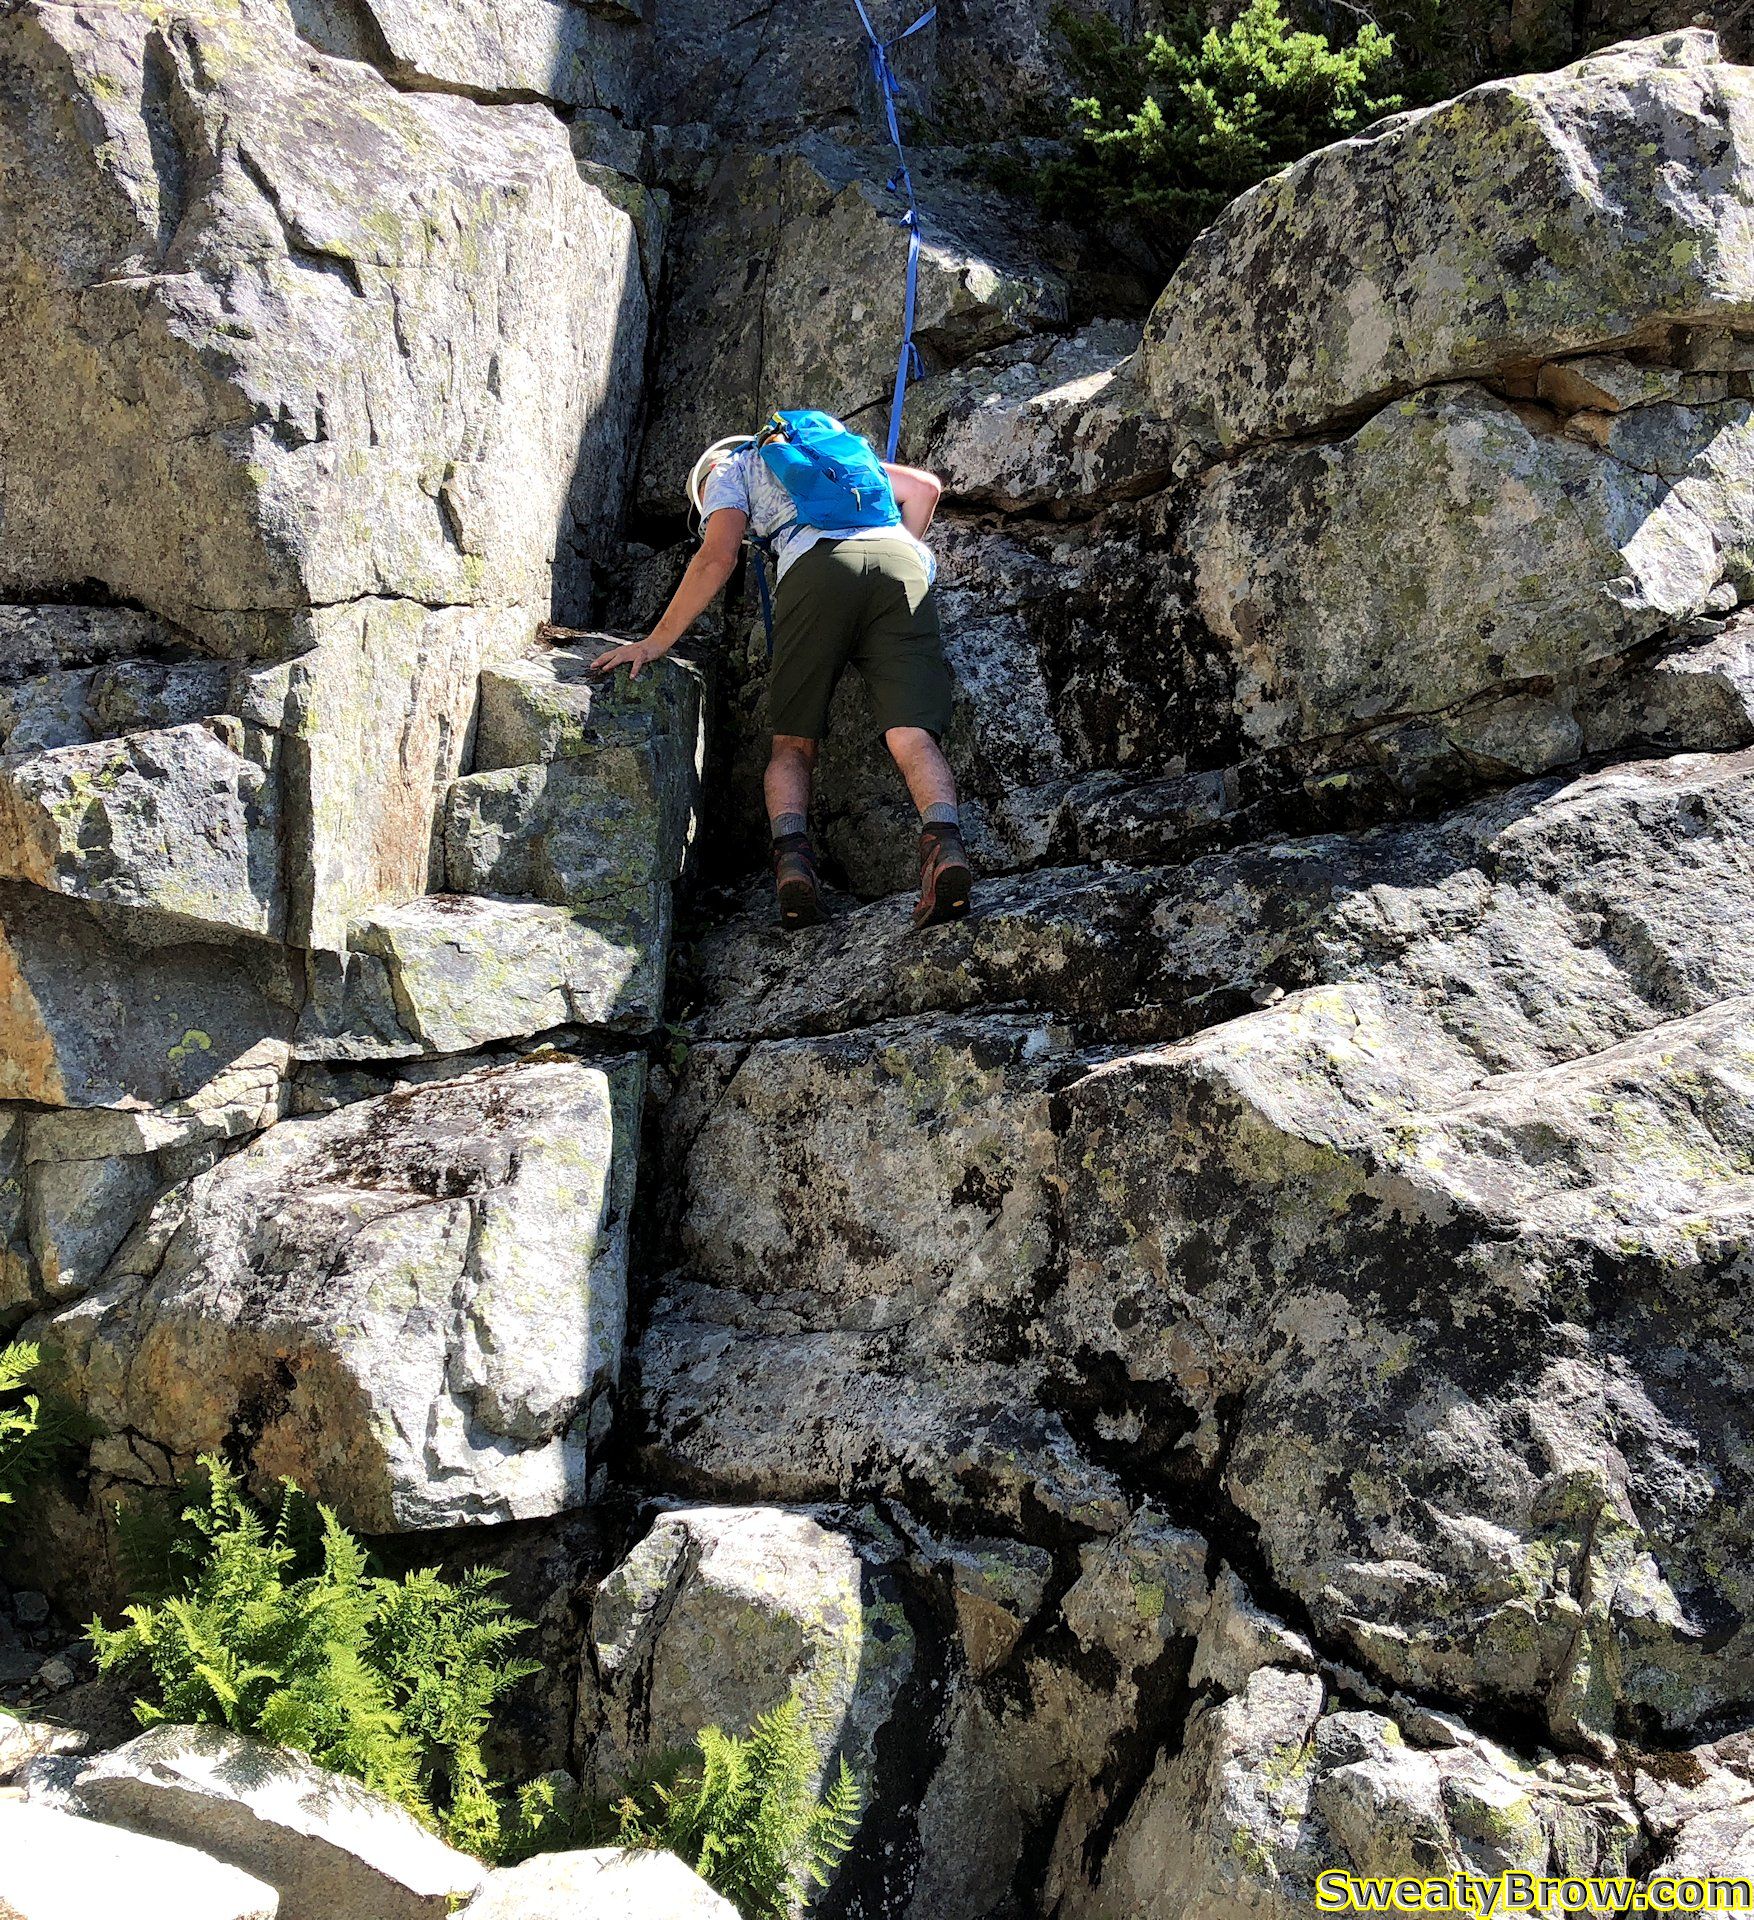
Starting down the Left Gully from Mount Hanover.
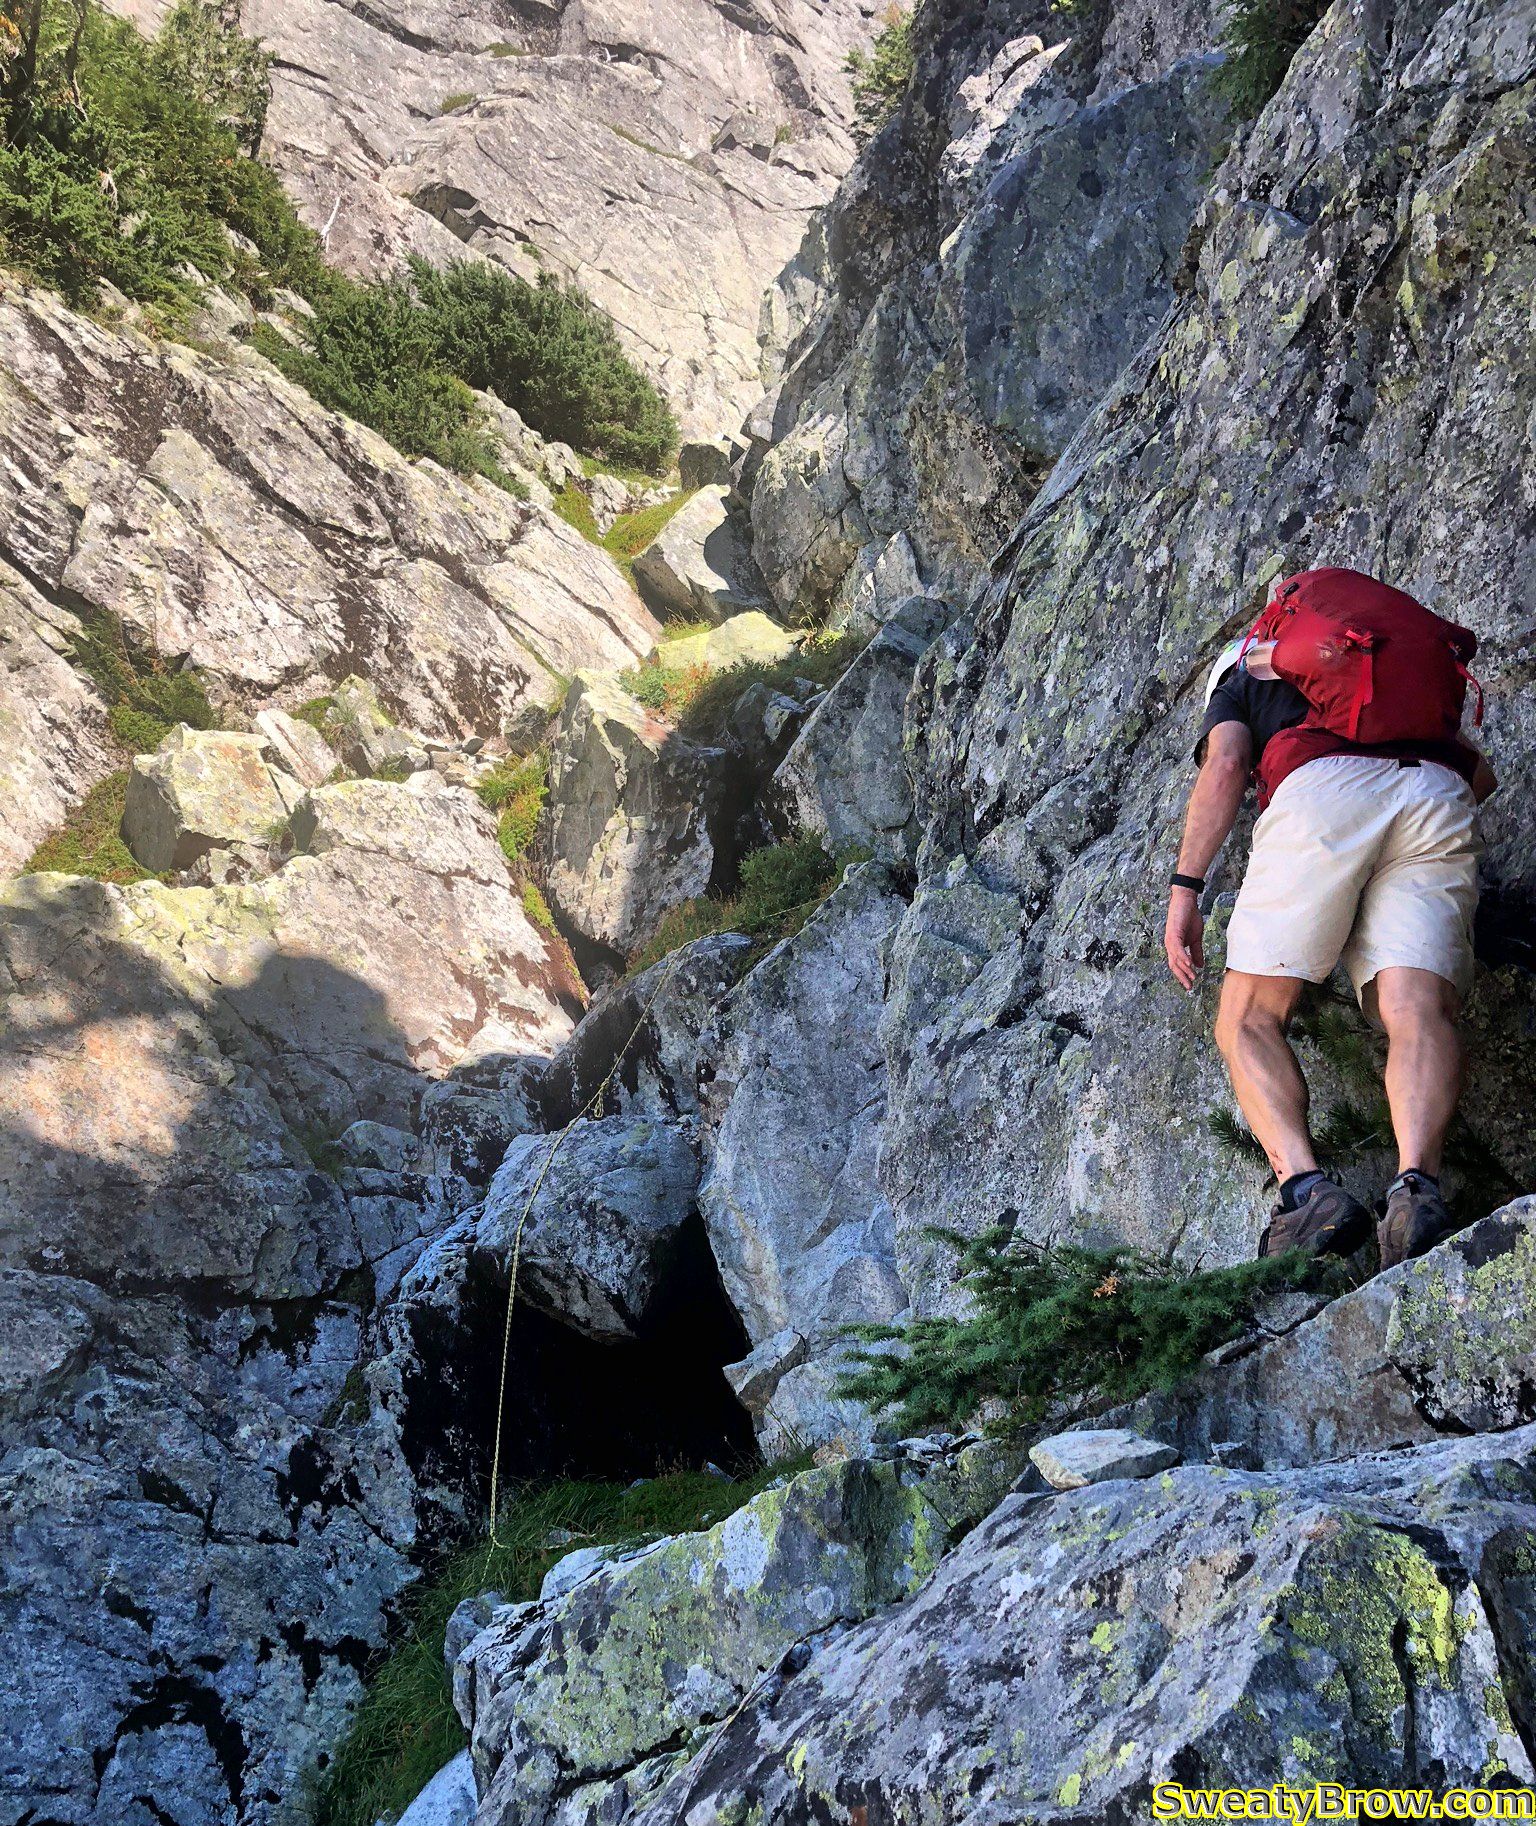
Again, we took turns taking the lead, and Jan arrived at the top of the slab/chimney choice. He decided that it would be too difficult heading down the slab, without being able to see any foot placements, and with a lot of air underneath. He moved over to the groove above the chimney and started down. Definitely the right choice. The foot placements and hand holds all appeared in just the right places, with just a little bit of hunting around.
All in all, the scramble portion was a little bit tougher than I had expected. I was very glad to have another person with me, though I don’t think that being solo would have stopped me from continuing.
Jan downclimbing one of the first obstacles on the way back down.
Working my way down through some obstacles.Dropping down using the yellow rope.Almost at the bottom of the technical part of the gully.Heading down the blue webbing near the bottom.Finishing the last of the scrambling – Jan descending the blue webbing near the bottom of the gully.
It took about half an hour or so to descend the gully, and we were back to descending the big boulder slope. I told Jan that if I was holding him up (and I was – he was definitely faster than me!) that I’d be fine if he wanted to continue on his own, and get back to the parking lot sooner. It was great to have a companion for the challenging scramble section, but I didn’t want to impede his pace.
Jan, however, was fine with continuing together. When I told him that I was also hoping to hit Hat Mountain on the way back, he asked whether it was OK to tag along. Of course!
We got back up to Hat Pass, and found the small trail that leads off, over Fat Ass Peak (hey, I don’t name these things) and then continues down into a gully and back up Hat Mountain.
By this time, I was lagging pretty badly. We got to the top of Fat Ass Peak, and looked down into the gully beyond. It was a lot further down than I had thought – perhaps 75m or more – and I really didn’t feel up descending the gully, climbing the other side, and then doing it again in reverse!
Looking across at Hat Mountain from Fat Ass Peak.
I offered Jan the option of doing it himself – I would be more than happy to stay where I was and wait for him, if he wanted to complete the H trifecta: Harvey, Hanover, and Hat – but he decided that he was fine without it. He checked his GPS and it said he’d already ascended 2500m for the day. That would do! Mine said a shade under 2100m, and I figured that was sufficient. Hat could wait for another day.
We retraced out steps, down Fat Ass, along the HSCT, and finally down the Brunswick Trail.
GPS track of the descent from Mount Hanover, showing the diversion toward Hat on the way back. It went a little bit wonky in the gully coming down for a bit, but mostly correct.
After a total of (for me) 9 hours, 21 km, and 2100m of elevation gain/loss, we were back at the parking lot at 4:30. This was a pretty big day for me – I was really hitting the wall on the way back down. The next day I had an appointment to donate platelets in the city, and that was about all I could manage for the whole day – otherwise it was a write-off!
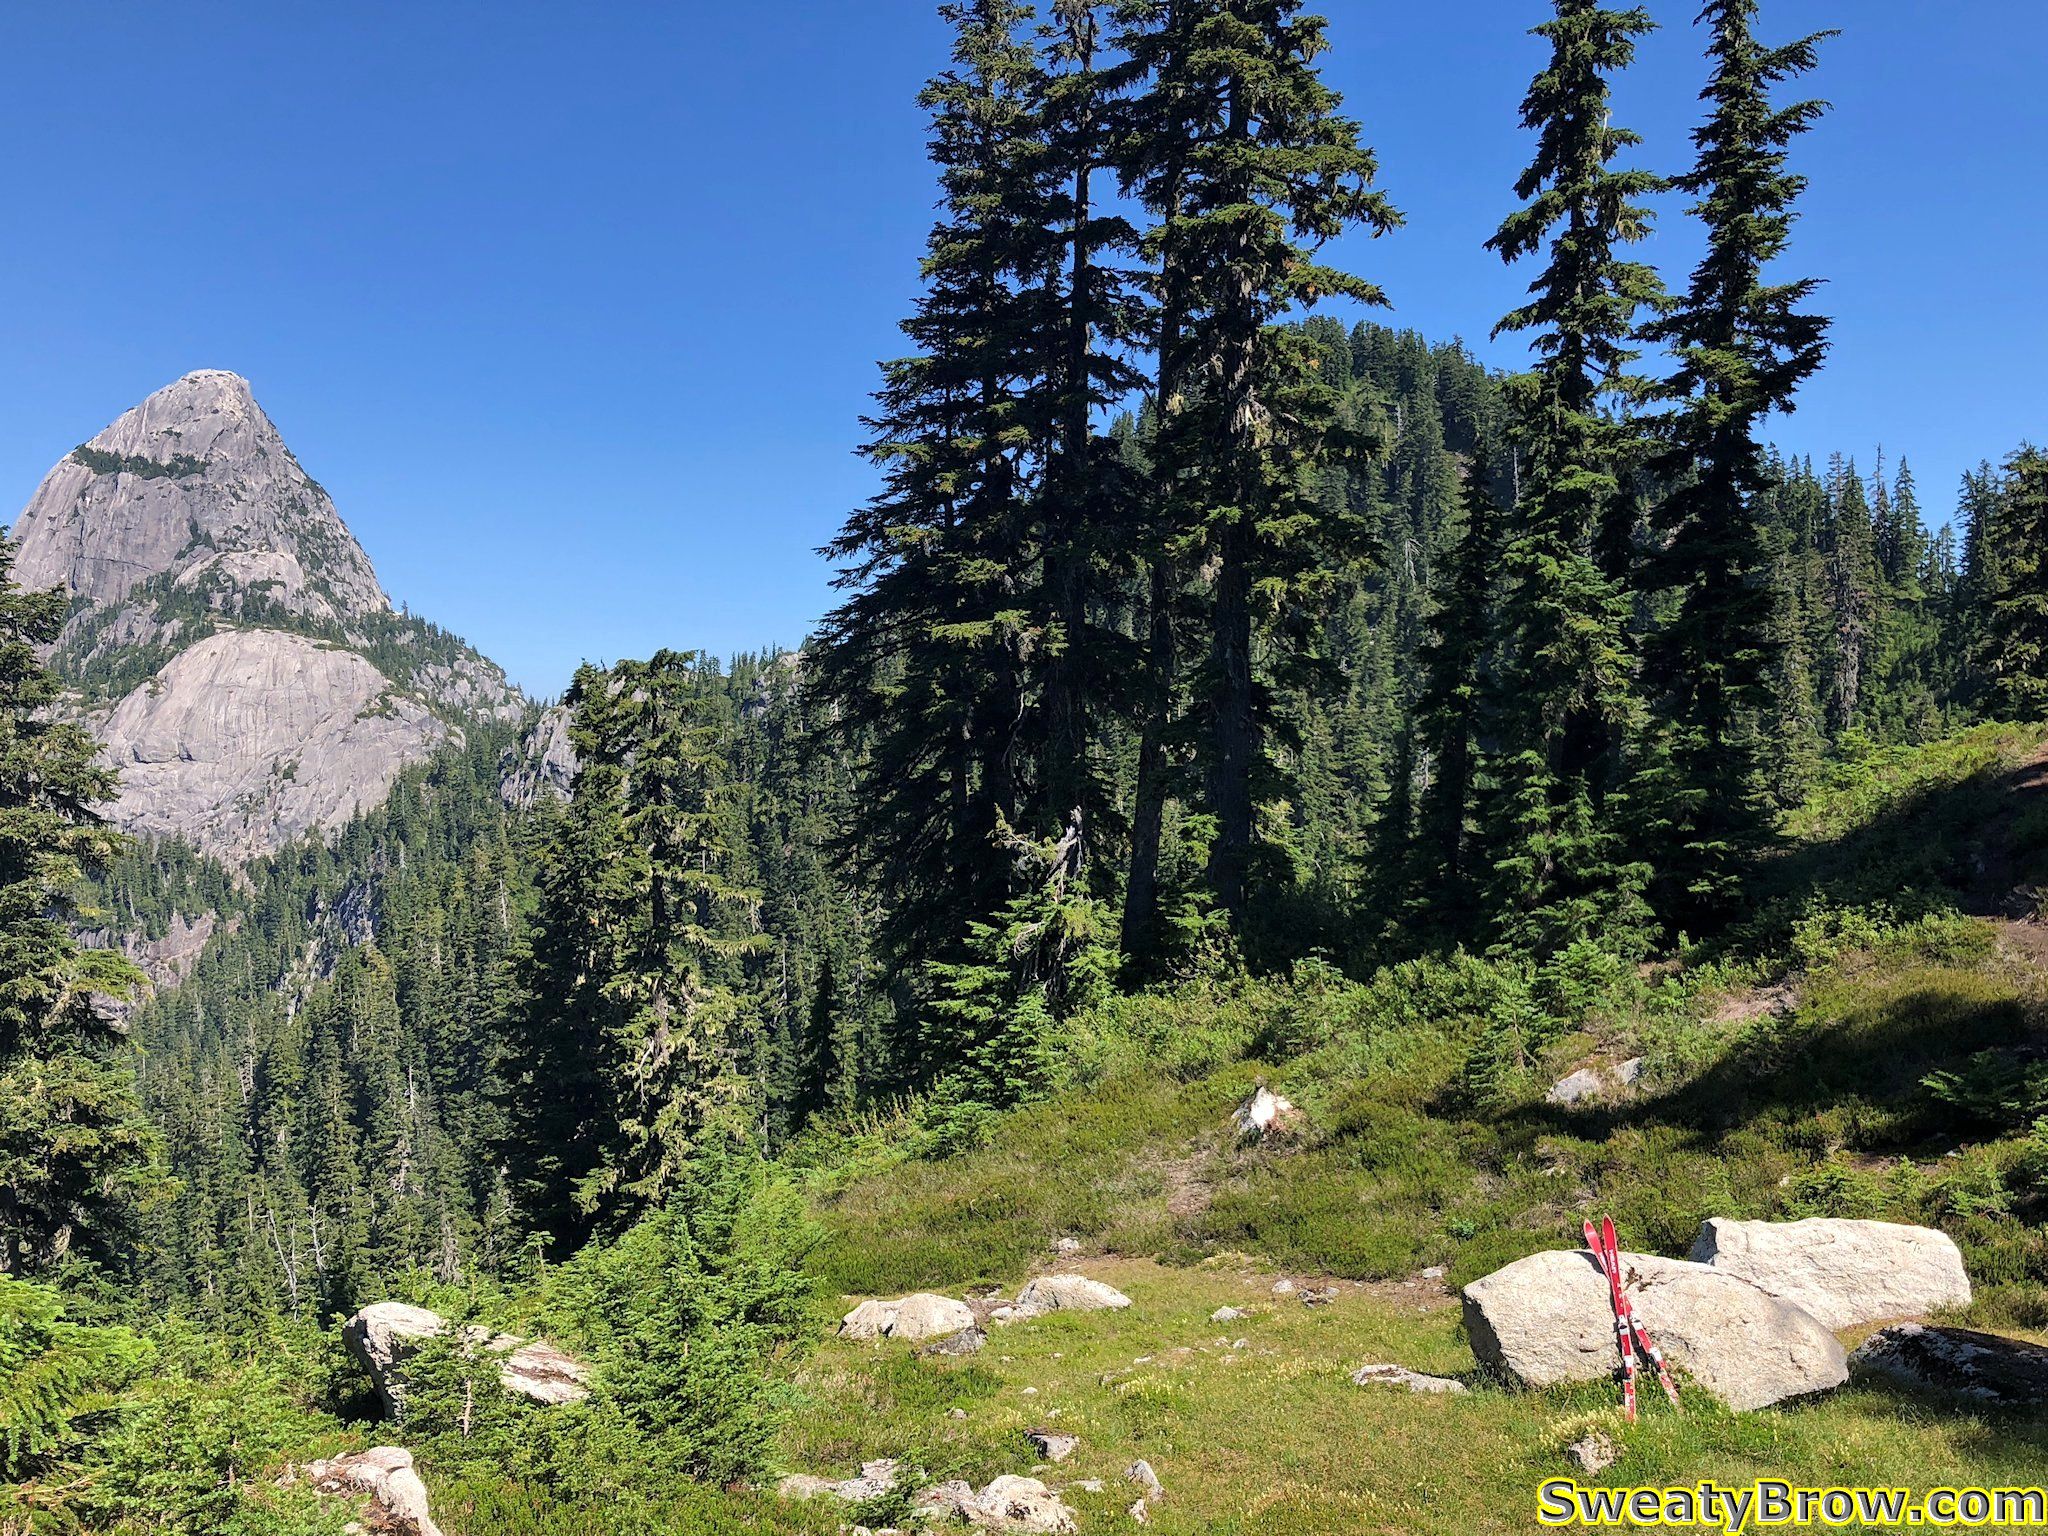
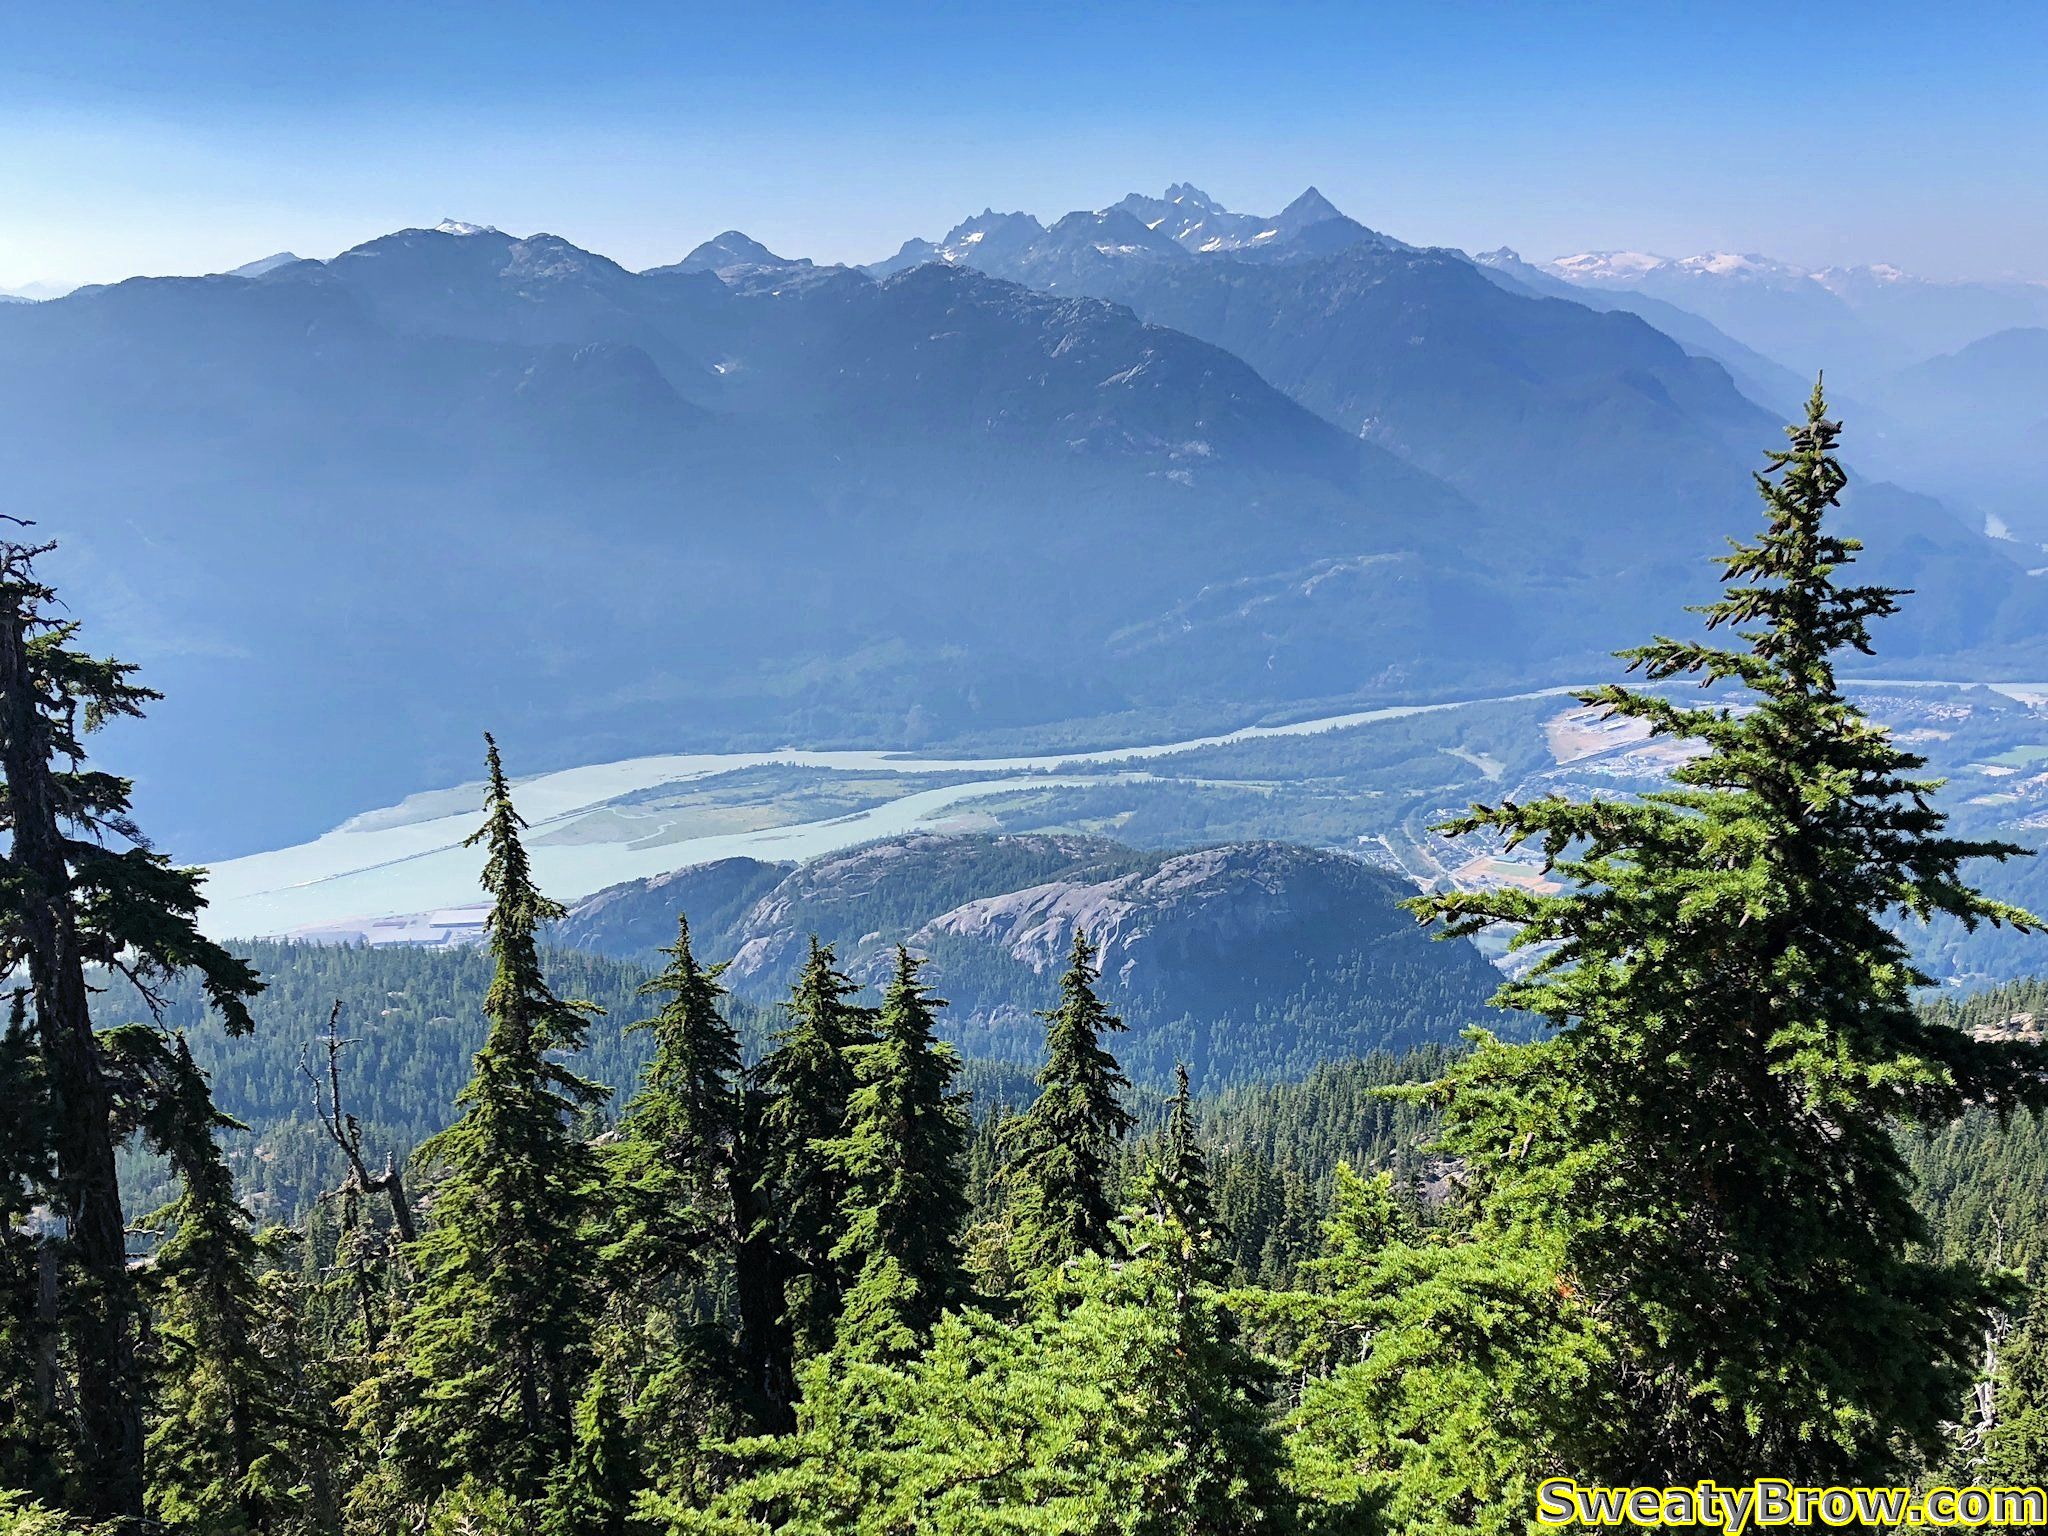
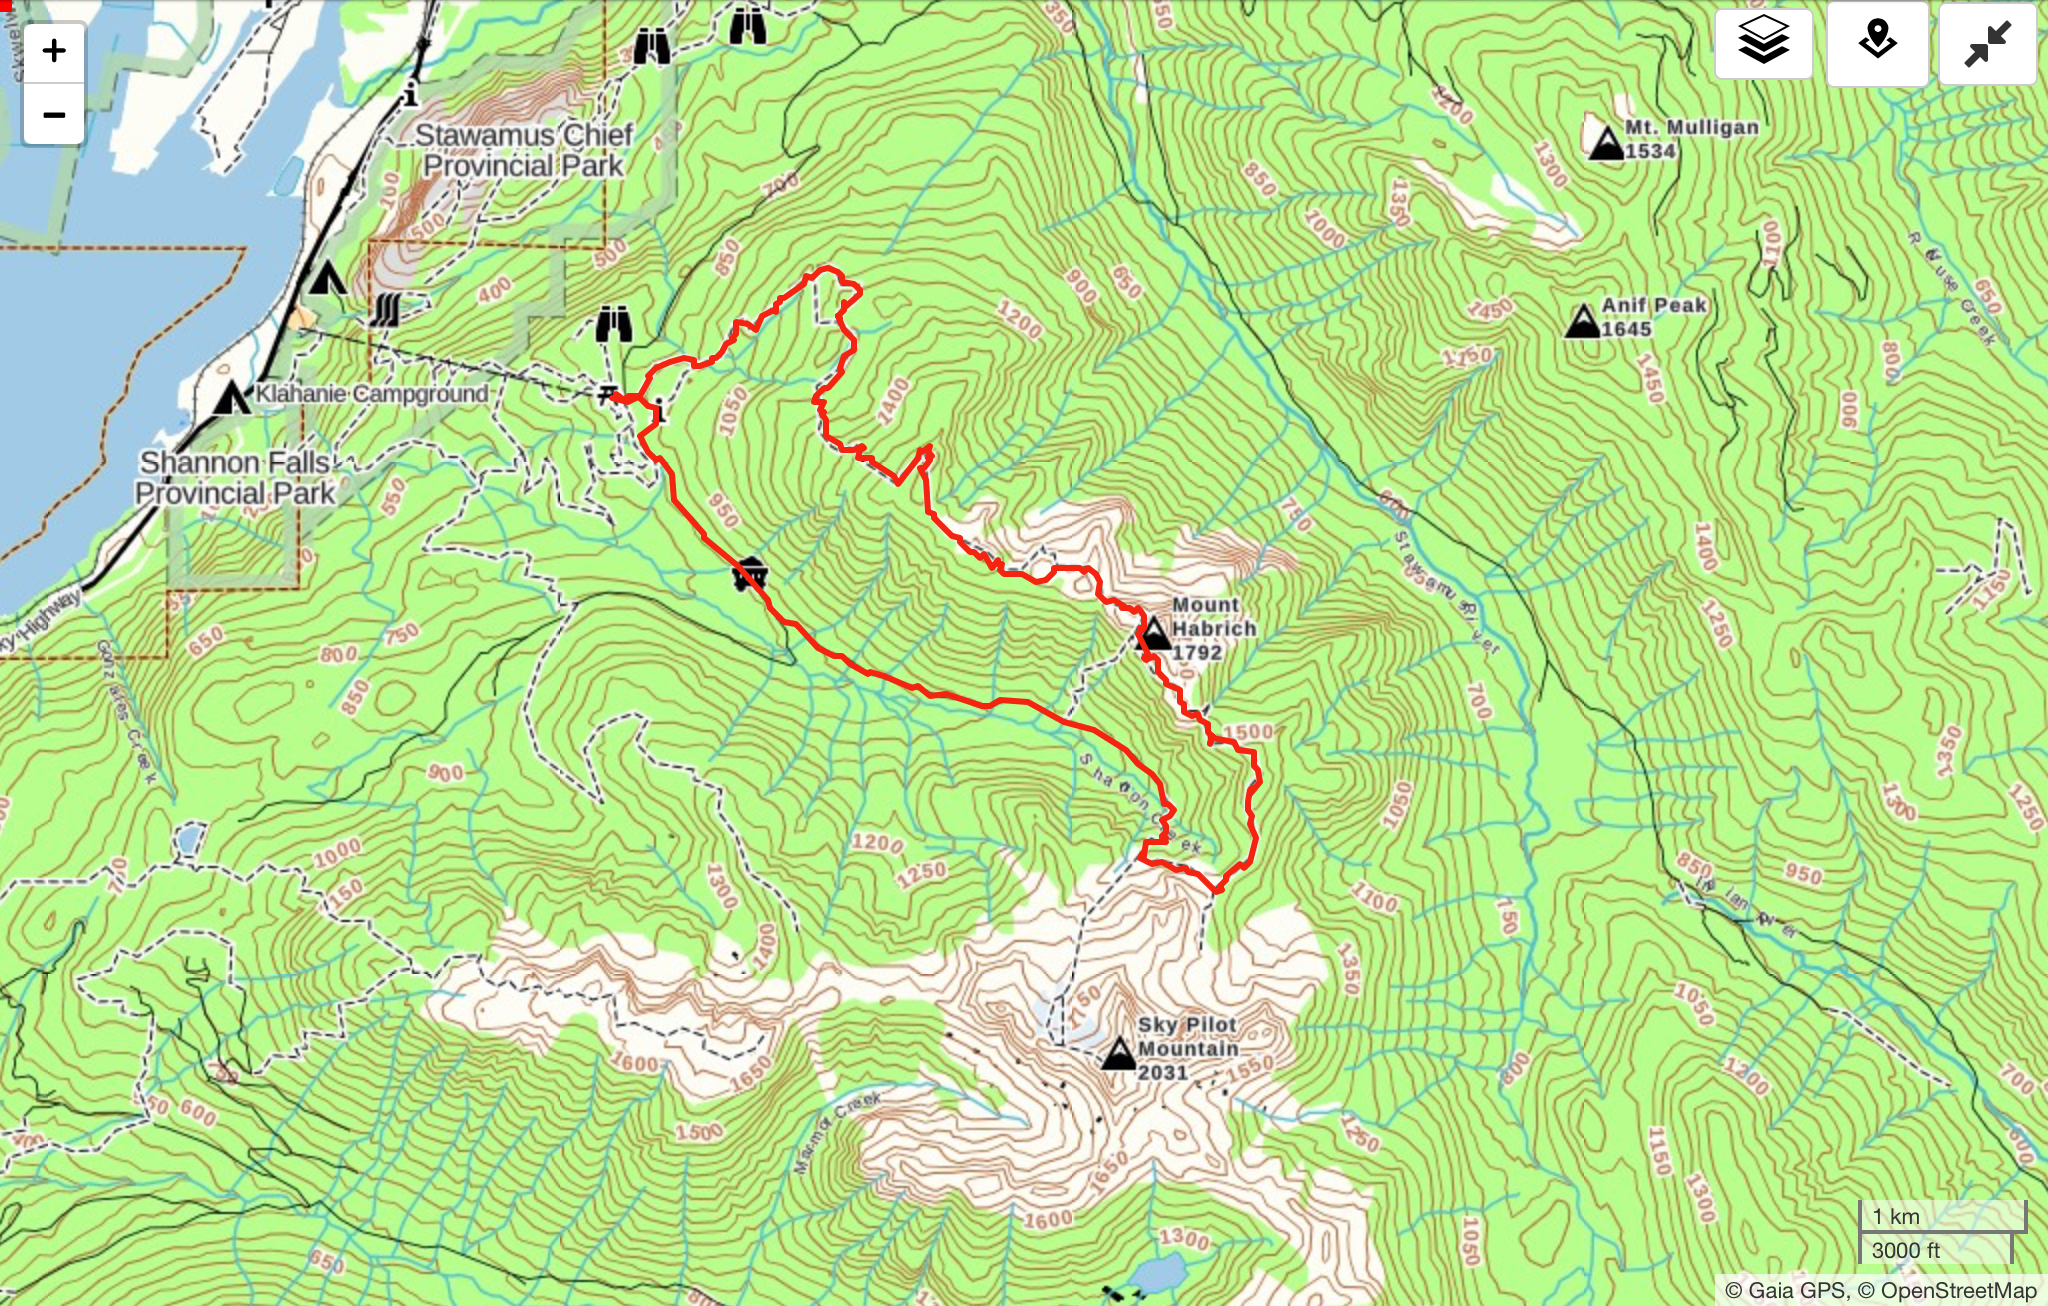
It was Thursday morning, and I had been camping in Squamish at the Chief’s Climber’s Campground since Monday. The last couple of days, I had gotten up fairly early, driven up to Whistler, and headed up the lifts to scramble up some peaks in the area. I decided it was time to do something closer (later start in the morning) via the Sea to Sky Gondola.
I decided that I would begin with what Marc Bourdon calls the “Sky Pilot to Mount Habrich Loop” in his book, “Squamish Hiking” but remain on the top of Habrich Ridge, all the way out to the end, then follow marked trails (Robin’s Connector, and Al’s Habrich Ridge Trail) back to the Gondola. In Marc’s book, the ridge is shown as having an “intermittent, poorly marked” trail west of Mount Habrich. I had also read online that people were occasionally having trouble over the past couple of years with linking up the full ridge.
I figured that the trip would be fairly difficult, and a long day out, but wanted to give it a try!
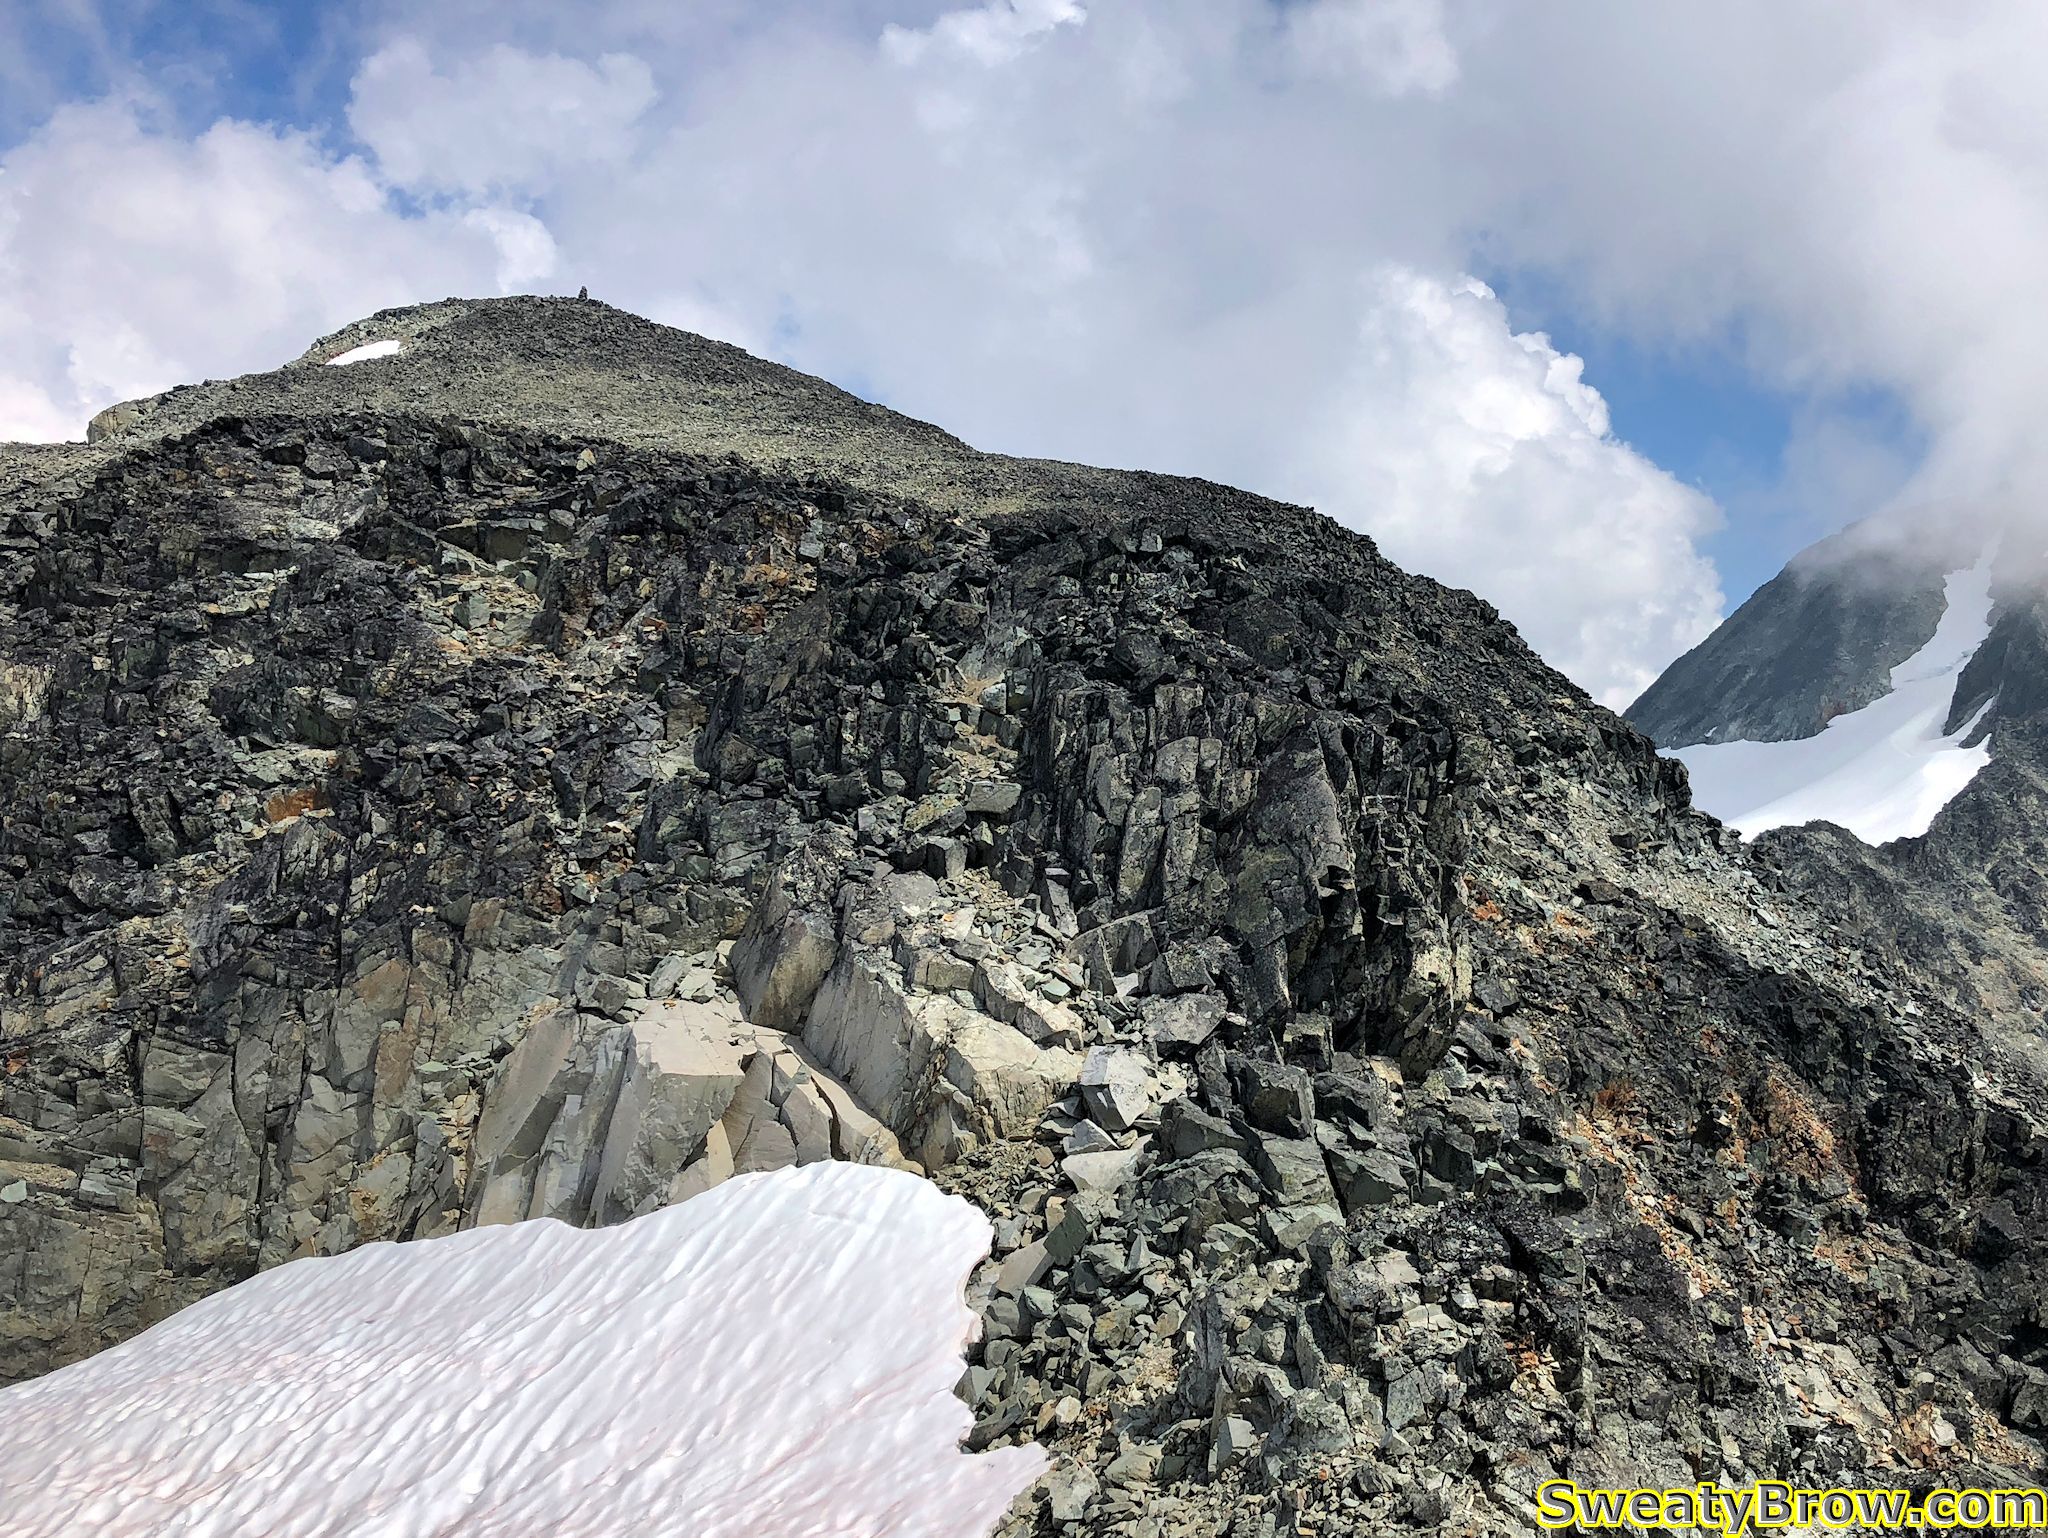
I was on the gondola fairly early, and began hiking up Sky Pilot Valley shortly before 10:00 AM. Shortly after 11, I broke out into an open talus slope at the top of the valley, and turned off of the Sky Pilot Mountain route.
The route up Sky Pilot continues straight ahead. I turned left about 5 minutes further on.Here is the spot where I turned off of the Sky Pilot route, looking northwest toward Habrich Ridge. Mount Habrich itself is just visible on the right.
The route then took me through some forest and across some meadows, toward the col between Sky Pilot and Habrich.
A pair of broken skis mark the low point on the Sky Pilot – Habrich col.Looking back toward Ledge Mountain, Sky Pilot, and the Co-Pilot (L-R).
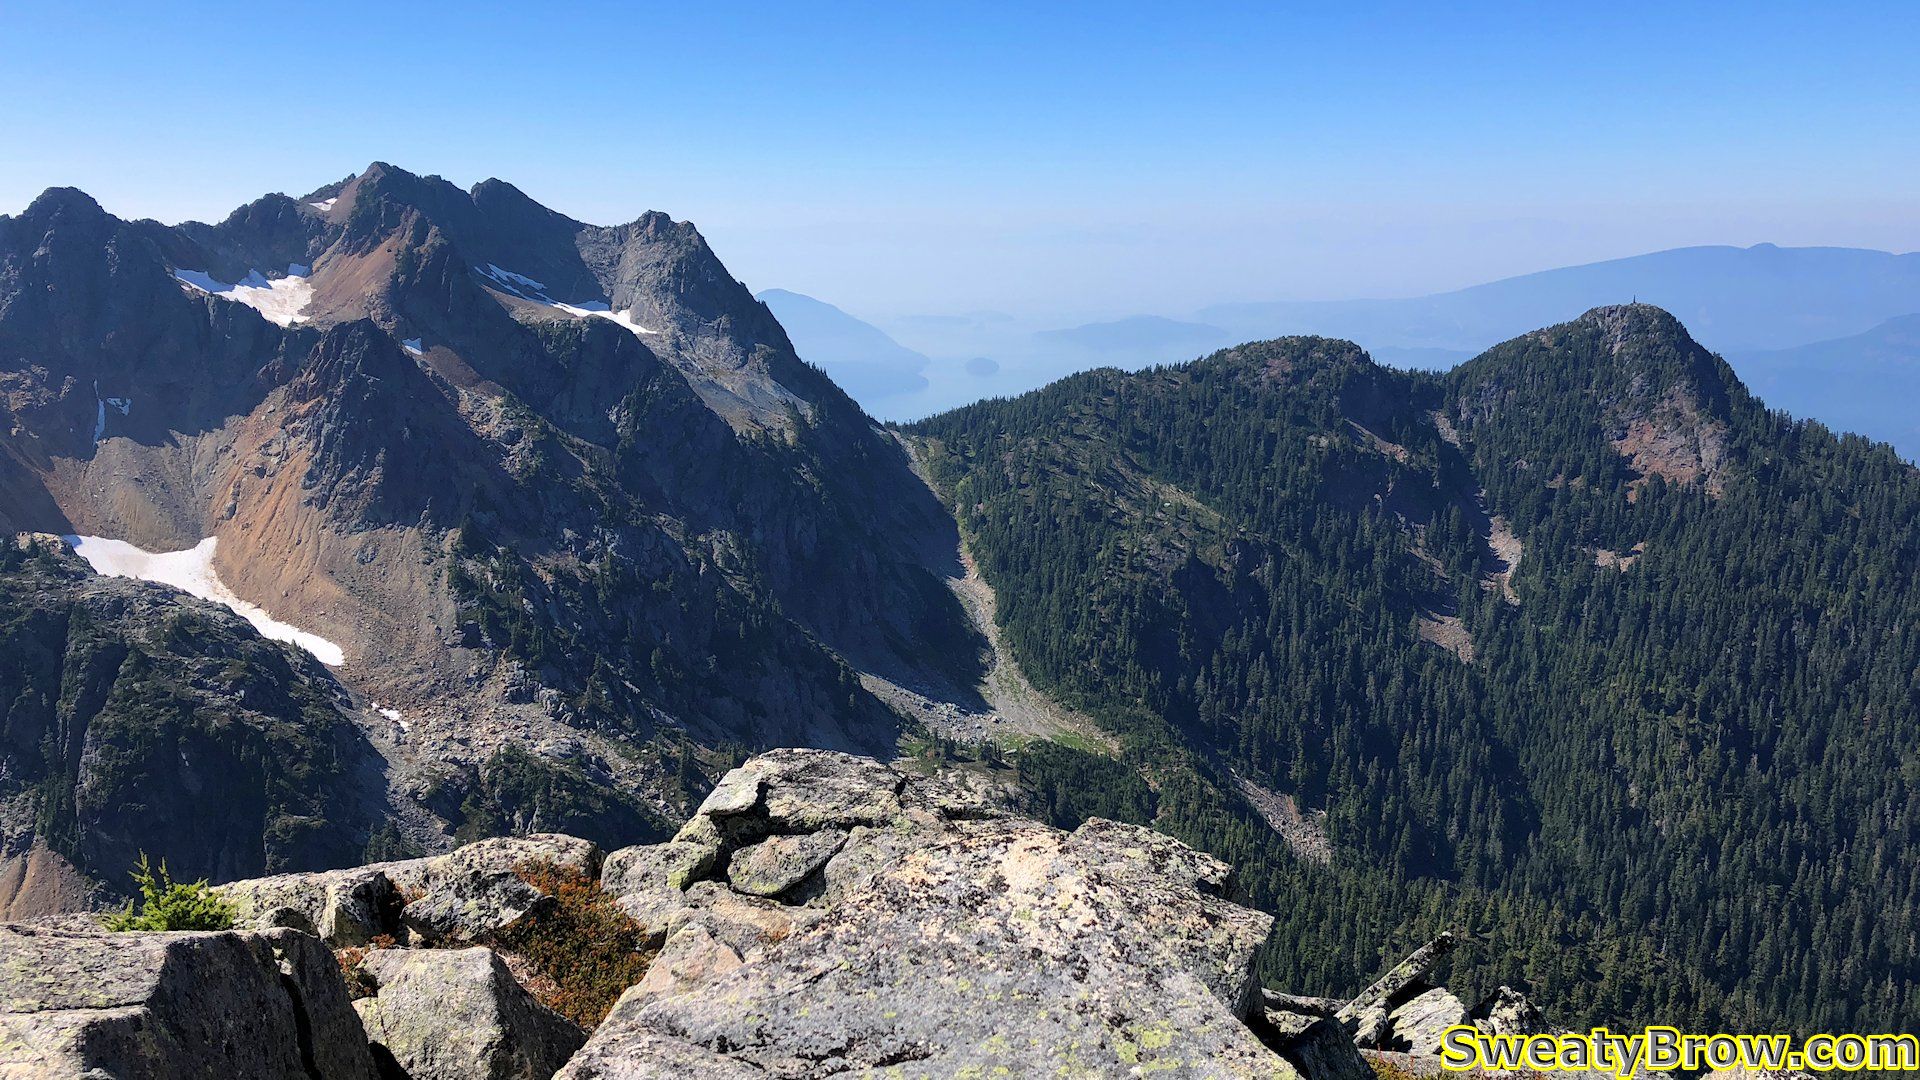
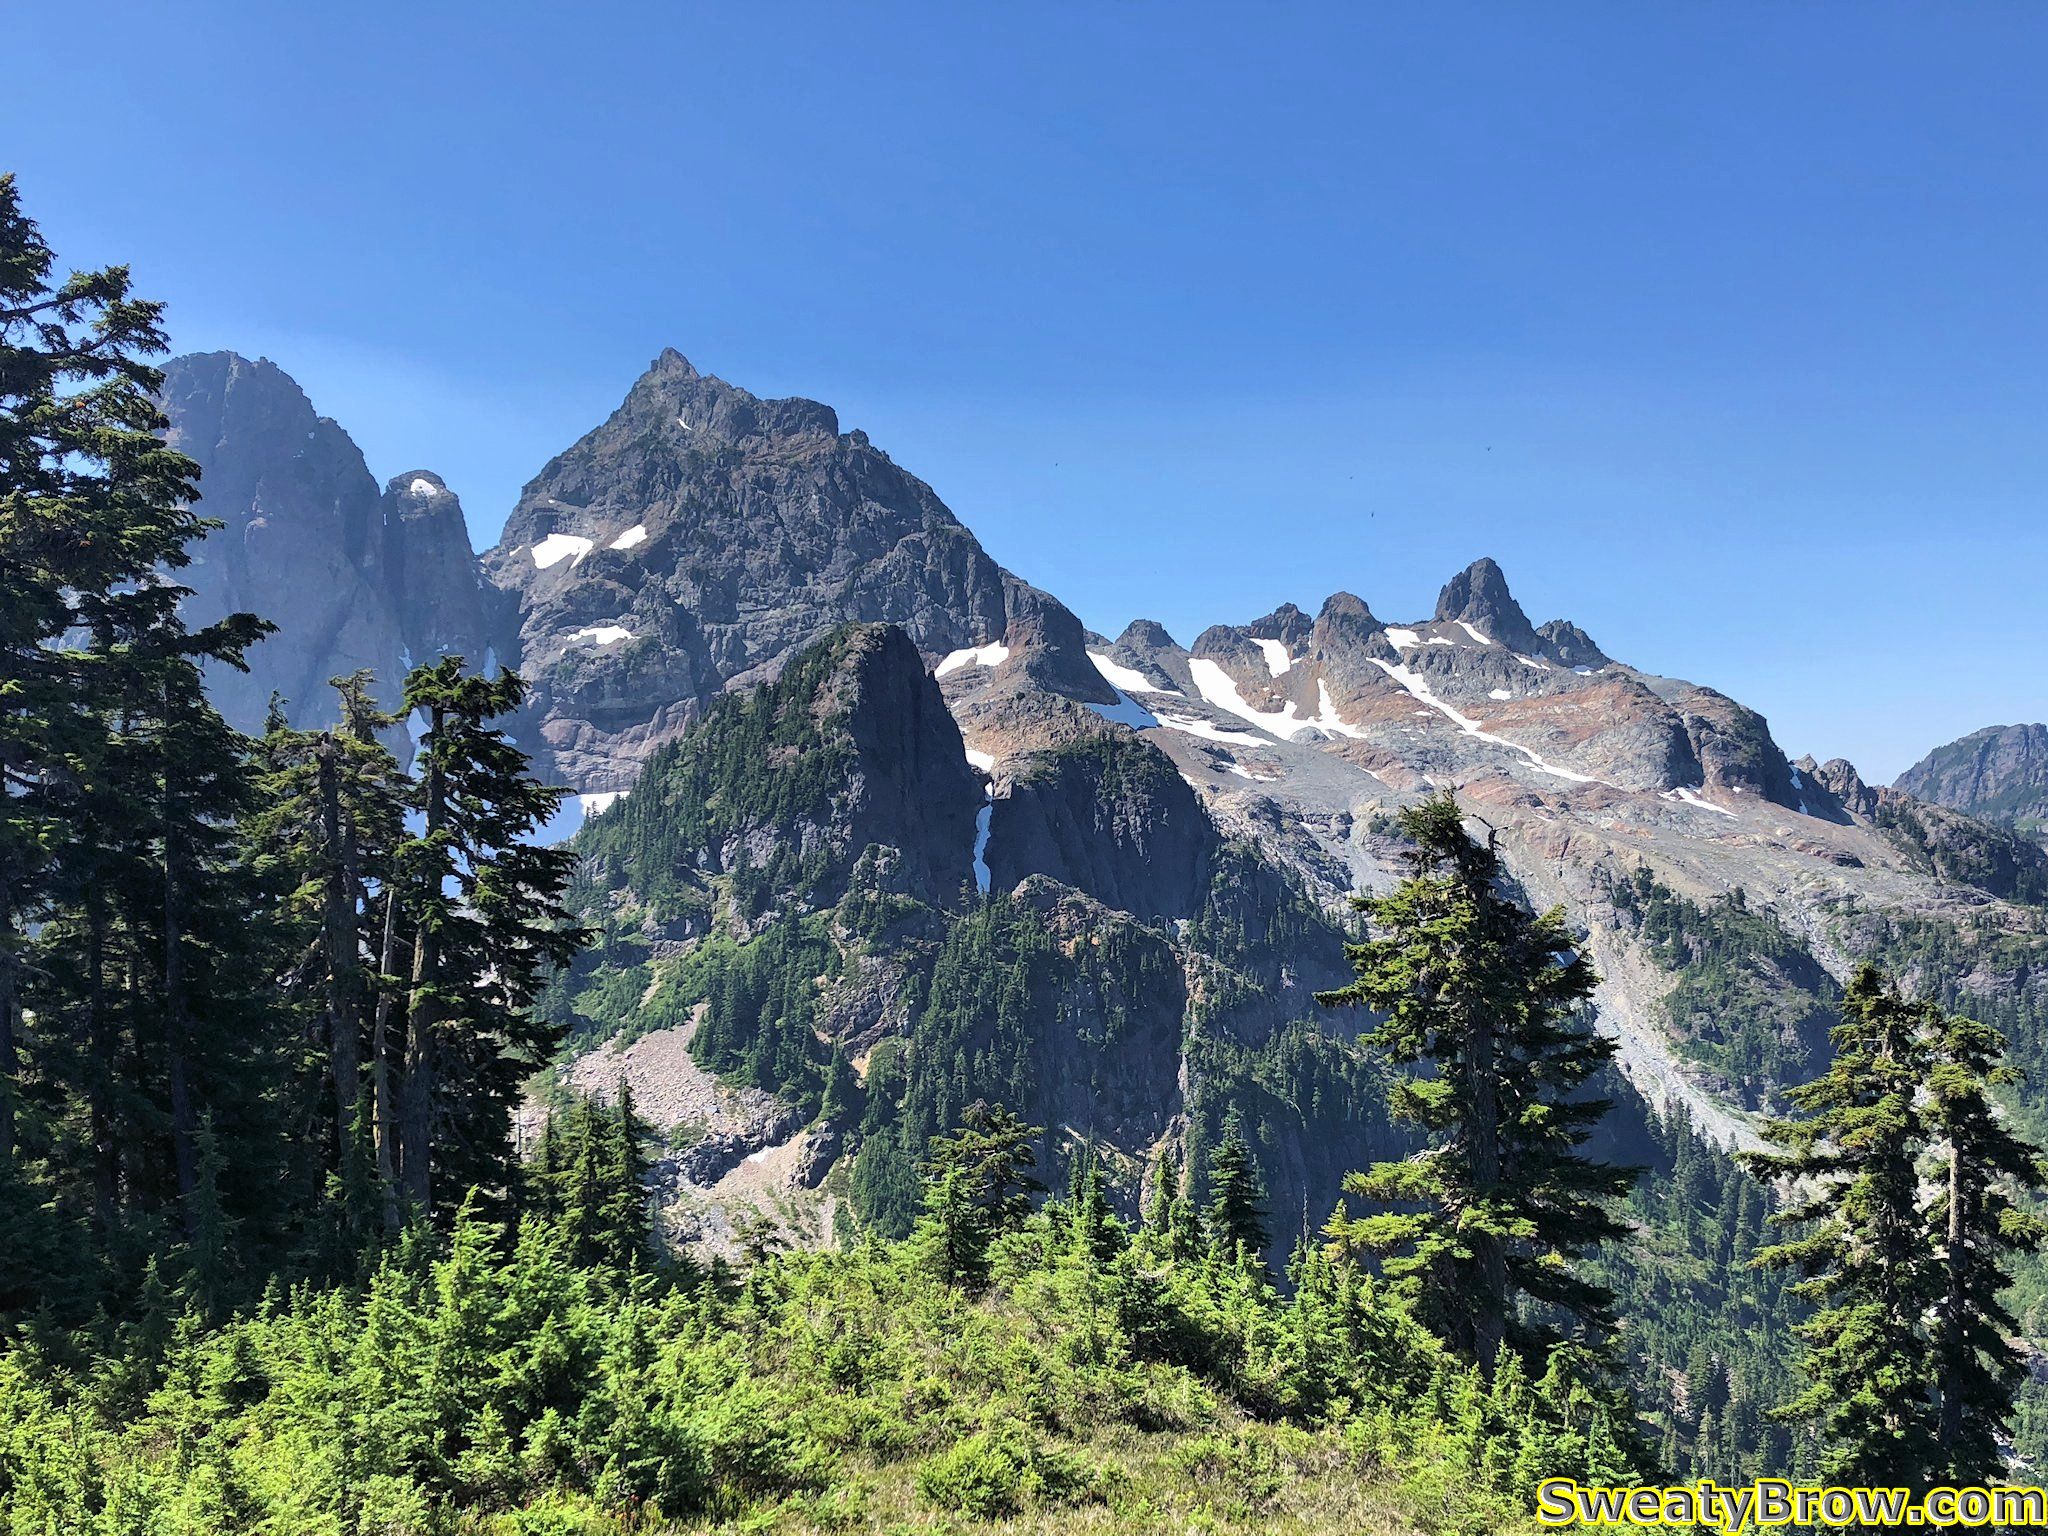
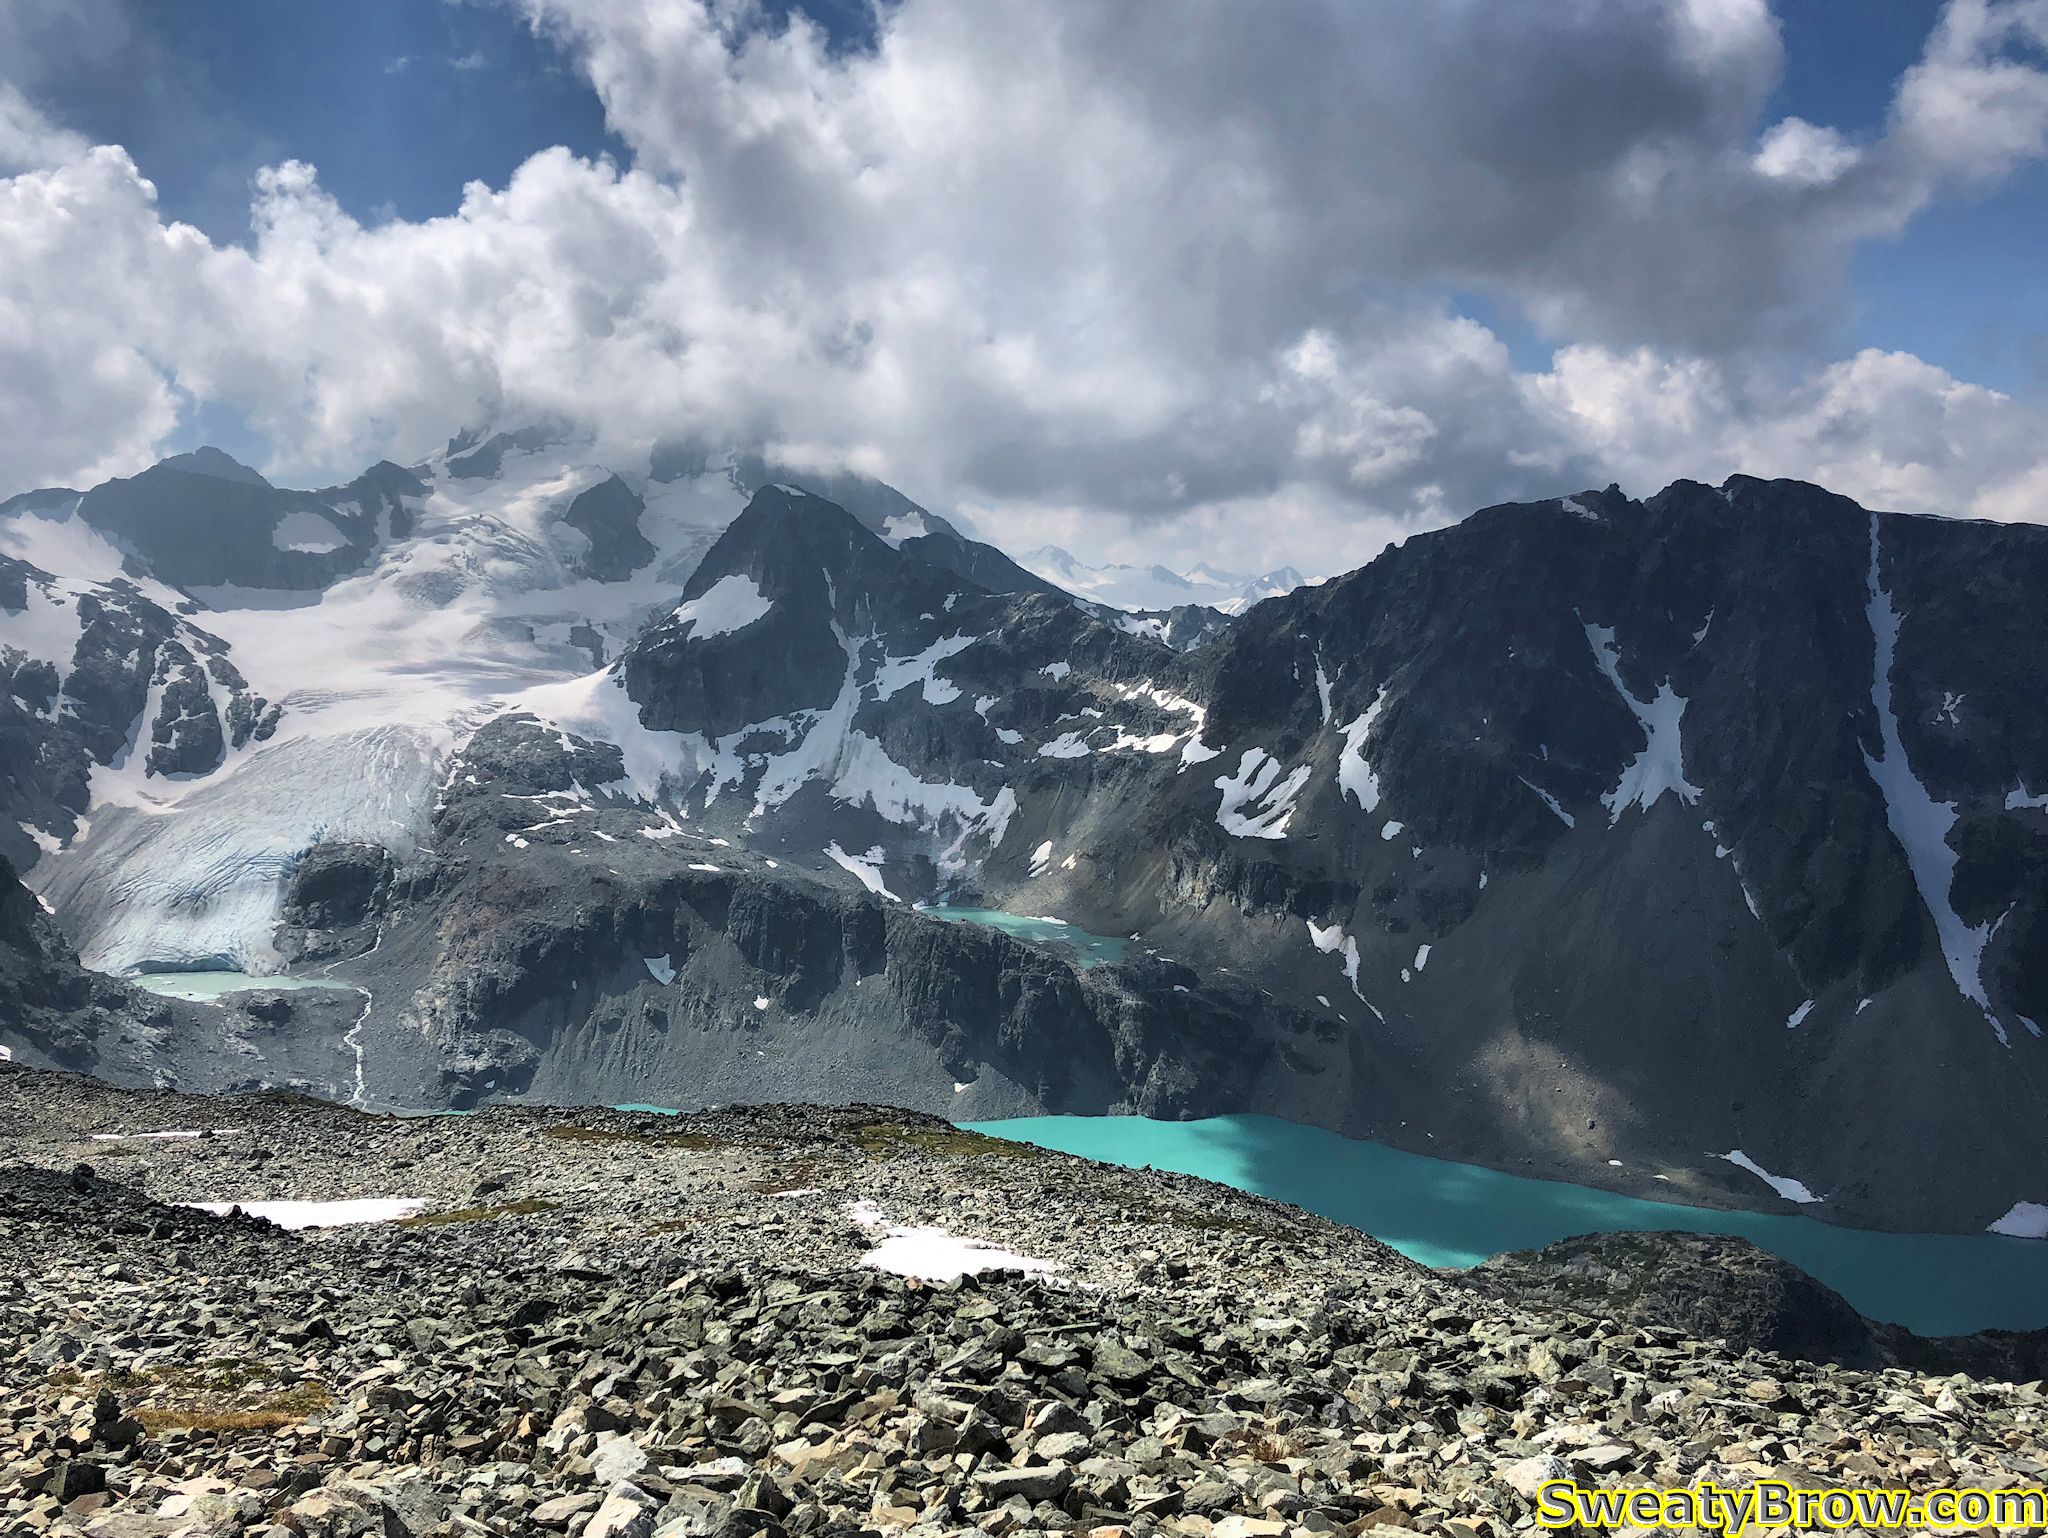
The low point was about 1440 meters, and then quickly climbed again to about 1600 meters. This was very close to the highest point of the day – there was one minor summit just west of Habrich that was slightly higher, at about 1650 meters. The rest of the day was to be relatively short, but frequent and steep, up- and downhill ridge-walking. Atop the 1600 meter bump, I stopped for about 20 minutes to have some water, and take some photos. The views were getting good!
View of Mount Habrich and its ridge from the high point to the east.
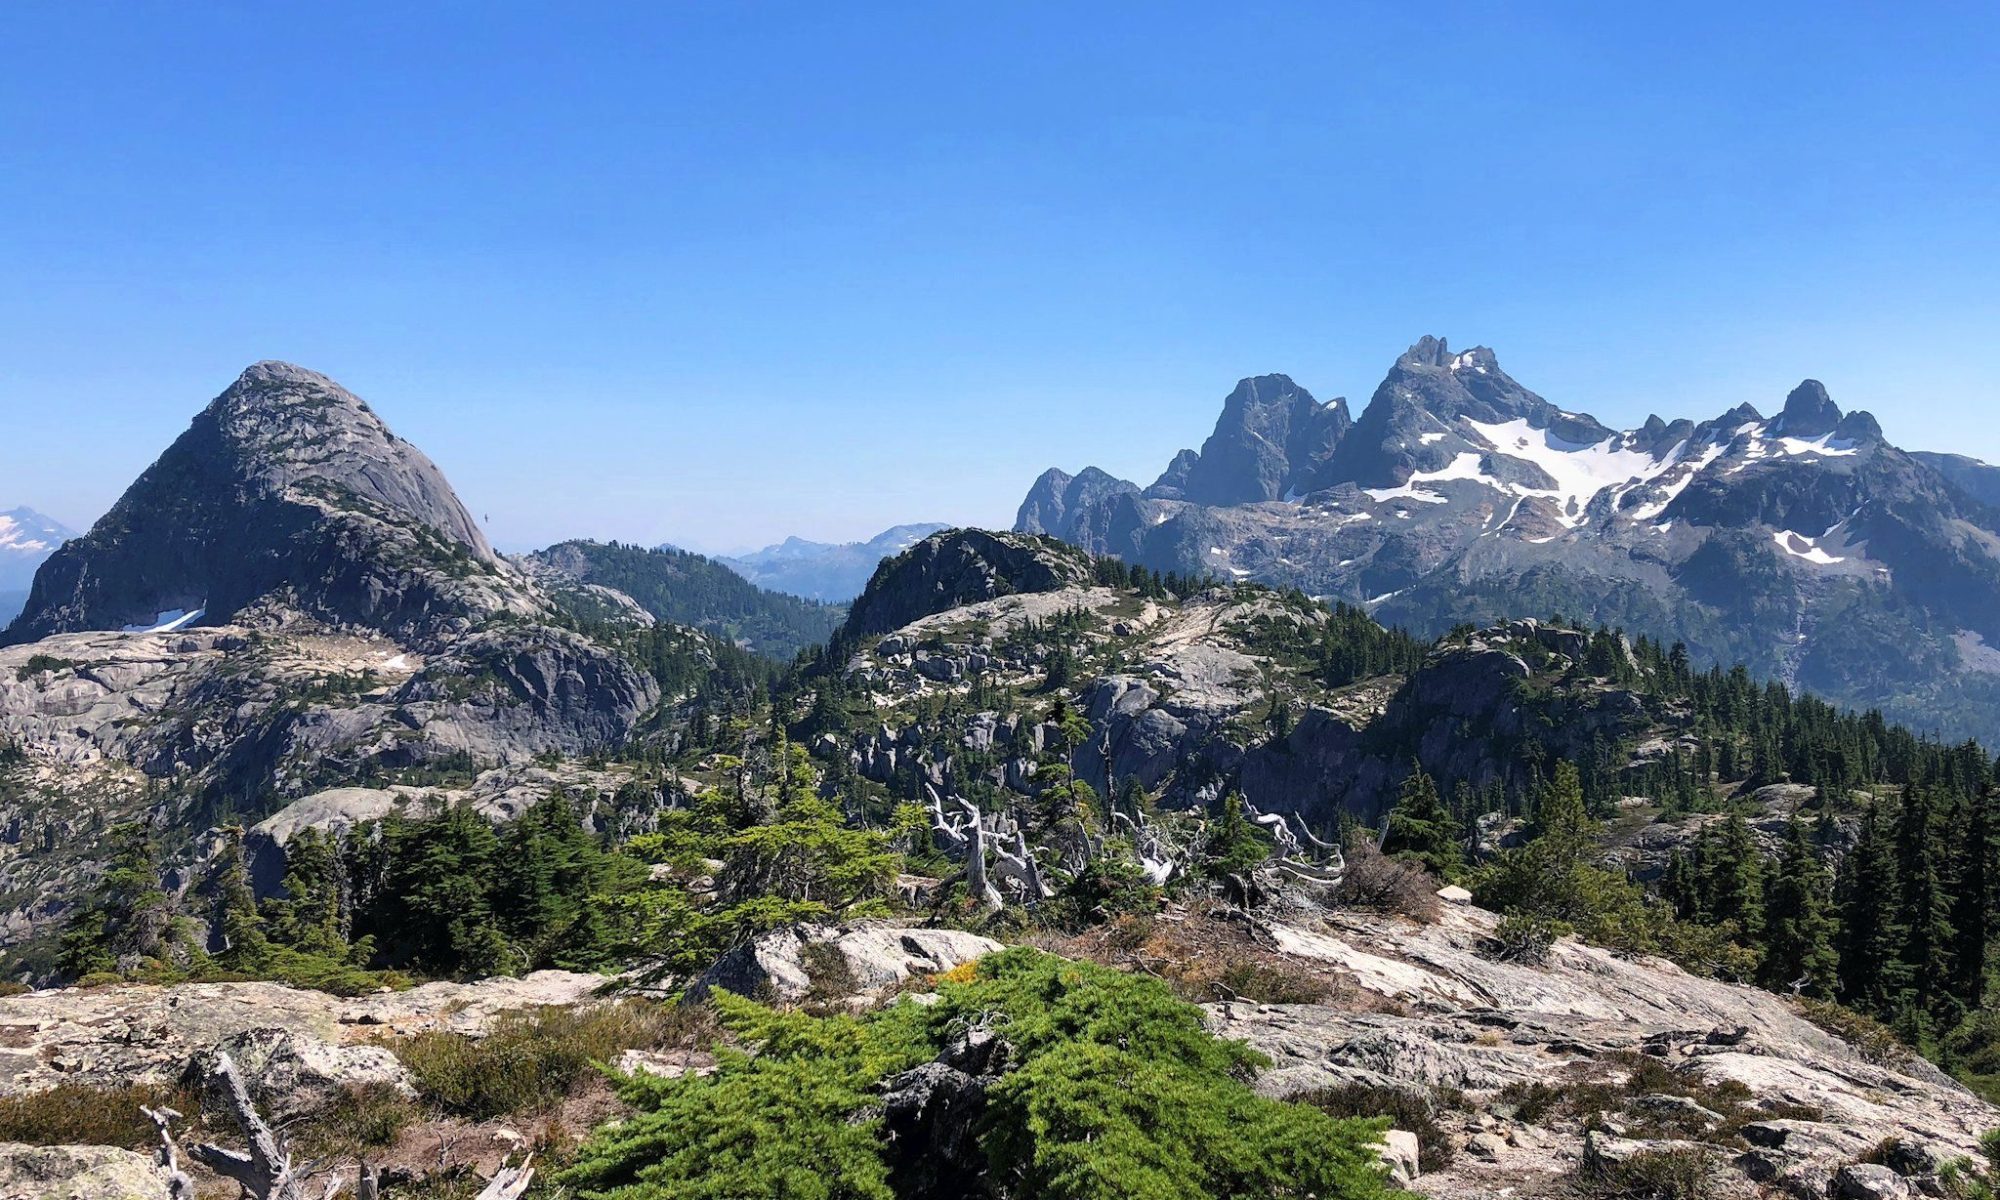
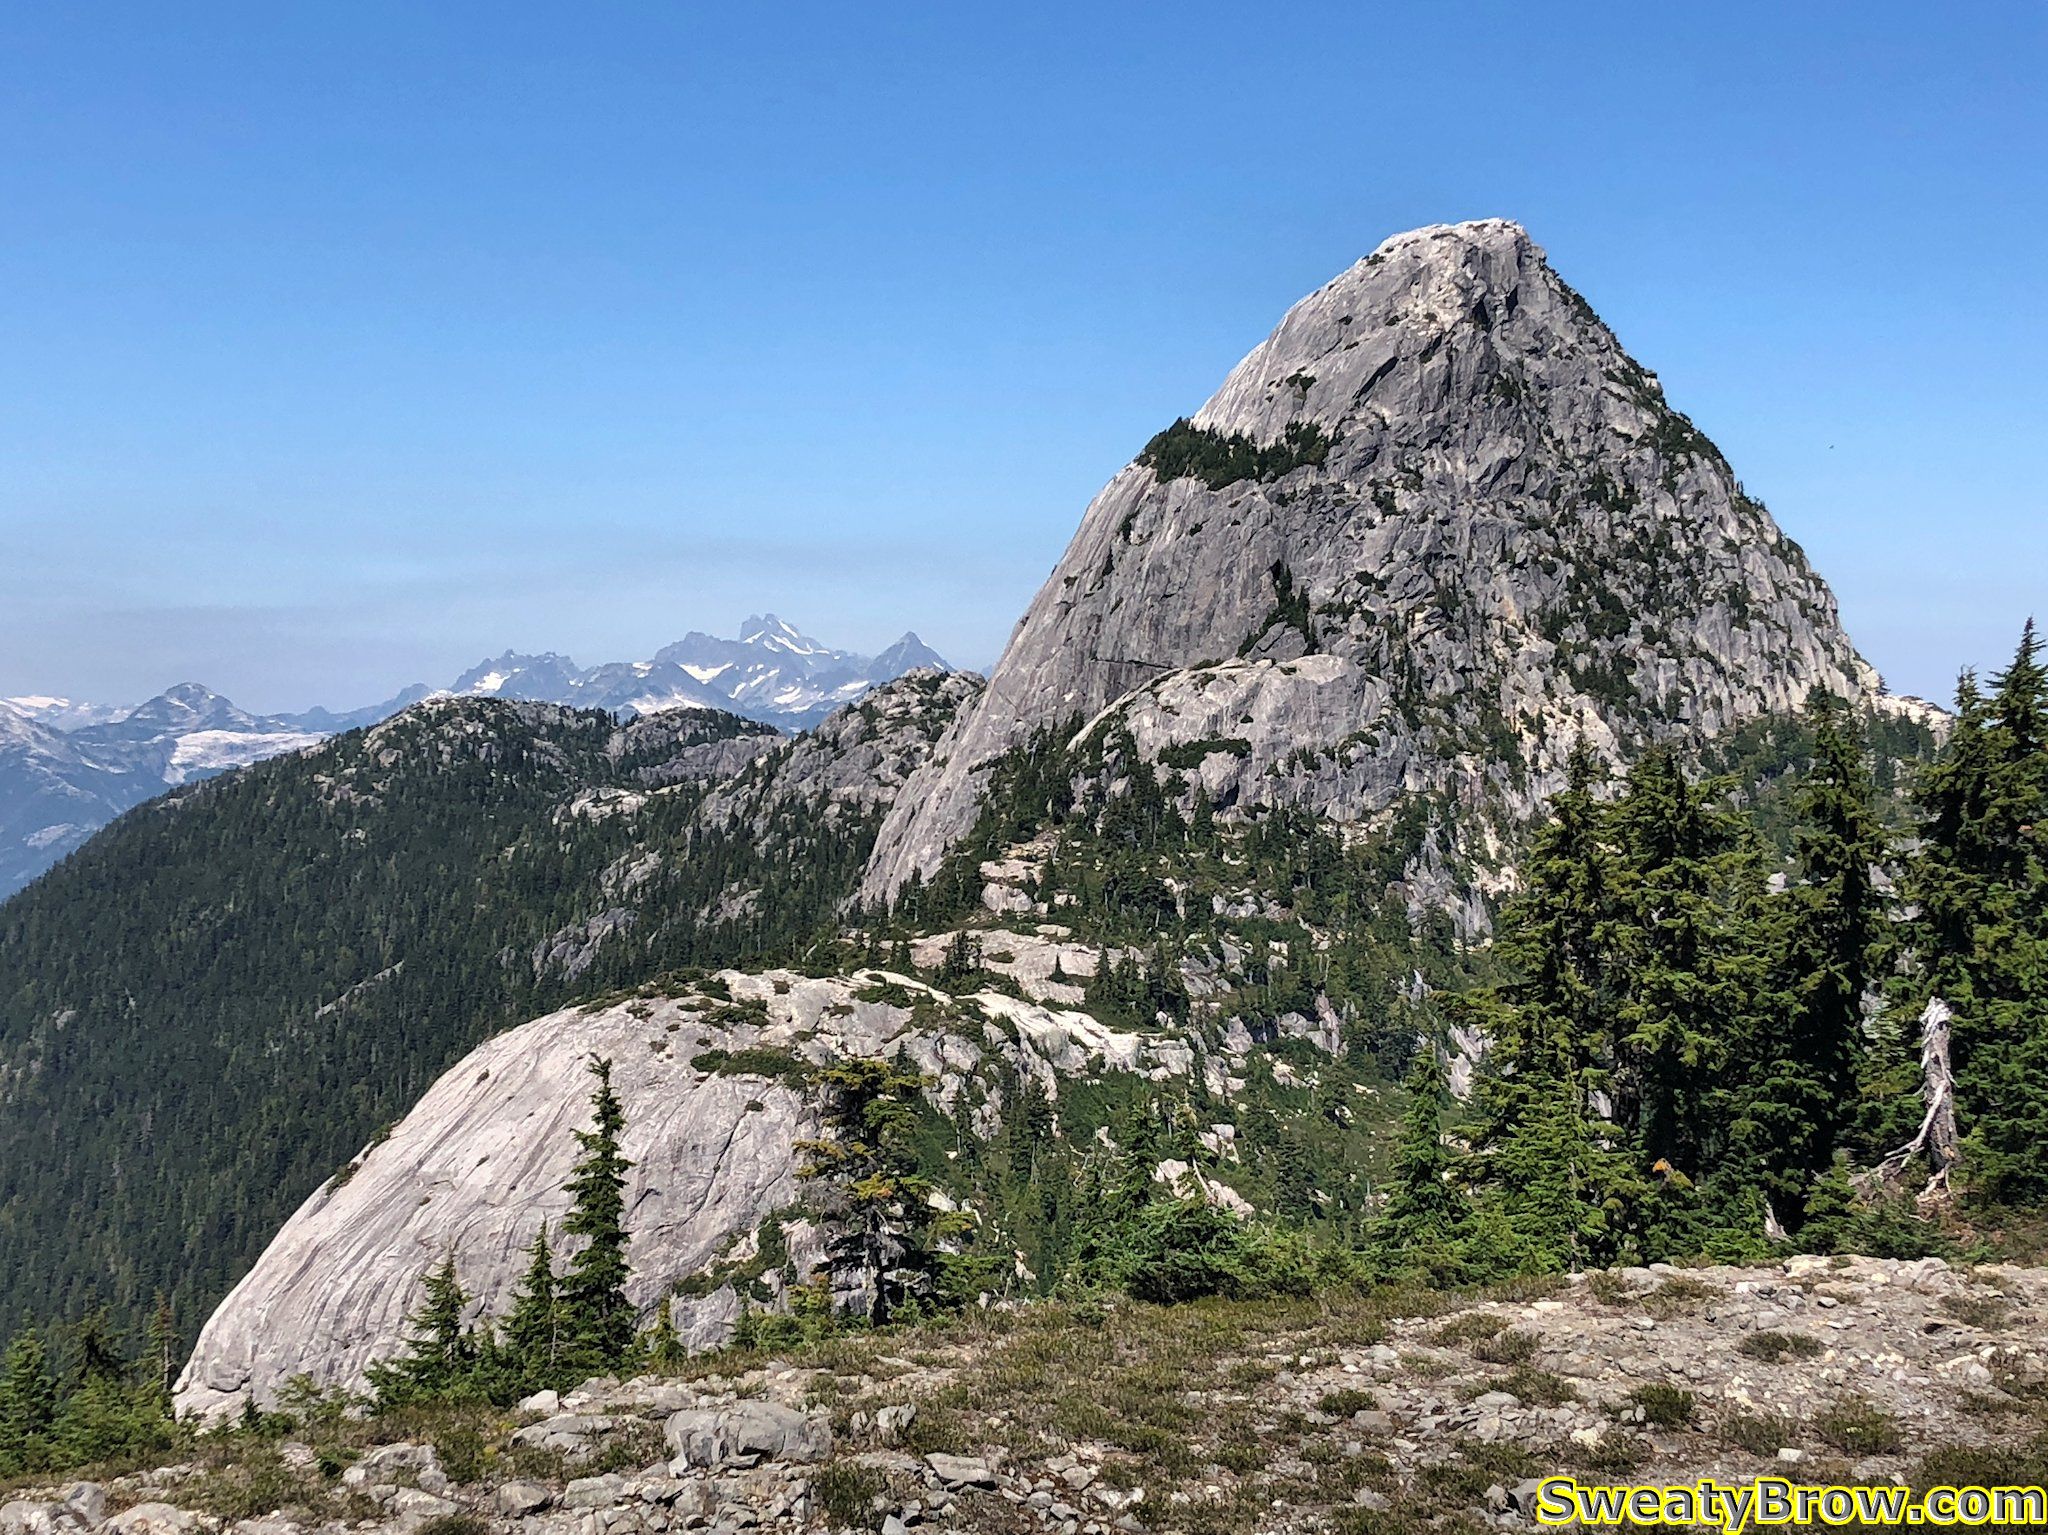
There is a feature on the southeast side of Mount Habrich that was about to become rather important to the progress of my day… The large rounded cliff just below and to the left of the peak is known as “The Brain”.
This big rounded cliff is known as The Brain.
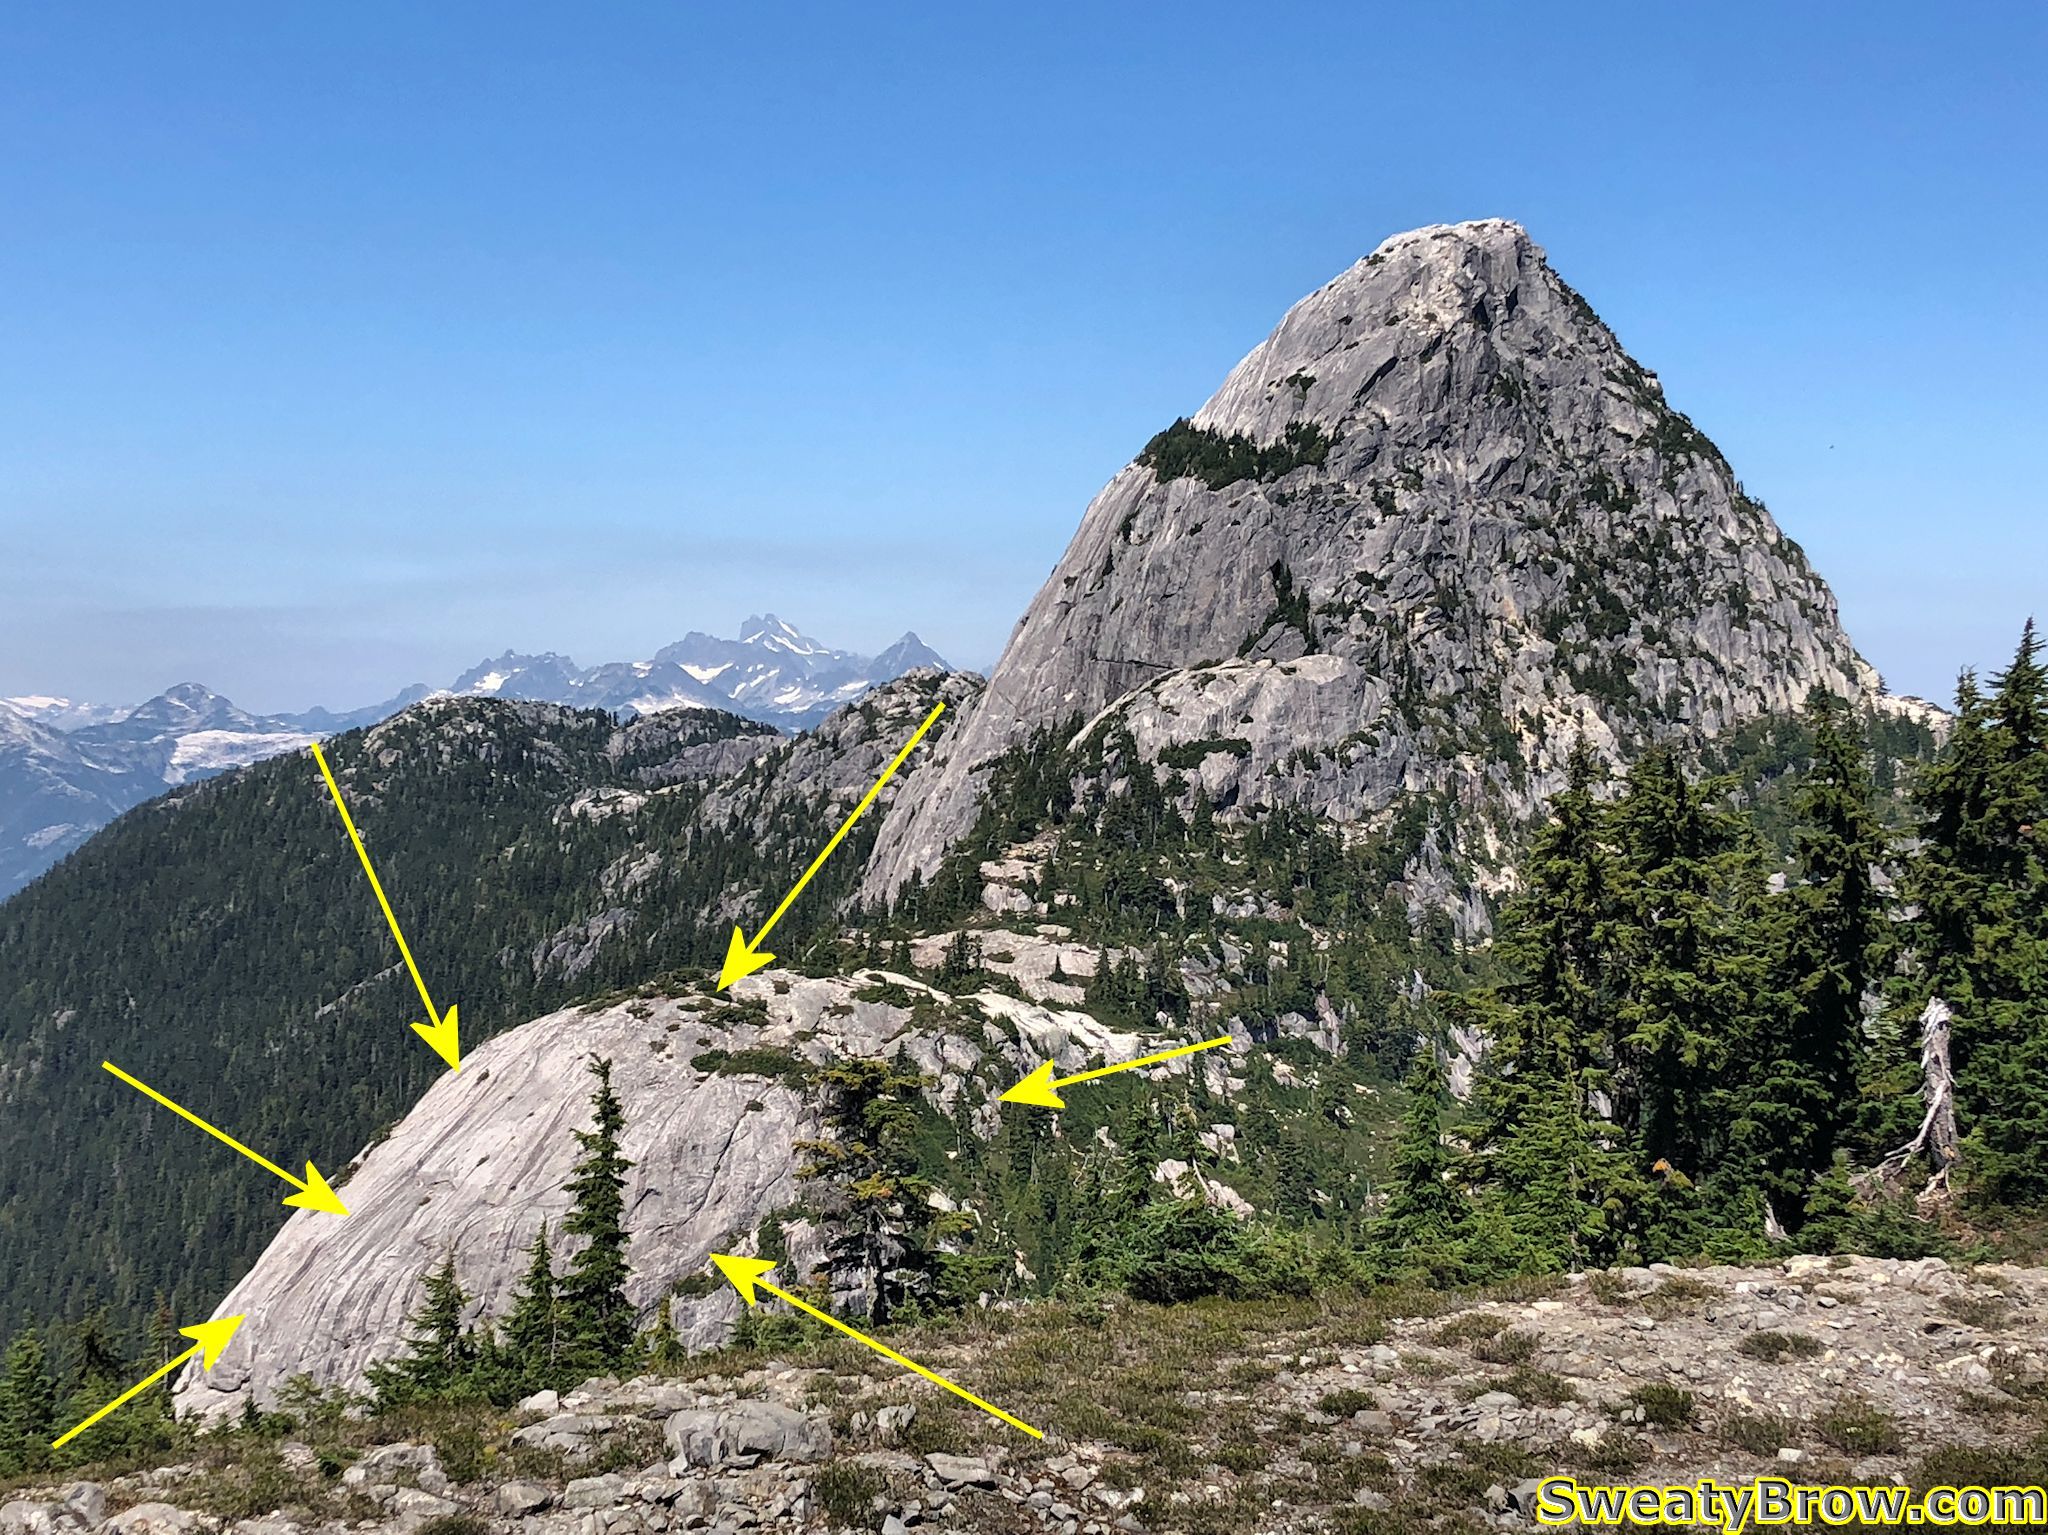
I read through the description of the route in the Squamish Hiking guidebook earlier in the day, and I was aware that I would need to use a fixed rope to ascend the right side of The Brain. The book said that if I had any doubts about my ability to complete the loop (returning to the valley below via a gully on the far side of Mount Habrich), then this high point would be a good point to return the way I came. I was operating under the premise that I would be comfortable completing the loop, so I continued.
Down a few steep gullies, a couple of semi-exposed steps, etc. and I was soon at another low point on the ridge. The Brain stood before me, mostly to my left, with the right edge of it directly in front of me. A clear path headed straight ahead, leading to a steep cliff with a rock corner and a knotted rope hanging down from a tree about 8 meters up. I could see another rope following a steep ramp above and to the right of it.
My route up the right side of The Brain
Naturally, I saw the ropes, and didn’t need to pull out the guidebook and check the description. It was right in front of me!
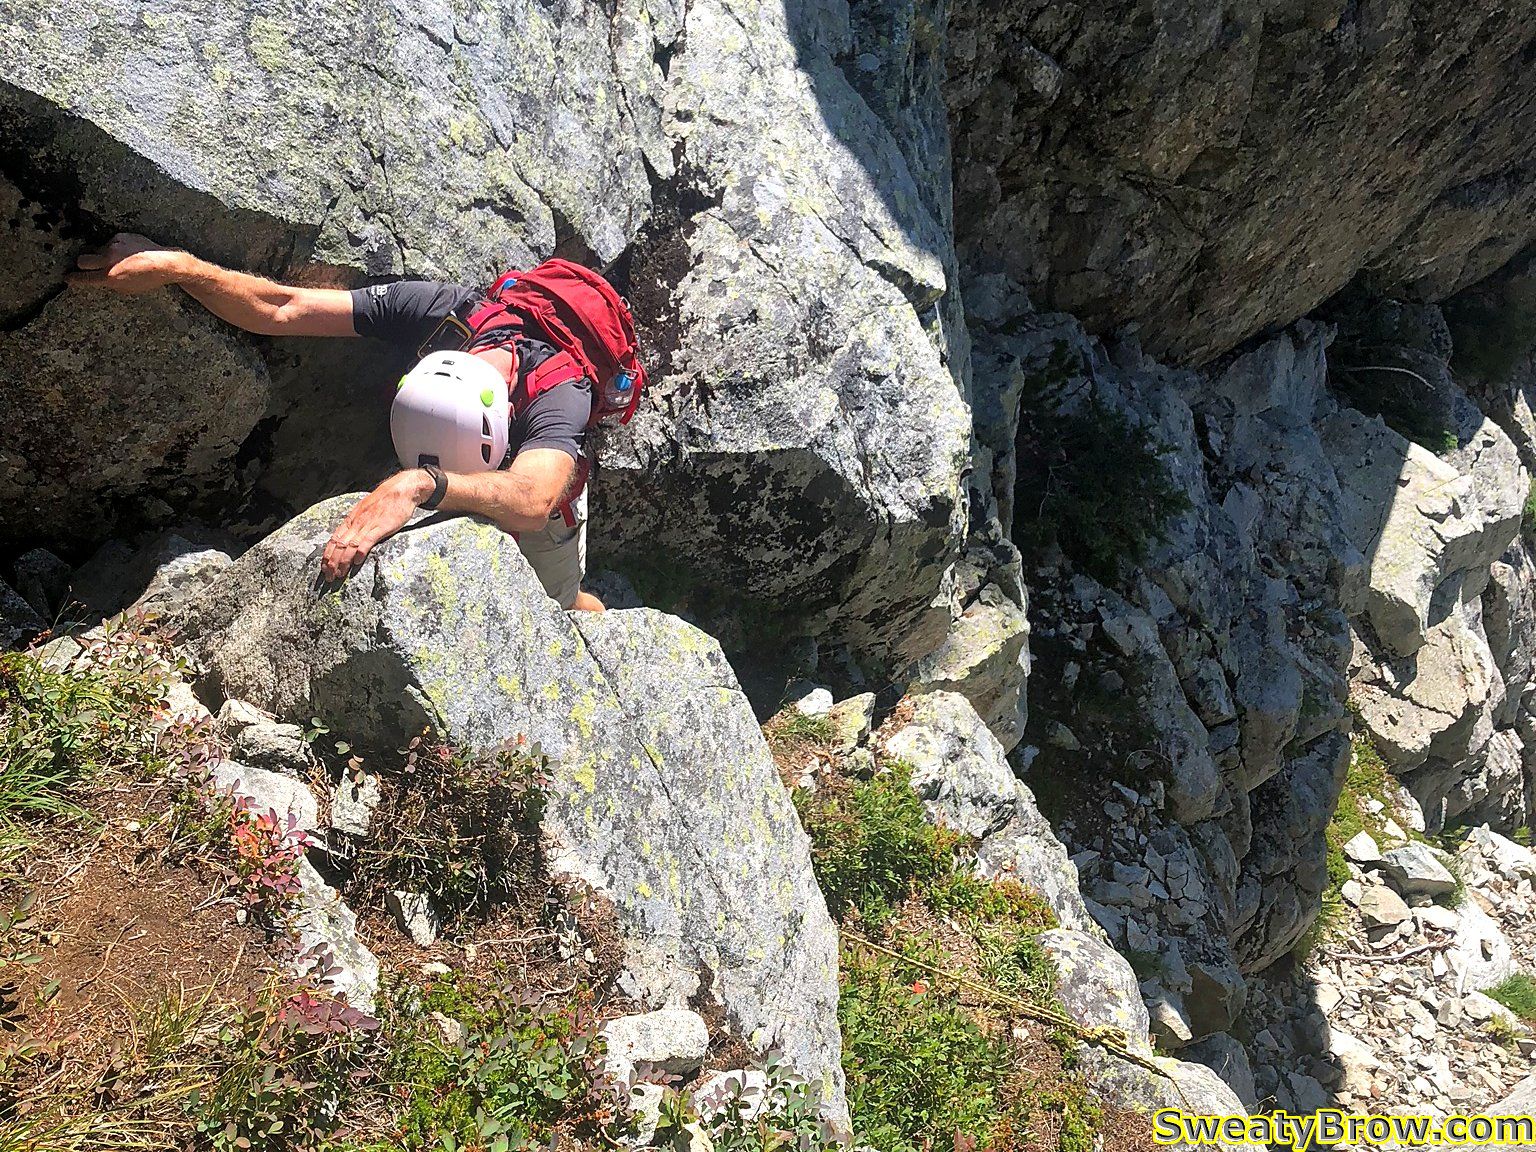
Before I knew it, I was batmanning up a super steep (almost vertical) corner, with very sparse footholds, and was about 6-7 meters off the deck. I scrambled my way onto a tiny stance beside a small tree, and gathered my wits. When my heart rate had eased off a bit, I continued up the steep ramp, again protected by a steep rope.
I continued up some steep, much less exposed, ground for a couple of minutes, then reached a bulge extending out from the wall. There was a barely discernible “ledge” traversing to the far side, protected by a couple of ropes (one of which was rather frayed at its attach point on the nearer side), and with a serious drop, probably 25 meters, into a gully below.
Unfortunately, I didn’t take a photo or video prior to traversing it. I gathered my wits, steeled my resolve, hiked up my big boy shorts, and started across…
I survived. I knew that I would, but wow… Being solo, and having forgotten to bring along my InReach satellite communicator, I had no way of telling anyone where I was, or where to look if I were never heard from again. Oops. This was pretty much the most committing move I’d ever made while entirely on my own.
A photo of the spooky traverse I made while solo, after I’d crossed it.
After this traverse, there was a little more travel up steep, rope-protected ramps, then things eased right off. It was about 1:00 PM, so just over three hours into the day. As I walked along a little farther, I spotted a gully coming up from the right, with a rope hanging down it. Of course, I had to then pull out the guidebook and have a look. Turns out, I was not supposed to head straight up the wall – the “hiking” route dropped way down to the right, at that point, and then up a long, steep, grassy gully. In fact, later that evening, I stopped by the guidebook’s webpage, and looked at the latest updates:
When following the route described in the guidebook, I’ve been told that some hikers are missing the handline descent into the gully just prior to reaching the “Brain”. Instead, they are following a well-defined trail which leads directly to the base of the Brain and a very steep rock wall with a rope fixed in place. Ascending this fixed rope leads to very dangerous and exposed fifth-class rock climbing terrain, which gains the top of the Brain. This is not the route described in the book. Look for the descent into the wide gully right (east) of the base of the Brain to stay on route.
Aha! OK, I did that wrong… The rest of this thing should be much easier!
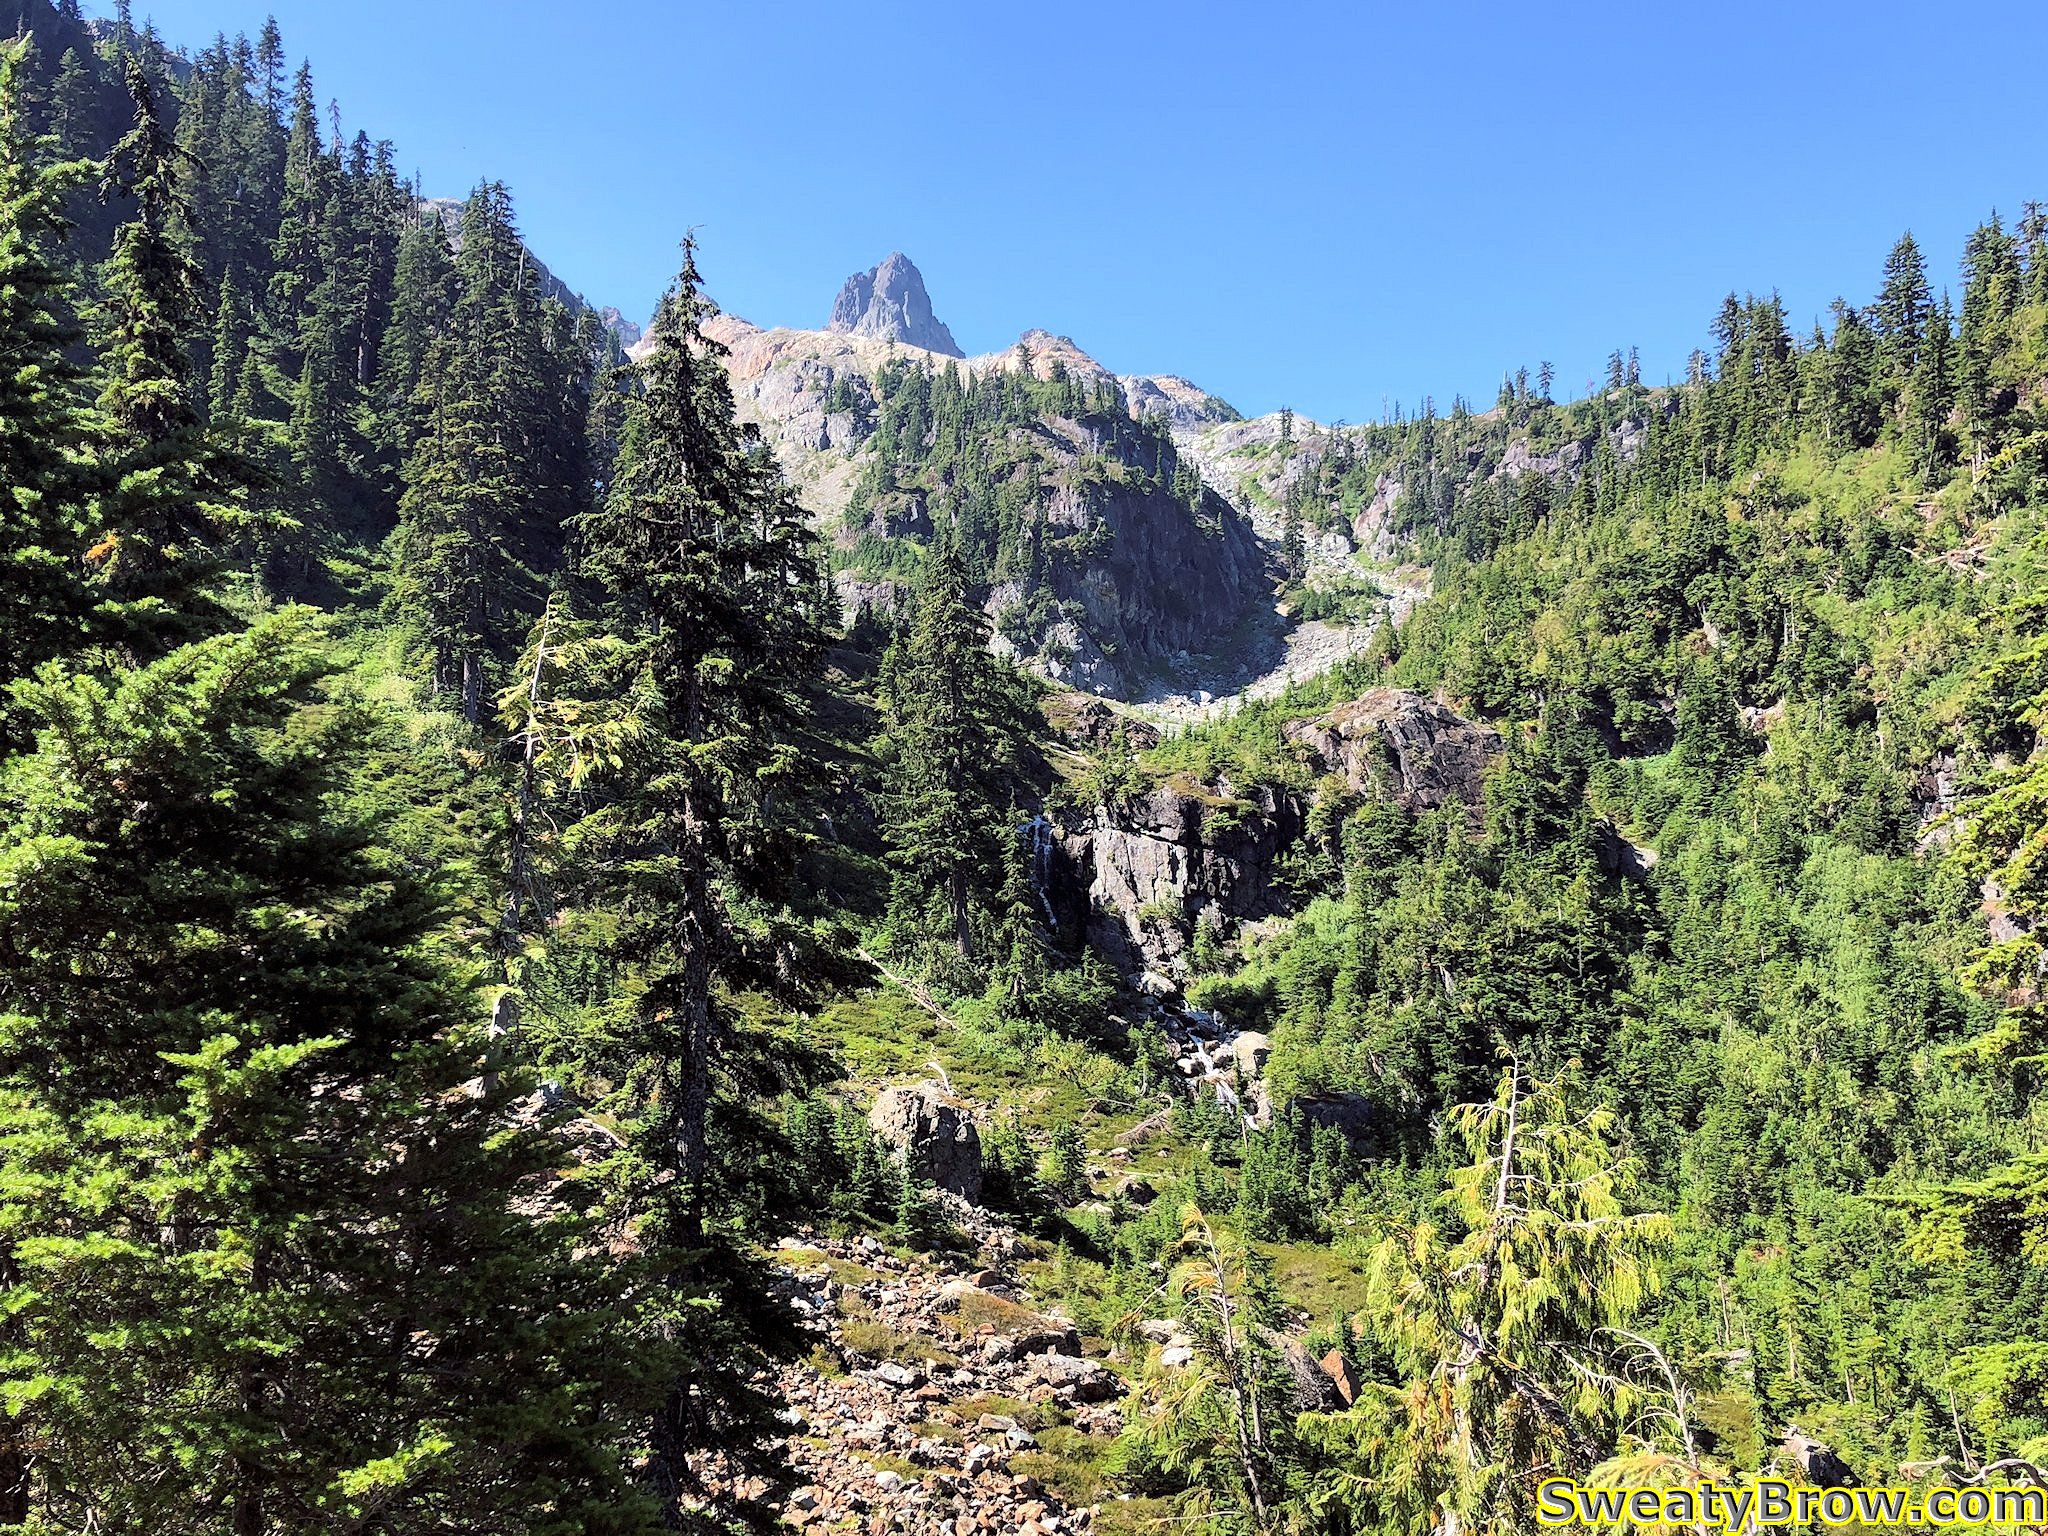
After overcoming The Brain, it was time to traverse below the south face of Mount Habrich. There was a gully to drop down, again with a fixed rope, and a little bit of exposure, then a trail along the bottom of the face. It popped back into the forest, and almost immediately started downhill. There was a fainter, but well flagged, trail that broke off to the right, though, and headed very steeply uphill. I followed this.
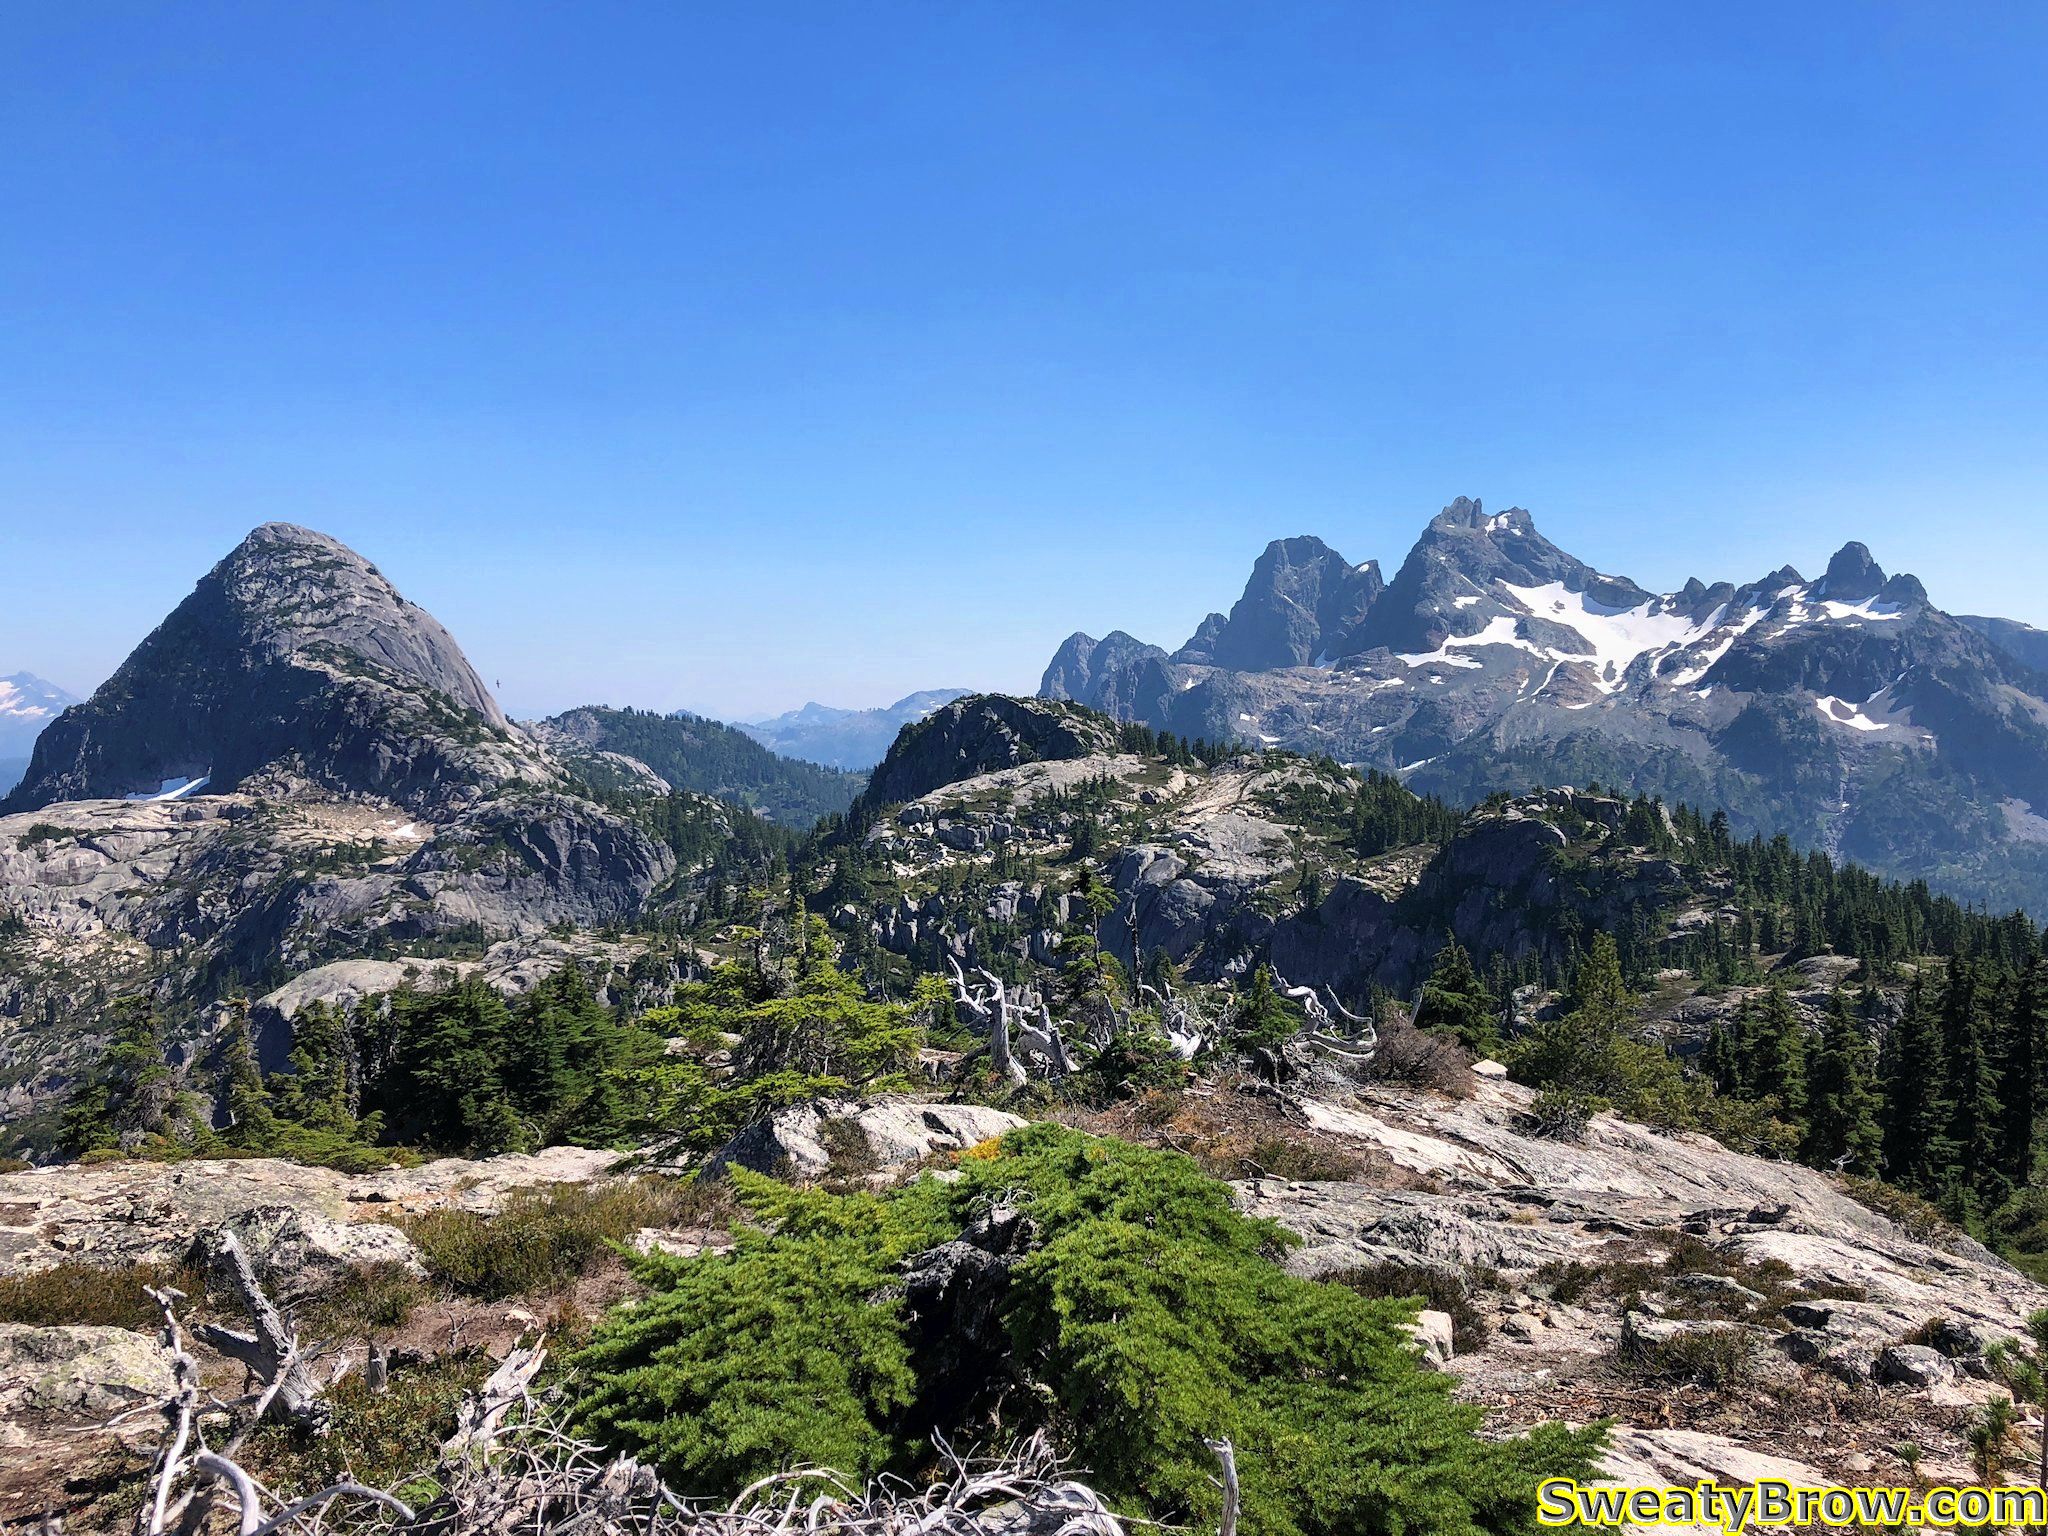
Did I mention steep? Very steeply, up through the trees. The trail popped out into the bottom of a notch between Mount Habrich and the next summit along the ridge. This summit was the highest point reached for the day, at about 1650 meters. The terrain through here was fun, pleasant scrambling, in a glorious location – the views to the north and south were just gorgeous.
Looking back at Mount Habrich from the west. Hard to make out, but there is a summit between me and the peak, directly over the top of which I hiked. The sunlit snow patch on the left is extending out of the gully between the peak and that summit.
After going up and over that first summit on the ridge, I came around the north side of the next summit, along a huge, flat slab system. I then dropped through a little basin area, where I ran into a group of four people coming the other way!
Coming around the nice flat esplanade, and looking beyond to the far end of the ridge.
They were laden with a bunch of climbing equipment, and were off to ascend “Life on Earth” – a 5 pitch, 5.10c-ish rock route up the southwest arete of Mount Habrich. I stopped to have a little snack and some water with them, and chatted briefly. One of the fellows was celebrating his birthday (which was the following day) with this climb. They joked about how they’d picked the hottest day of the year to do it, and that they hoped they’d be able to finish the climb and return to the gondola in time for the last ride down at 9:00 PM. It did seem a little dubious… Hope they made it!
I continued along for a while, up and down along the ridge. There were a couple of descents that had ropes fixed in place, but they were mostly in places where there were steep, dirty hills, which would be slippery in wetter conditions. There was one spot where I had to make a bit of an exposed step around an arete that had no real protection, and I was surprised because there had been some ropes in spots where they seemed unnecessary. Nevertheless, everything was pretty easy after the ascent I made up the side of The Brain!
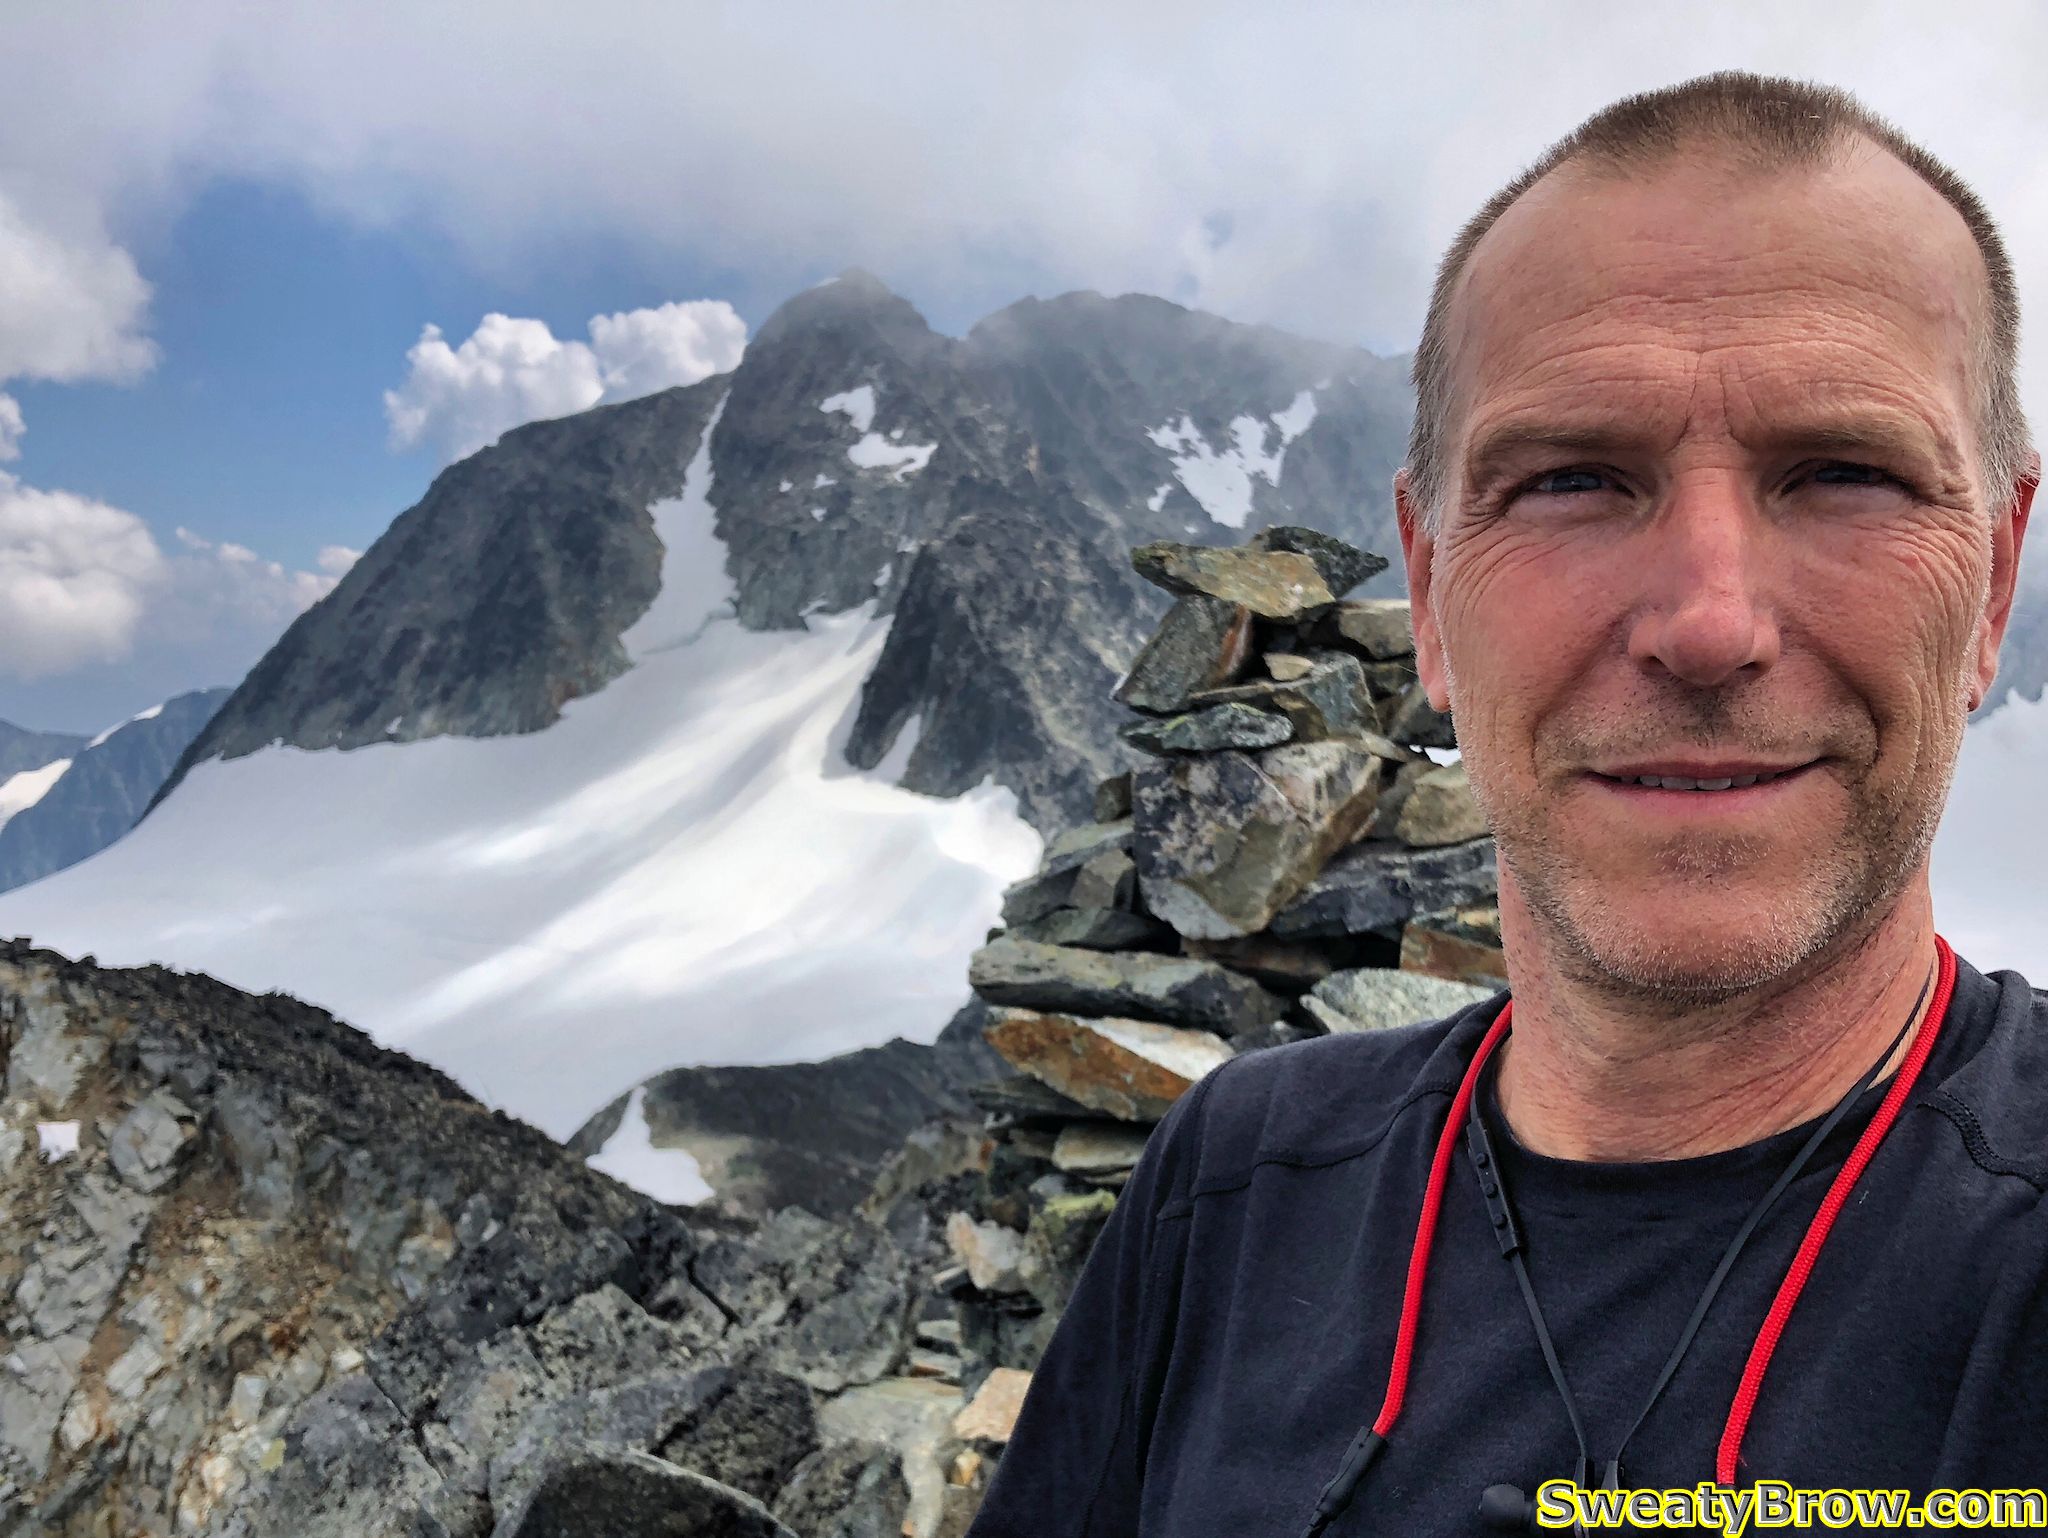
Finally, shortly before 4:00 I reached the far western end of the ridge, where my GPS and the guidebook showed “Robin’s Connector Trail” reaching the same promontory from the other side – from the gondola.
The far west end of Habrich Ridge, looking back toward Mount Habrich and Sky Pilot.
I stopped here for a while, taking some photos – and chatting/gloating online with a work colleague about what a great spot I was in!
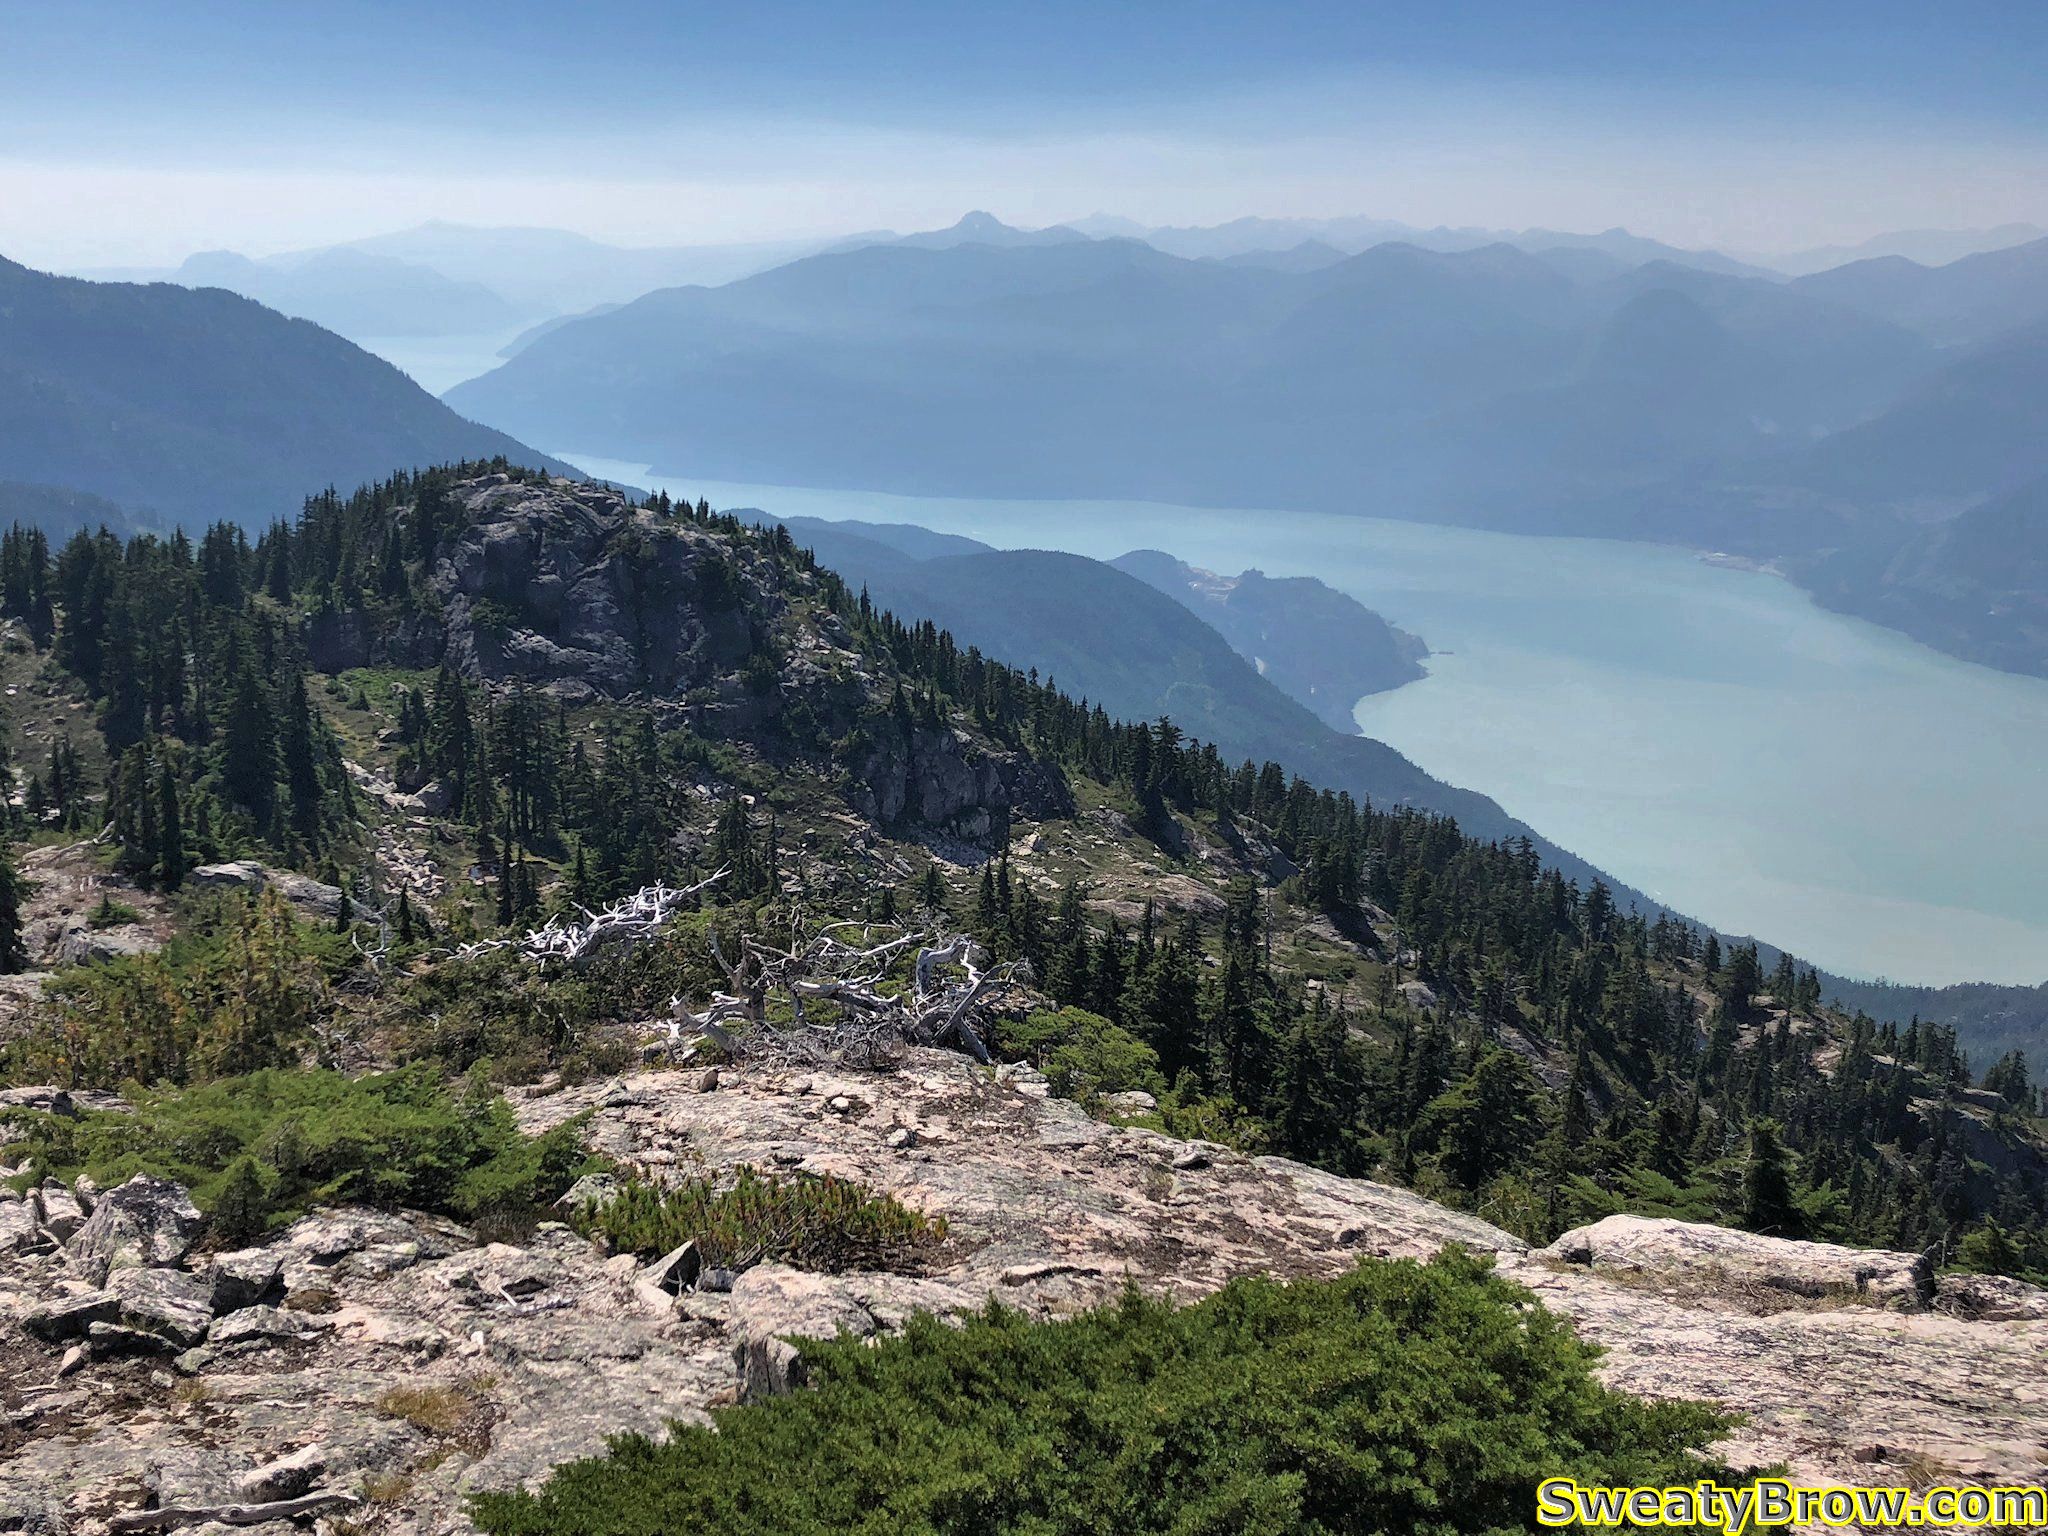
West end of Habrich Ridge, looking down toward Howe Sound.
I started hunting around for the trail, and had some difficulty finding it. Eventually, I found a bit of a footbed, and began following it downhill, but kept losing and finding it again along some rocky, talus filled slopes. I ended up being unable to find the actual “Robin’s Connector Trail”, but was able to follow another trail that is marked in the guidebook. It is a steeper, and apparently less well marked, trail that leads down to Neverland Lake, where it joins “Al’s Habrich Trail”.
Looking down at the three peaks of The Chief from the trail down Habrich Ridge.
I followed this down, down, down, and eventually managed to reach the Gondola shortly after 5:40.
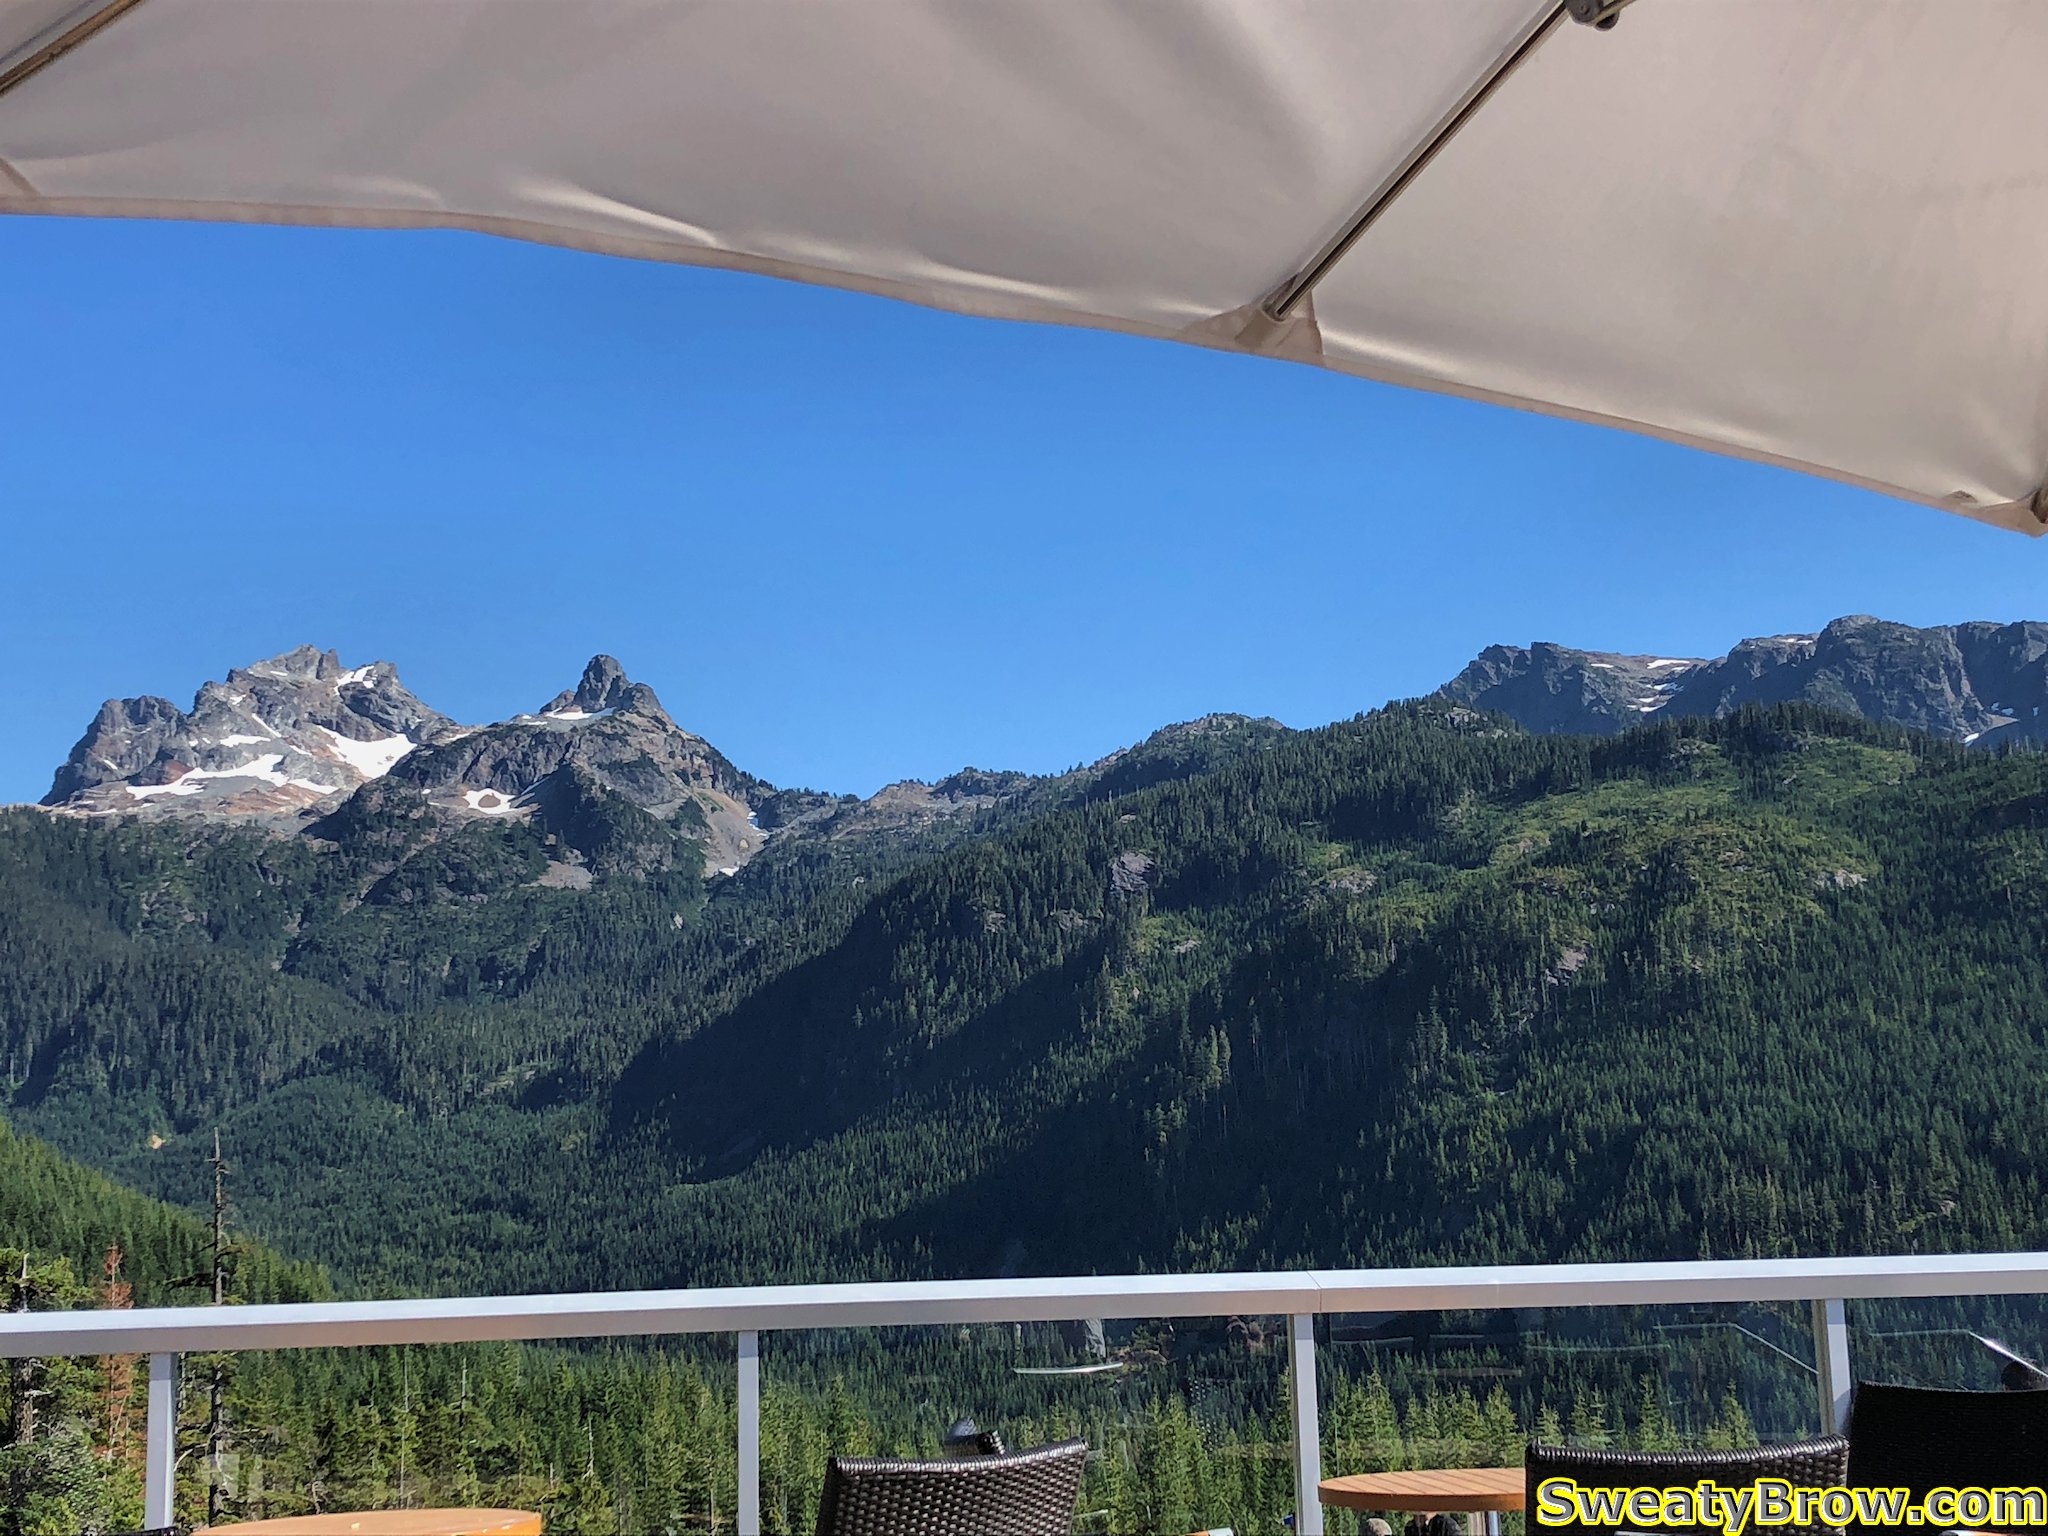
I feasted upon a plate of Victory Fries, and a massive Caesar Salad, washed down with a can of Guinness Stout. Truly, a meal of champions.
Enjoying a fine meal on the deck at the Sea to Summit Gondola. Looking up the valley toward Sky Pilot Mountain.
As I mentioned at the start, I was camping at the Squamish Chief Climbers Campground, a short 5-10 minute walk from the bottom of the Gondola. This meant that my tent was merely stumbling distance from my ride down the hill. Naturally, more beer was consumed, as I continued to celebrate a wonderful day in the mountains!
A GPS track of my route up and along Habrich Ridge.
Total time: 7:50 (6:10 “moving” – says Gaia GPS)
Distance: 16.9 km
Elevation: 1450 m gain/loss
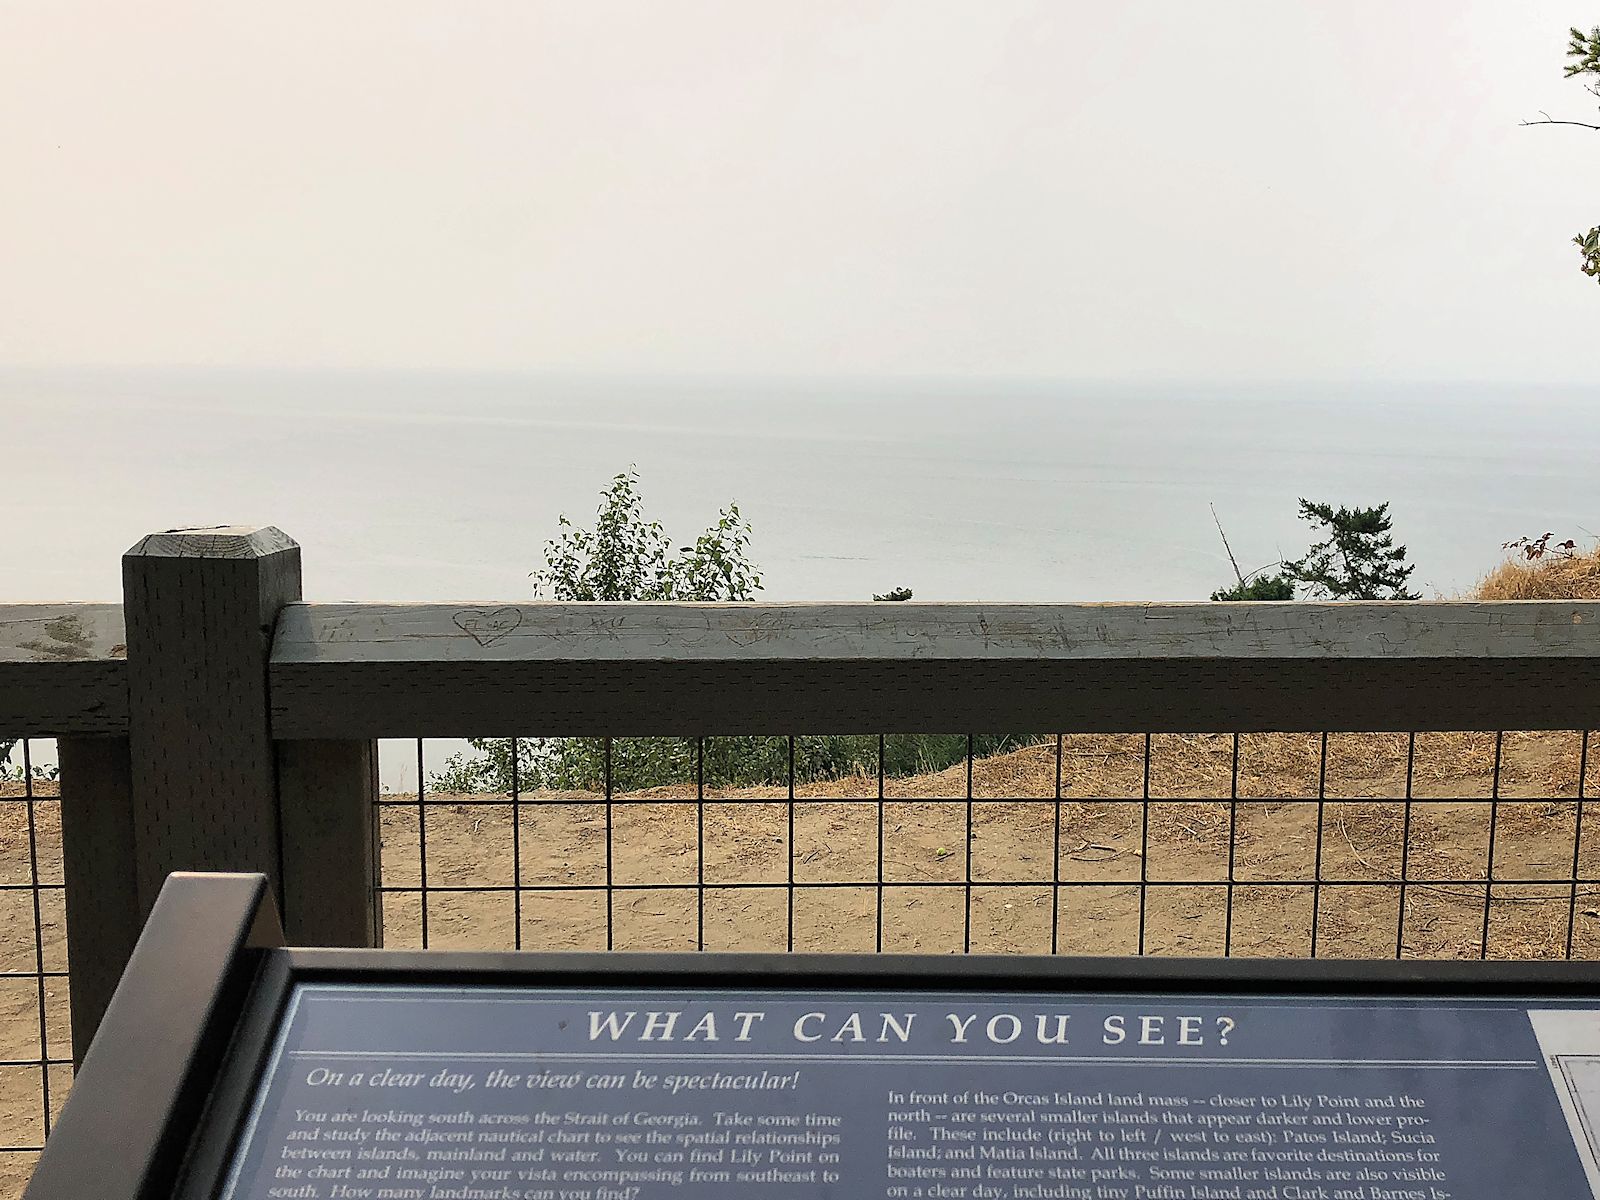
The view over the water from Lily Point, on the south tip of Point Roberts, WA on Monday, 13 August. There should be islands and mountains out there… This smoke is pretty ugly.
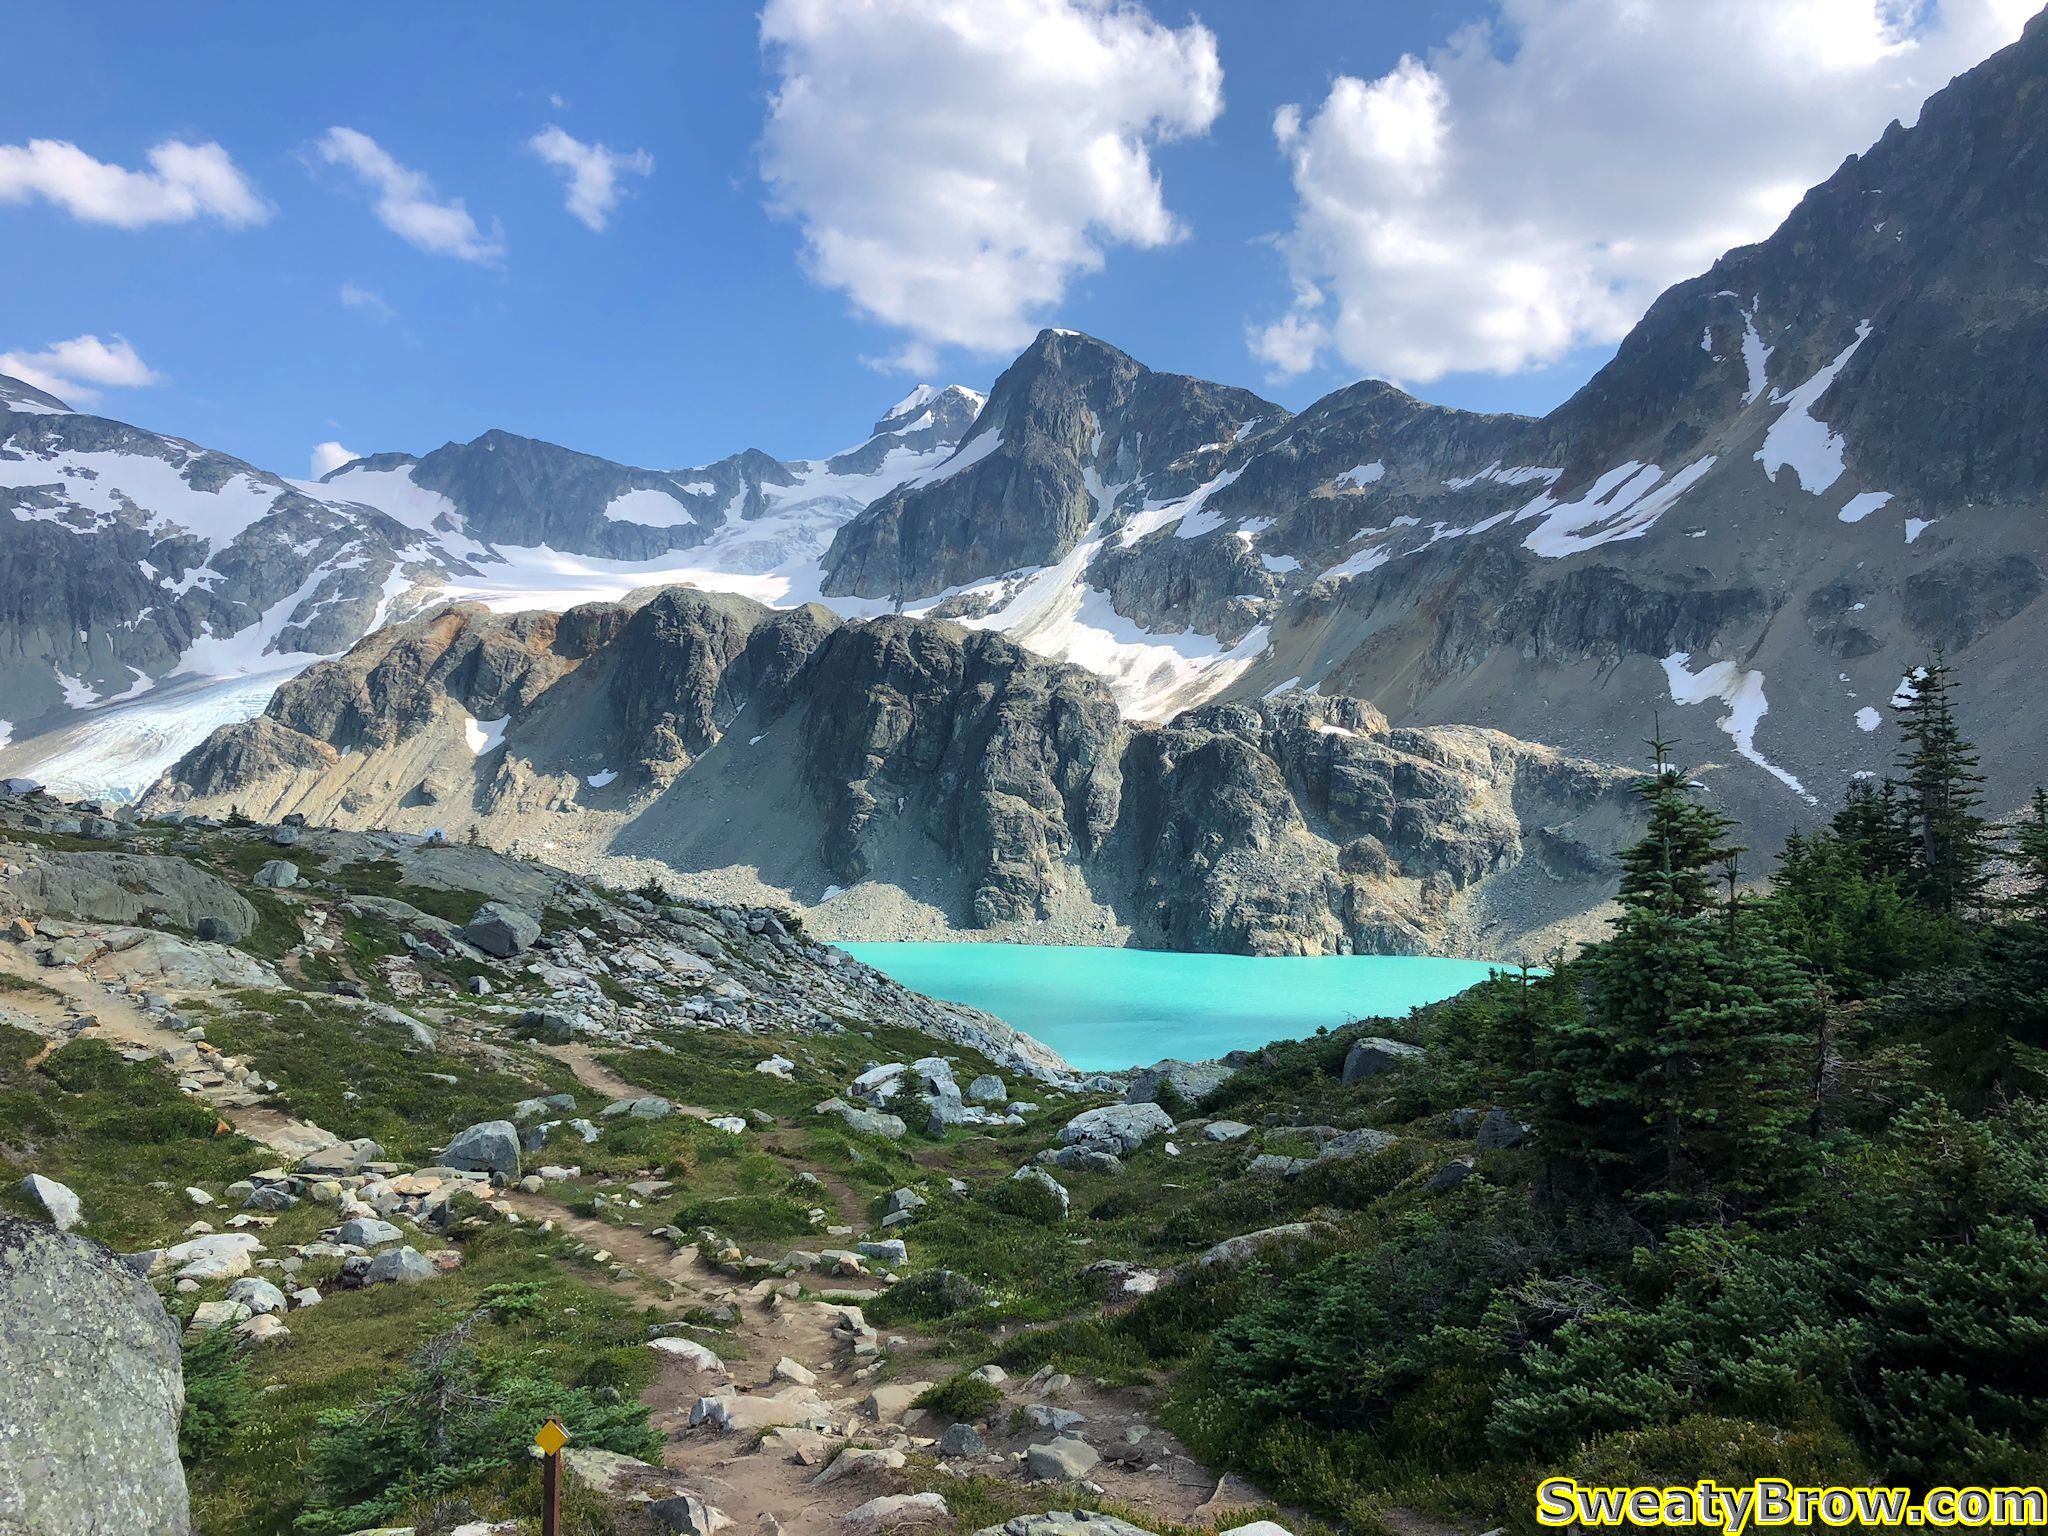
Monday, the 30 July, 2018, I hiked up to Wedgemount Lake, in Garibaldi Provincial Park, intending to stay for three nights. The hike was rather grueling, and was done in very hot, sunny weather. Distance was about 7 km (just under 5 miles), according to all the websites I read (I didn’t bother tracking it on my GPS) with an elevation gain of almost 1200 m (4000 feet).
Nearing the top of the trail to Wedgemount Lake, just over the ridgeline ahead.Cresting the hill, arriving at Wedgemount Lake
It took me 2 hours 45 minutes to the hut, and another 1 km along the lake (in 15 minutes) to get to my camping spot. The lake is just gorgeous, set within a circle of imposing mountains – to the southeast, Wedge Mountain, the highest mountain in Garibaldi Provincial Park, with Parkhurst mountain to the west of it, and the imposing Mount Rethel directly south of the Wedgemount Hut itself. To the northeast is Mount Weart, the second highest peak in the park, after Wedge. From much of the lake, the peak itself is not visible, due to a subsidiary peak (very daunting, itself) in between. And west of Weart is Mount Cook, directly north of the hut, which appears as a large ridge dominating the northern skyline.
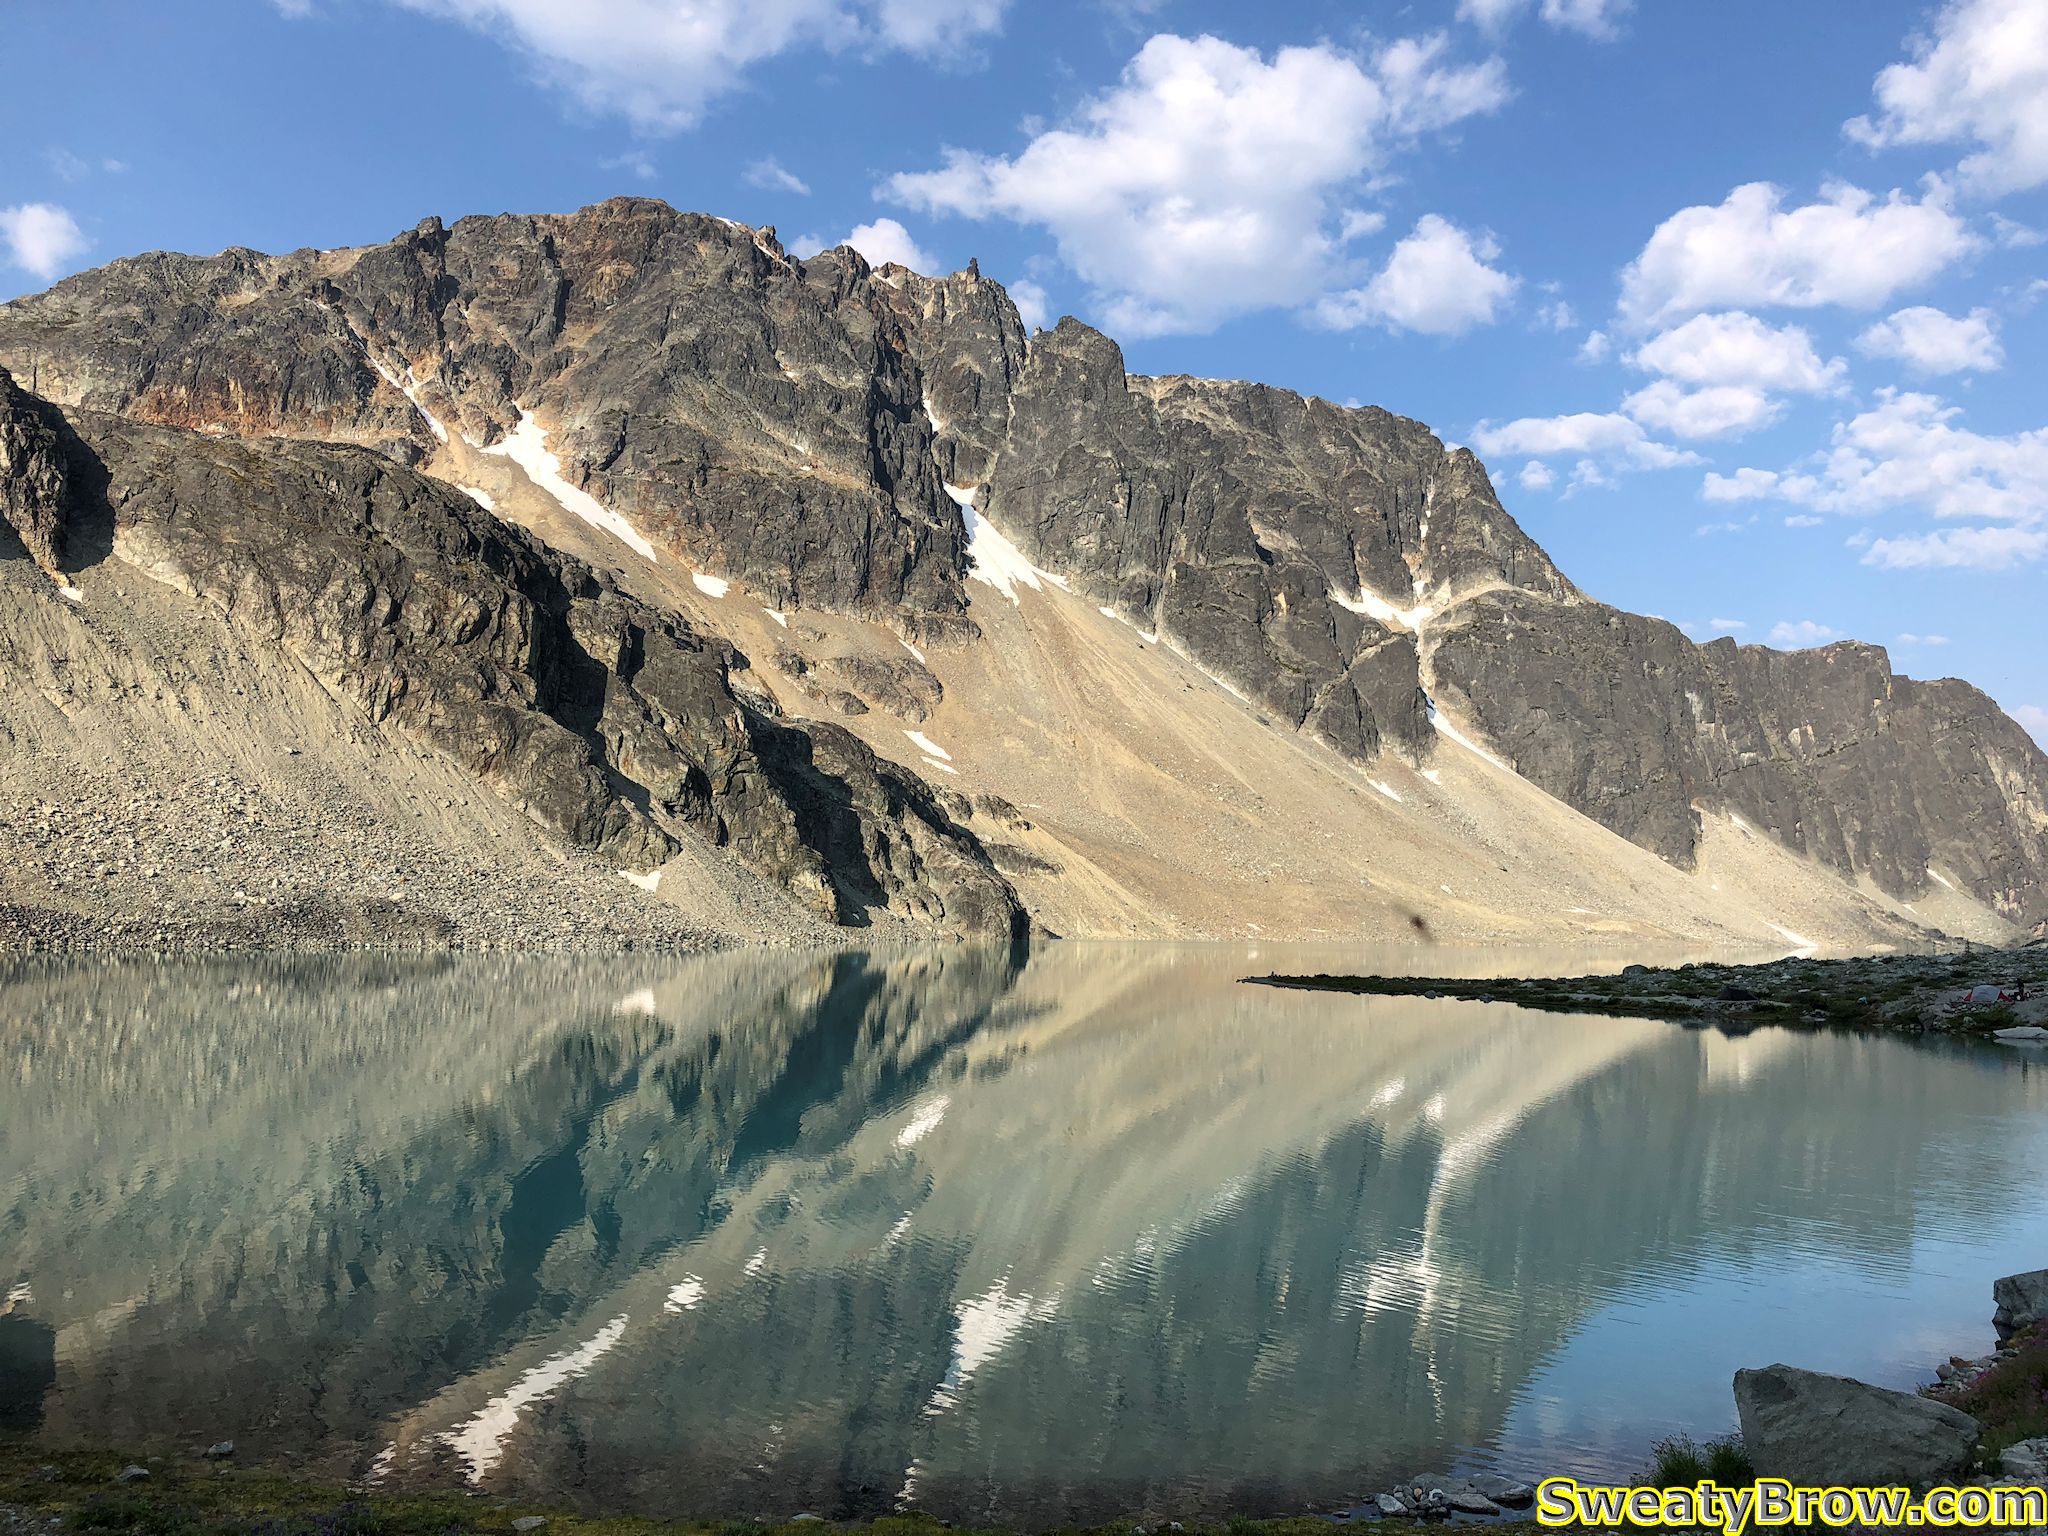
A view of Mount Rethel from my campsite alongside Wedgemount Lake, July 2018Mount Weart, behind a sibsidiary peak, viewed from east of Wedgemount Hut.
On Tuesday morning, I hiked up to Mount Weart, which tops out at 2835 m (9301 feet). The round trip was a little over 7 km, with a gain (and subsequent loss!) of almost 980 meters. The trip took 7 1/2 hours, of which an hour and a half was spent on the summit (enjoying lunch, taking photos, re-applying sunscreen, and generally soaking up the ambiance).
The bottom of Wedgemount Glacier, east of Wedgemount Lake.A view from higher up the route, with the glacier on the left, and Wedgemount Lake farther beyond on the right.Some snow, higher on the route to Mount Weart.Climbing toward the ridgeline on Mount Weart. Still smiling!Finally on top of the southeast ridge of Mount Weart. About half an hour or so to the summit…Looking back down the ridge, when nearing the summit of Mount Weart.
On the summit, I took some photos, and sat to enjoy lunch. I also discovered that I had cell service, so I contacted my wife, and then posted a photo to Instagram. (Did it really happen, otherwise?)
The cairn atop Mount Weart, with Wedge Mountain beyond.Summit of Mount Weart, with Wedgemount Lake below.
I also met up with a couple that arrived a little while after me, at the summit of Mount Weart. We had discussed, down at the lake, whether they had time to do the hike or not, since they had commitments later that evening, in Whistler. They decided to give it a go, and were glad they did! I think they ended up being late for their barbecue, but it was, most assuredly, worth it!
On the summit of Mount Weart, with new friends!
The trip back down the mountain was fairly arduous, and took almost as long as the ascent. I started down just after these new friends, and caught up to them on the ridge. We walked for a while together, but they stopped for a while when we reached the snow slopes below the headwall.
Descending below the headwall of Mount Weart.
I continued on my own, checking behind me once in a while, seeing how they were progressing as well. There was a lot of very loose rock, particularly just below those snow slopes. At one point, I felt a large boulder that I stepped on begin to shift, and I leapt forward to firmer ground. The boulder let loose, and carried another, both of them about 75-100 cm in diameter, downhill. They hit some larger rocks 10 meters down the slope, an shattered into pieces. I hit my foot hard when landing on solid ground, and still feel the bruising in my heel while writing this 10 days later… Could have been much worse!
When just reaching the edge of the glacier, and prior to the route turning further west (where I could no longer see them), I watched until the other guys got below what I considered to be the trickiest part of the route – a series of cliffy steps beside a steep waterfall. When they appeared to be past the worst of that, I continued along much easier terrain back to camp. I saw them head past my tent a while later, looking tired, but very pleased with the day!
Tuesday evening, after climbing Mount Weart, camping alongside Wedgemount Lake.
For the first time, I carried my lightweight camp chair (only $26 USD on Amazon.com!) on a backpacking trip. Light, small, and comfortable. Unfortunately, the horseflies were ferocious while at camp, and the wind just wasn’t strong enough to keep them off – and Deet was useless. I ended up spending most of my time inside the tent, despite the heat. (I had to lift the edges of the tent fly significantly for better ventilation from the occasional wafts of breeze.)
Wednesday morning, I was planning to head up Mount Rethel. It is located on the other side of the lake, and requires you to cross the outlet of the lake, then cross a long scree slope along the lake, before heading up some steep snow slopes. I packed up my ice axe and micro-spike trail crampons, and set you. After about a half an hour of hunting around, I finally found my way to the lake’s outlet.
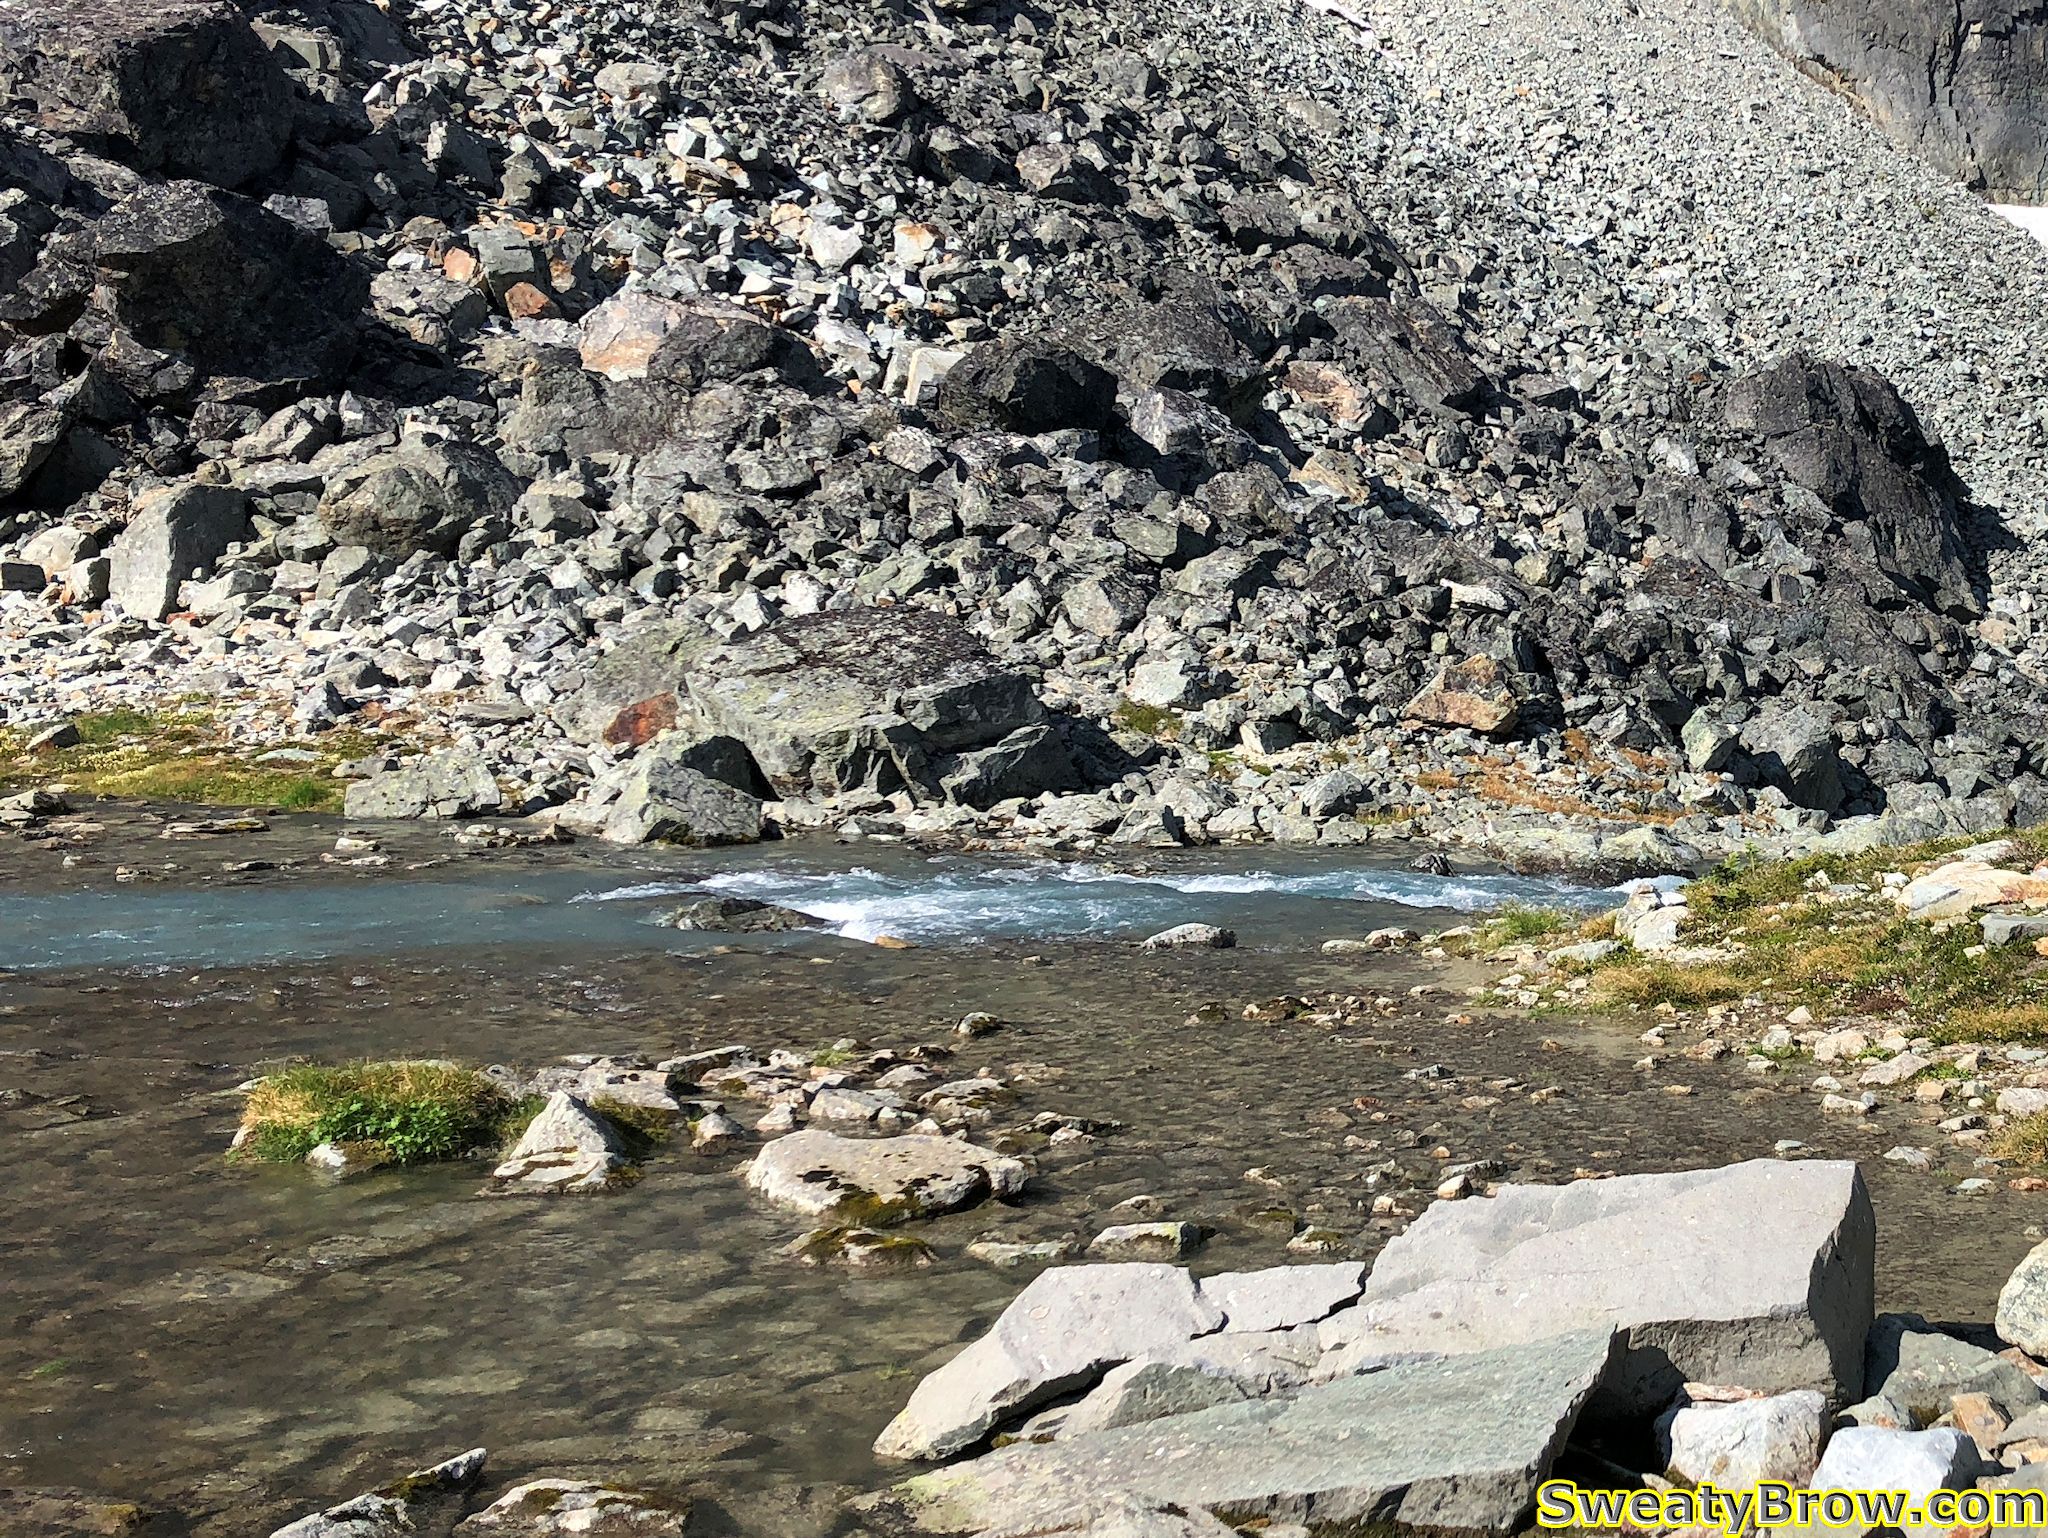
Unfortunately, the traverse of the outlet was a little more than I had bargained for. I was hoping for a few boulders that I could carefully negotiate. What I found was either: 1) lower down, a raging torrent with huge gaps between boulders, or 2) higher up, a wide (15-20 m) expanse of shallow (maybe 15-20 cm), slower moving water with jagged, rocky footing. There really wasn’t a spot that I could “boulder hop” across. If I had had some sandals/crocs and maybe hiking poles, I would have crossed it, but there was no way I could do it in bare feet. The footing was too sharp, and if I lost my balance and fell, there was a chance I could be quite hurt, or worse, carried into the torrent below.
The outlet of Wedgemount Lake, higher up, where it was wide and shallow, but very rocky.A view showing where the outlet of Wedgemount Lake becomes narrower, faster, and deeper.
I decided to change my goal for the day, and head up Mount Cook. It was the mountain that I had planned to hike up on Thursday morning, prior to hiking packing up and hiking back to the car. I turned around, and started up Cook instead. Unfortunately, I carried the extra weight of the trail crampons and ice axe, which would not be needed on that hike. Oh well…
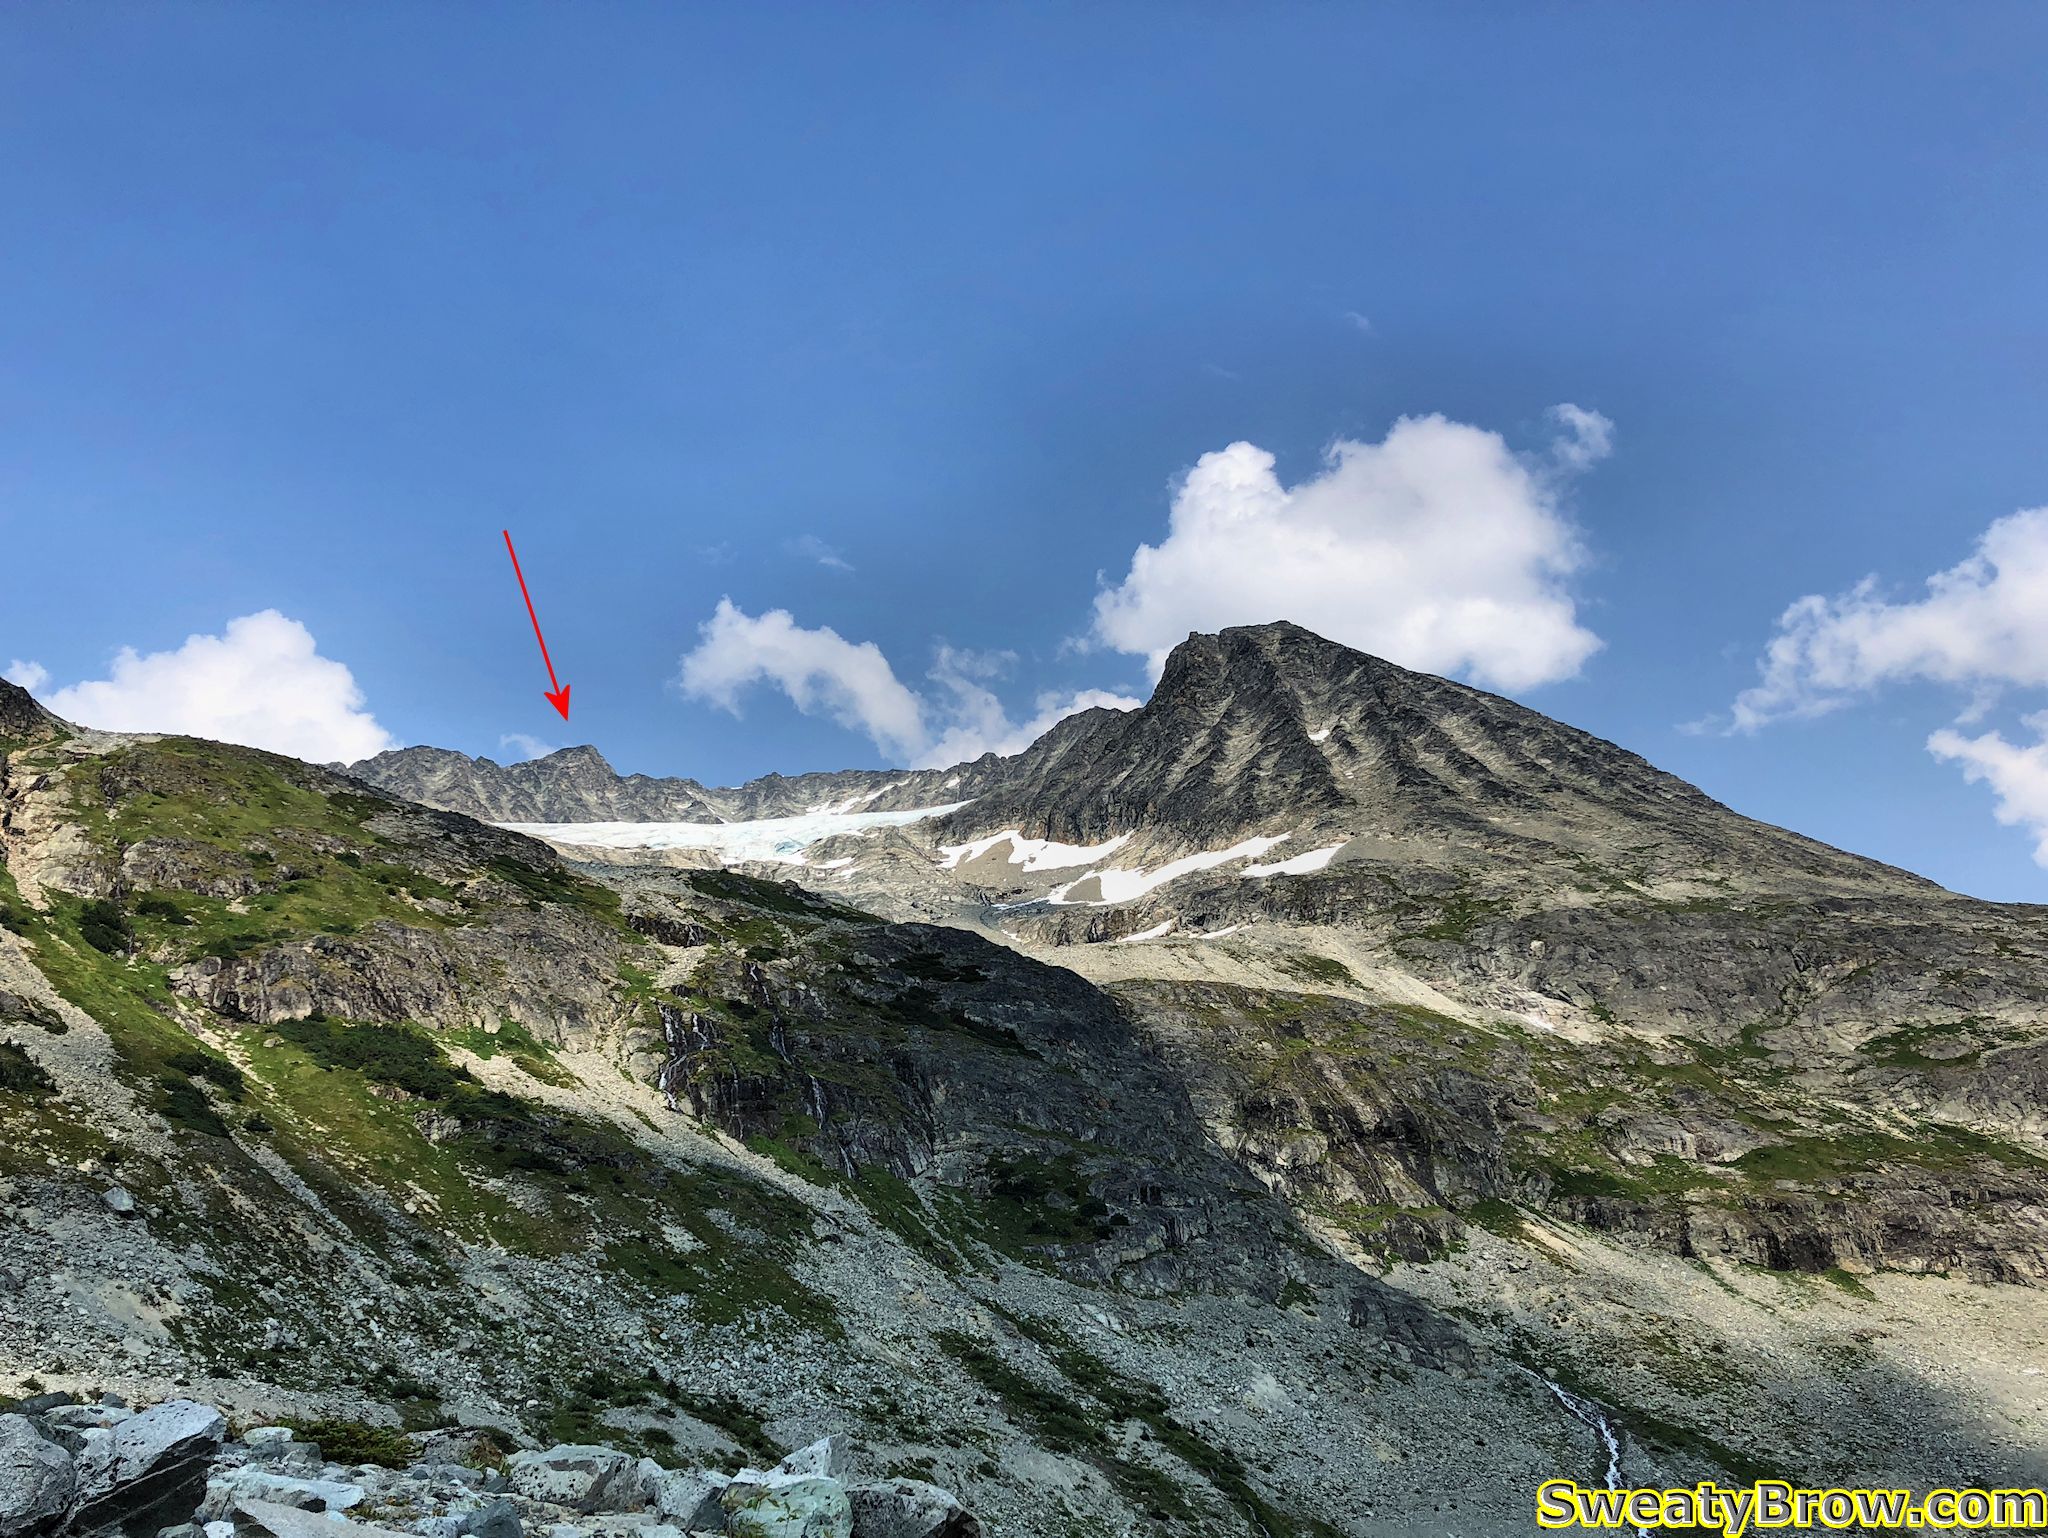
My first really good view of Mount Cook, after leaving the outlet of Wedgemount Creek. West Summit on the left side of the ridge, true summit on the right.
The other problem with the change in destination is that I didn’t bring the beta along with me. Now, the beta was pretty simple – along the lines of, “go up a junipery and bouldery gully to a scree slope, go uphill, turn right, and keep going.” But there was a photo of the approach, with an arrow, giving the gist of the route. I didn’t have that with me – and I got it wrong…
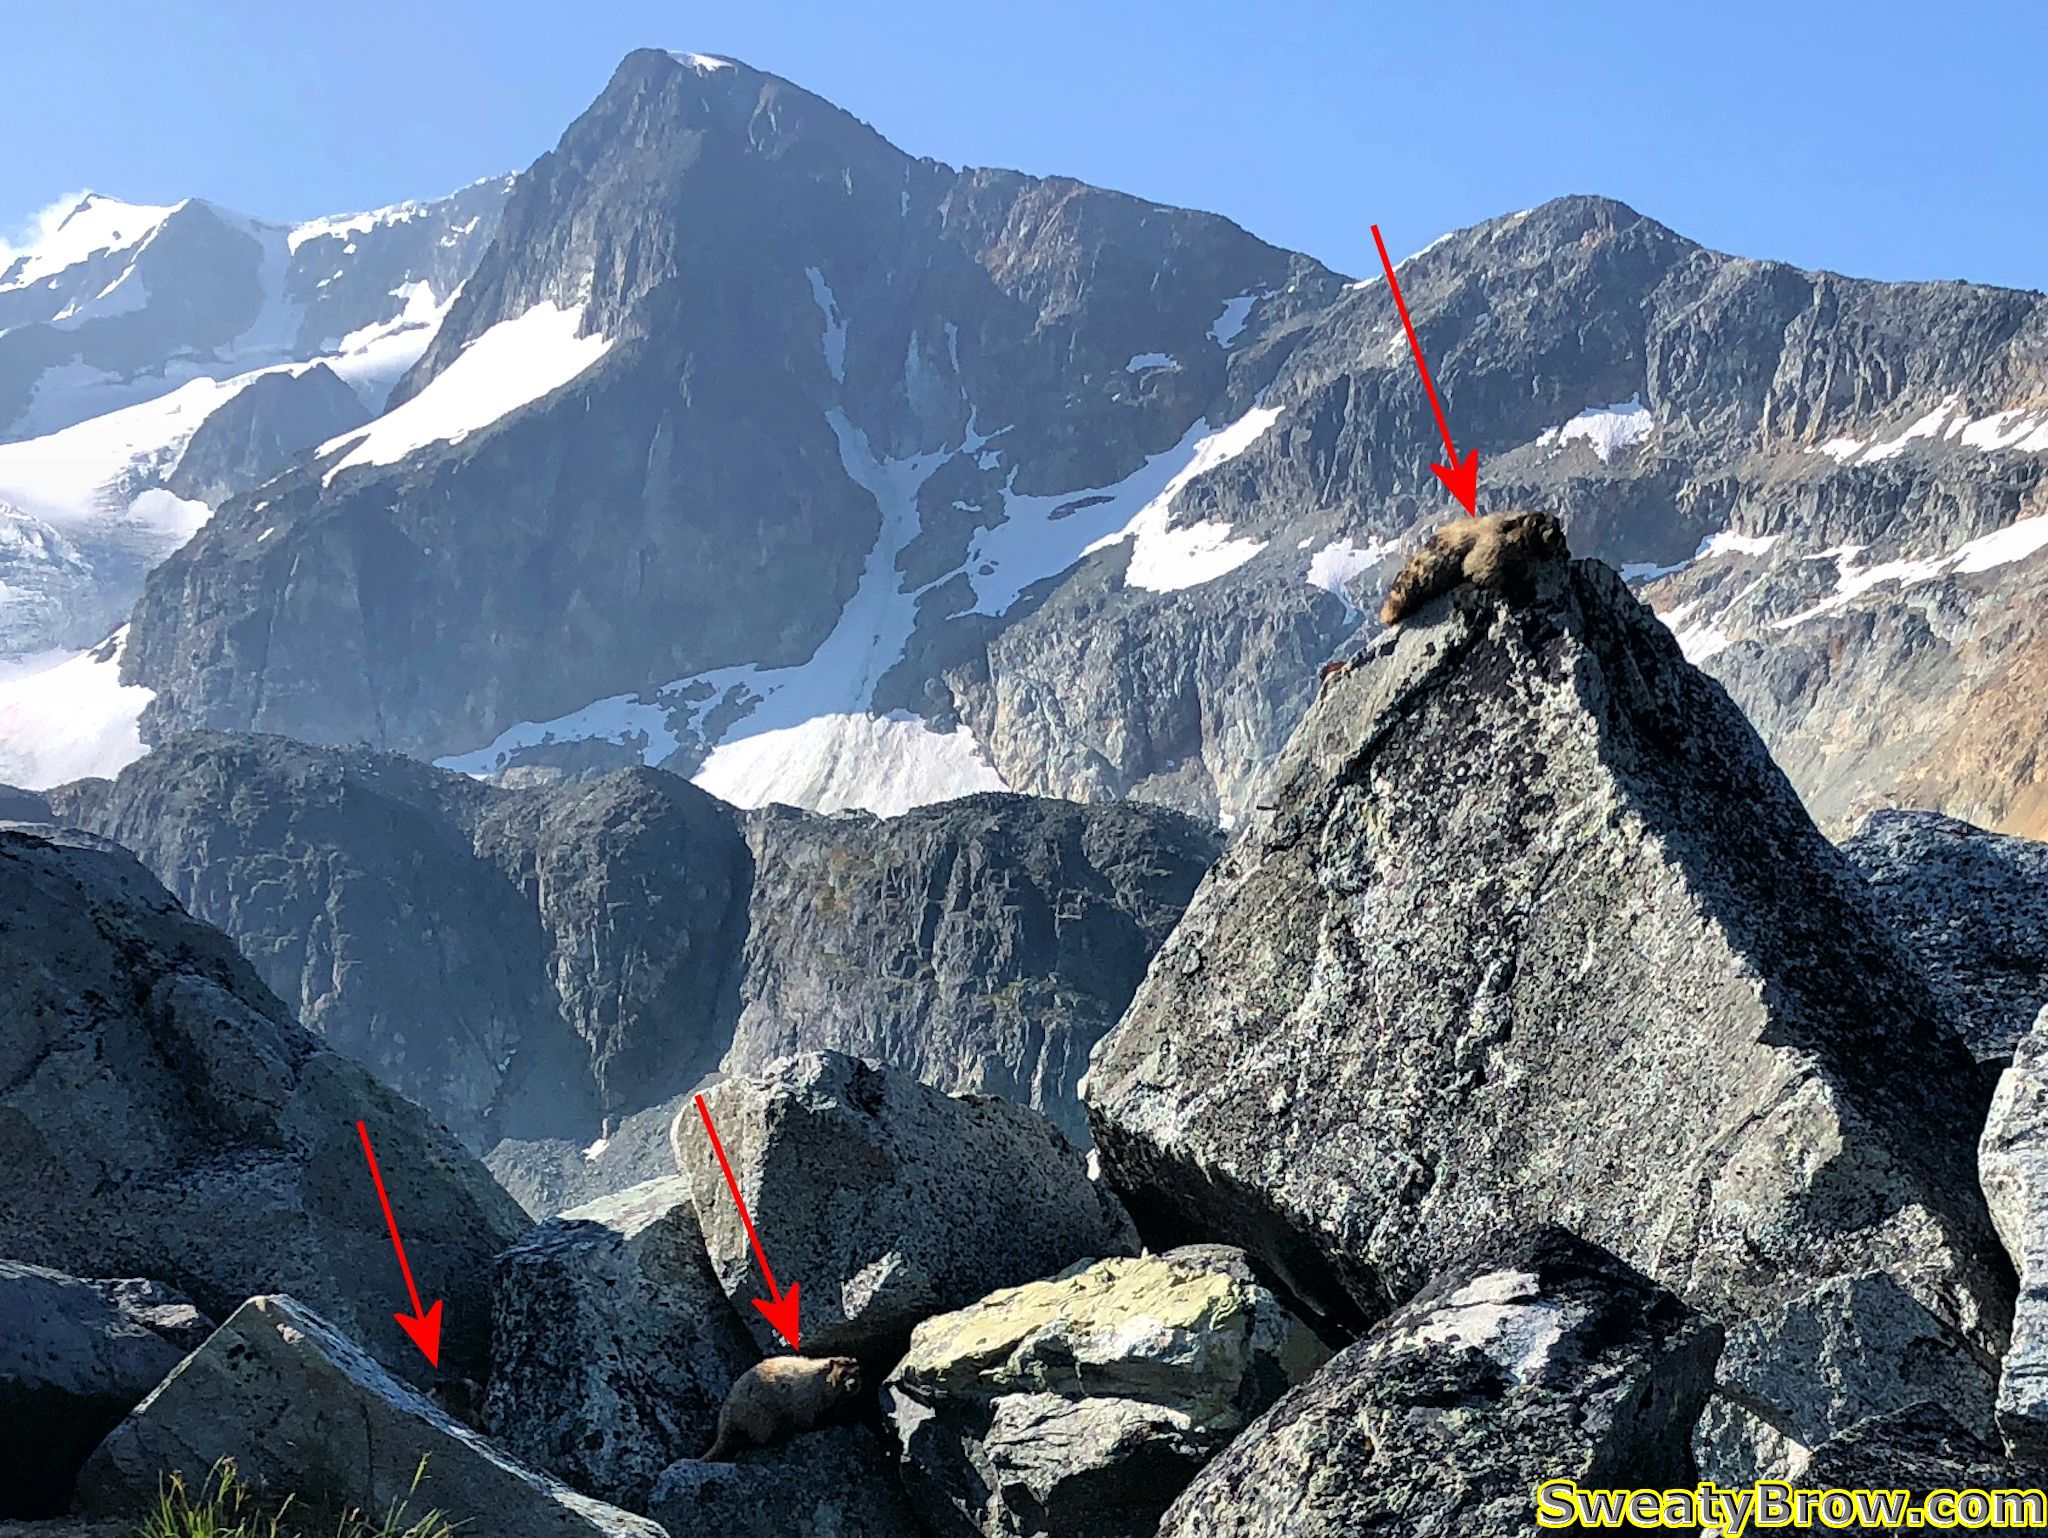
To begin with, the route I took was fine. I headed back past the hut, and followed a trail toward the slopes heading north. On the way, a trio of marmots curiously peeked at me…
Three marmots looking at me from alongside the trail. Can’t see them all? Click the photo to see a full size version with arrows pointing them out!
Turns out I went too far left, too soon. The route I took got me there, but it was not pretty. Lots of bashing through a nasty bunch of scrubby tree, with terrible footing around them, then up a super steep meadow with boulder chutes, to reach the proper ridgeline.
Looking down at Wedgemount Lake from the scree slopes of Mount Cook.
And speaking of the ridge – it is truly ugly. I have slogged my way up some nasty slopes before, but this was one of the nastiest, slipperiest, most prolonged slog-fests I have ever experienced. In some sections, it felt like every step was about to bring the entire mountain down around me.
An idea of the scree slopes heading up Mount Cook. Very loose and sharp.
The steep ridge brought me to the “west summit”, after which the gently ascending line to the main summit was much nicer. There was even a nice notch to drop down into, and scramble up the other side – that bit was actually quite fun.
West summit of Mount Cook.Scrambling section prior to the summit of Mount Cook. The route was big and blocky and only slightly exposed.
The summit of Mount Cook has great views, but there was a lot of cloud coming into the area from the southeast. Weart played peekaboo through the inconsistent cloud – now you see me, now you don’t. I was glad I’d been up there the day before, rather than this day.
Looking past the summit cairn on Mount Cook toward the summit of Mount Weart.
After a few selfies and an Instagram post (yeah, I’m that guy, I guess) I started back down, with hopes of finding the correct route, this time. Just as I approached the West Summit again (about to drop down the steep stuff…) the clouds, which had been holding well above me up until now, suddenly threatened to sock in the hill. A big, thick mass came at me, and for a moment everything became very dim. Fortunately, that single low-lying cloud moved on, and I was in the clear again.
Threatening clouds while descending the Mount Cook rubble pile.
Long story only slightly less long, I did manage to find the correct route down, and the return to the lake was much more pleasant that the approach had been.
Total travel time up (although this includes the time exploring the option of crossing the lake outlet toward Mount Rethel) was about 3 hours 50 minutes (!!) – for a hike that is listed as 1.5-2 hours up, in the guidebook. That covered a total of 5 km, and almost 800 m of ascent. The return trip, on the other hand (via the correct route) was just under 3.5 km, in 2 hours.
When I got back to the lake, I decided that I might as well pack up and head back down to the car, rather than staying the one additional night I had planned. I was not going to be ascending another peak in the morning, and I still had lots of time to get back down. In addition, in bashing through the mini trees while off-route in the morning, I had managed to get tree sap all over my hands and forearms, as well as on the front of my knees and thighs. I really didn’t want to get that stuff all over my quilt, and I didn’t have any faith that I’d be able to wash it off without soap.
So, that’s what I did – packed up, and headed back to the car. The three hour trip up was almost exactly 2 hours in reverse. By the end of the day, including Mount Cook, I’d ascended about 800 meters, and descended over 1900 m.
A long, tiring day, to finish a tiring, but fulfilling trip!
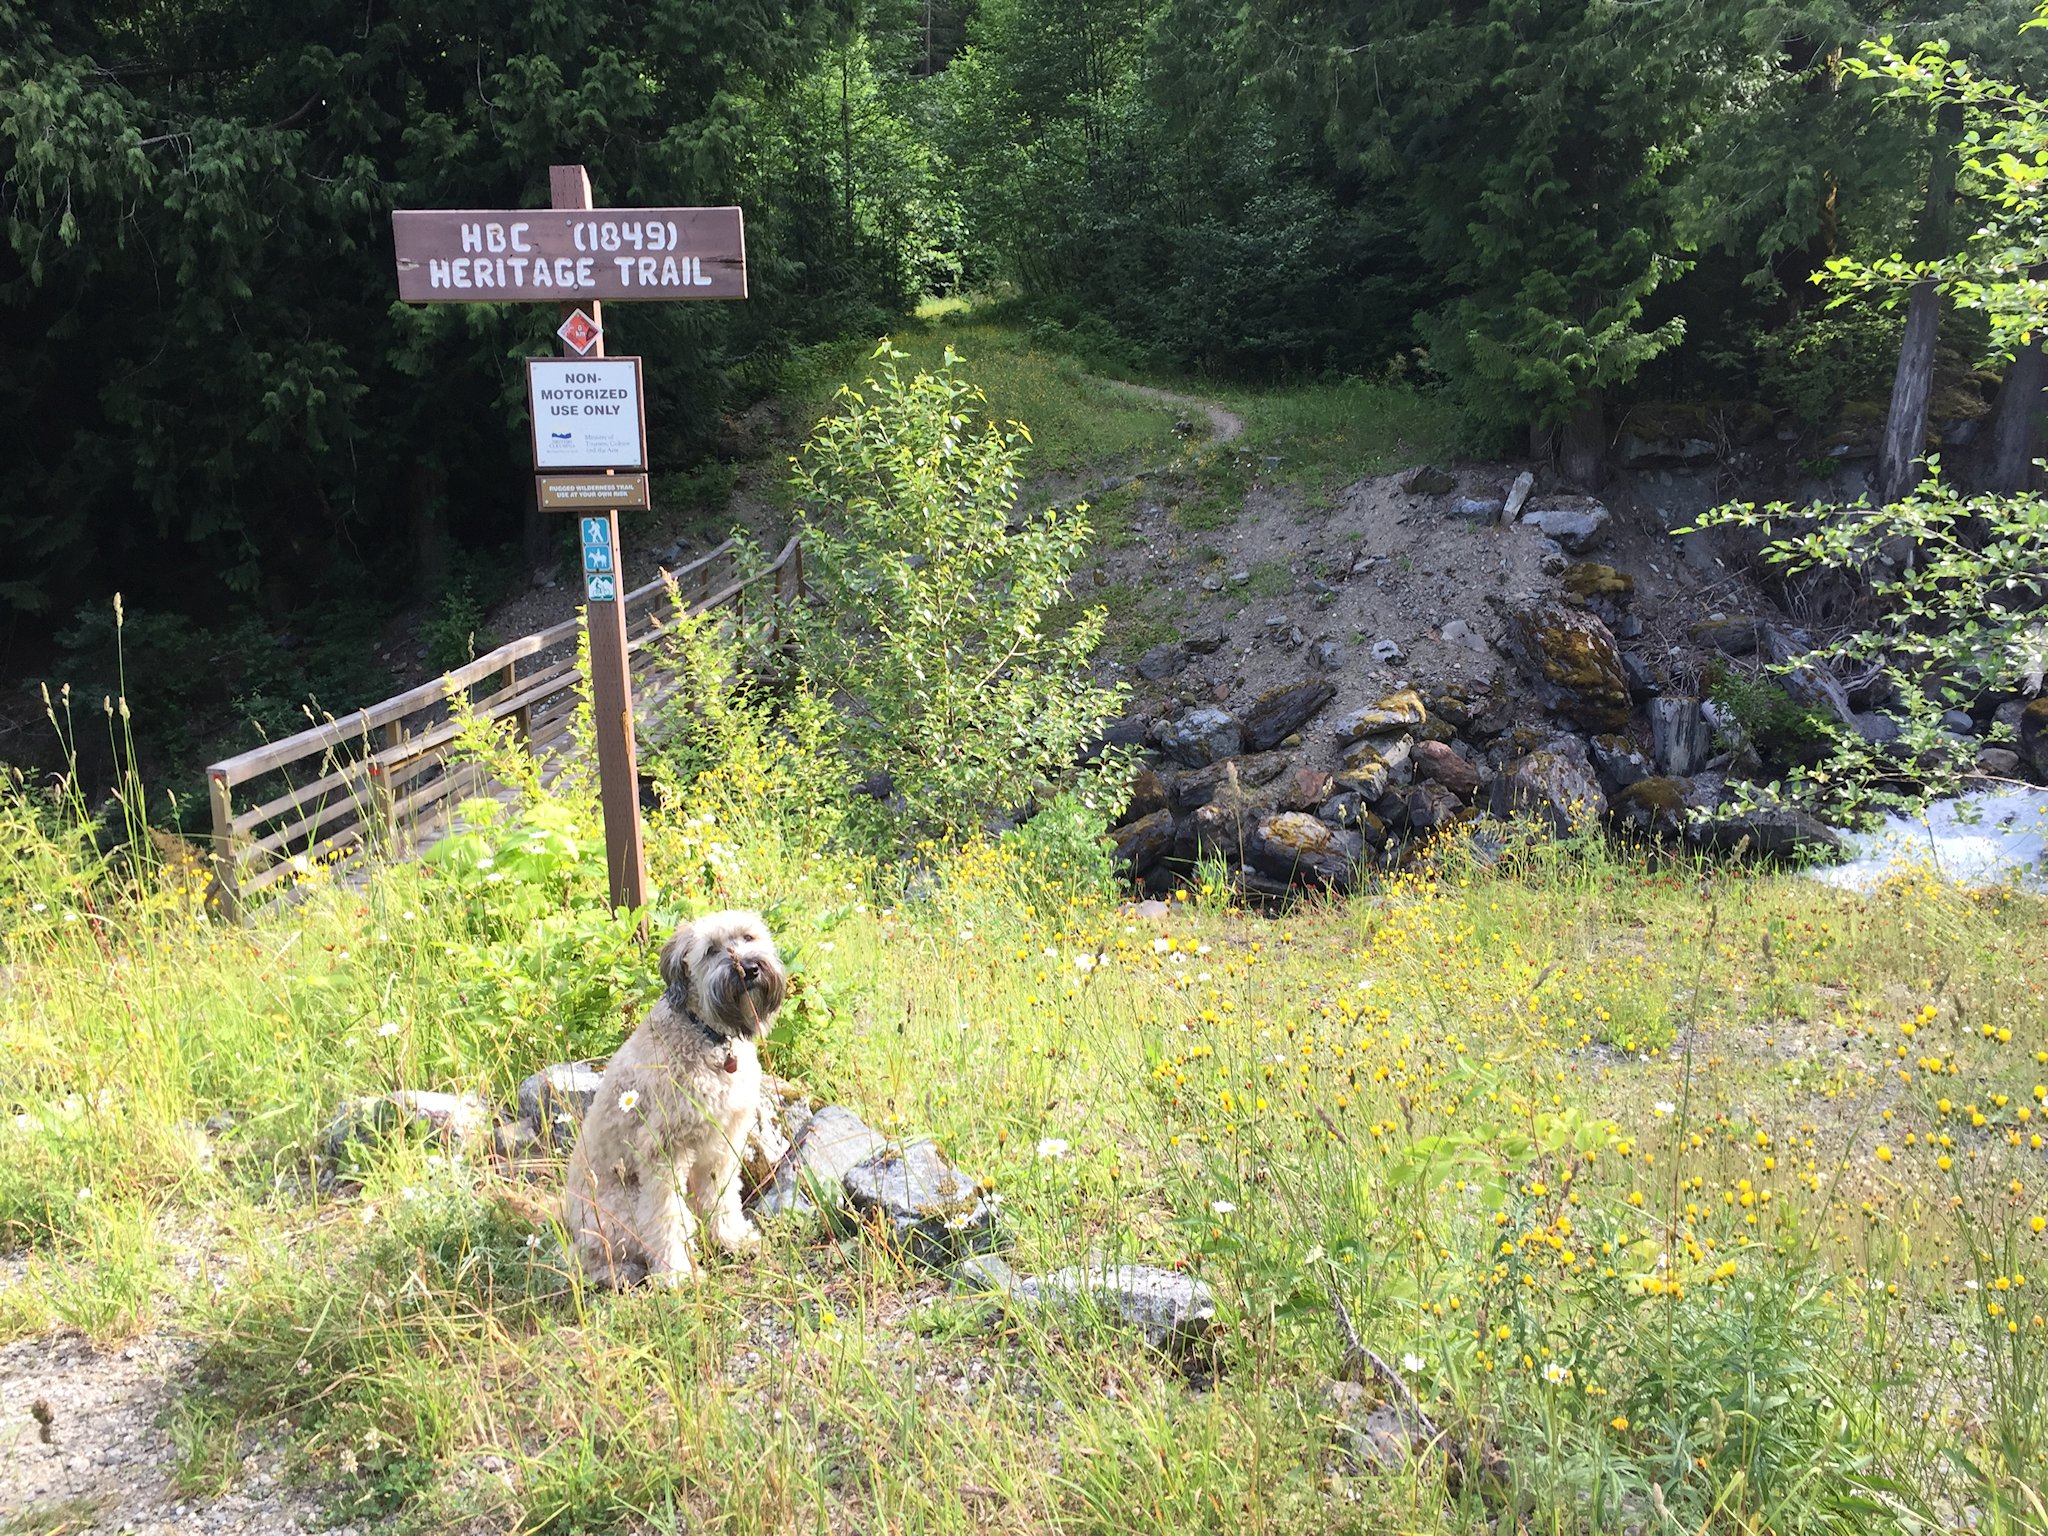
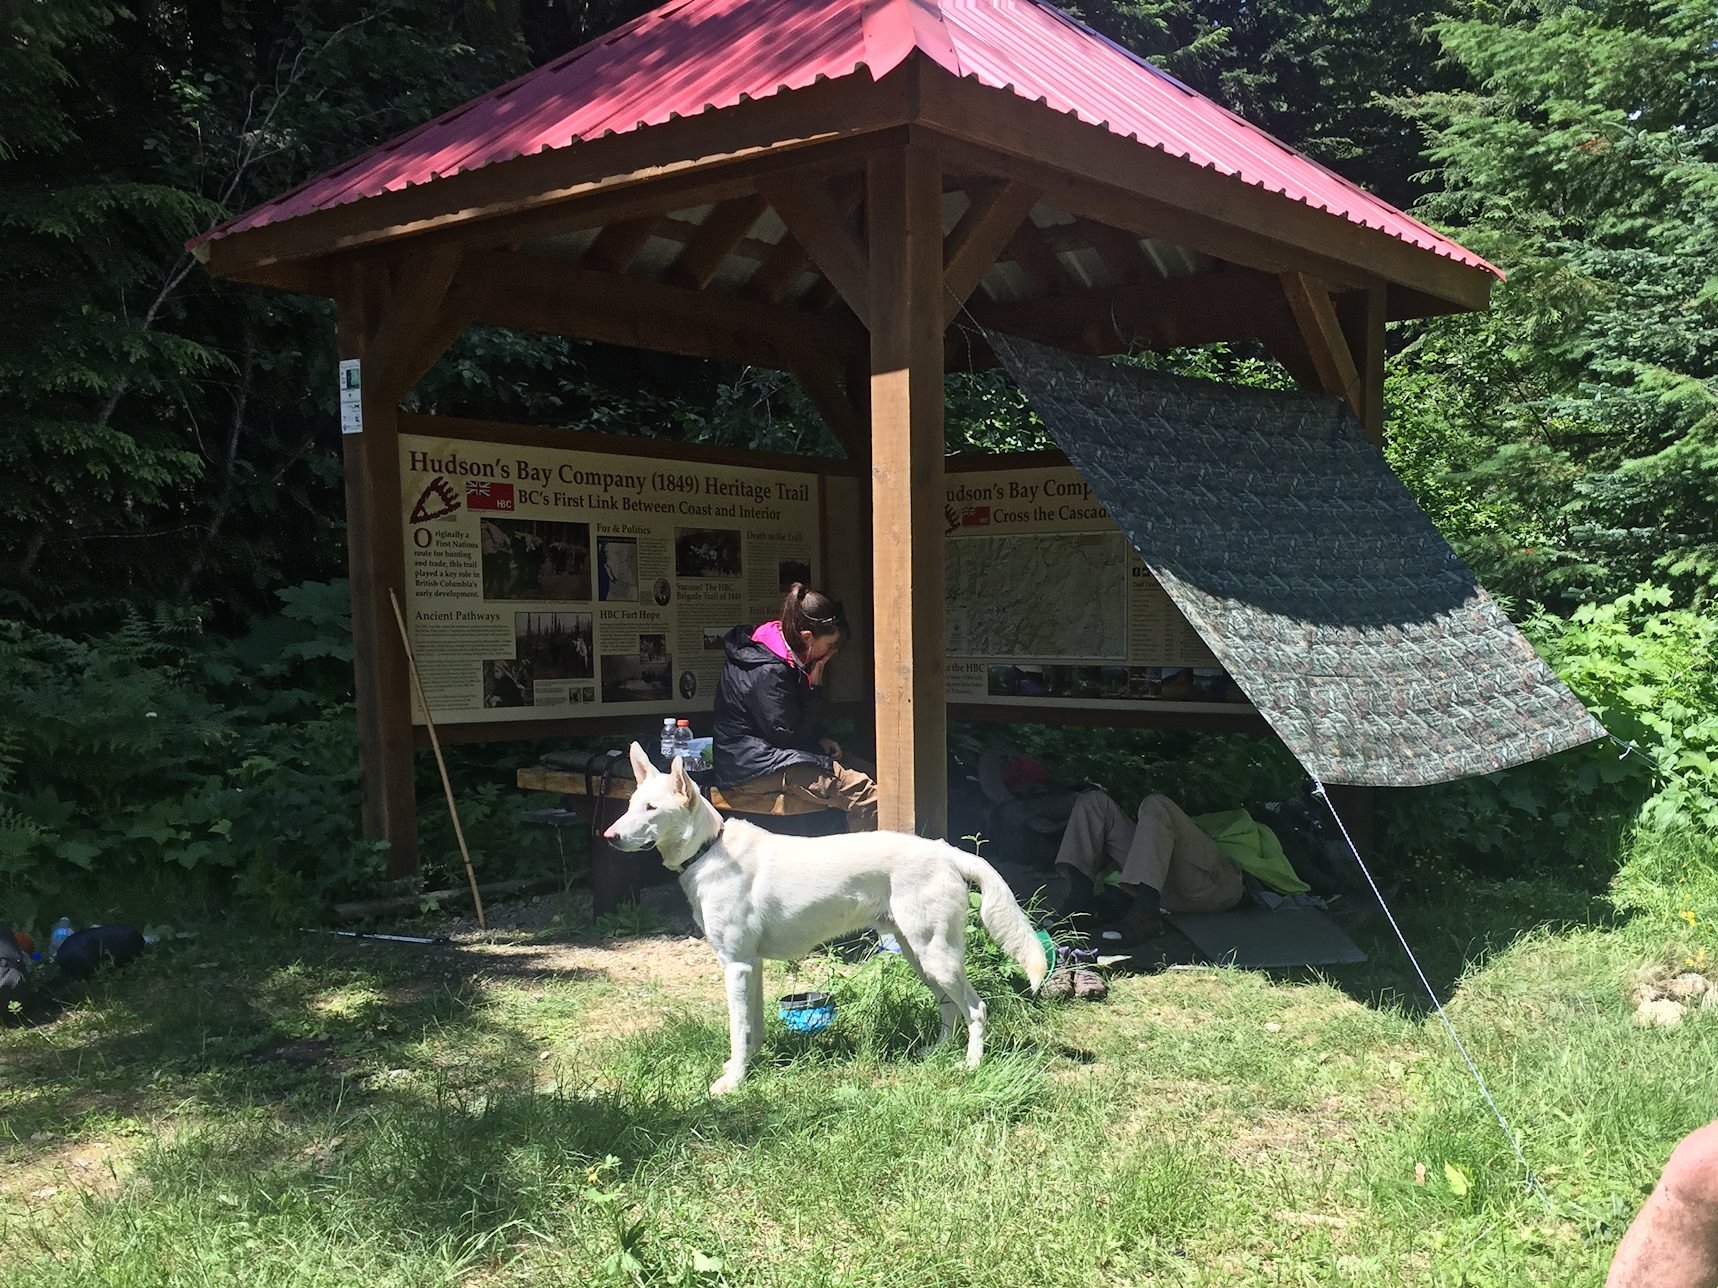
We had spend two days on the Hudson Bay Brigade Trail, taking us to the Sowaqua Creek Forest Service Road. The morning of the third day, we had an emergency take place in camp, and one of the groups that had shared the camp had to be evacuated. (See: The Hudson Bay Brigade Trail Part I)
By the time the affected group had been evacuated, and we were packed and ready to go, it was after one in the afternoon. Fortunately, the trip back to the previous night’s campsite was just a short one. By 4:30 PM, the tent was set up in Colvile Camp, and we settled in for a relaxed dinner and evening.
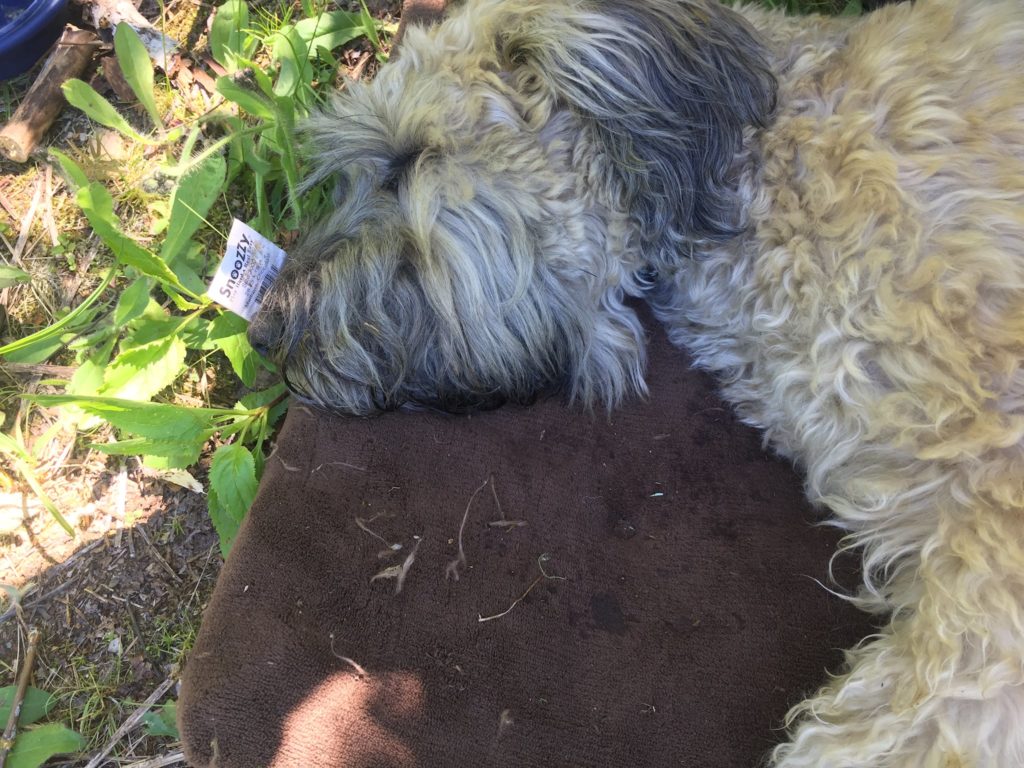
Chester relaxing outside the tent at Colvile Camp.
At this point, we (that is, my dog Chester and I) had kind of joined up with the group of three that we had met on the first day; we were kind of a loose confederation of hiking groups. We didn’t hike together along the trail, but we met up now and then when stopping for a break, and leap-frogged along the trail.
We had a pleasant evening at Colvile Camp, and played some cards and conversed late into the evening. Another group also joined us the the fire for a while, and the company was enjoyable.
A bit of socializing by the fire at Colvile Camp.
The next morning, July 4th, was the final day on the trail. We packed up, and were on our way sometime around 9:30 or so. This last section of trail, which had been the first day’s travel coming the other way, was to be about 11 km, with 600 m of elevation gain, and 1100 m of loss. In other words, not an easy day, but no marathon.
Between Colvile and Manson’s Camp (halfway back to the car) Chester and I got quite a way ahead of the other group. We stopped at Manson’s Camp and rested for a bit. We had quite a bit to drink (there is a small stream there) and lay down in the shade for a bit. Chester was particularly tuckered, and I got out his sleeping pad for a bit of a nap.
A tuckered Chester takes a well deserved rest at Manson’s Camp.
After a while, the other guys caught up to us, just as we were preparing to head out again. We said our goodbyes, and wished one another the best. Chester and I, all rested up, would easily beat them back to the parking lot, so this was the last we would see of them – or so we thought!
Another ten minutes along the trail, and Chester suddenly refused to go any farther. I coaxed and cajoled as best I could, but he just wouldn’t continue. We had another 5 km to travel, and about 500 m to descend. He seemed to be exhausted and overheated, and unwilling to go another step. After a bit, I tried to carry him for a while, but I couldn’t keep that up for long. I tried rigging up his pack as a kind of sling, and it helped for a bit, but only temporarily.
Chester gave up and laid down next to the trail. He would go no further.
Eventually, I just stopped, and waited for the others to catch up. I was exhausted and discouraged. I’m not sure what I had in mind – perhaps see if they could carry some of my load, and try to put Chester into my pack? At this point I don’t even remember exactly…
After a while, I heard their voices approaching from up the trail. Chester heard them, too, and jumped up to see them as they came into view. Well, he got very excited to see them again. Turns out, that was all it took to get him hiking again, and he was fine the rest of the way to the car!
Chester was happy to follow his new friends all the way back to the car!
A short while later, we were back to the car, and on our way home in air conditioned comfort…
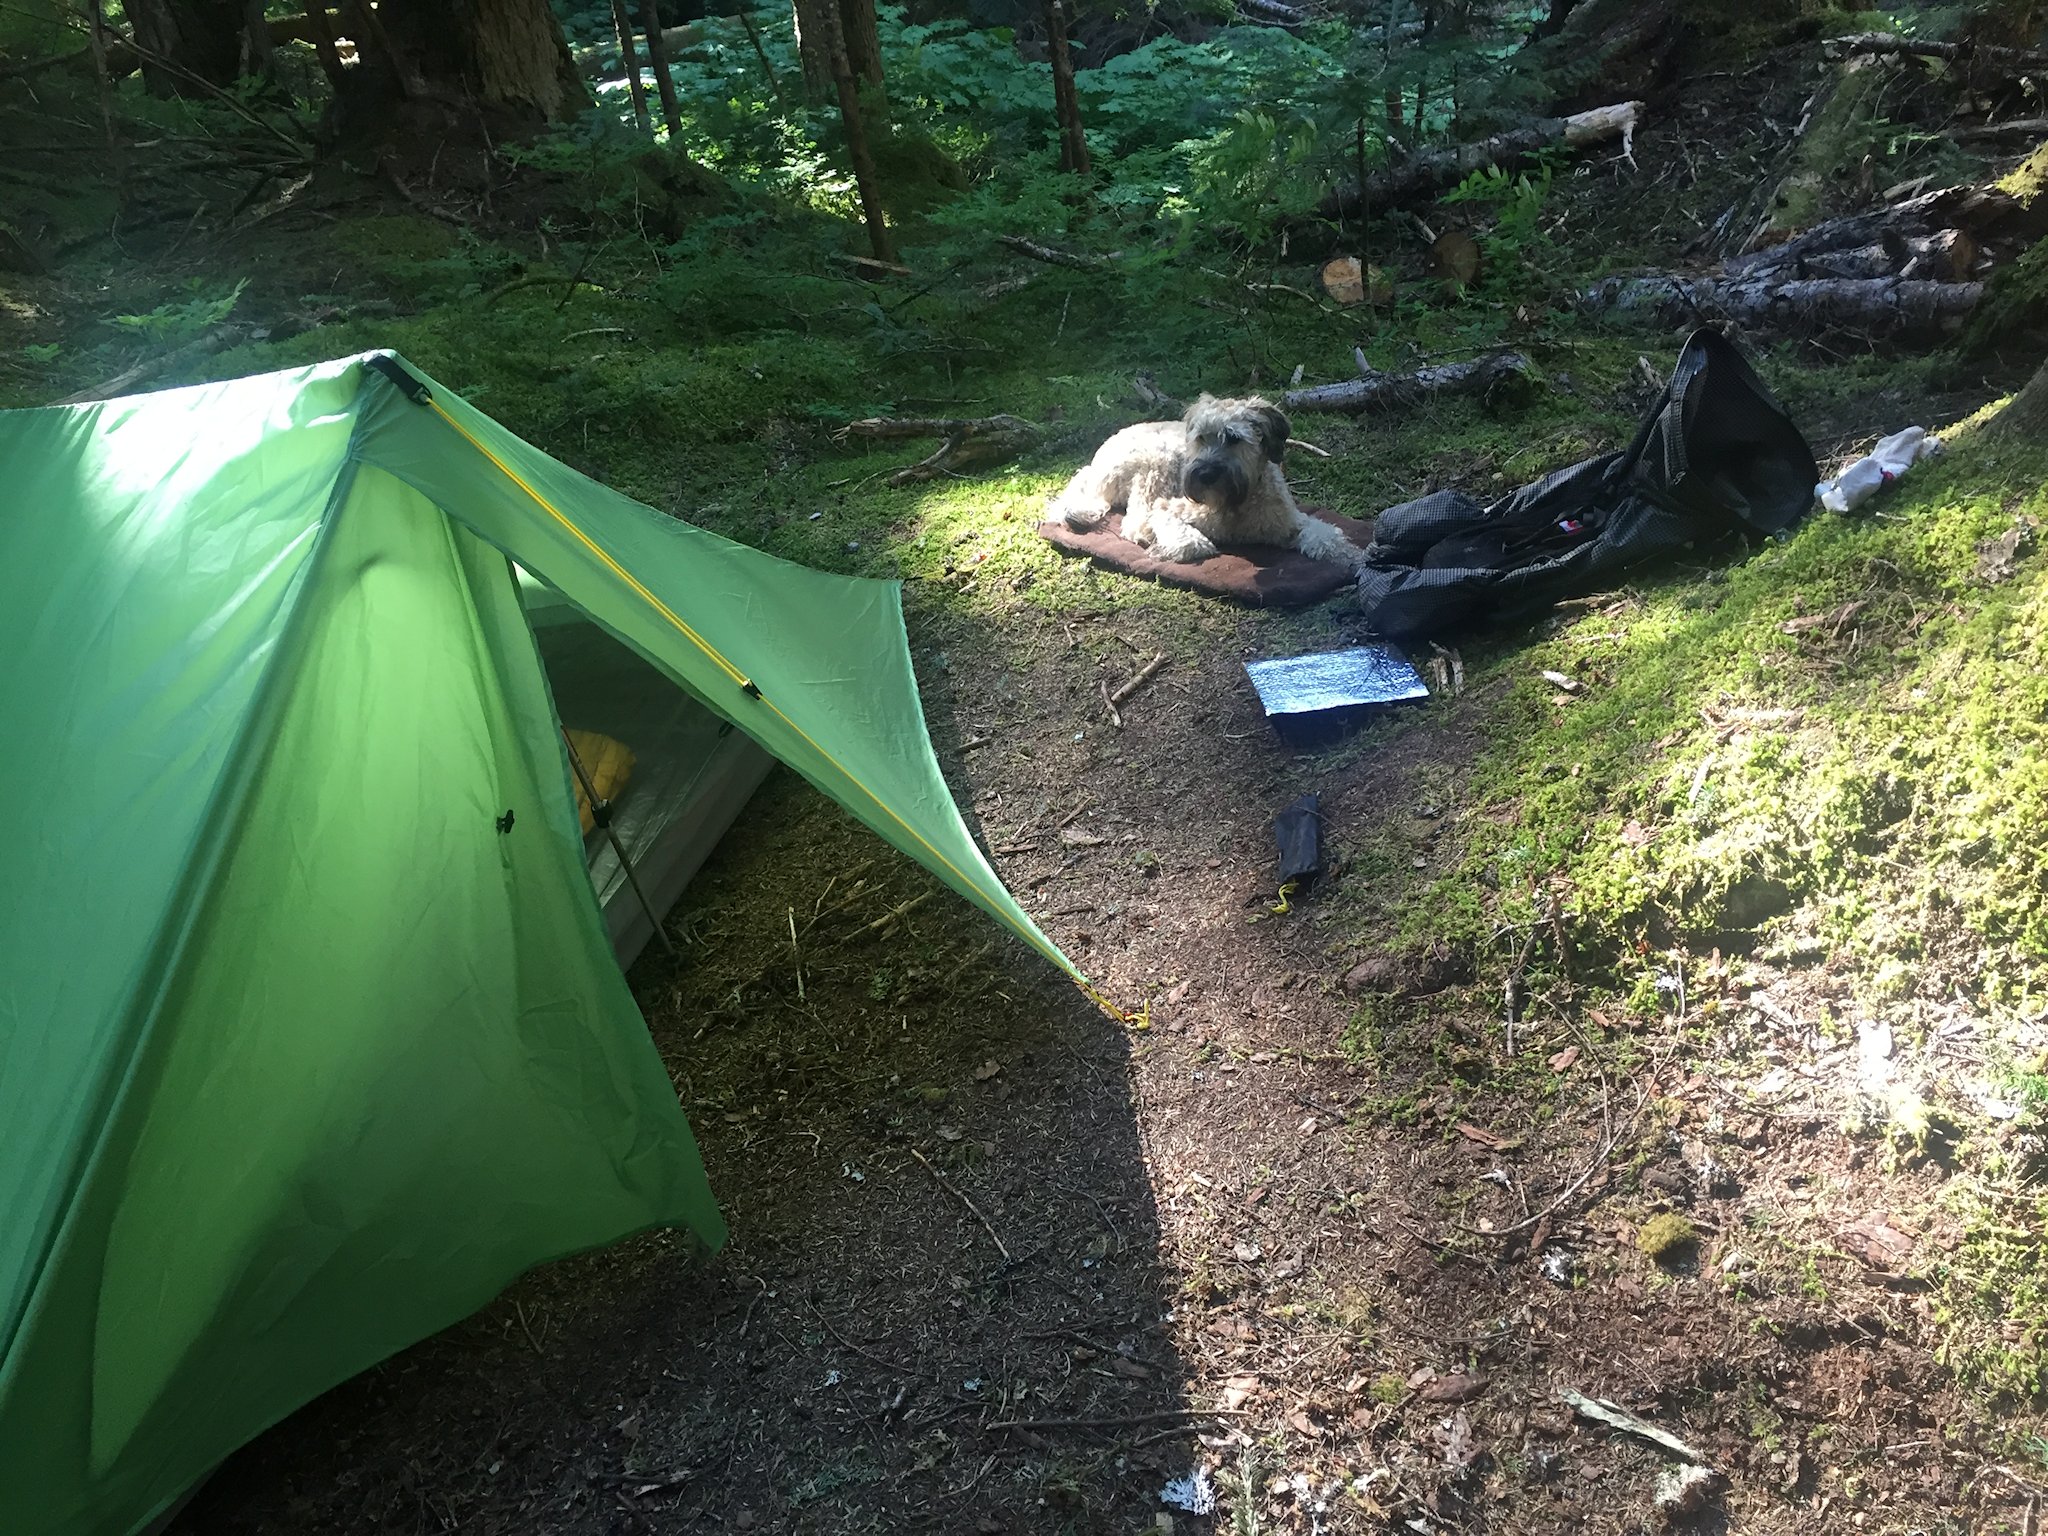
July 2017. I had the first eleven days of the month off of work, and wanted to do some backpacking. I had a new home made tent, and a new home made down quilt and I wanted to try them out. I had a 3 week long backpacking trip planned, starting in eight weeks, and was keen to get working on trail-shape!
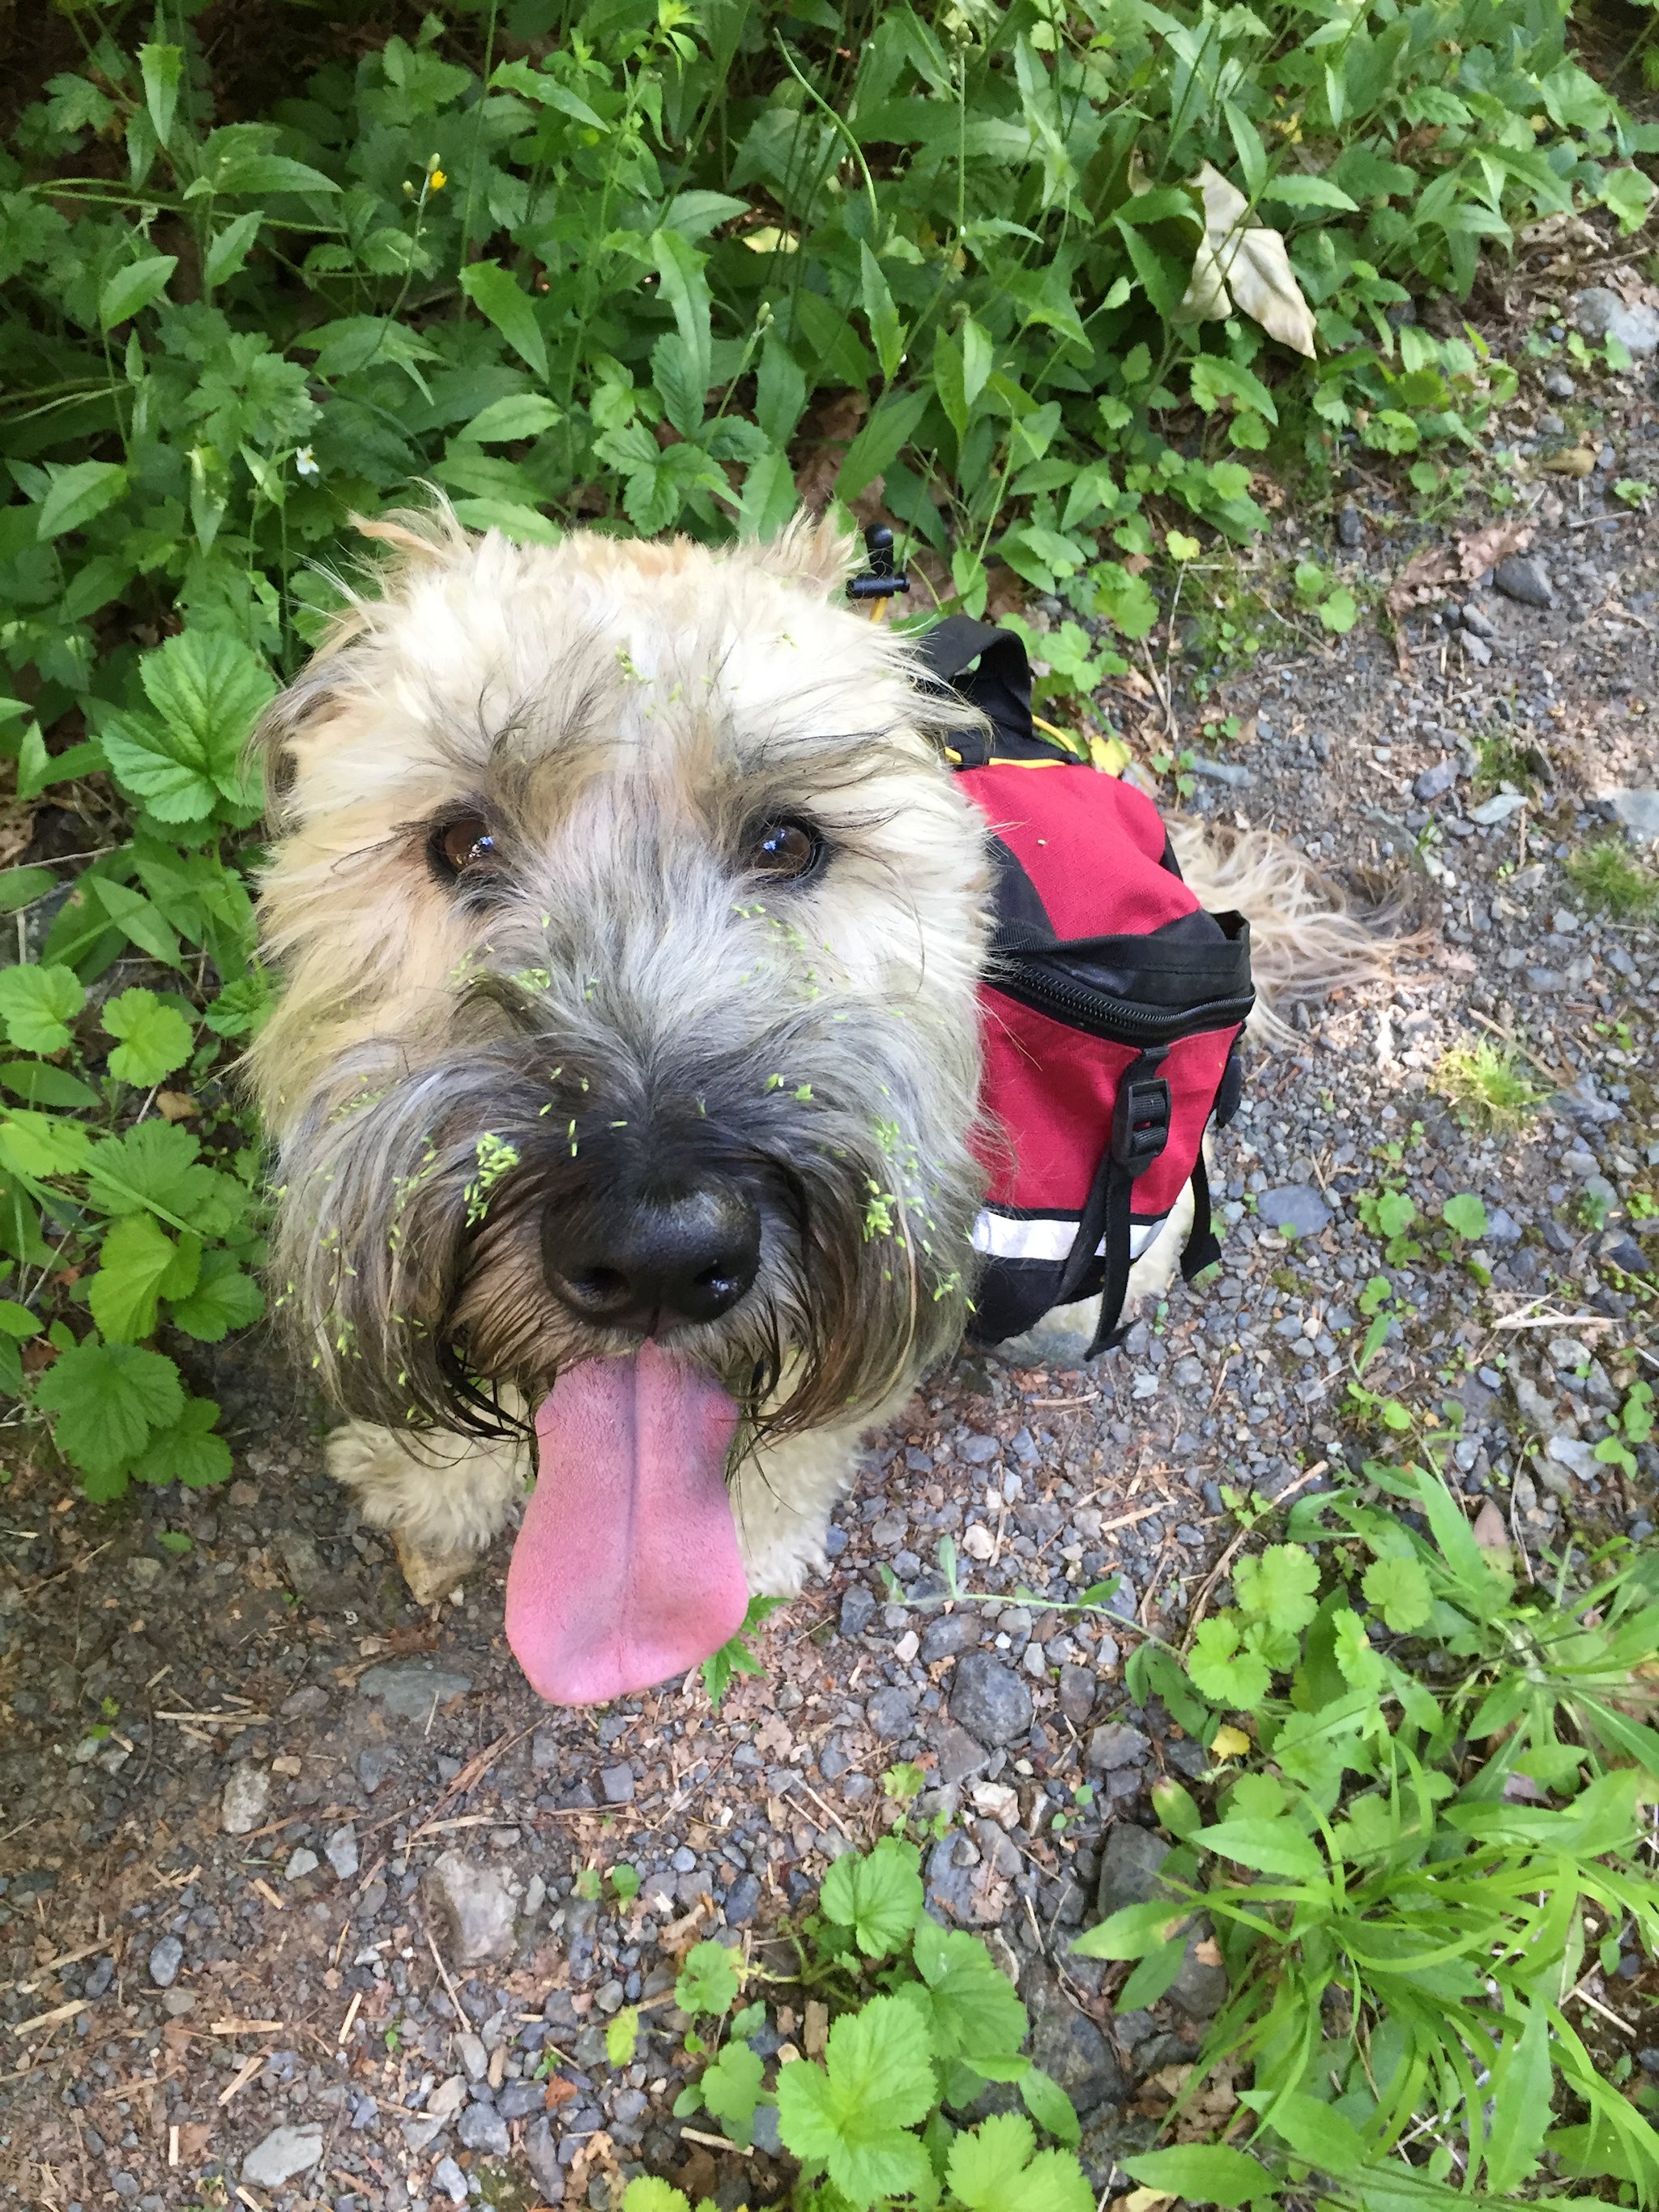
I planned two “solo” trips for my time off; the first one (this trip) included my dog, Chester, and the second was without him.
My hiking buddy, Chester
I had never heard of the Hudson Bay Brigade Trail before, but while looking online for nearby trail ideas, I began to learn about it. It seemed like a good option for a trail on which I could take Chester along.
We arrived at the trailhead on the morning of July 1st, and found one car parked there. While we unpacked the car (and took photos for Chester’s Instagram page) another car arrived, with three guys planning a very similar trip to mine. We discussed how we had no idea whether we would see zero cars at the trailhead, or twenty – the trail was that unfamiliar to all of us. We didn’t know it at the time, but we would end up sharing campsites for all three nights on the trail.
Chester posing nicely at the trailhead
Turns out the trail is well marked, and in quite good shape, considering how relatively unknown it is. The designated campsites don’t have a whole lot of infrastructure (tent pads in particular) but there were some amenities available…
The first day, we ran into a few other parties who were also on the trail. Chester and I mostly hiked alone. The day comprised a total of about 12km of hiking, and an elevation gain of about 1200m, and loss of about 600m.
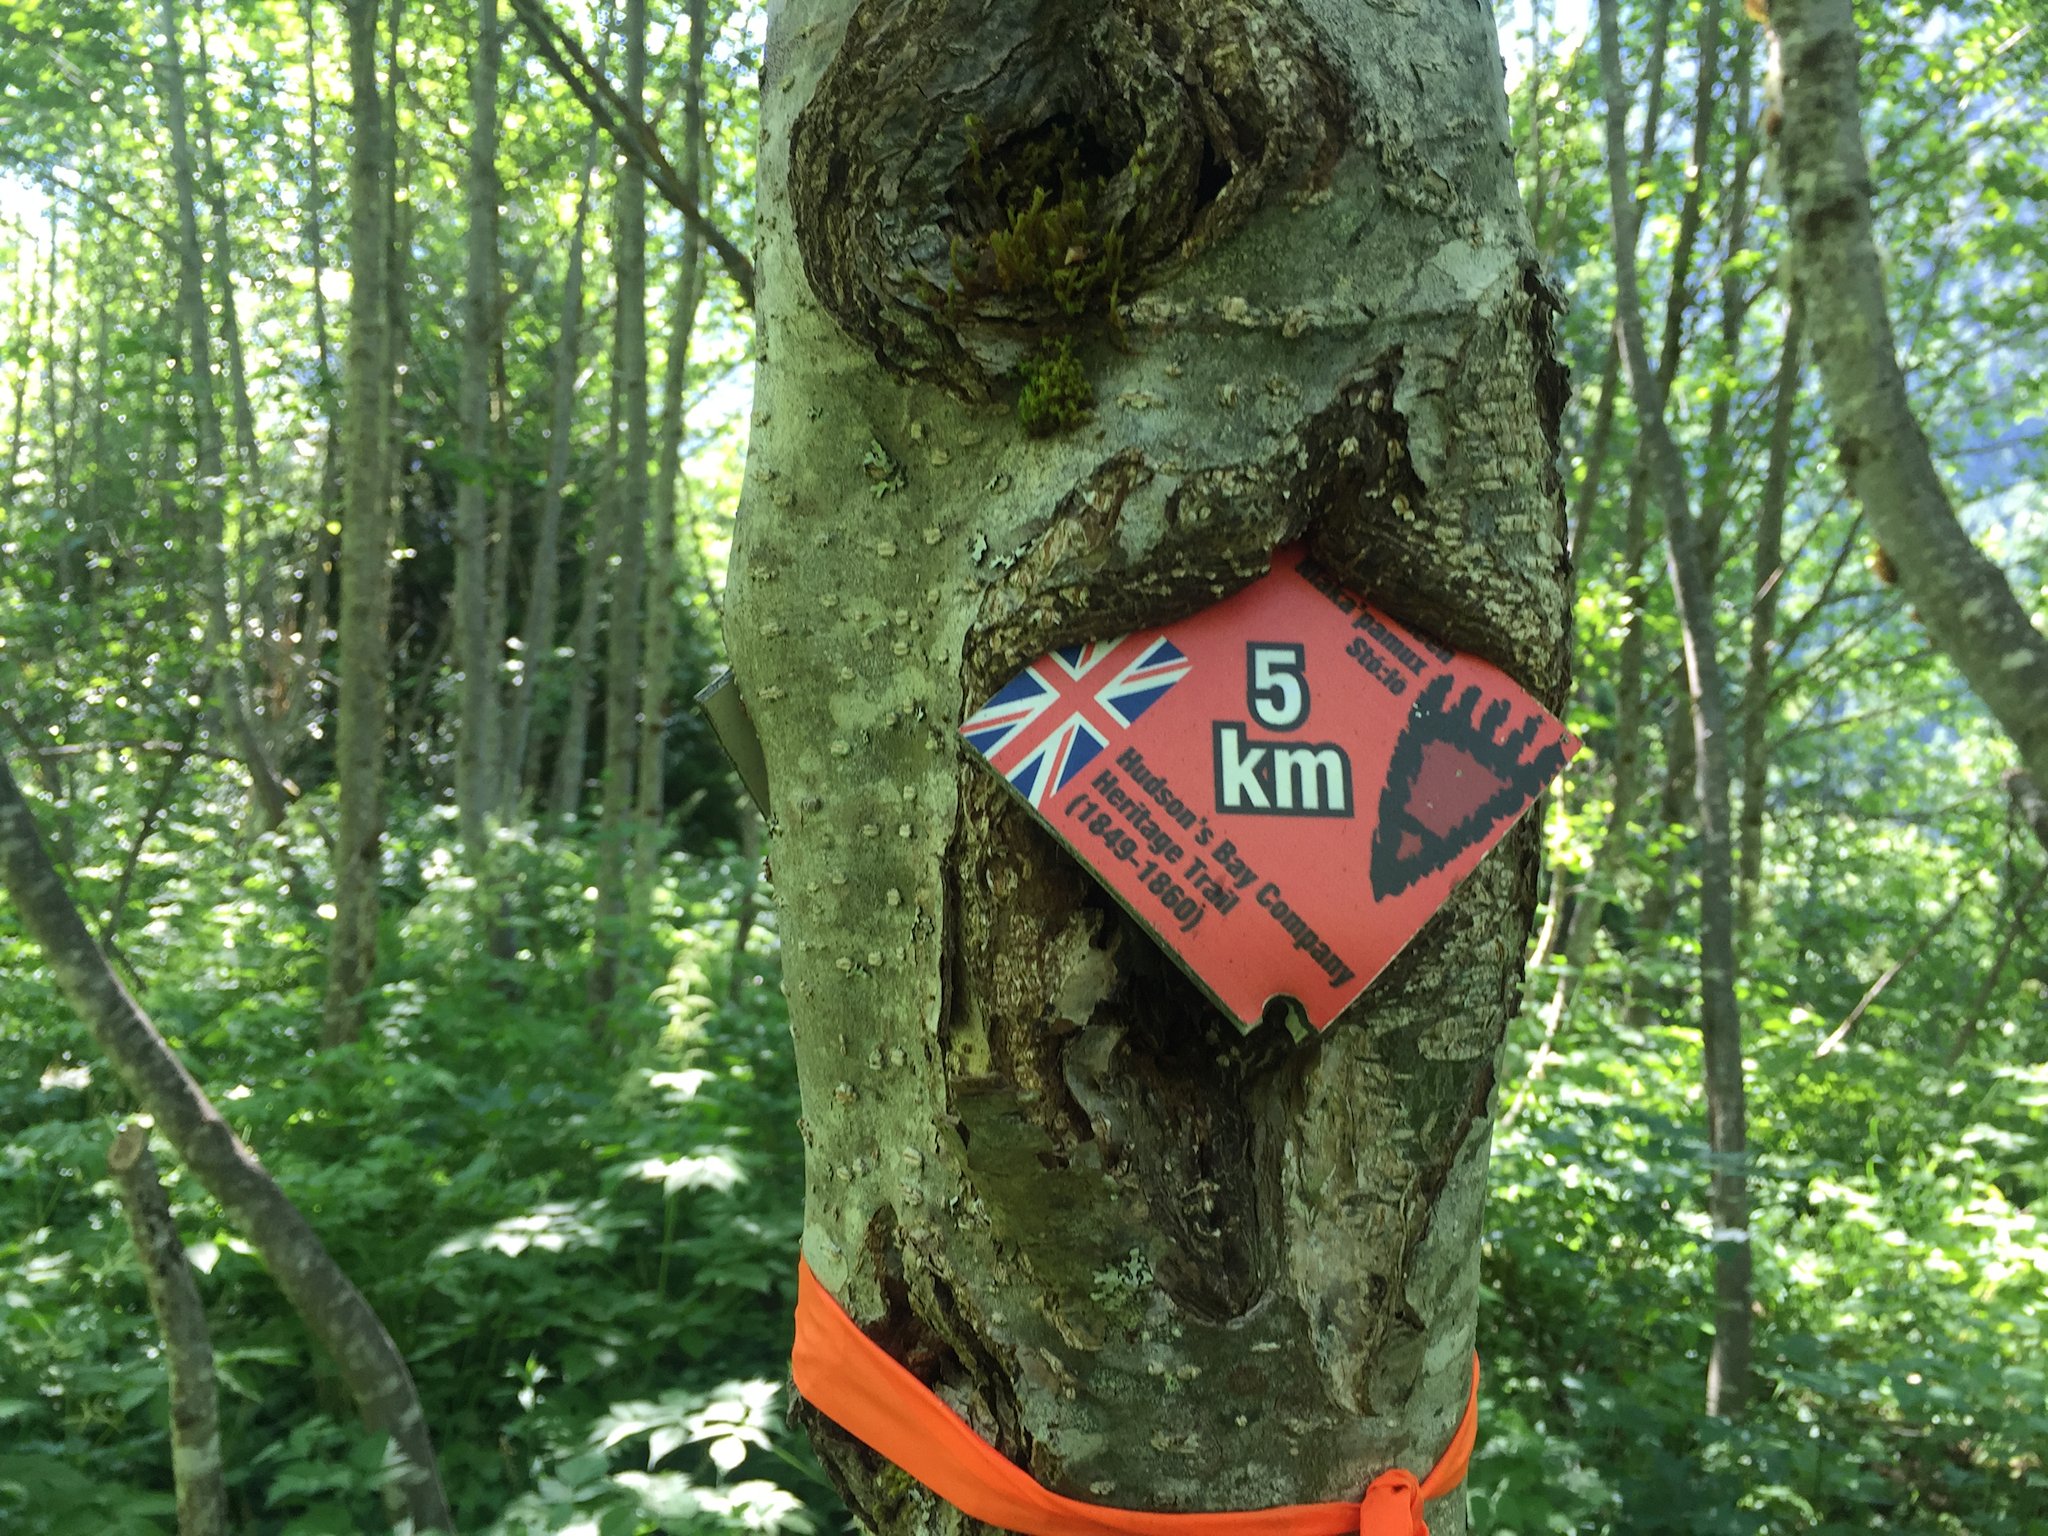
One of the trail markers along the route
Chester near Manson’s Ridge
When we arrived at the first night’s camp, there was one couple there, already setting up. Another few parties trickled in as well, and a nice evening was spent at the picnic table and benches, visiting with the neighbours.
Tuckered dog in camp, after the first day’s hiking
On day two, some of the folks from camp were heading west, while we continued east, aiming for Sowaqua Camp that night – a much less ambitious day than day one had been! This time we covered about 7.5km, gained 415m, and lost 595m, over a short trip of under four hours travelling.
On the morning of day three, I considered hiking up toward Deer Camp, which would take us up into alpine territory and what looked like a lovely area. We could leave most of our gear behind, hike up, then return and hike back to Colville Camp, where we had spend the first night.
However, that plan was not to be. While packing up the tent, we heard some noise from the logging road that passed close by camp. A guy had driven by on an ATV a while earlier, at great speed. When he returned the other way, one of the guys camping along the road’s edge flagged him down, and asked if could go more slowly when passing campers along the road. ATV-guy invited him to engage in a sex act with himself, and roared off. I know, shocking, right?
Well, young buck camper dude wasn’t about to take that lying down. He reached down to grab a rock, and hurl it at ATV-guy — and violently dislocated his shoulder doing so. The air became thick and blue with the sound of his own cursing…
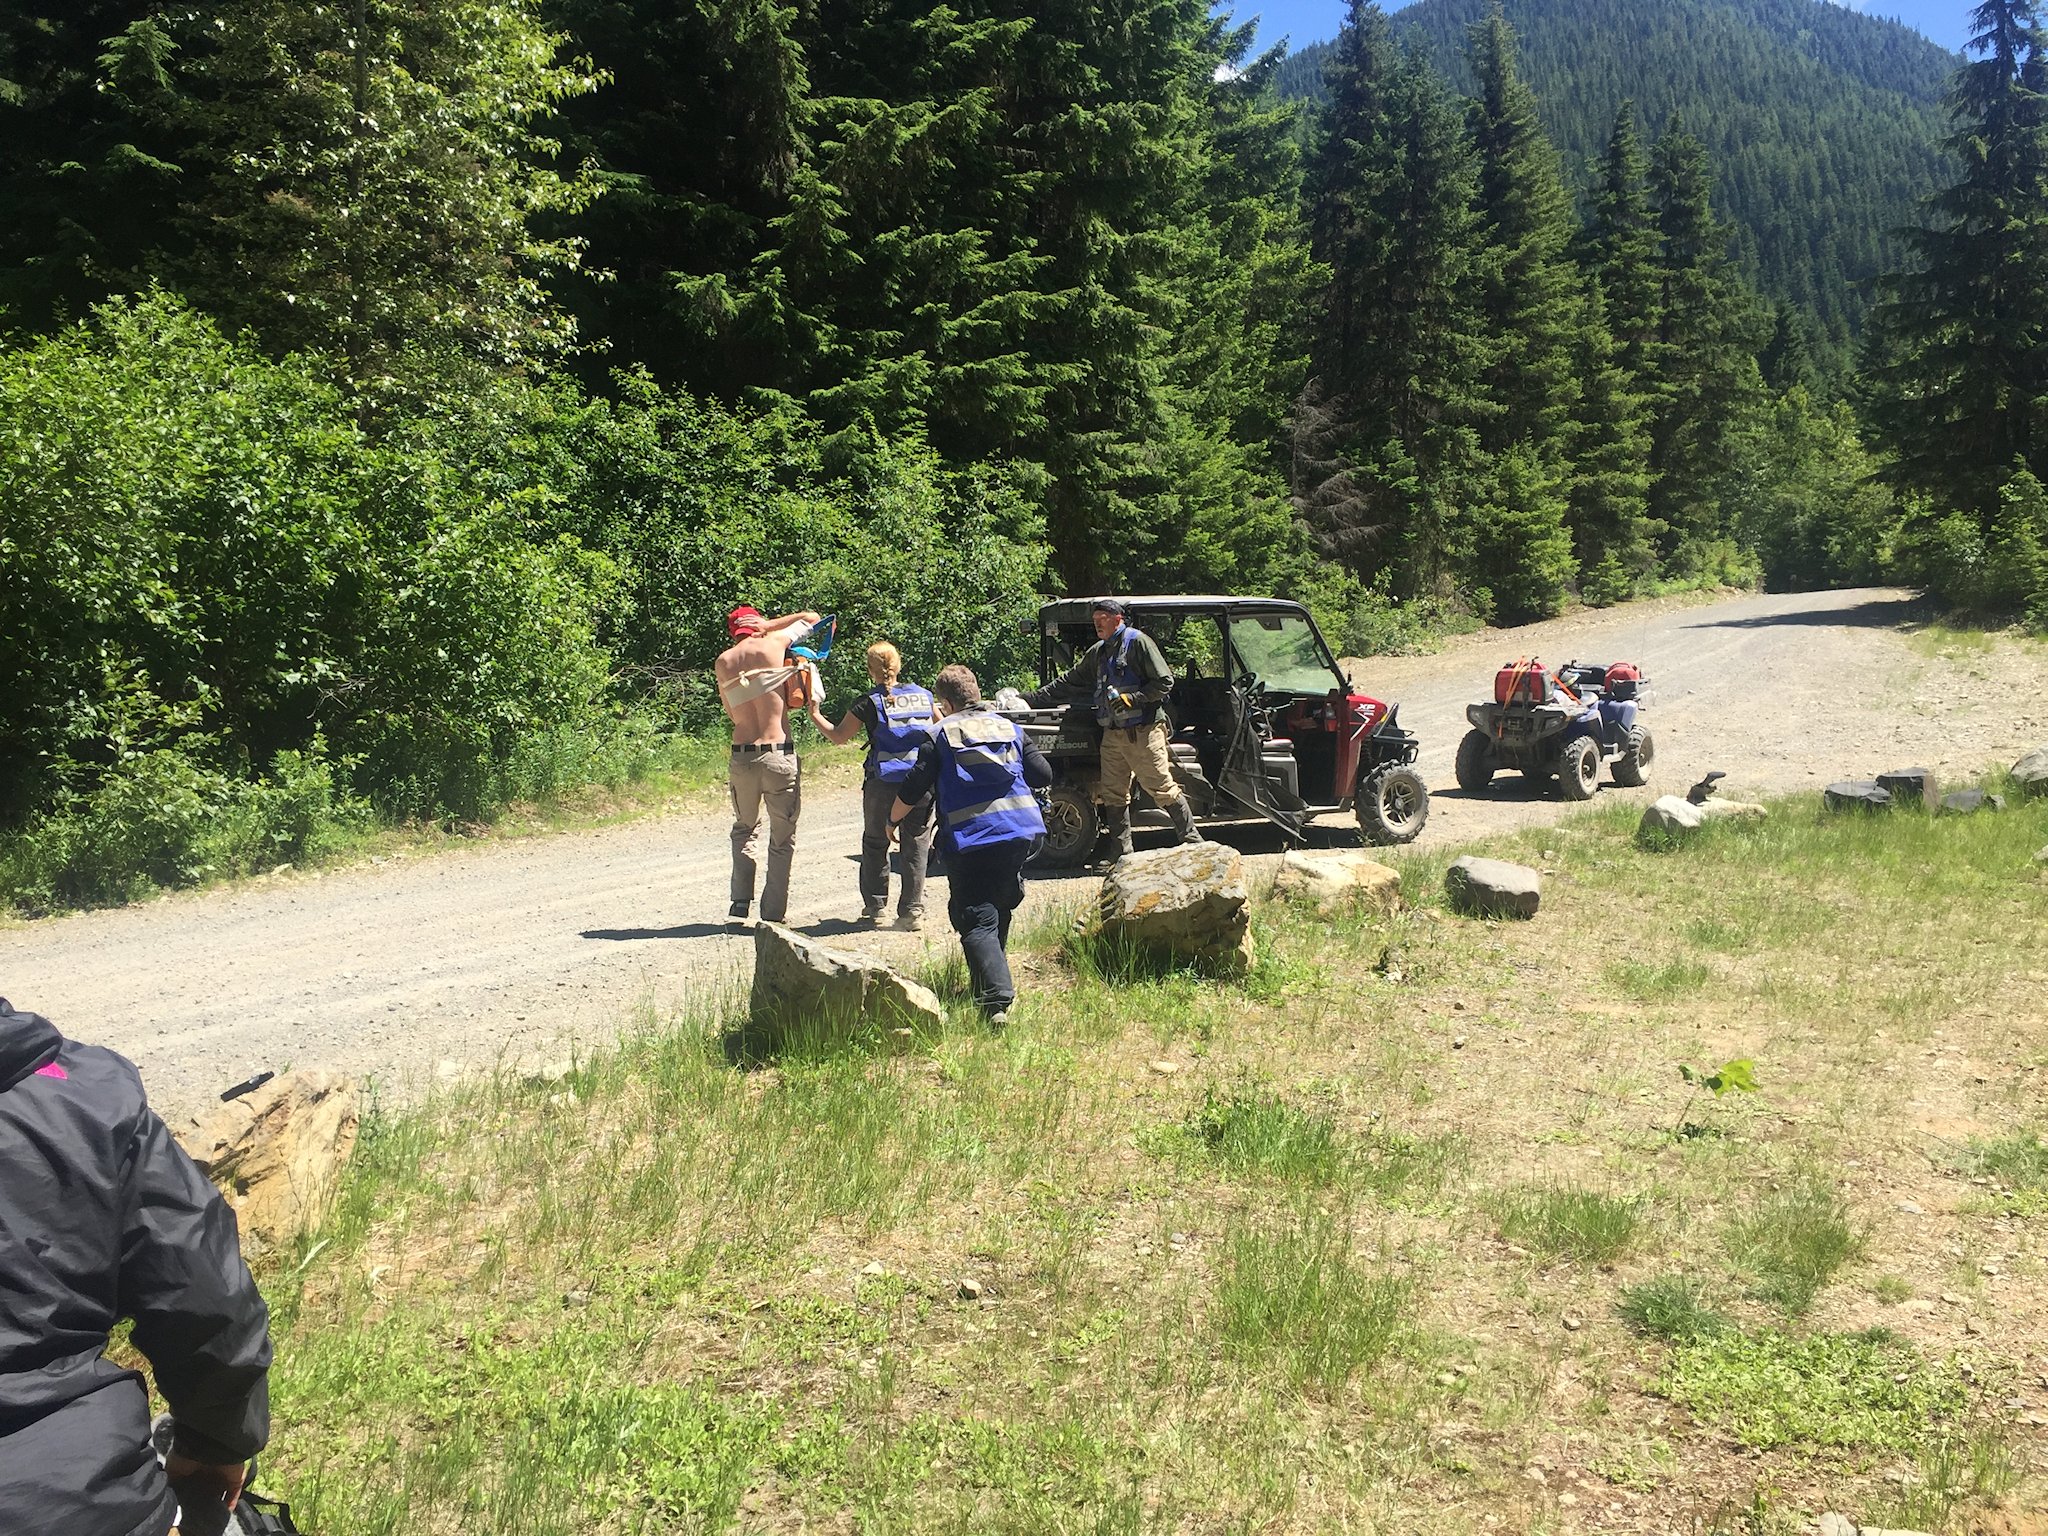
So there we were, young dude and his significant other (and their dog), the three other guys I’d first met at the trailhead, and Chester and I. We helped get the victim comfortable, lying under the shade of a tarp (it was turning into a very hot day.)
Shoulder guy under a tarp, with girlfriend and dog nearby.
We were many hours of hiking away from a road or a phone. There was no cell coverage whatsoever. But what did I have in my pack? An InReach satellite communication device. For the first time ever, I activated the SOS function.
Long story only very slightly shorter, a couple of ATVs with Hope SAR volunteers and a paramedic showed up a while later. They stabilized the afflicted dude, and prepared to transport him out.
Injured hiker heading for the ATV to ride down to a waiting ambulance
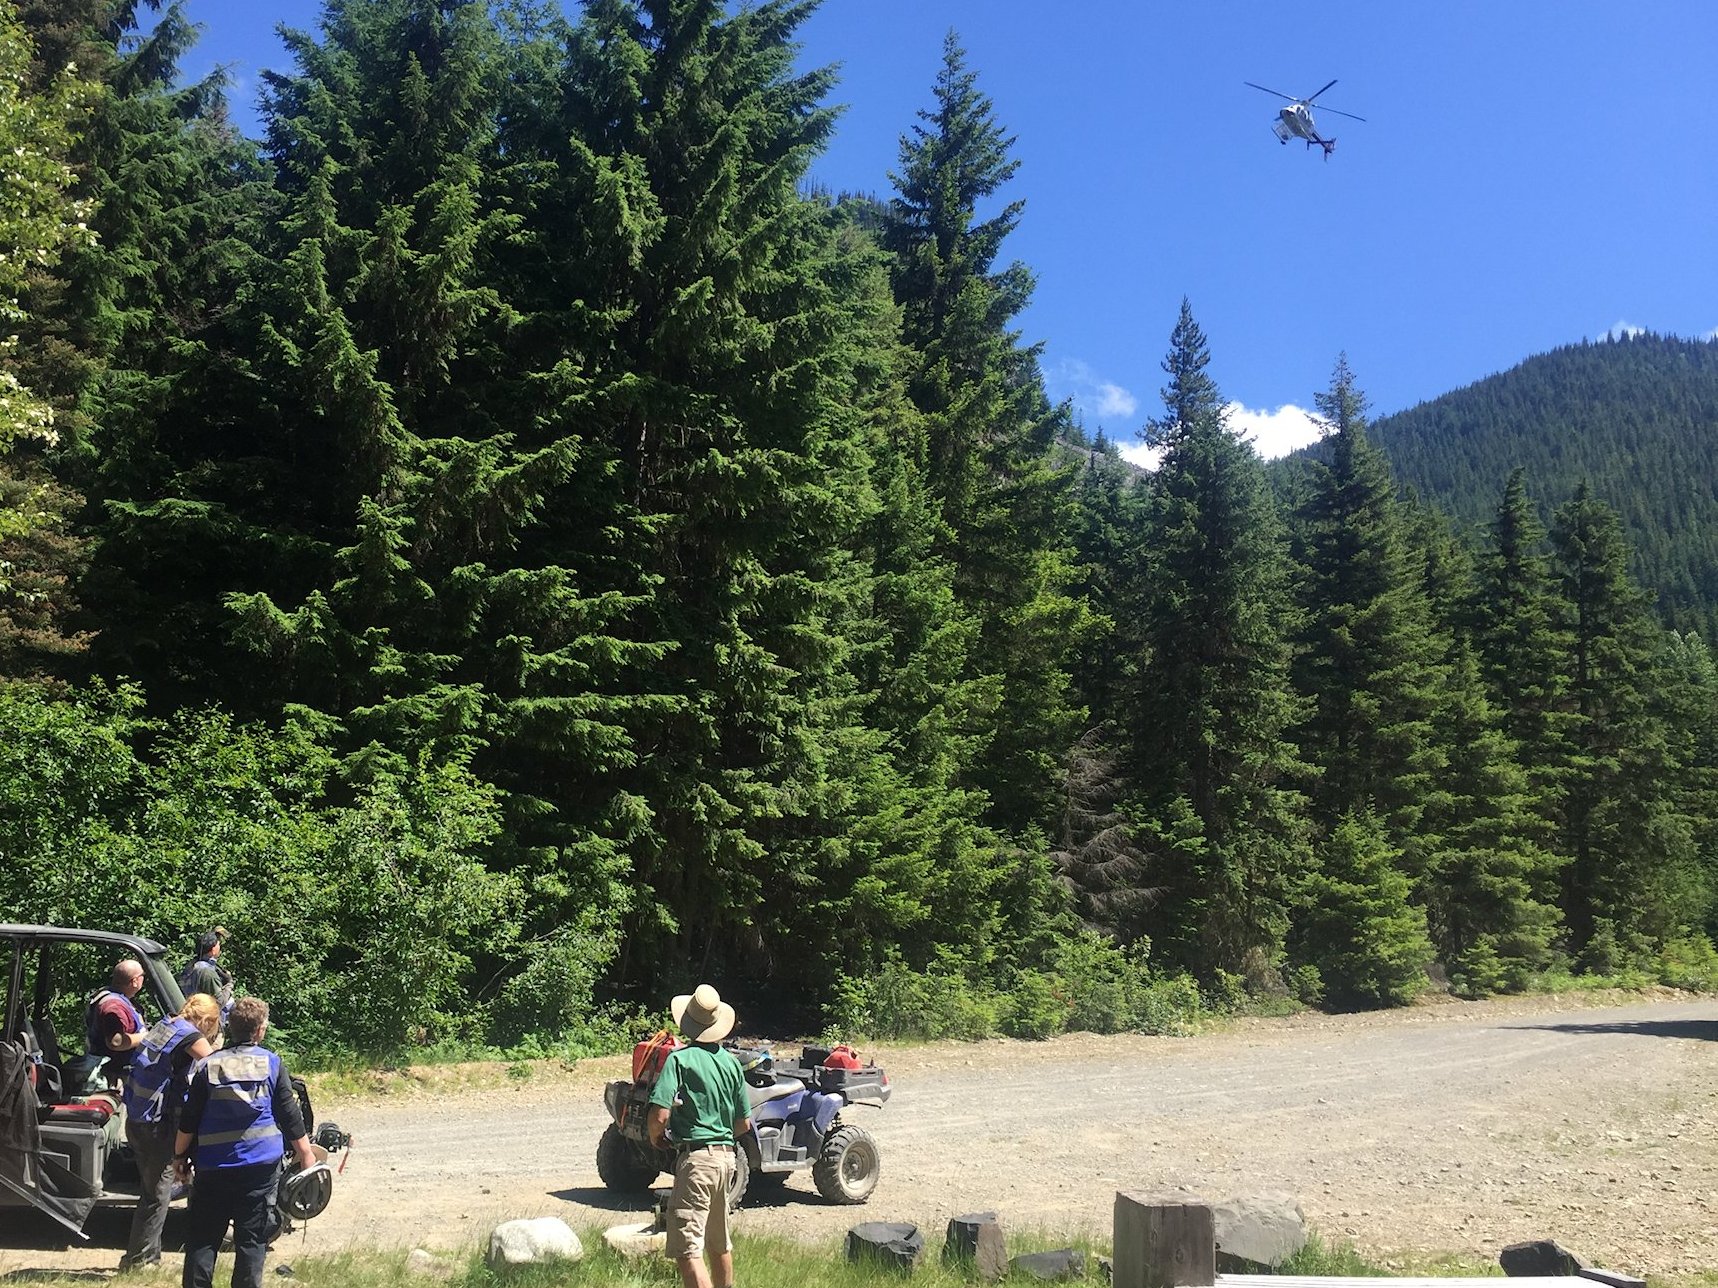
Via my InReach, my wife let me know that the BC Ambulance people were going to send in a helicopter. ATV guys said it wasn’t necessary, and tried to call it off over the radio – but the message never got through. Just as dude was getting in the ATV, the helicopter arrived.
Helicopter arrival
Good thing, too, because they couldn’t possibly have evacuated his girlfriend, the dog, and the TEN TONS of gear they had in their packs, via the ATVs. With young dude winging away in the chopper, the logistics worked out, and a few minutes later, all was quiet again in camp.
Chester tied up away from the helicopter landing area
The party of four, and Chester and I finished packing up, and set off on the return journey toward the cars…
So, I learned that the “Big Three” are the quickest and easiest way to slim down the load that you lug around on your back while backpacking. I went to a much lighter, slimmer pack. And I made my own lightweight tent. Time to think about my sleep system.
Why down?
I decided to start with a down quilt, because that is the lightest option available. Living near and backpacking in the mountains of British Columbia, however, means that moisture is frequently part of the equation. What that means, is that this will not be my only quilt.
Down is great when it stays dry, and can keep its loft. A few days (or even hours) in a rainy environment can quickly negate any benefits of using down. You end up with a bag of what feels like damp oatmeal, with zero warmth whatsoever.
Nonetheless! A down quilt is light, warm, and awesome, if you can keep it dry. And backpacking in the summer in BC often provides long stretches of dry, sunny weather!
Why a quilt?
A quilt is a very efficient way to stay warm. When using a sleeping bag, the insulation that is under your body doesn’t actually do anything to keep you warm. Once it is flattened by body weight, there is little insulating value at all, so it is pretty much wasted weight. What is more important is the insulating value of the pad or mat that is used. (More about that later…)
As long as a sufficiently warm pad is used, you really just need enough material to cover your body, and tuck close enough to prevent drafts.
The hood on mummy bags also include a lot of wasted material. Other than in extreme conditions (winter mountaineering, say) it is more efficient to cover yourself to the neck with a quilt, and then put a warm layer on your head. A tuque is usually sufficient, but in very cold conditions, I take along a home made down hood, which I made for use with my quilt. It weighs about 30 grams, and keeps head and neck toasty warm!
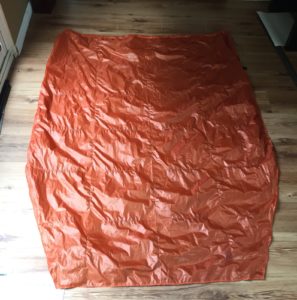
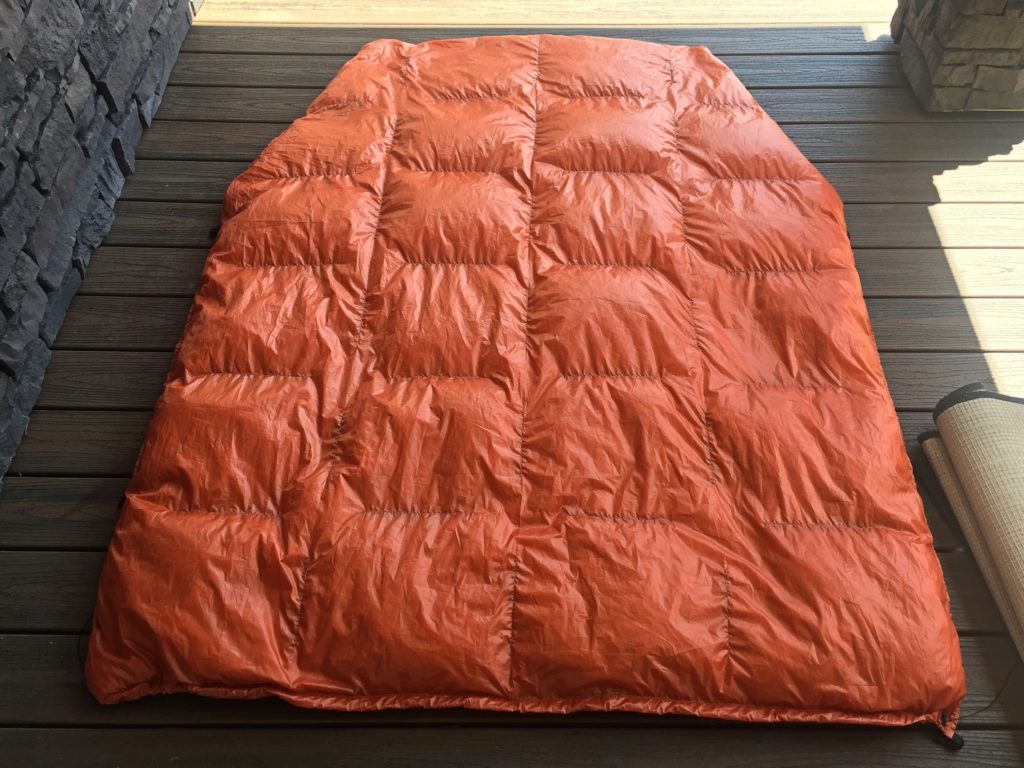
Outer fabric for the Sweaty Brow down quilt. The fabric is .9 ounce per square yard, 15 denier poly taffeta in Burnt Orange.
Where did the design come from?
I did a bit of looking around on the interweb, and cobbled together ideas from a couple of different places. The most important is from the same guy I based my tent on – he goes by “dubber” on YouTube. Here is a link to his down quilt construction video. Another useful source was Joe, at Backcountry Banter, who had less of the “nitty gritty” than dubber, but good design thoughts.
I ended up making a Karo Step quilt, which has partially open baffling, permitting the down to be shifted when required, and greatly simplifying the stuffing process. All the down gets placed in at once, and spread throughout, rather than having to measure out the down, and place it into different chambers.
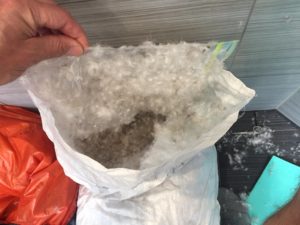
Transfer of down from the bag it came in, into the completed quilt shell. Transfer took place in my shower. It was a messy process…
I’m not going to go into full details about the making of the quilt, or the materials, but here are some highlights:
The fill is one pound (454g) 850 FP grey, water resistant treated down.
Total weight is 540 grams.
Length: 66″ (168 cm) Width: 49″ (124 cm) tapering to 34″ ( 86 cm) at the feet.
I made a velcro-in down footbox panel, which can be taken along if it will be cold.
The tapered leg section has snaps to wrap the legs.
The top has an elastic cinch and a snap buckle to click behind the neck and tighten.
The sides have two additional buckles to join onto adjustable straps on the sleeping pad, allowing the user to hold the sides down and cinch them in close, preventing drafts.
The completed down quilt, laying on the front deck. You can get an idea of the simplicity of the baffle layout. Version two will likely have smaller chambers and more baffle material to prevent down movement…
My thoughts:
I have been comfortable under the quilt down to temperatures just below freezing, while wearing long underwear, top and bottom, and my down hood. I’m not sure how much lower I can take it than that, because I am kind of a cold sleeper – I get cold easily, and it can really disturb my sleep if any part of me is chilly.
The only issue I have had with the quilt is that the openings in the baffles seem to be a little bit too big. That is, the down moves just a little bit too easily between the chambers. I move around a fair bit in the night, and the down shifts downward, following gravity and puffing out the edges of the quilt that are laying on either side of me. It takes a while, but once or twice during the night, I find that I have to smack the quilt around a little, to spread the down evenly over the top of my body.
Unfortunately, it is very difficult to change this, once the quilt is complete. It would require removing all the down, and re-opening the seams, then sewing in short sections of baffle material into the gaps. I will think about whether I want to take such an extreme step.
In the meantime, the quilt is super lightweight, and very comfortable – with just a little care-taking during the night – at temperatures around and above freezing. It is great for summer trips, and shoulder season trips at lower elevations.
While doing research on lightweight camping equipment, everything kept coming back to “The Big Three”. Pack, shelter, and “sleep system” (used to be sleeping bag!). The first thing I replaced was my pack. Next on the list was my shelter.
In the past, I have had (and I still have!) a whole bunch of tents, ranging from a “Unishelter” bivy, to a 10-person Coleman job – the Tent Mahal.
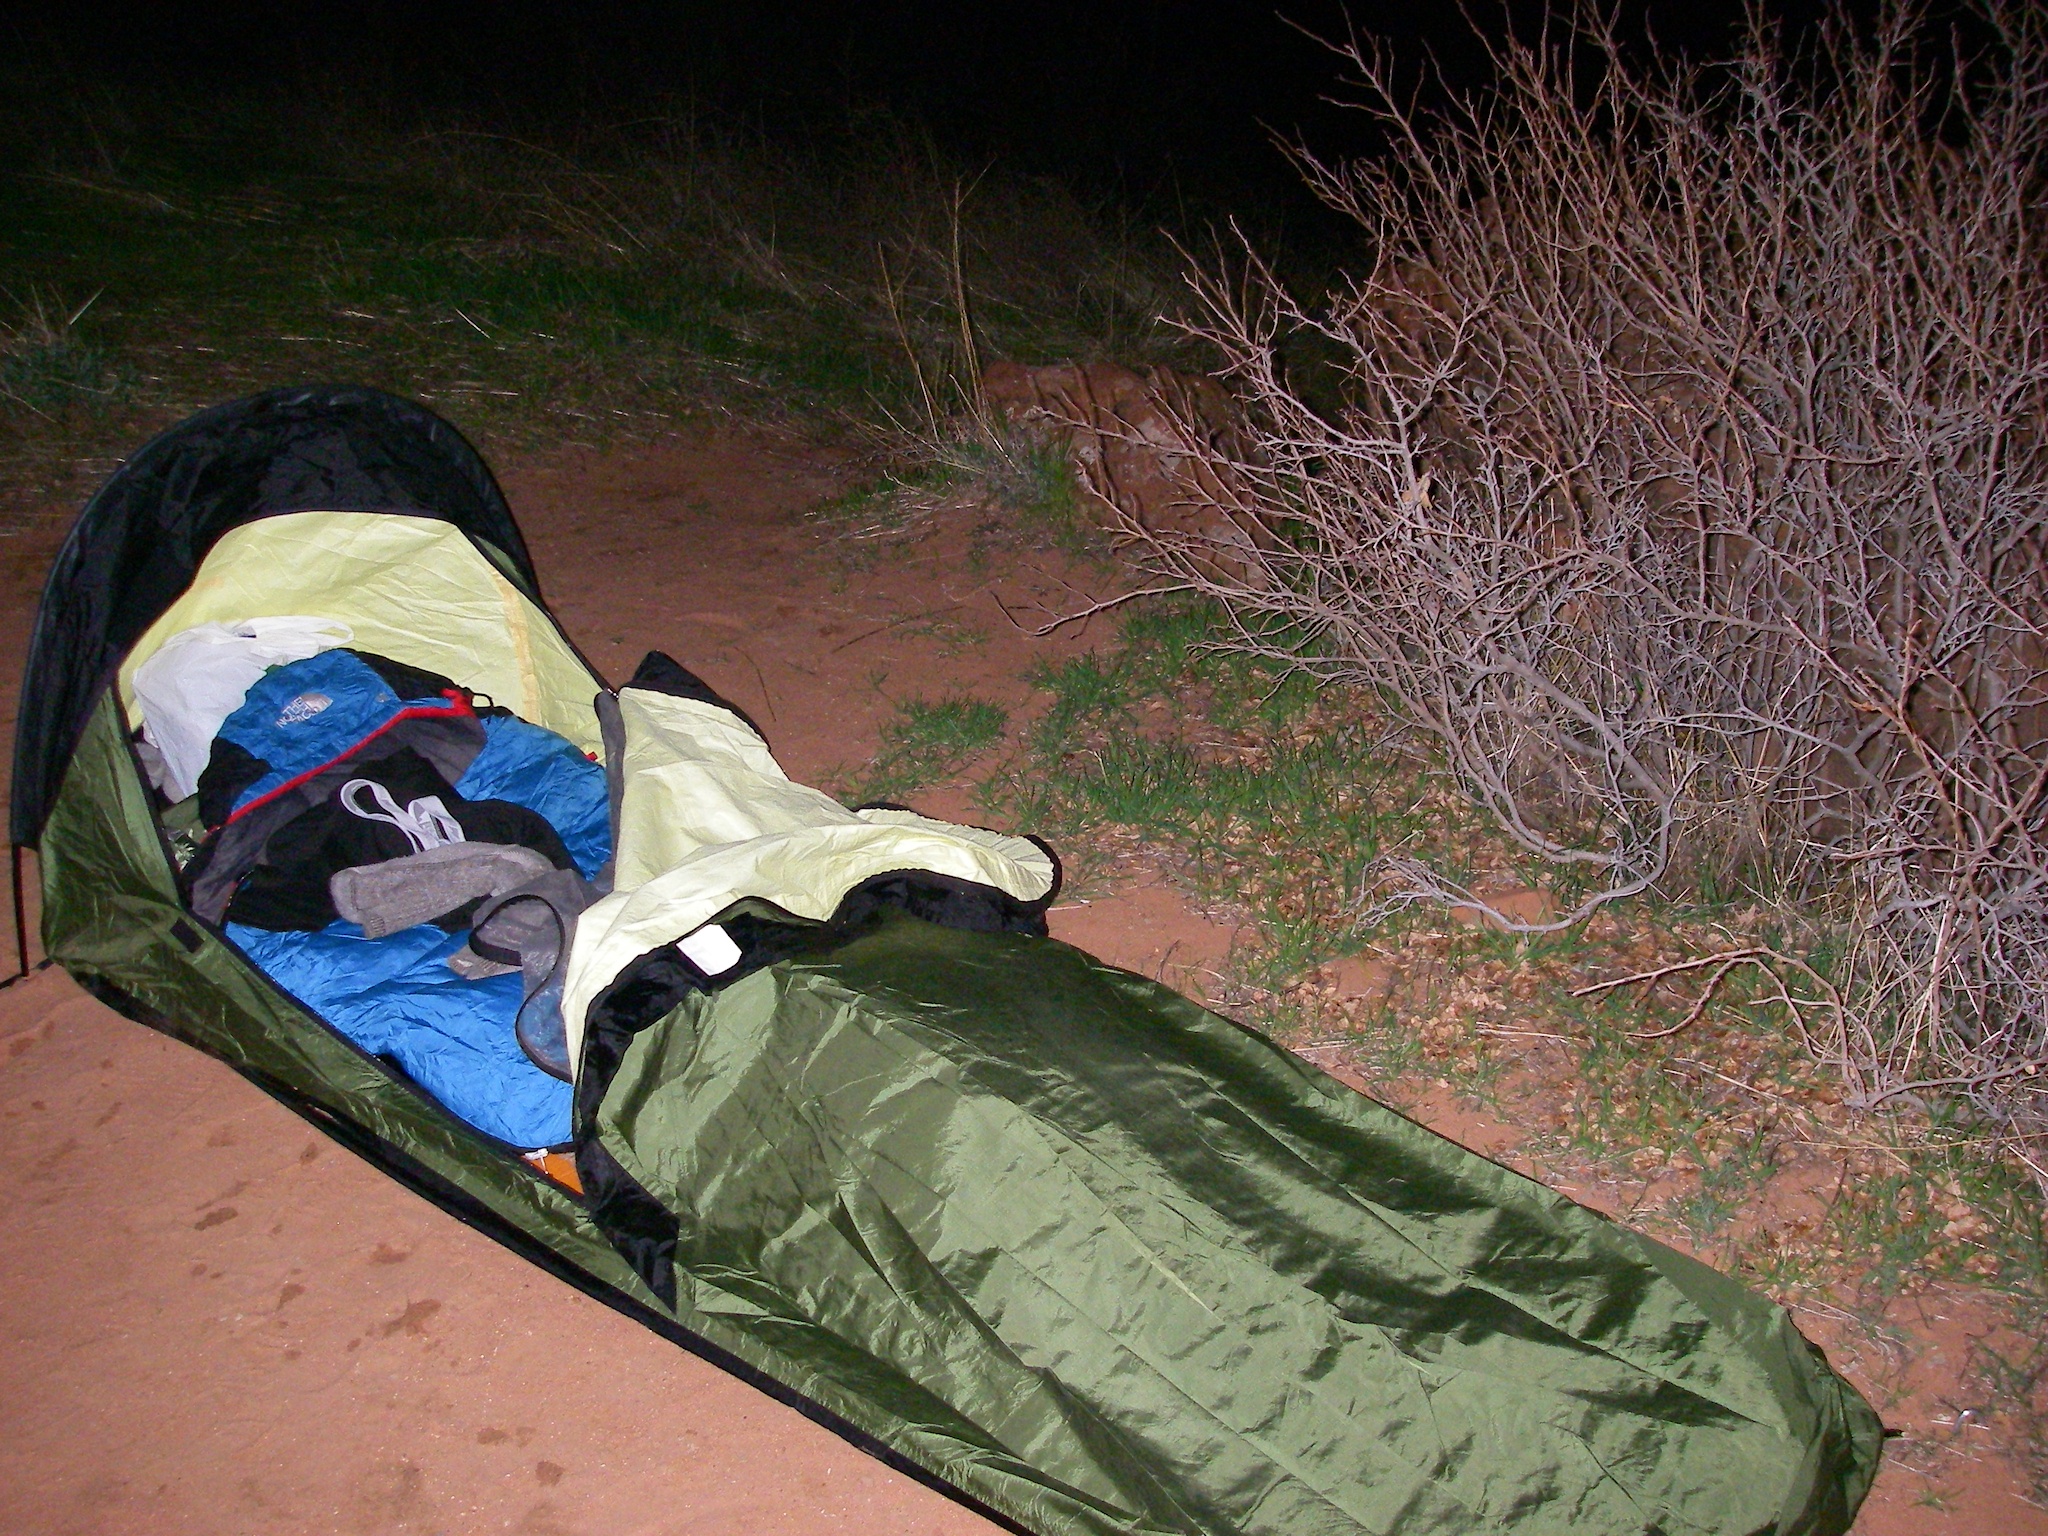
The Integral Designs Unishelter in Paria Canyon, Utah.
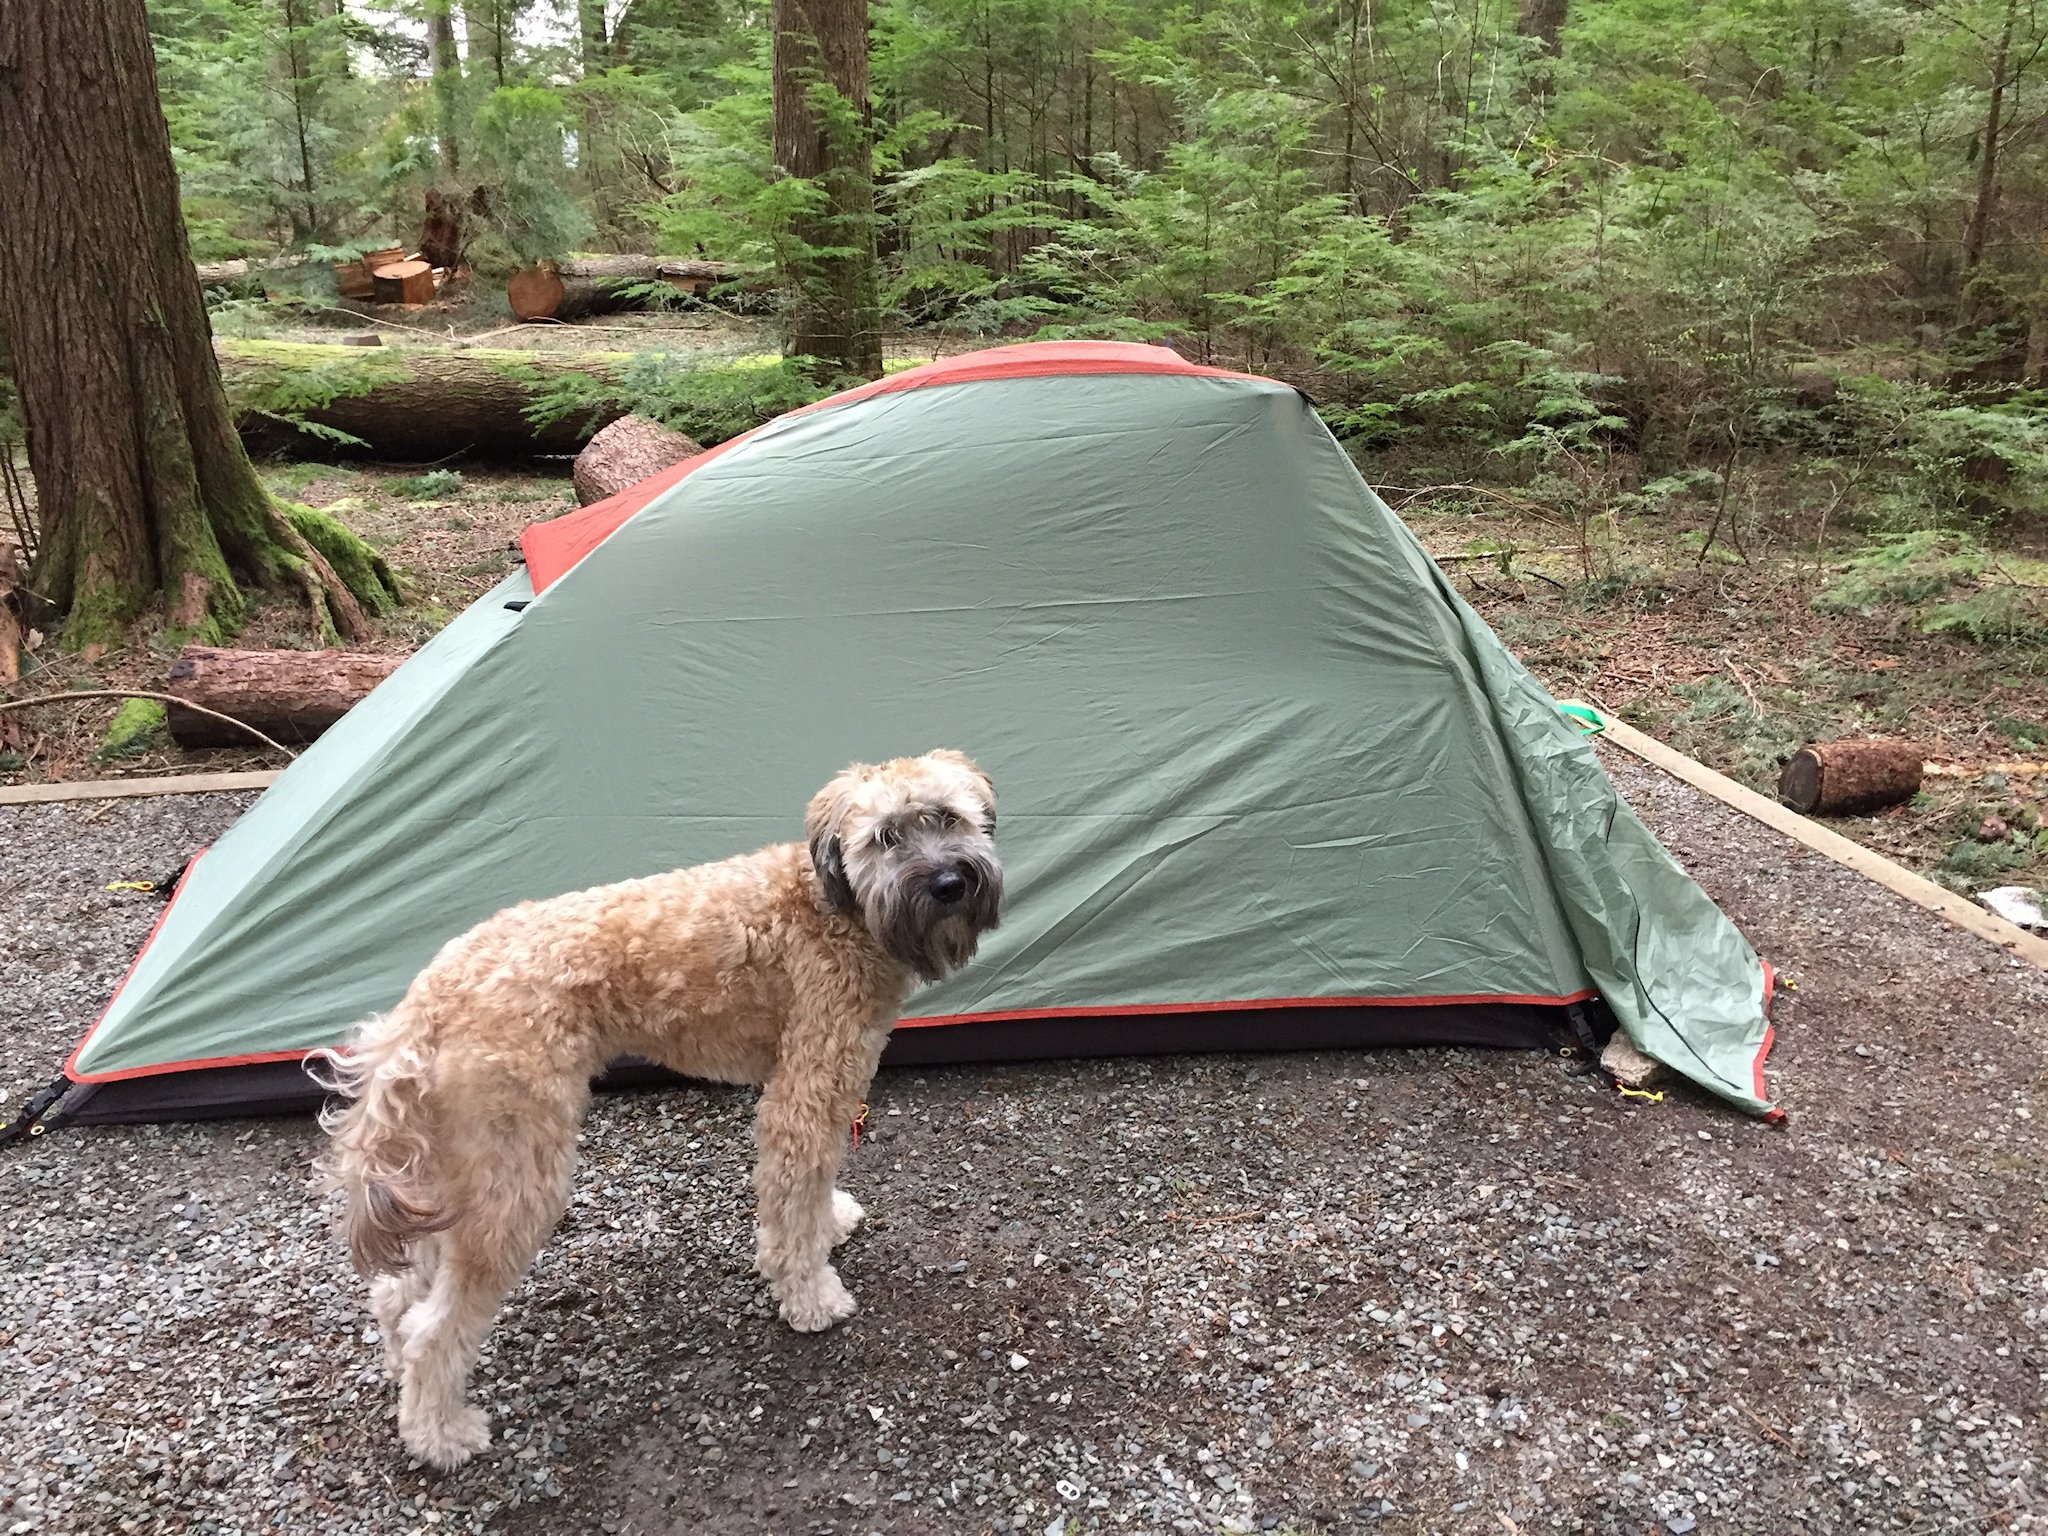
For solo trips, or with my dog, I have recently used a single person, cheap tent from Alps Mountaineering – the Zephyr 1. I got it on SteepAndCheap.com a few years back, for about $80 USD. It weighs in at only 1625g, or a little over 3.5 pounds (body, fly, and poles). It’s pretty small, but both the dog and I fit inside. There is very little vestibule space.
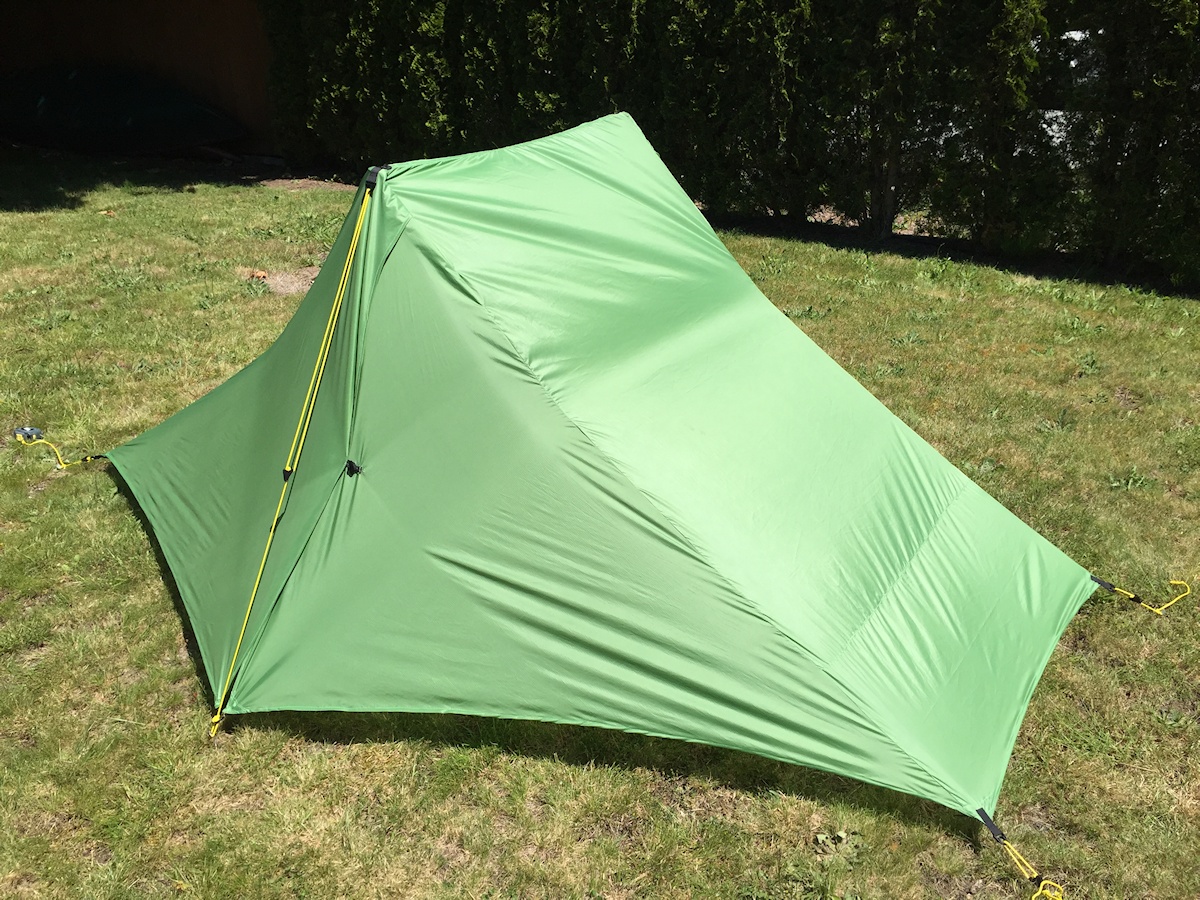
Zephyr 1 (and Chester) in Squamish
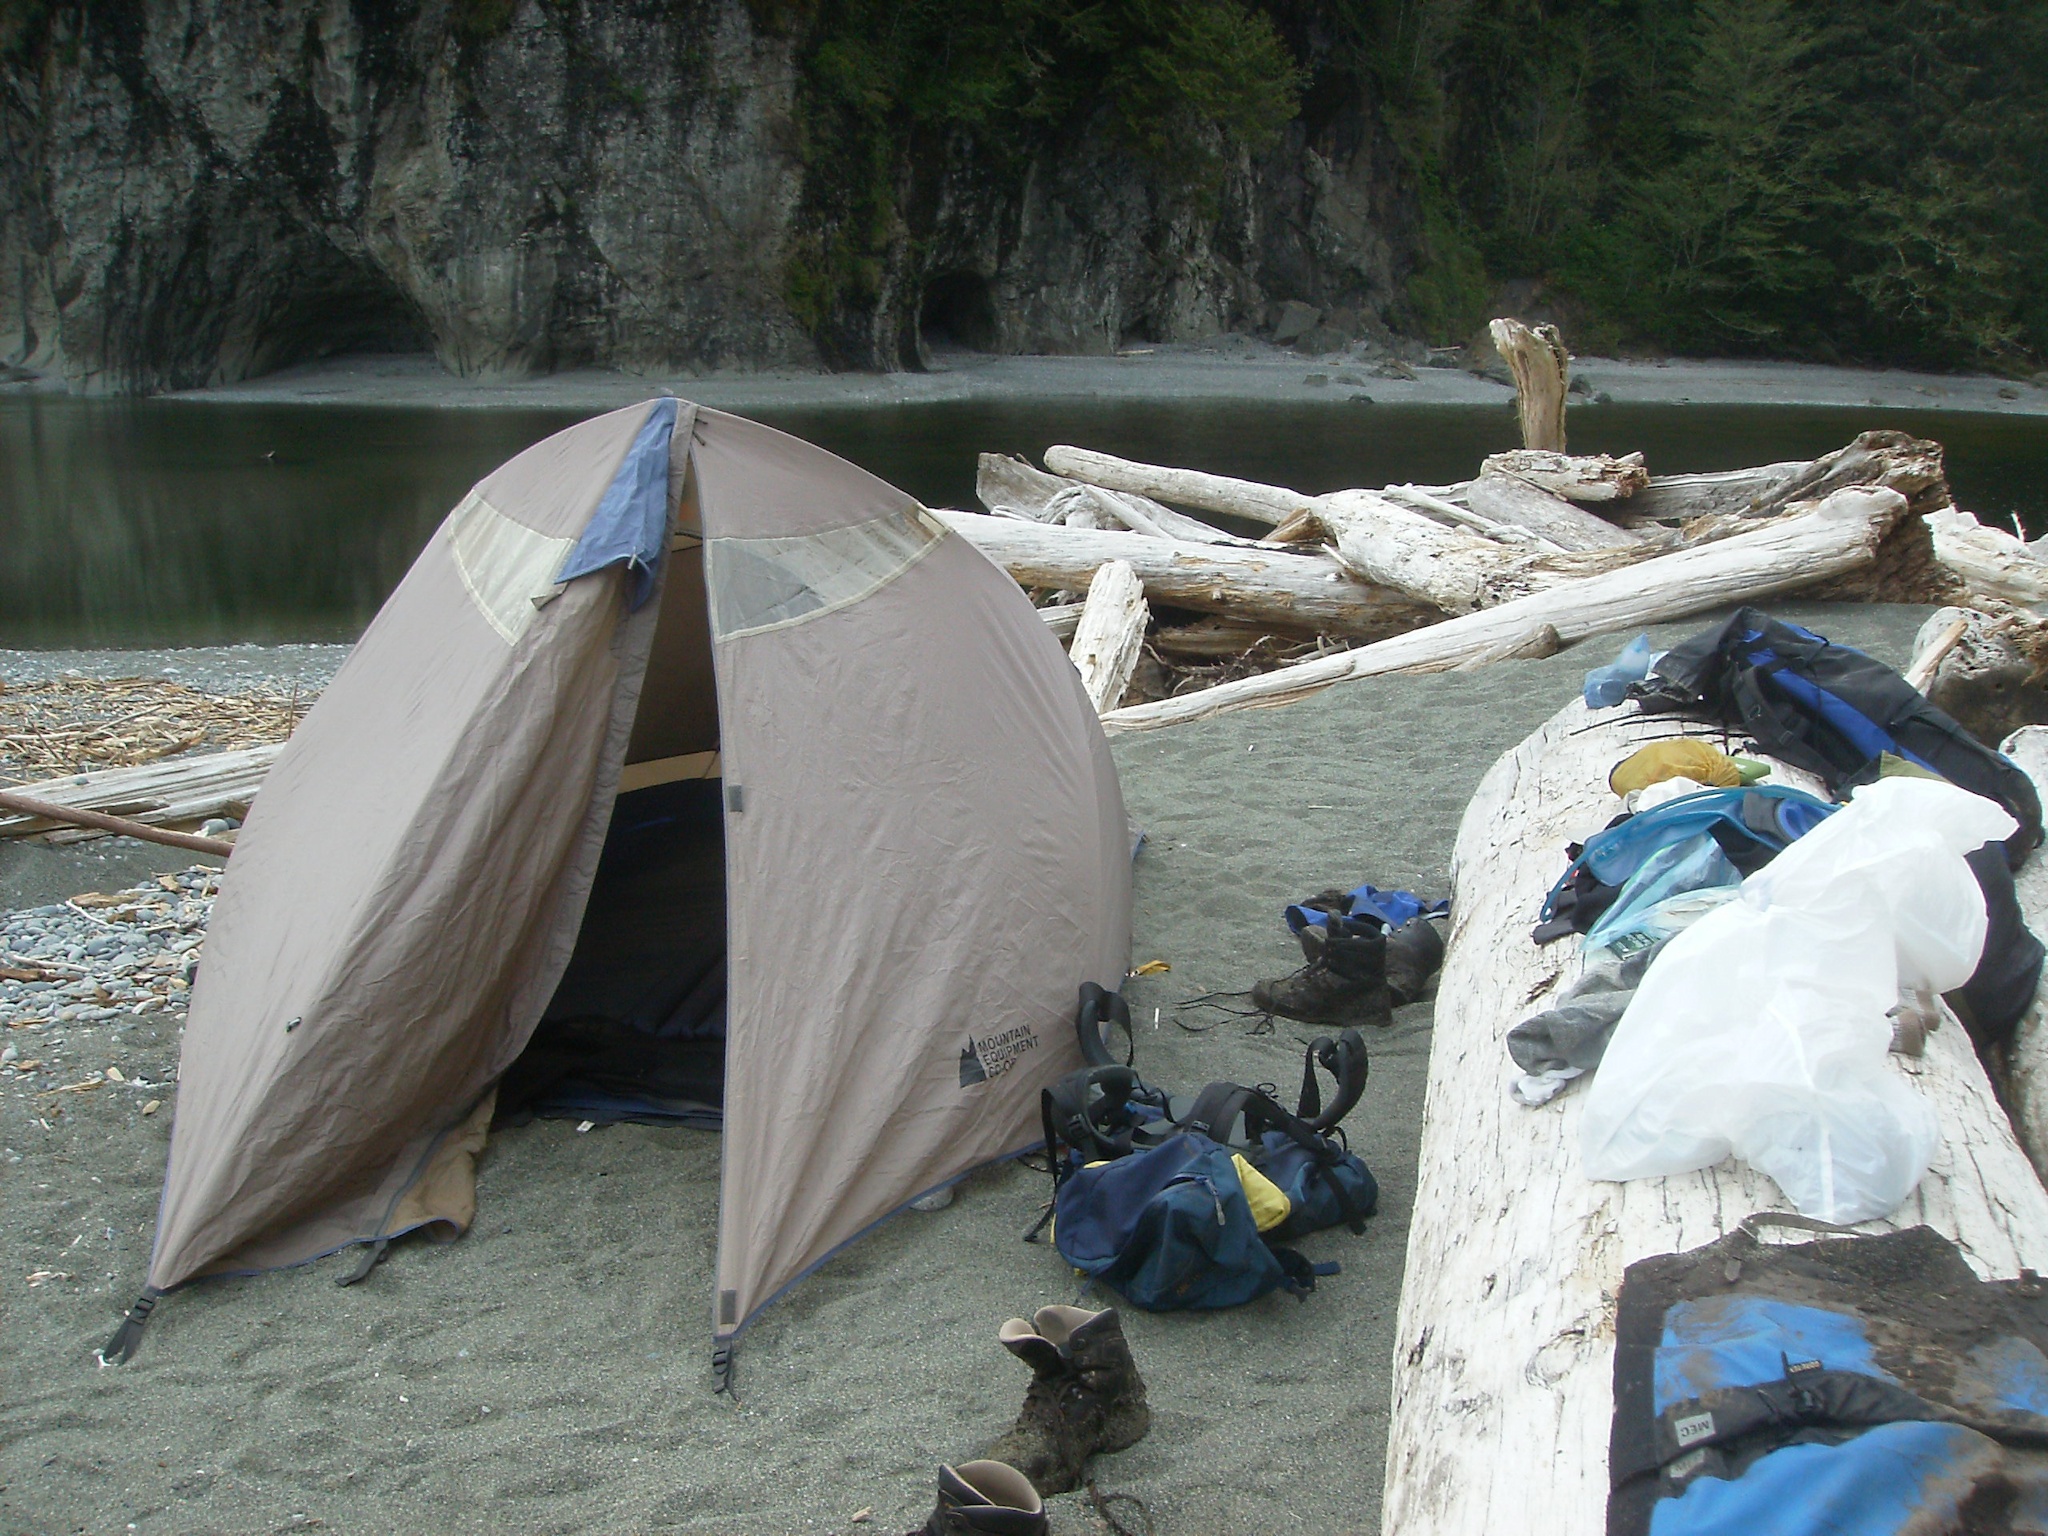
If I feel I need a little more space, I have my MEC Tarn 3 tent. Like the Zephyr, it is a double wall mountaineering style tent, and weighs in at about 3100g – close to seven pounds. Great for spreading out, and for hiding all my gear in when I wander off for the day… And a really nice sized tent for two, despite the weight.
Tarn 3 tent on the West Coast Trail
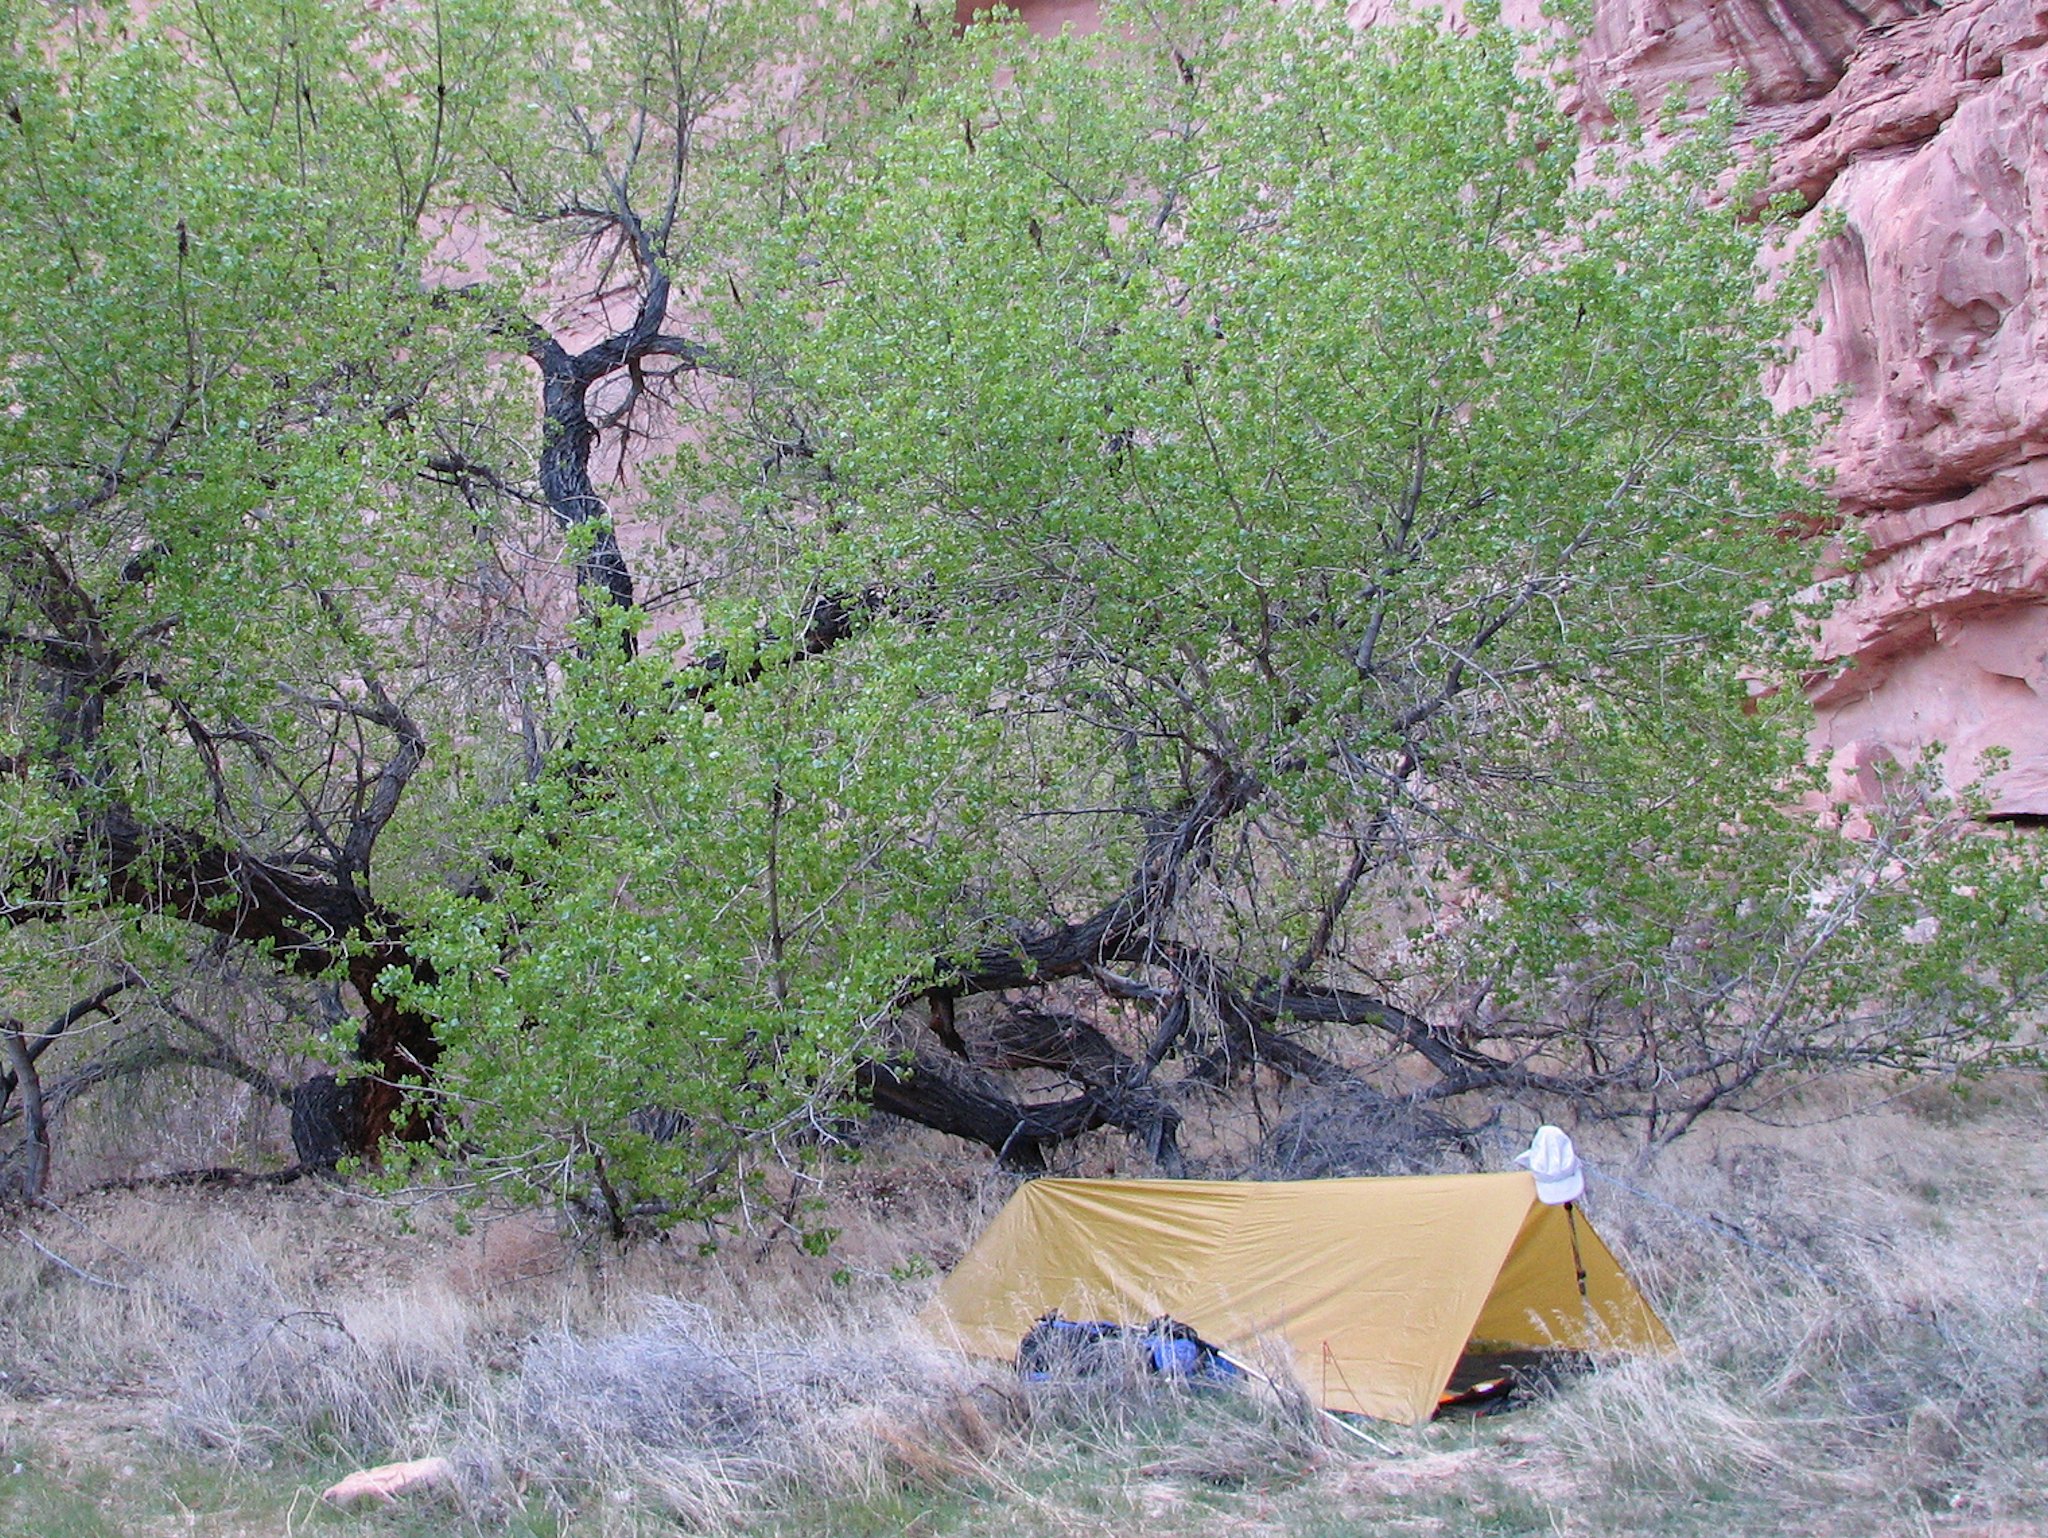
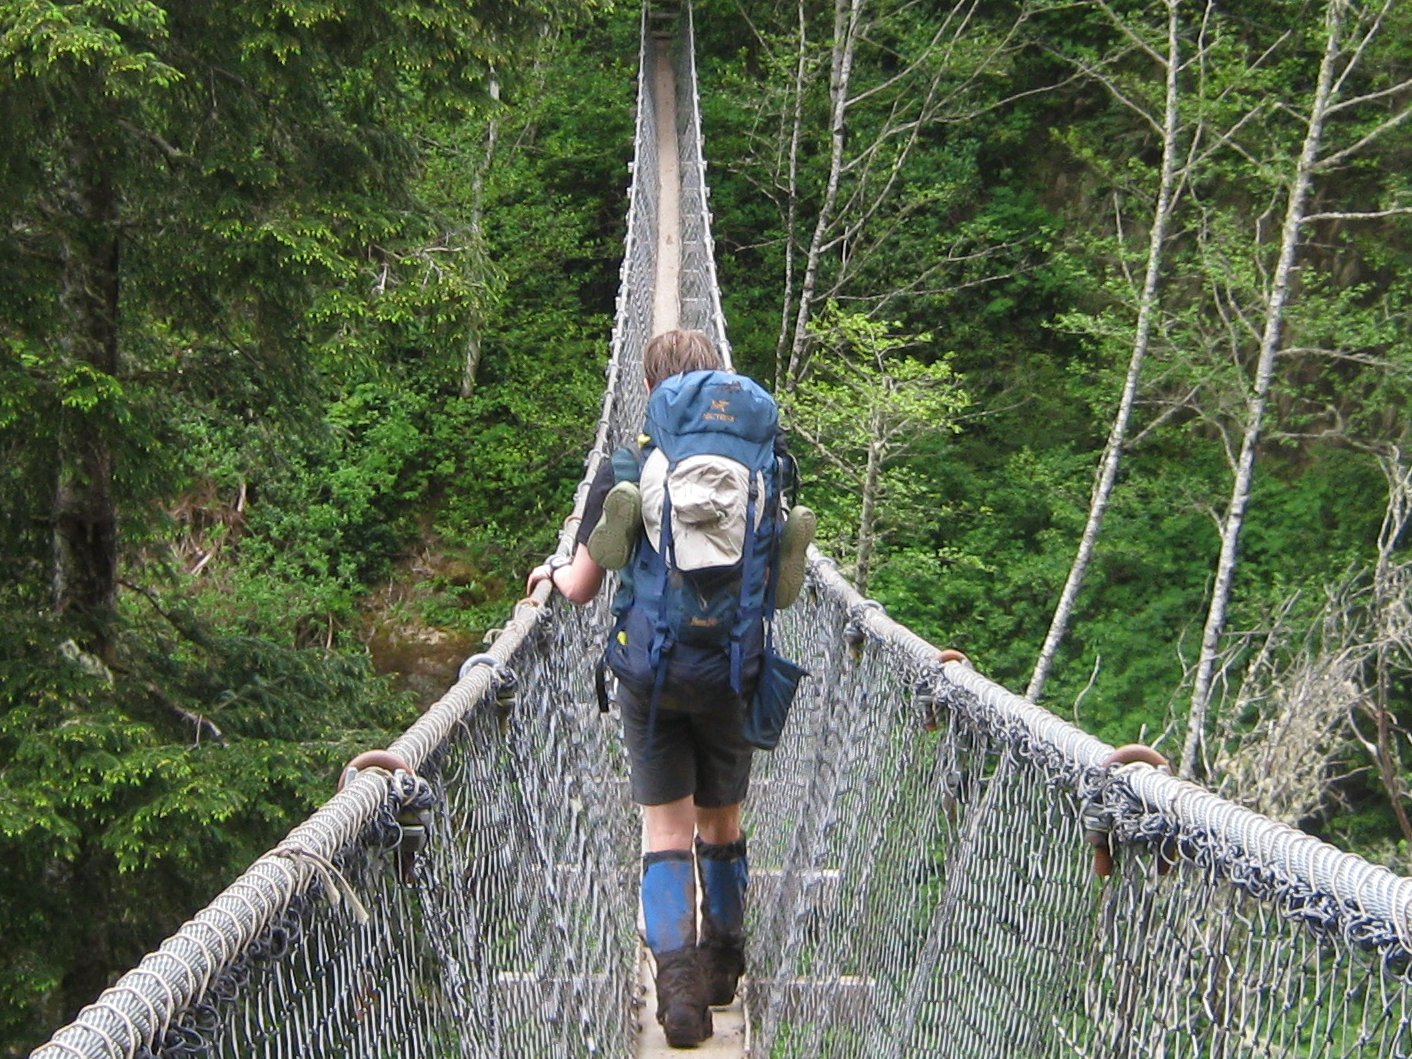
In the past, I have also used a simple sil-nylon tarp, supported by a pair of trekking poles. It is light-weight, but I wasn’t a fan of the open ends, or of the lack of protection from bugs.
Tarp shelter in Grand Gulch, Utah, 2008
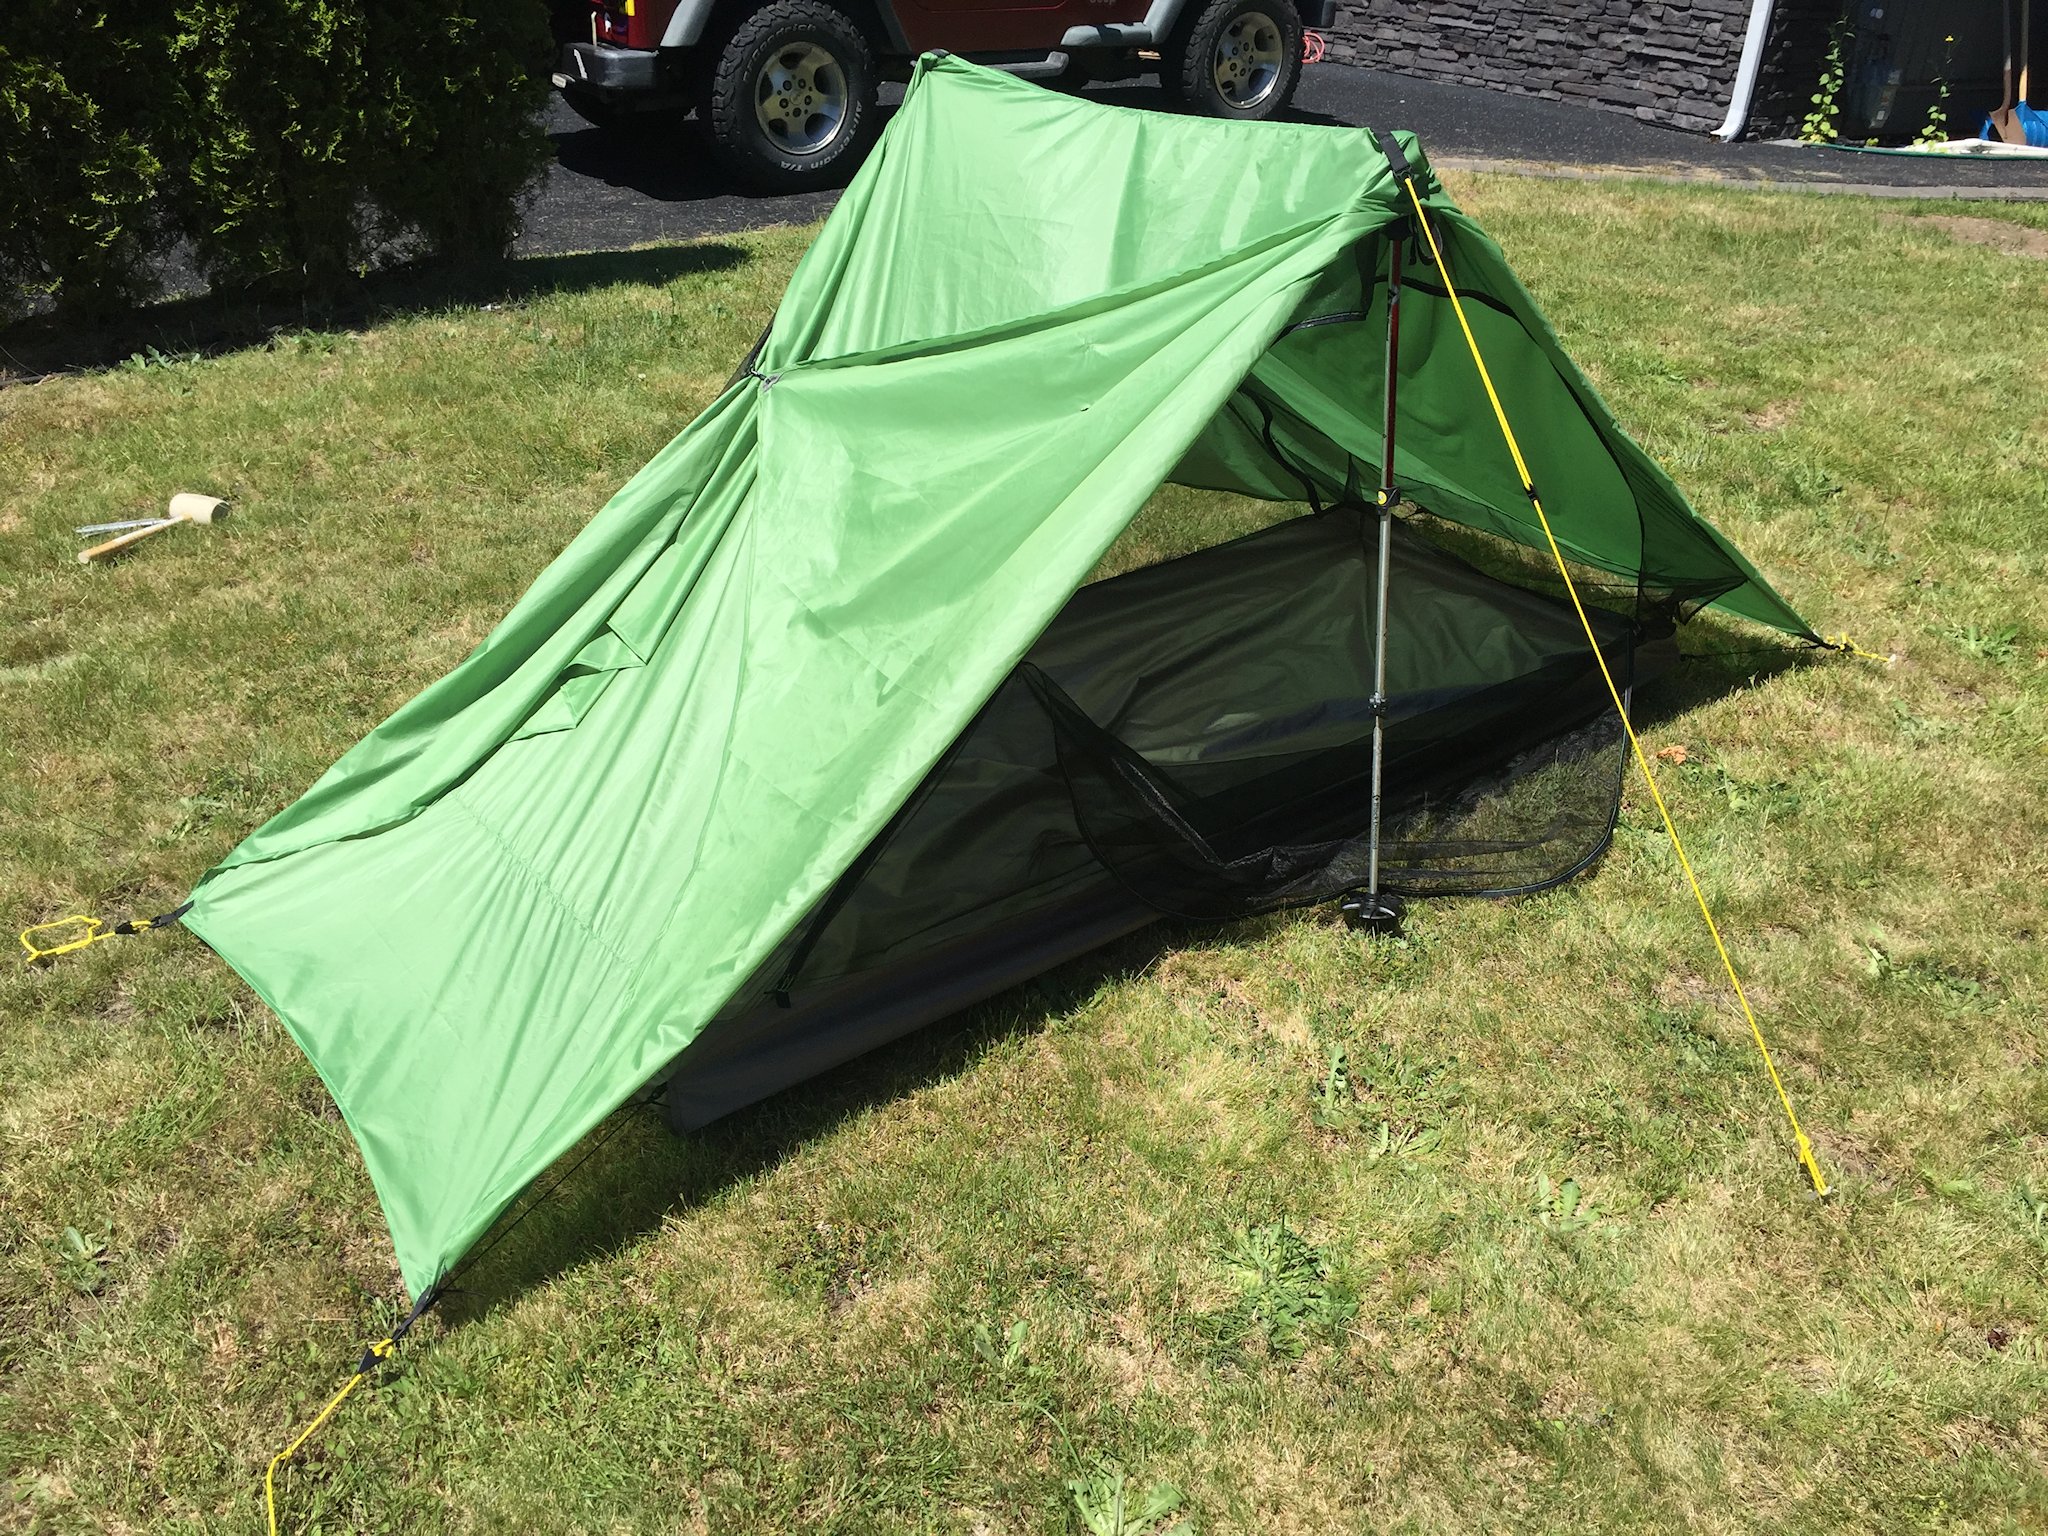
I looked at some ultralight options from the smaller manufacturers, but the prices pretty much took my breath away. So I looked for options… I have a sewing machine, and I know how to use it, so why not? I found this video on YouTube, and was incredibly impressed. It is fully enclosed with mesh, has a full bathtub floor, and doors front and back. It is not free-standing, and requires a pair of trekking poles to pitch. Which is OK, because as I get older I find I like using poles more and more…
I ordered a bunch of material and bits from good old Ripstop By The Roll, and went to work. It is not perfect, but here it is:
Front and back doors open, set up on the front lawnFront and back doors closed, set up on the lawn
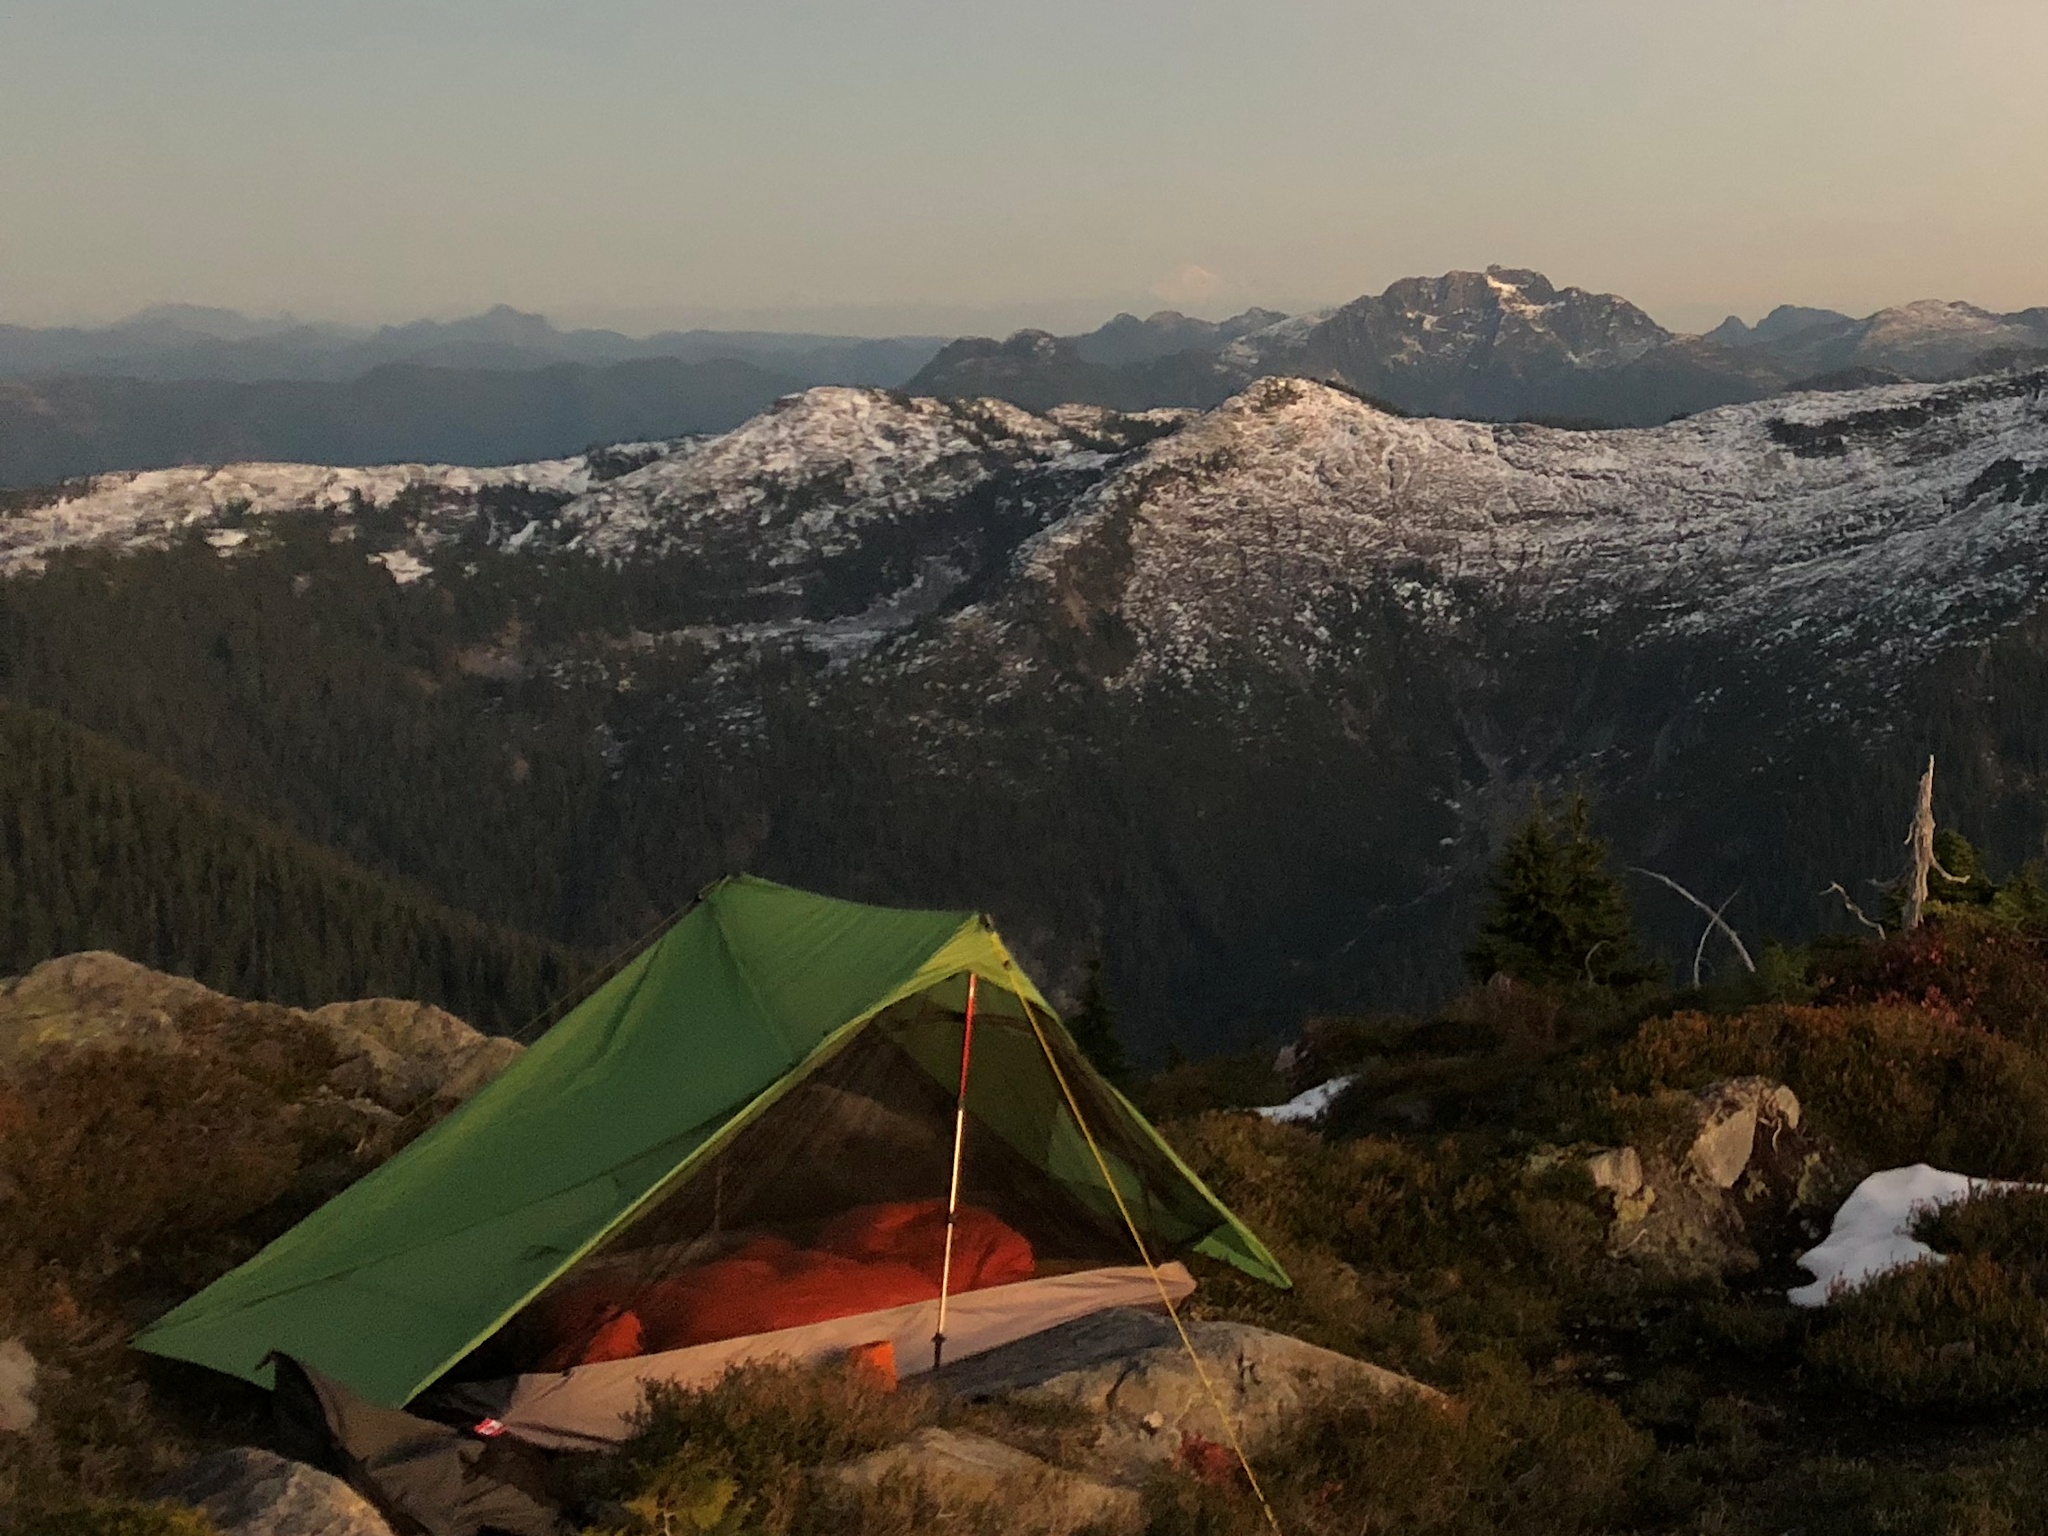
I have used this tent for about fifteen nights, or so, and am pleased with it so far. It weighs about 1050g, plus stakes and poles (carbon fiber trekking poles, 465g) and has a lot more interior space and vestibule space than the Zephyr. I used it on top of Capilano Mountain last fall, where the winds went wild overnight, and it held up just fine. There will be a Version 2.0 eventually, but for now this is working well!
My Sweaty Brow tent, atop Capilano Mountain at sunset. My home-made down quilt is also visible inside.
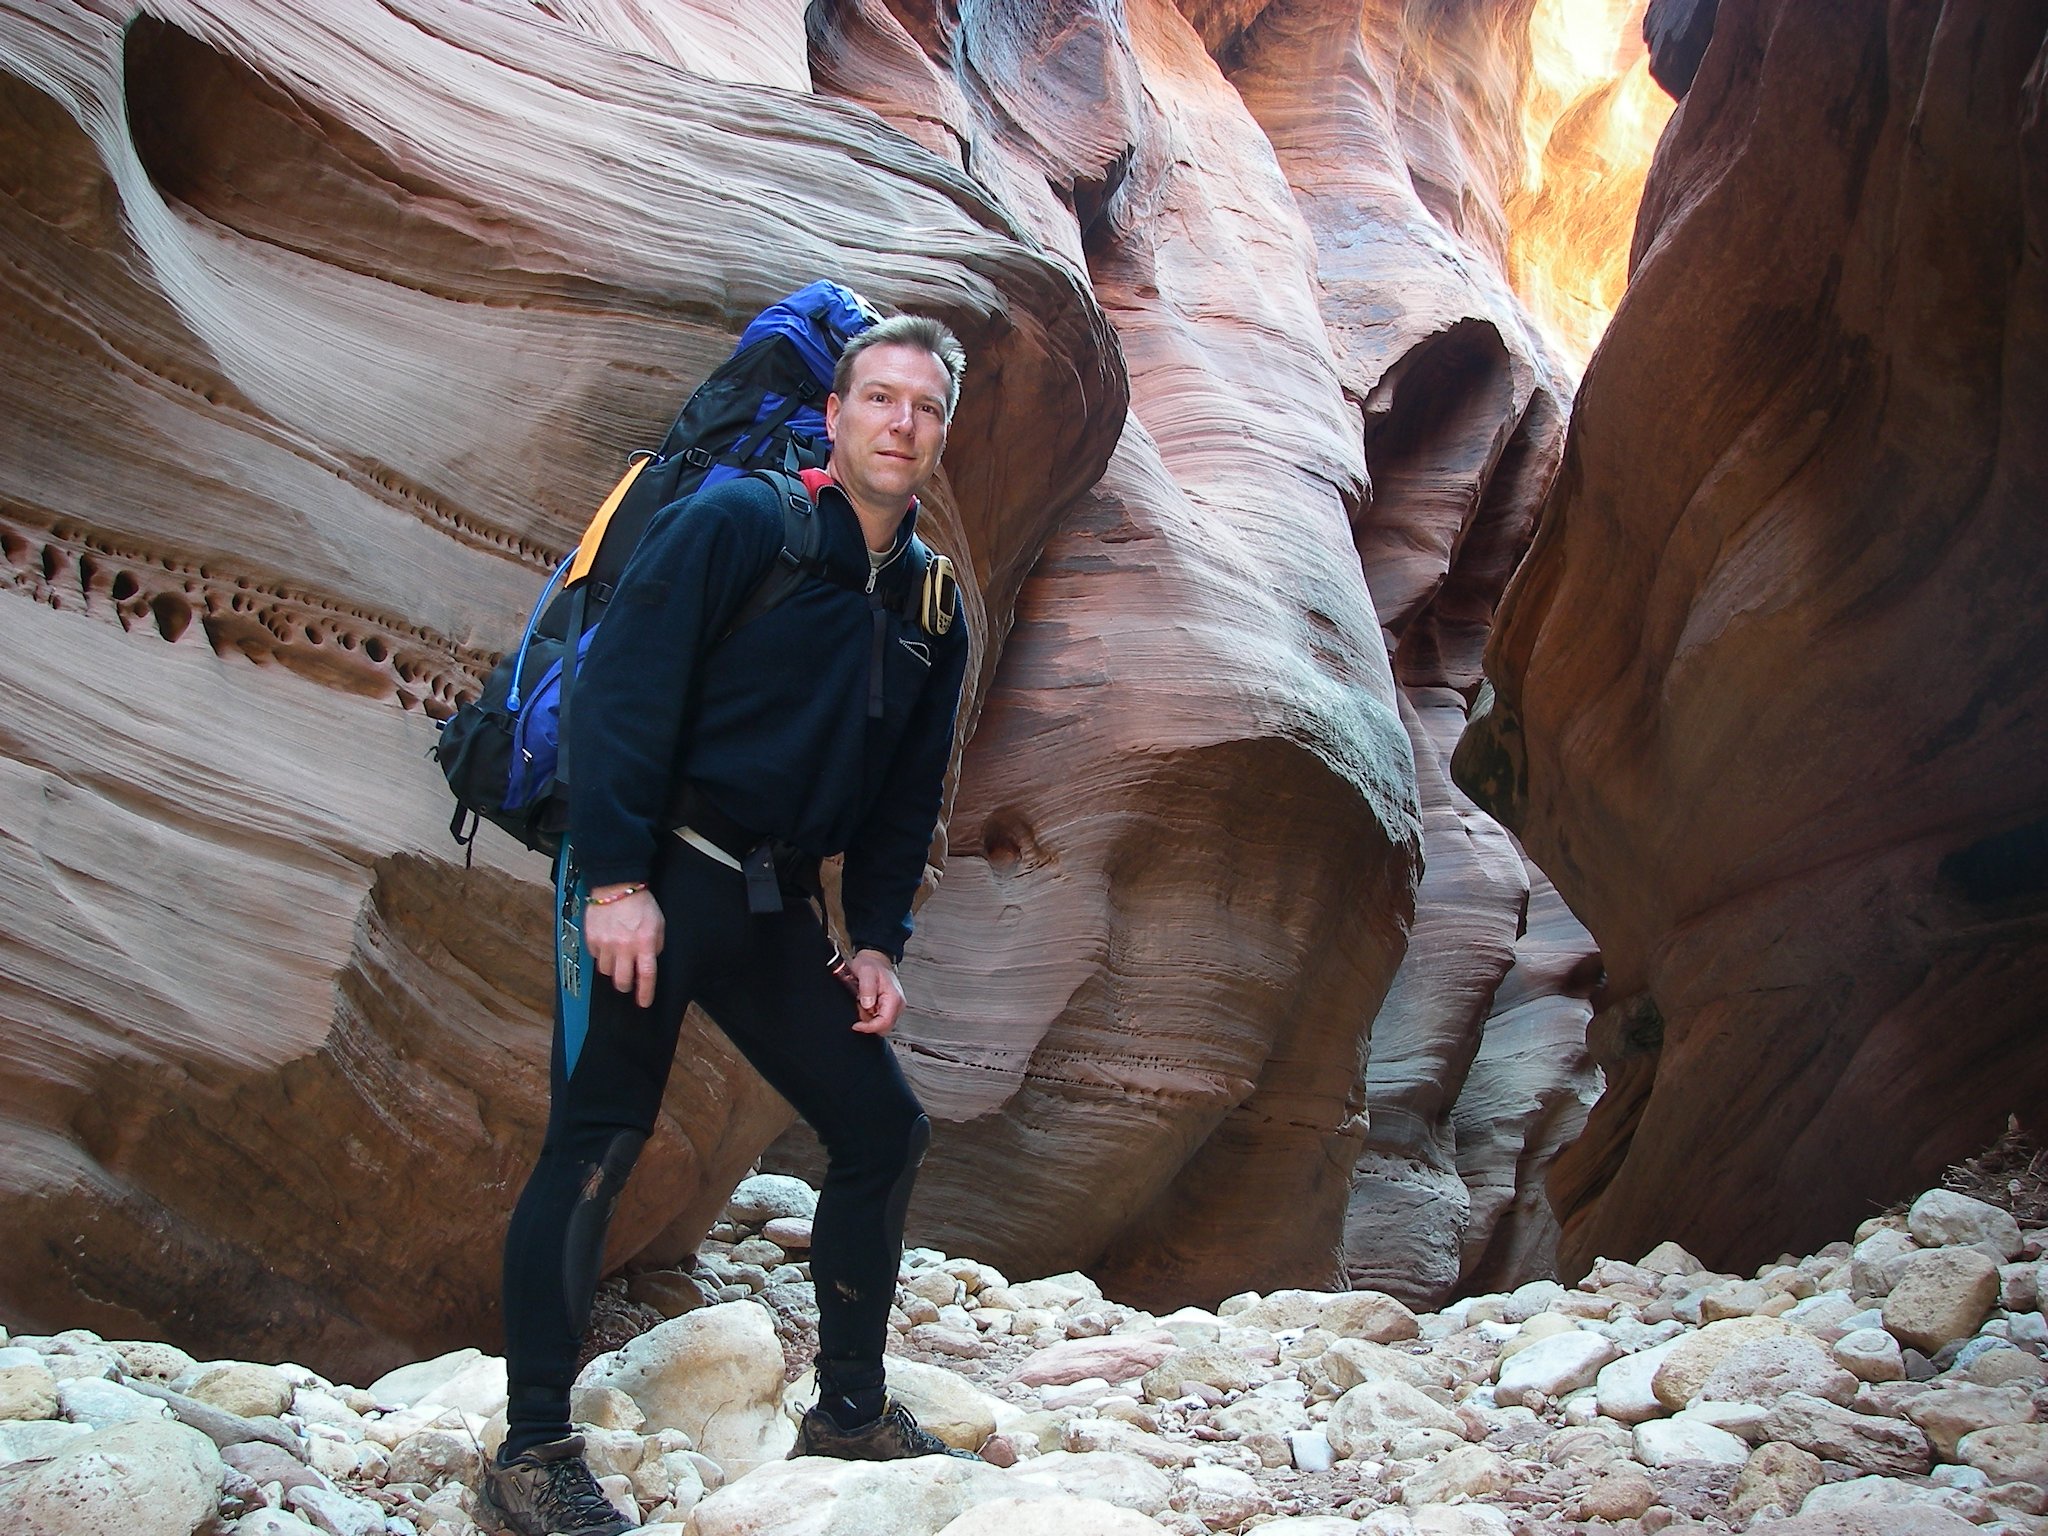
For a number of years, I had been using a big, old, heavy backpack from Vancouver’s Taiga Works, which I had purchased in the mid 1990s. It was about 75l, and weighed pretty close to a tonne – at least, it seemed that way… I’ve used it in Utah, backpacking the Paria Canyon, and Grand Gulch. I’ve used it on a bunch of trips around Southwest BC, and I’ve used it on the West Coast Trail. In fact, if I need to take everything including the kitchen sink, I still carry it. If I need big capacity, no matter the weight (i.e. no long, high days) it is a great workhorse.
Big ol’ Taiga pack in Buckskin Gulch
A few years ago, I bought an Arc’teryx Bora 50 (discontinued, discounted, from MEC) and it is a really nice pack when you don’t need to carry as much. It is a few pounds less than my Taiga, is very comfortable, and has some great features – but it’s still no lightweight.
My son with the Arc’teryx Bora 50 on the West Coast Trail
At about the time I was starting to get into the idea of hiking the John Muir Trail, I decided to upgrade to a nice new pack. However, I had not yet converted to the “less is more” school of thought. I wanted a modern, large, not necessarily light pack. I went to MEC and picked up a Forge 65l pack. Before I even used it, I started learning about the truly “ultralight” options out there…
I did a little research, and settled on the Zpacks Arc Haul, a backpack with a carrying capacity of about 40 pounds, holding about 60l (including all external pockets), and weighing in at only 680g (24 ounces)! Granted, it was a lot more expensive than the MEC pack, but I was sold. I returned the Forge 65 to MEC.
I have now carried the Arc Haul on a few overnight trips (up to five nights in length) as well as some day trips (at that weight, it is perfectly reasonable as a day pack, and incredibly comfortable!) and I just love the thing. The suspension and hip belt fit like a glove, and it carries everything I need for a solo, multi-day trip (if I am careful about what I’m taking).
I also purchased a hip belt pouch for the pack, from Zpacks. I then bought some material from Ripstop By The Roll and made a matching one for the other side, for less than half the price. I have also made a pouch for one of the shoulder straps, as well.
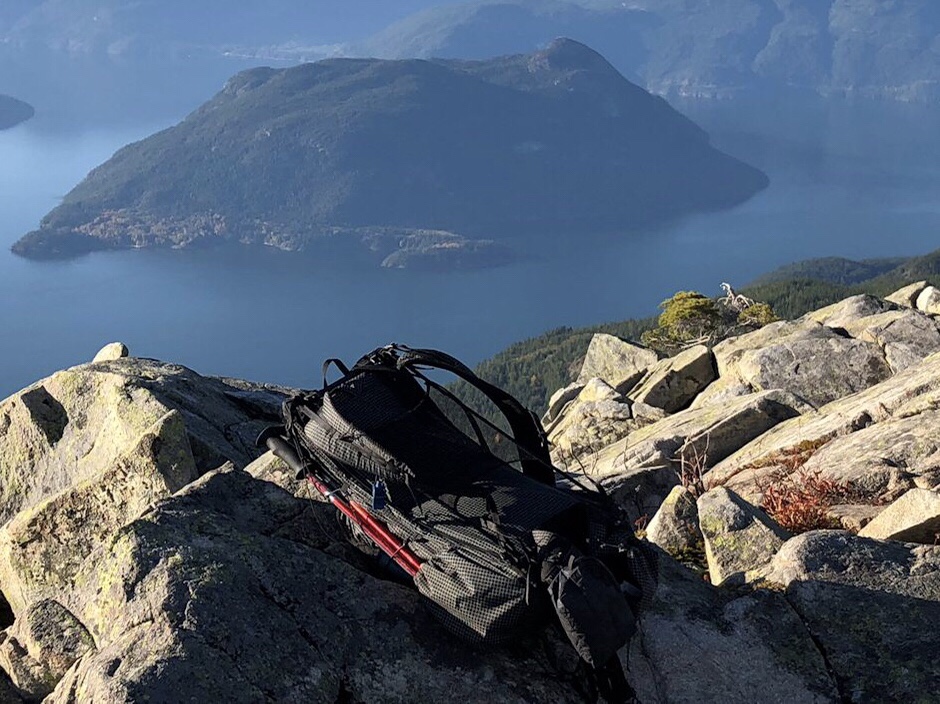
Unfortunately, I don’t have any photos of me wearing it, other than the straps visible on my shoulders! Here is a link to a good shot of the pack from the Zpacks website. And here is a photo of it atop Mount Harvey, with Howe Sound below. Hey, it’s all I’ve got!
The Zpacks Arc Haul backpack, resting quietly in its natural environment.


