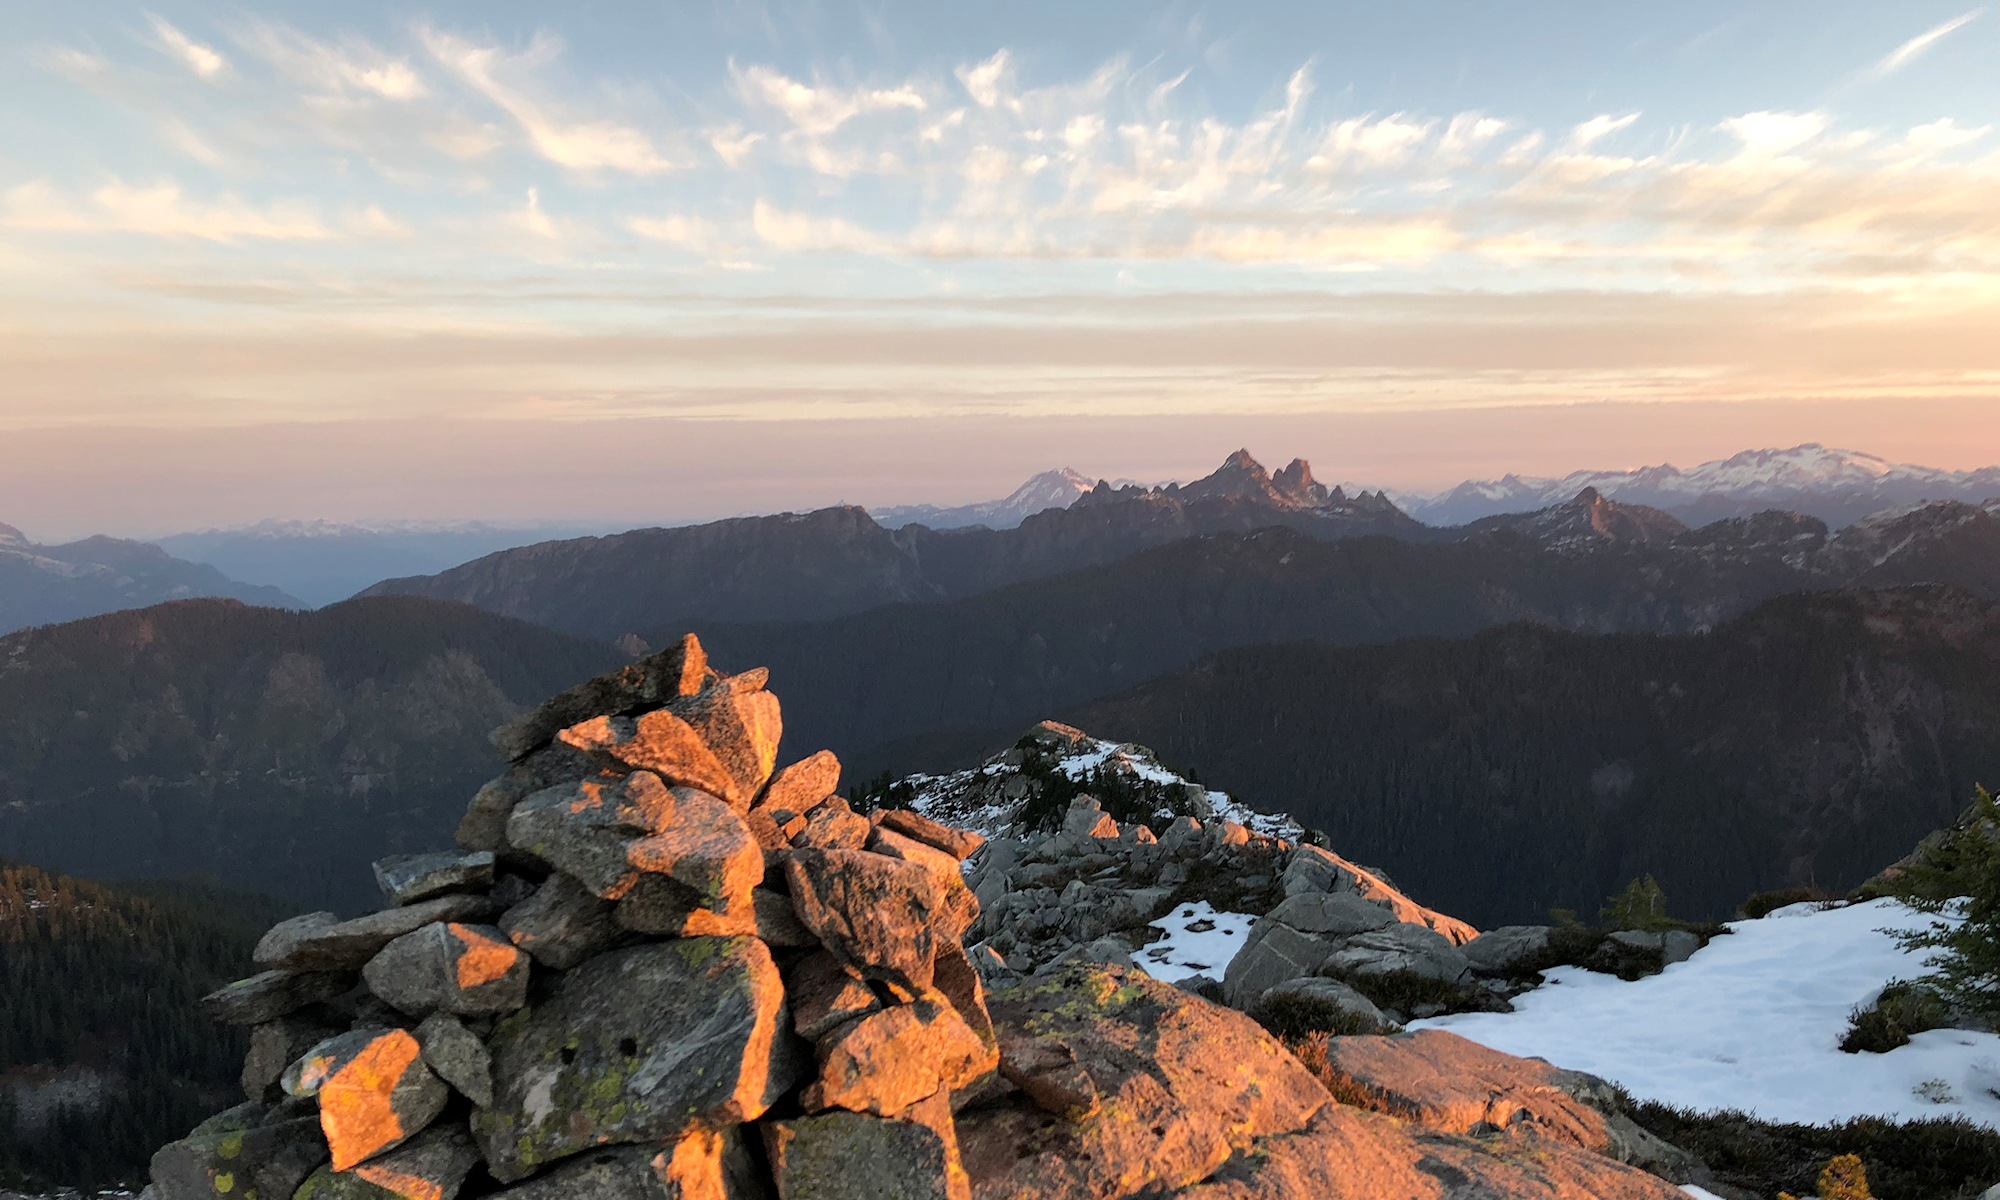
Last year, I posted the first instalment of the time that I spent on the Pacific Crest Trail in 2023. The post took ages to type in, and covered a week on the trail. That’s it. One week.
I don’t feel like typing in anything more about that trip right now – at least, not in the detail that I provided about the first week. In fact, not much detail at all.
So I’m going to provide a very quick summary of that summer:
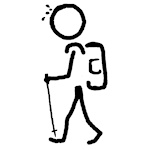
I spent about 3 weeks on the trail before our dog Chester became very sick. He had been having kidney issues for several months previously, but the situation became much more severe. Just outside of Big Bear Lake, California, I decided to head home to spend the last quality time that I could with my little buddy.
Chester, the best little adventure buddy.
I had just over three weeks with Chester. He had some good days, and he had some worse days, and then, on June 12, he was gone.
Four days later, I was back on the trail in Big Bear Lake. My whole cohort of hikers I’d begun with were about a month ahead of me. I saw a lot fewer hikers on the trail. It was getting hot.
On the fourth of July, I was in Tehachapi. It’s on the edge of the Mojave Desert, and it was hot. I decided to skip up to Oregon. A day and a half later, I arrived in Ashland, and began hiking north from there.
It was still hot. And my heart just wasn’t in the adventure any more. Crater Lake was cool, there were a lot of fine folks around, but my ankle hurt (I’d sprained it badly five years before, and it still causes me grief), I cried about Chester daily, and my mind was just constantly elsewhere. I wanted to get back to my boat, and back to my family, and back to my home where I could grieve for Chester properly.
A couple of days into Washington State, I called it. Caught a ride to a trail angel’s house, then a bus to Portland and from there, home to Vancouver.
After a total of just over 10 weeks on the trail (punctuated by a month off of it) and around 1100 miles hiked, I arrived late at night at the downtown Vancouver bus station, where Karyn was picking me up. Getting of the bus, I tripped on the curb and went down hard. Hurt my knee, whacked my chin on the sidewalk (my jawbone still has a big bump there) and broke the little finger on my left hand. The worst injury I got all summer was when I got home.
So I haven’t been out doing much hiking at all lately. Aside from a couple of hours along the Baden Powell Trail in North Vancouver a month ago, I haven’t spend more than an hour on my feet in many many months.
Aside: I bought a new car almost exactly a year ago. It is a Volvo station wagon, but the Cross Country version. It is lifted about 5 cm from the regular wagon, and has all wheel drive. I wanted one with the smallest available rims (18″), so that I could put beefy tires on it, suitable for driving on rough gravel logging roads. The one I ended up buying had all the bells and whistles I was after (honestly, it offers to hold a kleenex for me if it thinks I may sneeze…) and for a screaming good deal – but it had the largest rims available (20″), with the lowest profile tires (245/40 R20). Moreover, the tires were summers. I haven’t (legally) been able to drive up to Squamish since October.
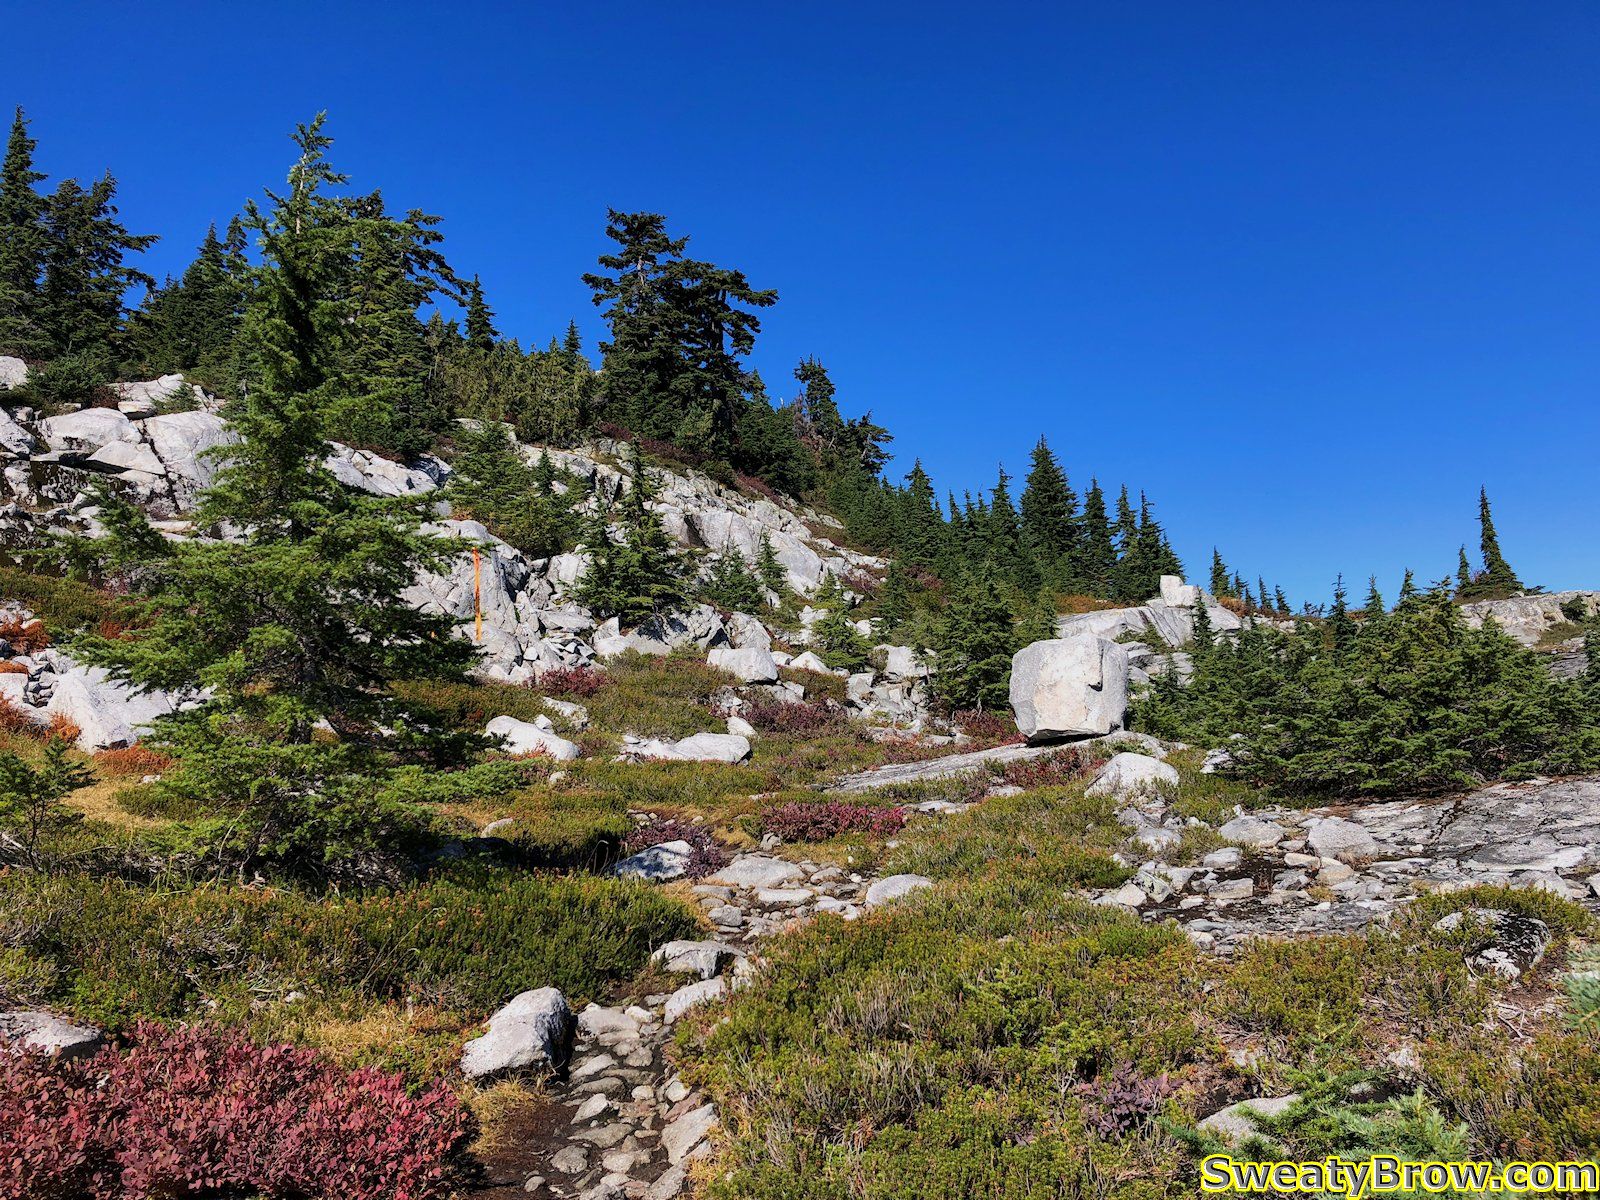
After intending to do so for months, I finally got around to buying new rims and tires for the vehicle. I got my 18″ rims, and some all-terrain, all-season tires, which I will keep on the car for, well, all seasons. Good in the snow in winter, and good off paved roads in summer… The reason I went into all of this? Because for the first time this year, I was also able to drive up the road to the Mount Seymour ski area, to access the trail to the First Peak of Mount Seymour!
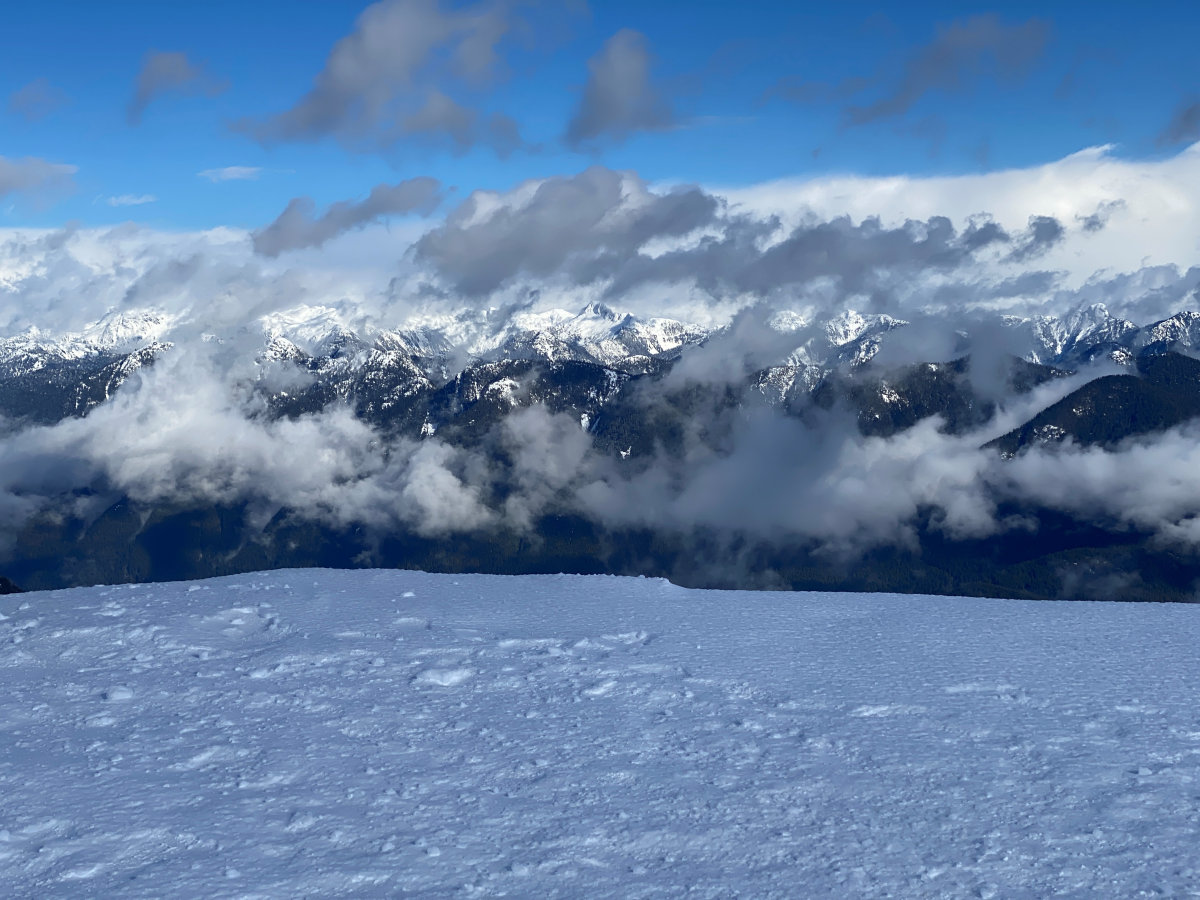
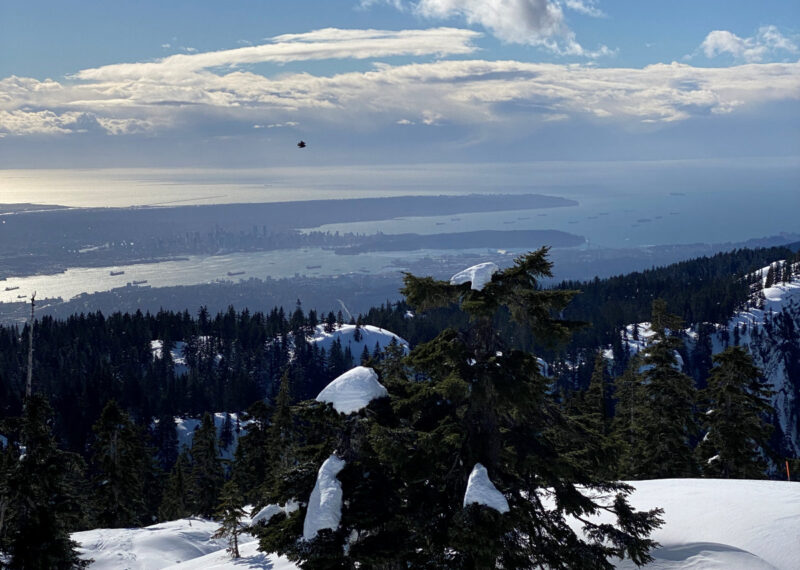
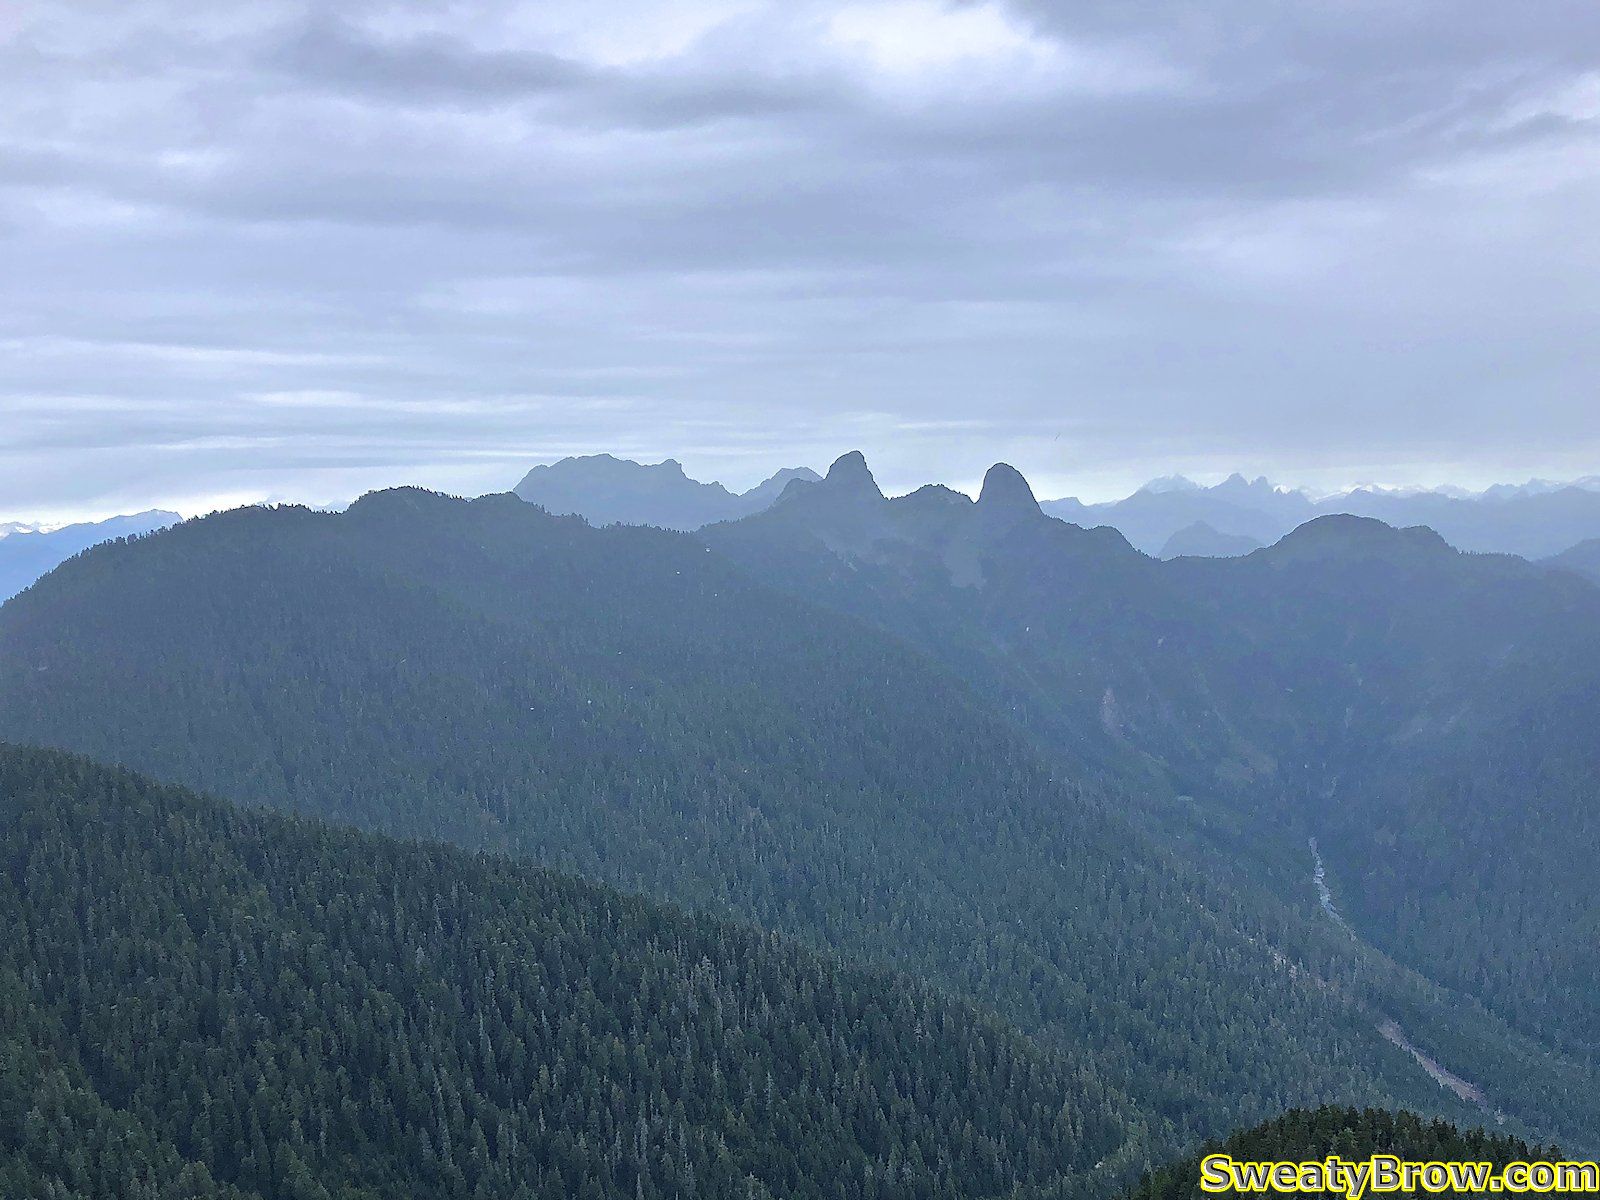
Anyway, conditions looked good this past Tuesday, and it was time to try out my five day old tires on a trip up to Mount Seymour. Of course, the roads were well plowed, and the tires didn’t touch a single flake of snow.
On the drive through the city, the weather was very pleasant, with a few puffy clouds around, but no precipitation. There were some fairly thick clouds over the mountains, though. Once I turned up the hill for the final 11 km winding road to the parking area, the rest of the drive was in the shadow of those clouds.
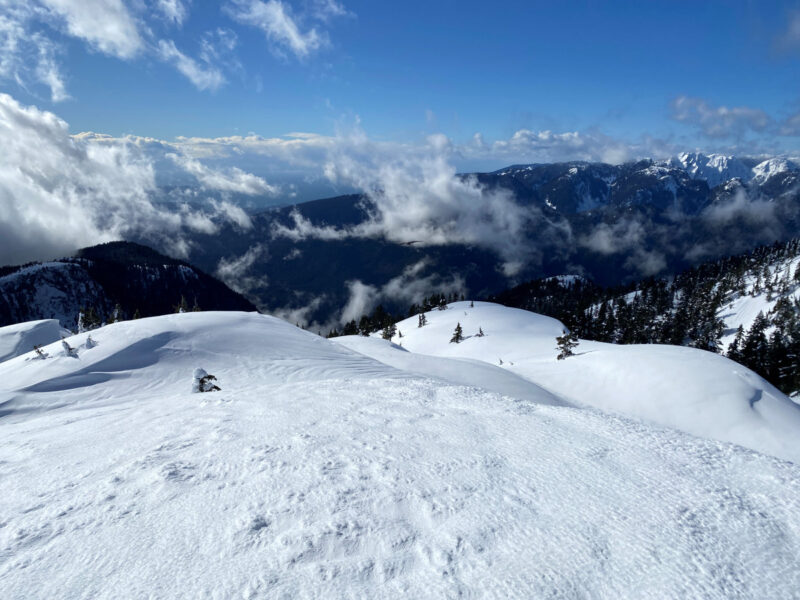
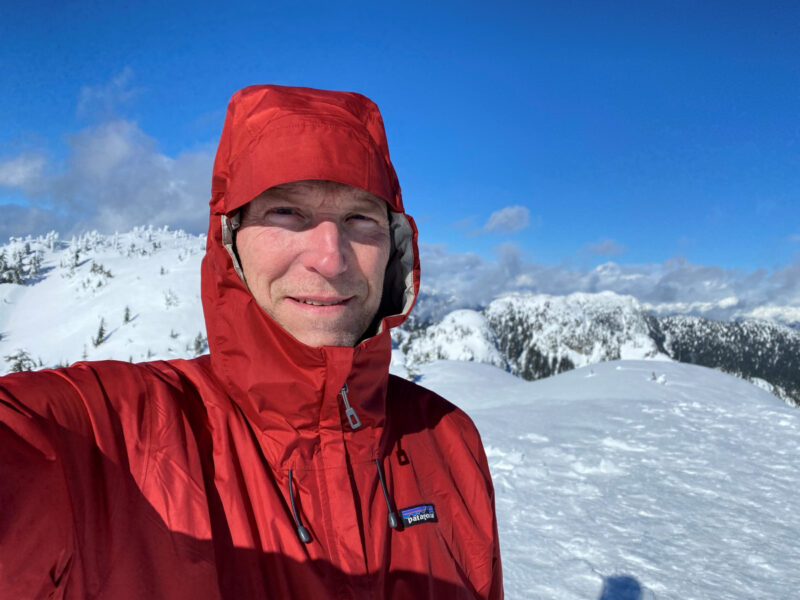
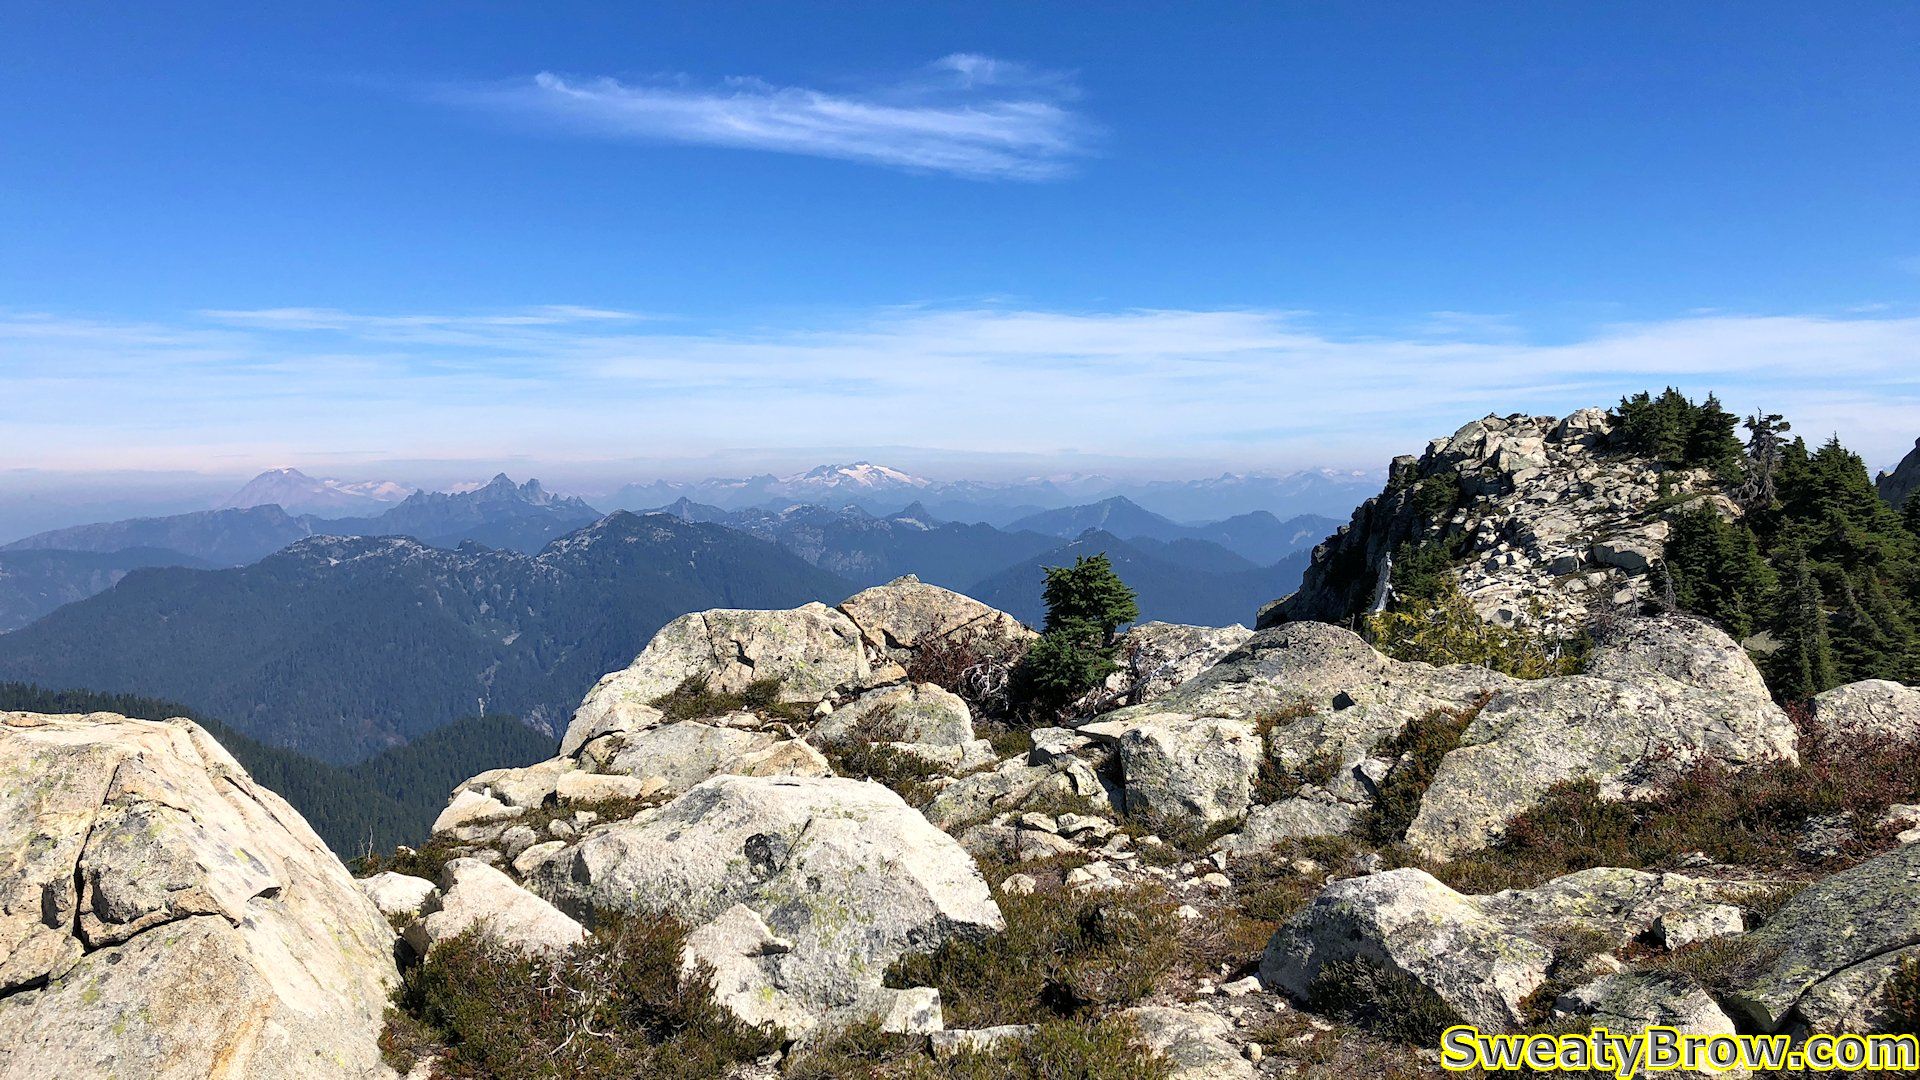
To cut a long story slightly shorter, the weather was cloudy and snowy for 2/3 of the way up to the first peak, then cleared up beautifully. The wind remained sharp and cold in exposed spots, especially on the summit. I could only stay for a couple of minutes, despite the brilliant sunlight.
It was a lovely trip out, I managed to open up the lungs a bit, and burned a few calories off. It was a good day out!
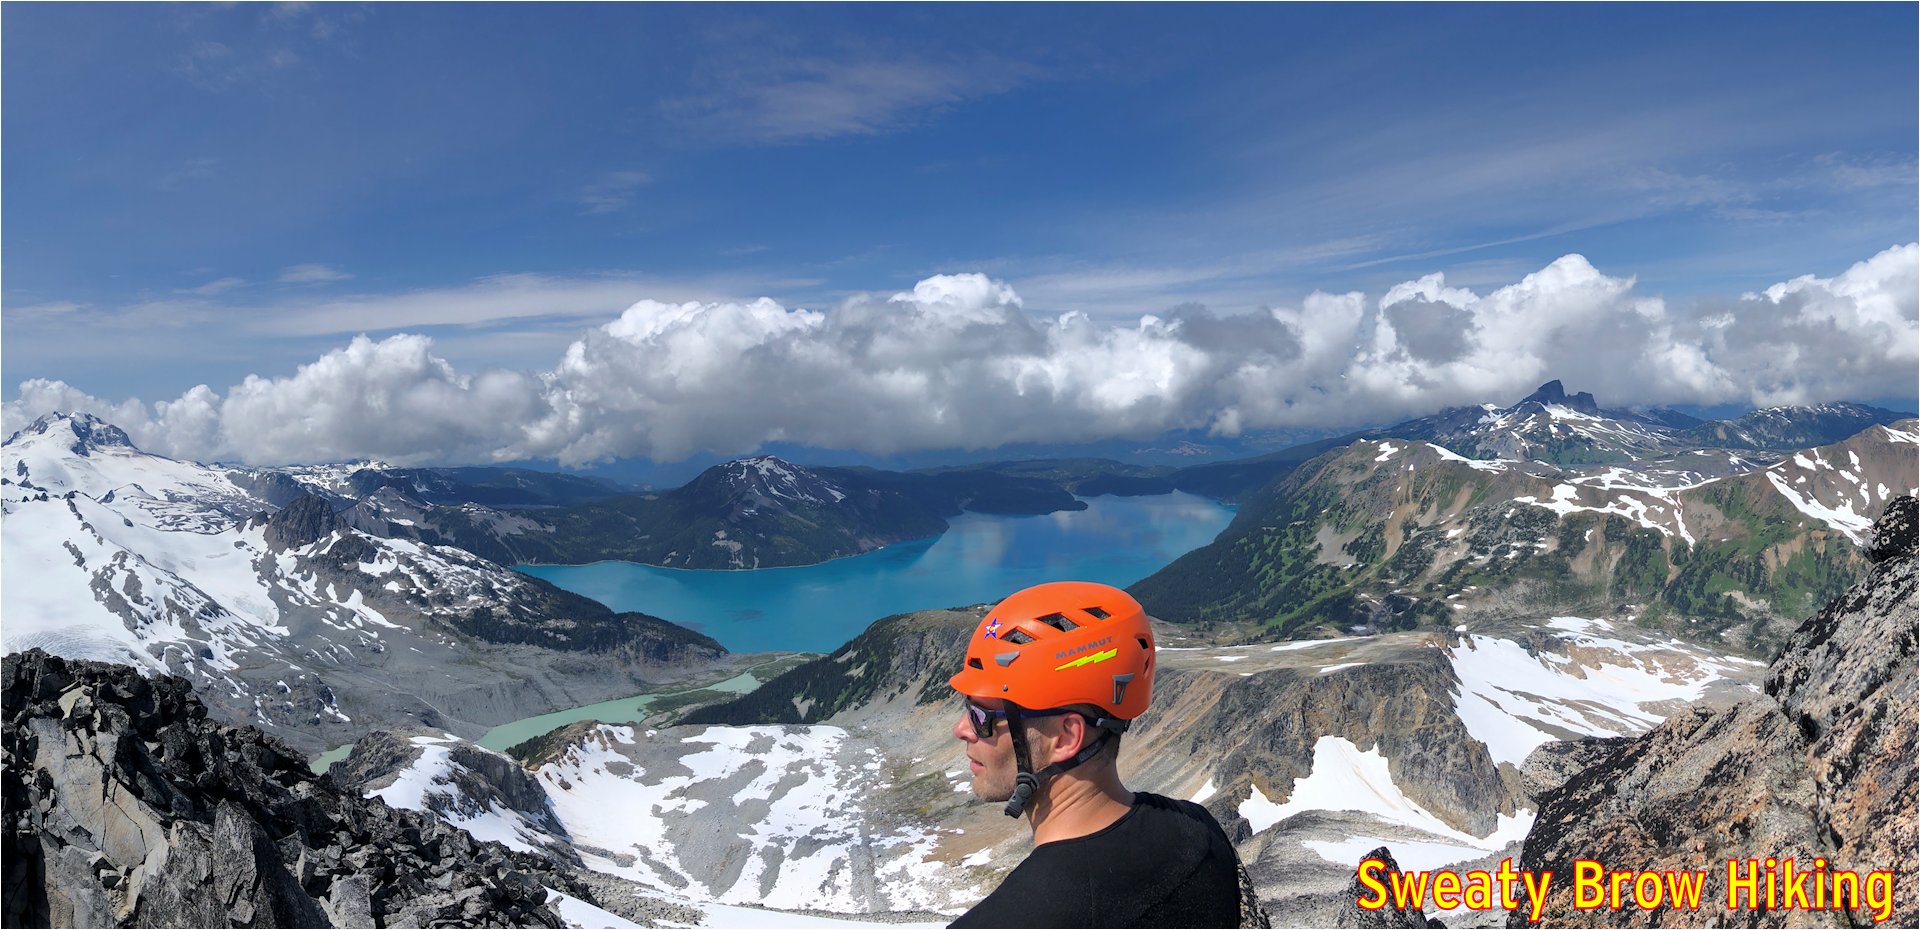
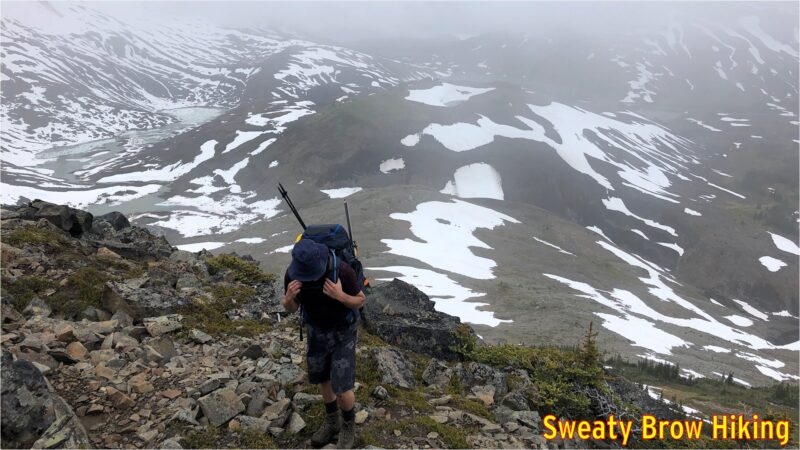
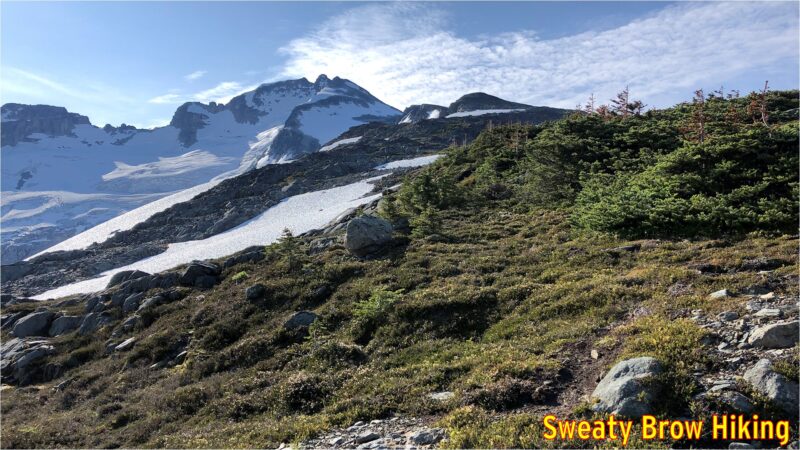
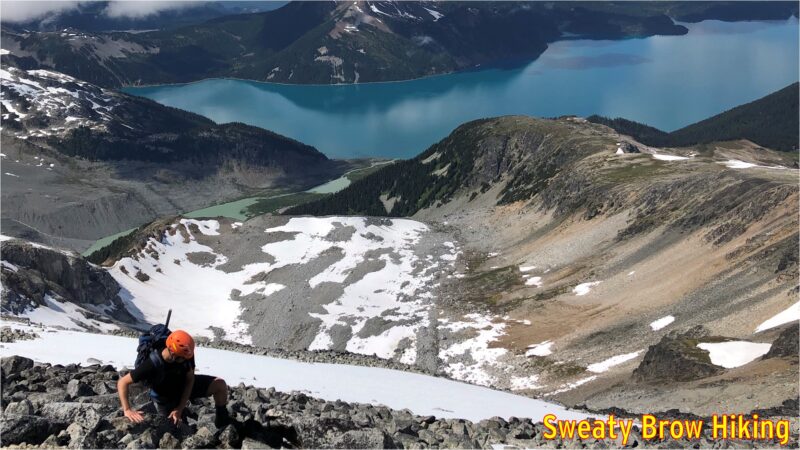
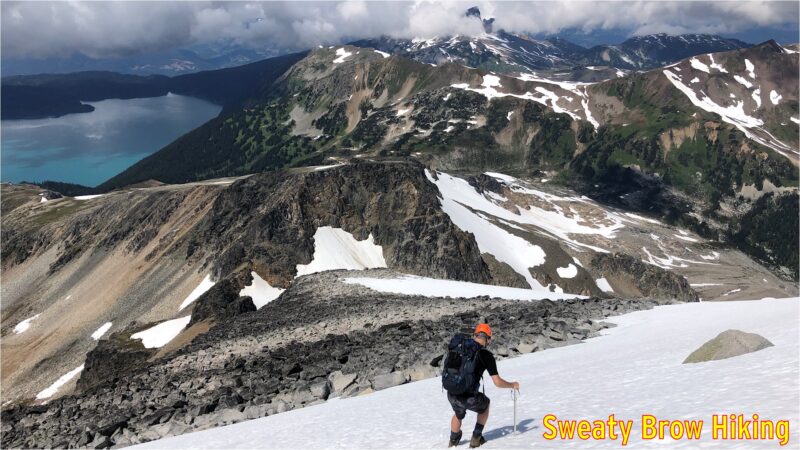
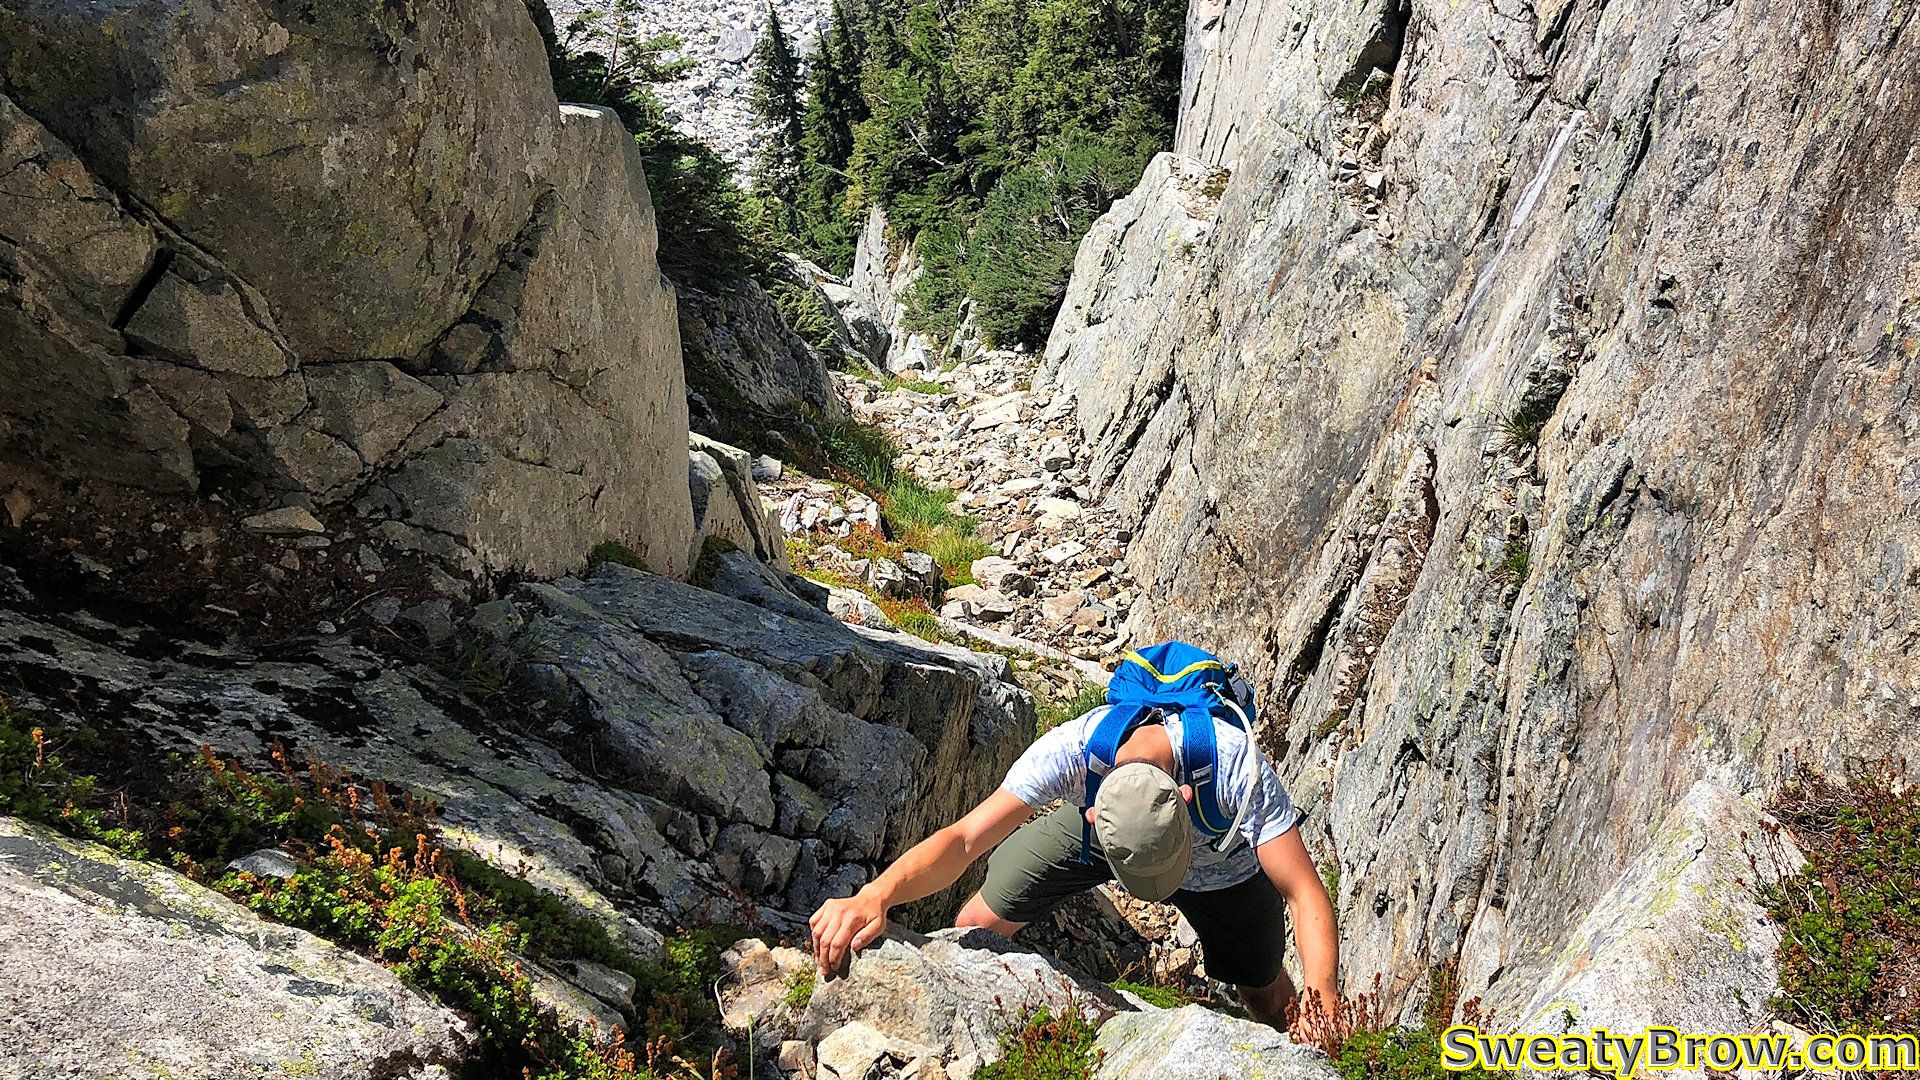
Castle Towers is a mountain that Jeff and I had been wanting to climb for a while. It involves a long trek into the Garibaldi Park backcountry, an overnight stay, and a lot of up and down over many kilometers!
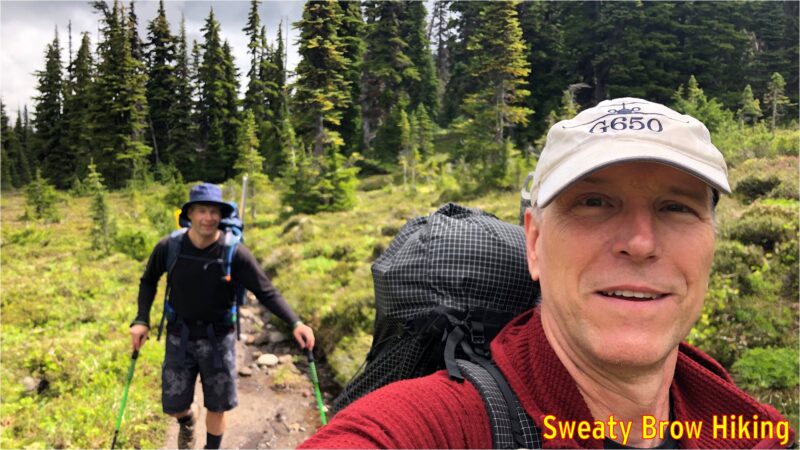
We met at Jeff’s place in North Vancouver at just after 5:30 AM, and were soon on our way. After a quick stop at the Zephyr Cafe in Squamish, we arrived at the parking lot for Cheakamus Lake a little before 8:00, and did a final gear sort. We were on the trail by 8:15.
After stashing a brace of beers in the creek for the return, we crossed the Cheakamus River and started steeply up toward Helm Creek Campground.
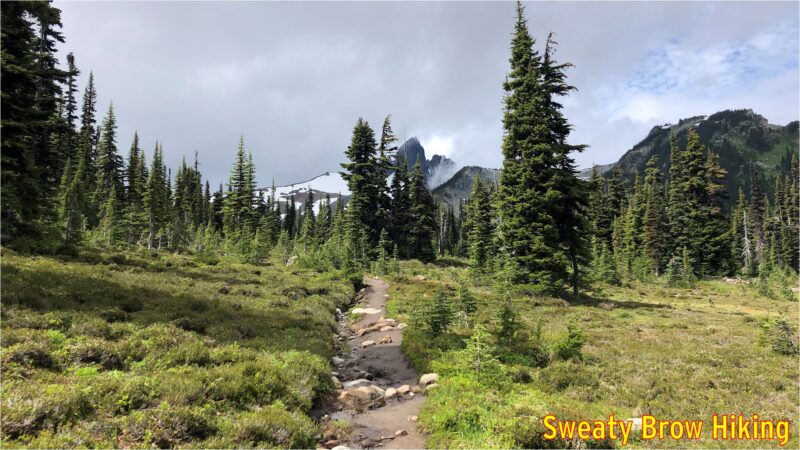
As we climbed steadily up into the heart of the park, despite some blue patches in the sky, the weather slowly became worse. We reached the campground after about 3 hours of hiking, and stopped for a bite to eat.
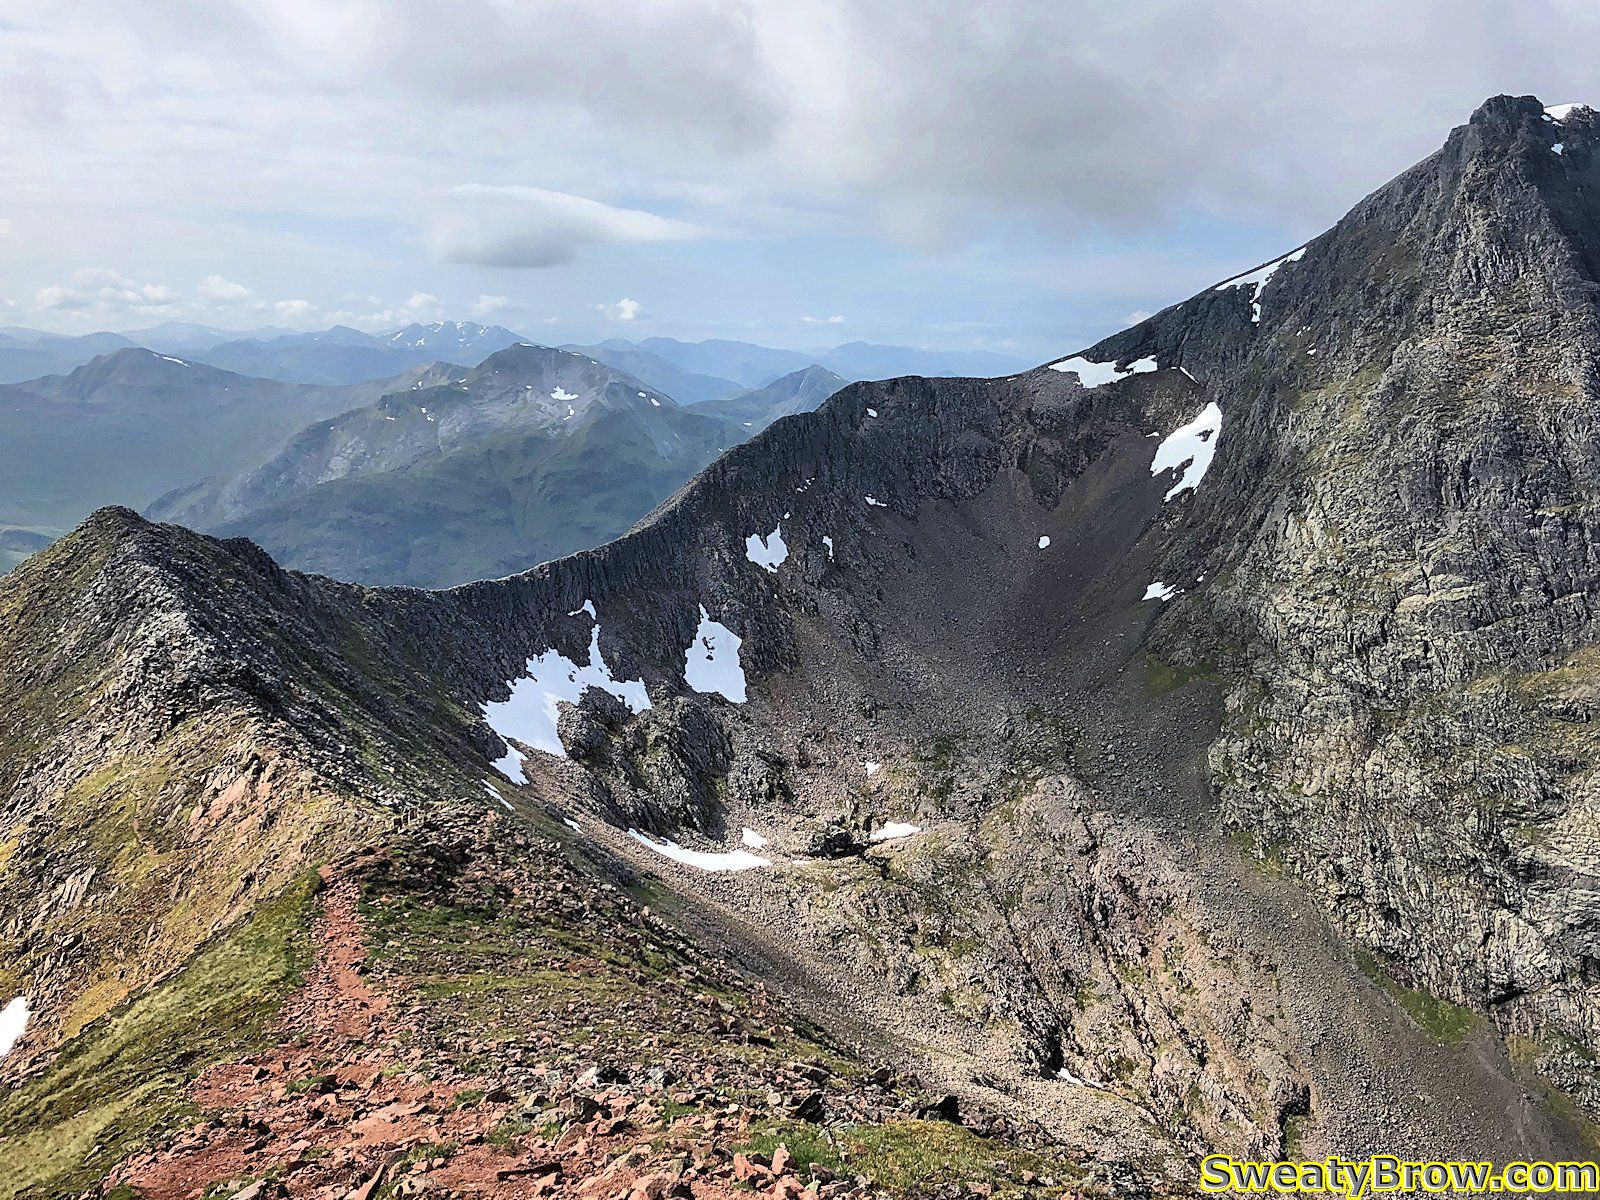
Reaching the open area of meadows near Helm Creek Campground. The Black Tusk is playing peek-a-boo directly ahead.Two happy hikers approaching Helm Creek Campground.
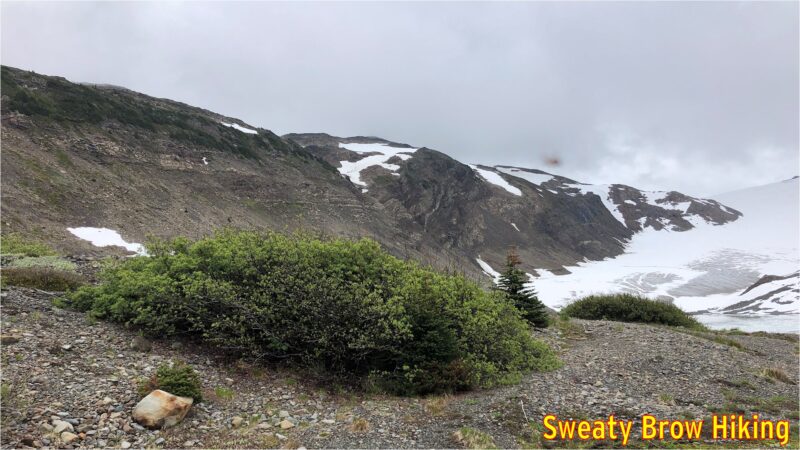
We continued up toward the Helm Glacier, and planned to traverse up on the left side of the glacier, all the way up to the head of the valley. As we turned up the valley, we watched a couple of marmots who were having a bit of a tussle. Another was nearby. I have some video somewhere, and will upload soon…
As we looked up the valley, we were disappointed to see more snow than we expected trailing up the slopes beside the glacier. The going didn’t look nearly as good from this vantage point as we had hoped.
Looking up the Helm Glacier. The snow on the left side was going to be our route. Didn’t look great from here. Instead we cut left, up a steep slope (not visible) to joint the left skyline.
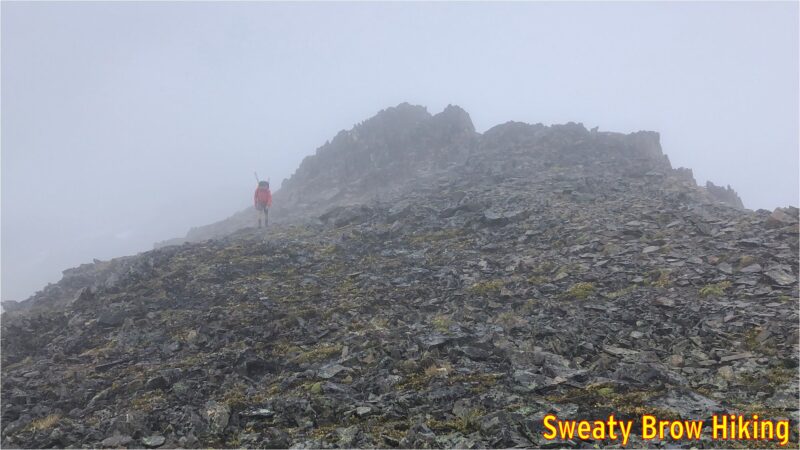
We made a quick change of plan, and headed steeply up to the left, to reach the ridge line east of the glacier, and south of Helm Peak. It was a steep, gruelling ascent, and once we reached the top of the ridge, the weather really closed in around us.
Heading up the side of the valley, and into the murk.
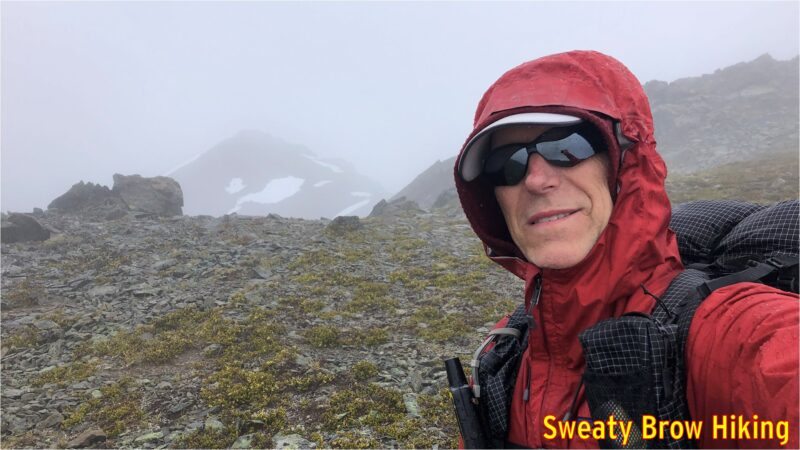
As we followed the ridge, the rain began to spatter down, and we were totally engulfed in cloud. Because we couldn’t see very far, we couldn’t tell whether it was possible to bypass the various bumps and peaks along the ridge. Rather than risk attempting to bypass these features, and end up cliffed out as the terrain got steeper and steeper, we ended up going up and over every single feature along the ridge, adding a lot of unnecessary up and down to the approach. I didn’t take any photos once the fog got really thick, but you can get the idea of deteriorating conditions below…
The fog begins to close in.
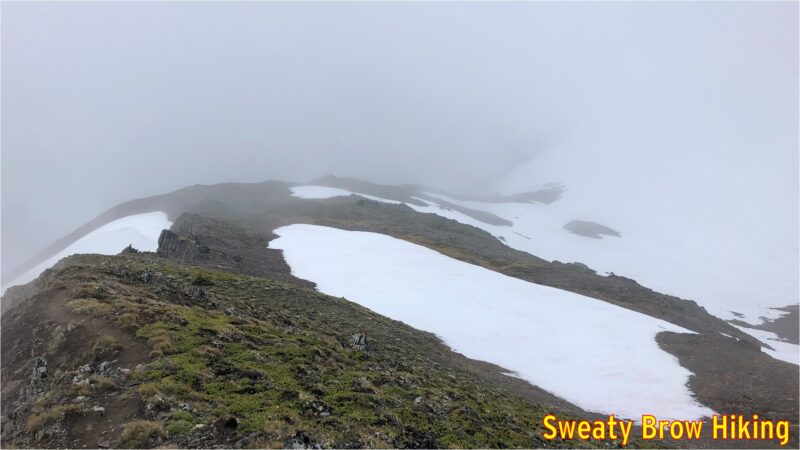
Finally, 7 hours after beginning the approach, and thoroughly tired and wet, we reached the head of Helm Glacier, and started the steep descent down slippery grass meadows into Gentian Pass, our destination for the night.
Our route drops down into this saddle, and off the left side into the abyss of Gentian Pass.
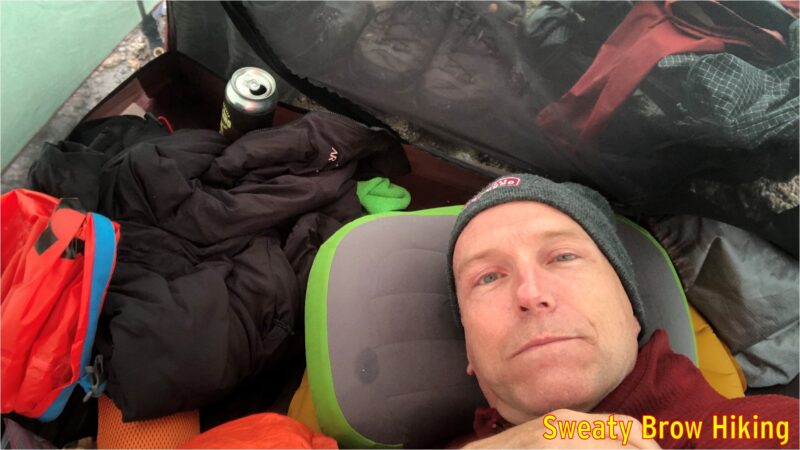
When we arrived at our planned camping area, at about 4 PM, the wind was driving, and the rain was like needles on our skin. We decided it was best to set up our tents as quickly as possible, rather than stand shivering in the elements. Conditions were not suitable for taking photos!
Setting up the tents was quite a challenge under those conditions, and when we finally did get them pitched, we each crawled into our respective abodes for a bit of shelter in our bedraggled states. We each also cracked open a beer to reward ourselves for a job well done. I managed to doze off for a little while, as well.
Settling in for a nap. Note the (now empty) beer can next to the door of the tent.
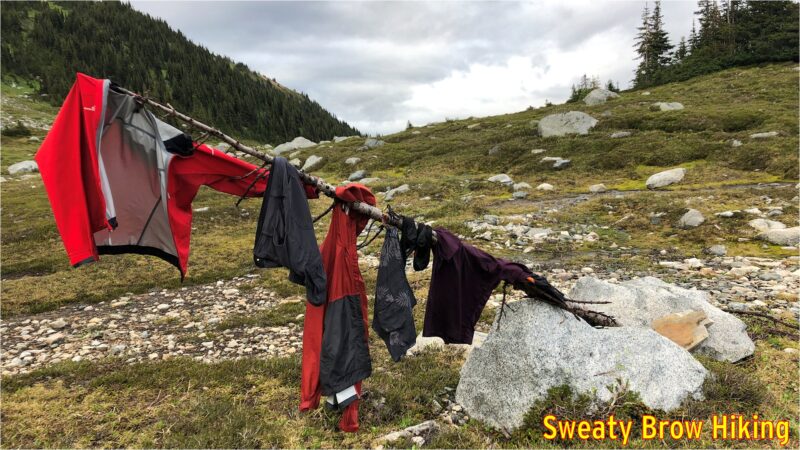
Things eventually quieted down outside, and we emerged from our tents around 7 PM to think about dinner. The rain had cleared off, the wind had dropped to almost nothing, and there were once again breaks in the clouds! We hung some of our wet things out to dry on some nearby snags, and set about preparing some hot food.
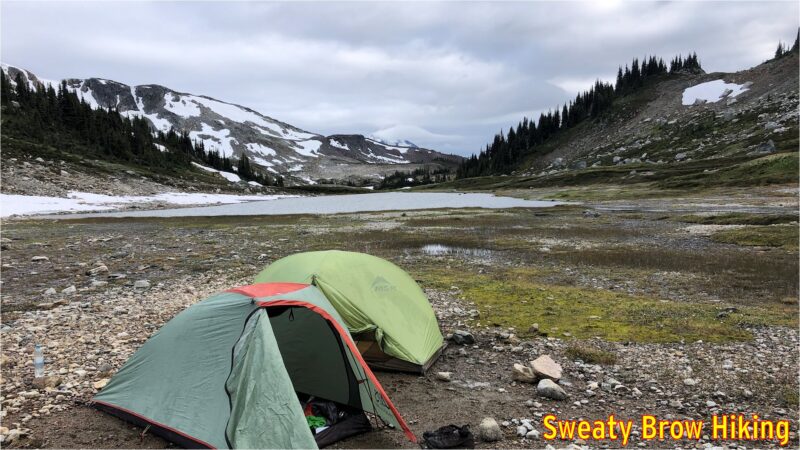
Our campsite for the night.The drying pole.
Bellies filled, we retired to our sleeping bags to rest up for a big day to follow..
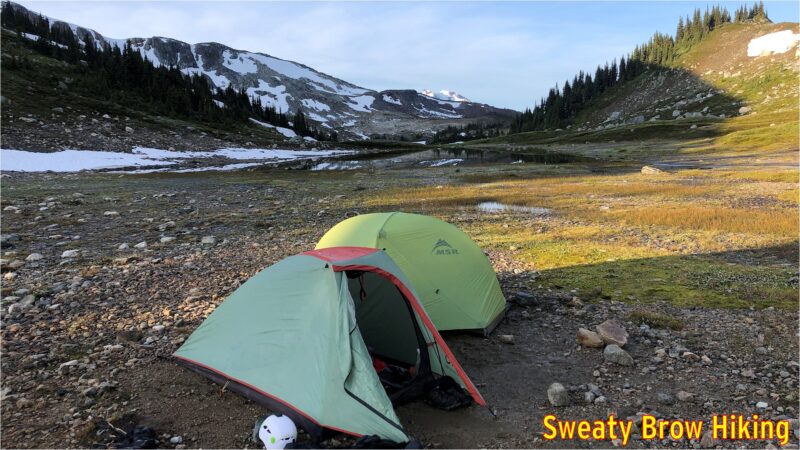
The next morning we were up bright and early, and the day was looking fantastic. There were a few scattered low clouds around and some high wispy cirrus clouds, but nothing appeared threatening. We had some breakfast, and tidied up camp, packing everything into our tents before we left.
A bright, sunny morning!
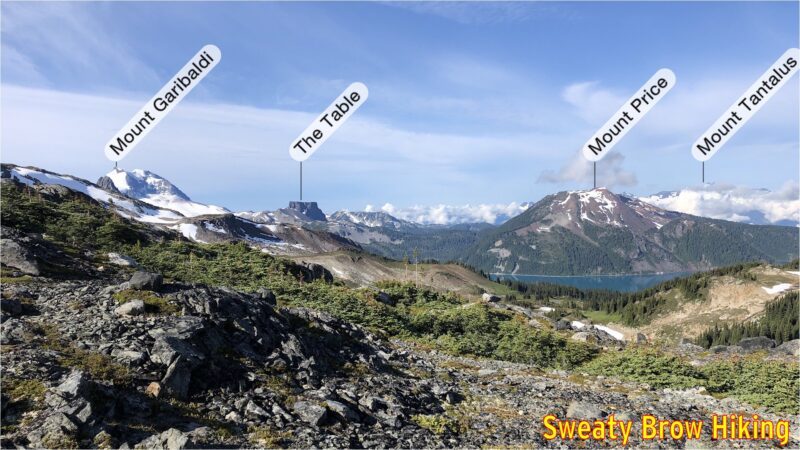
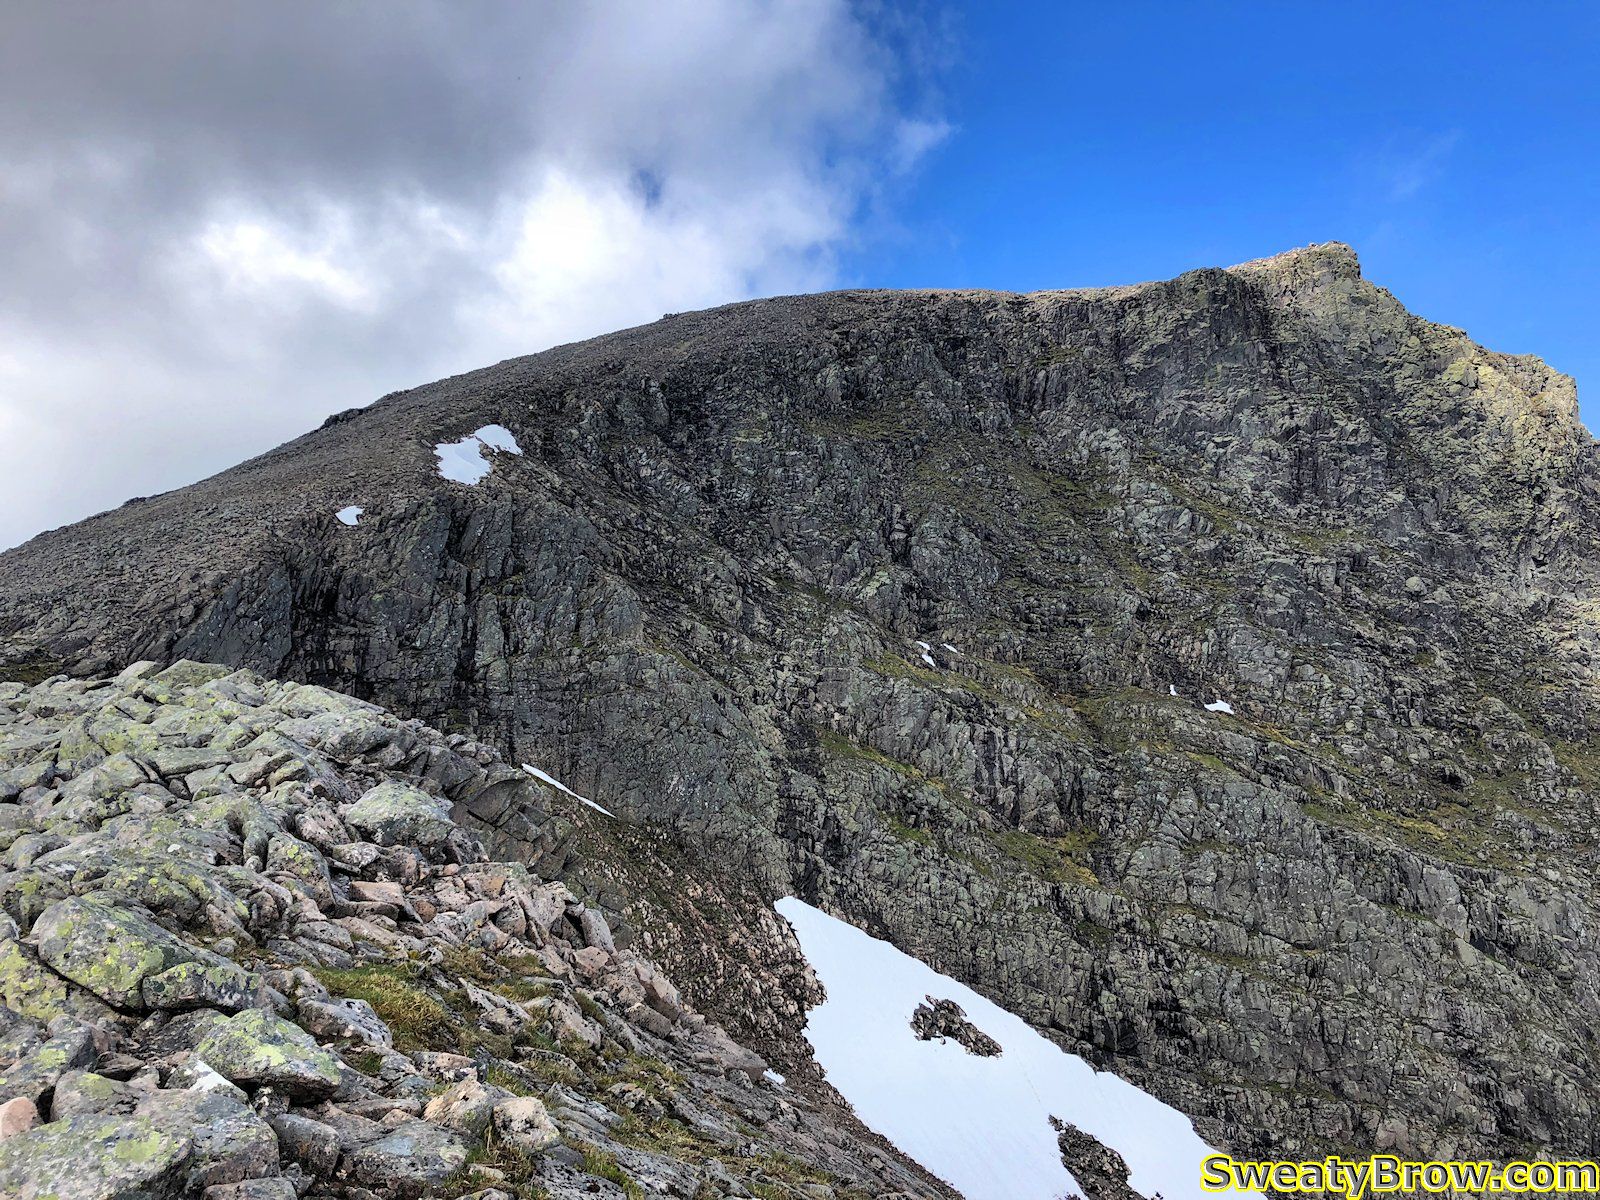
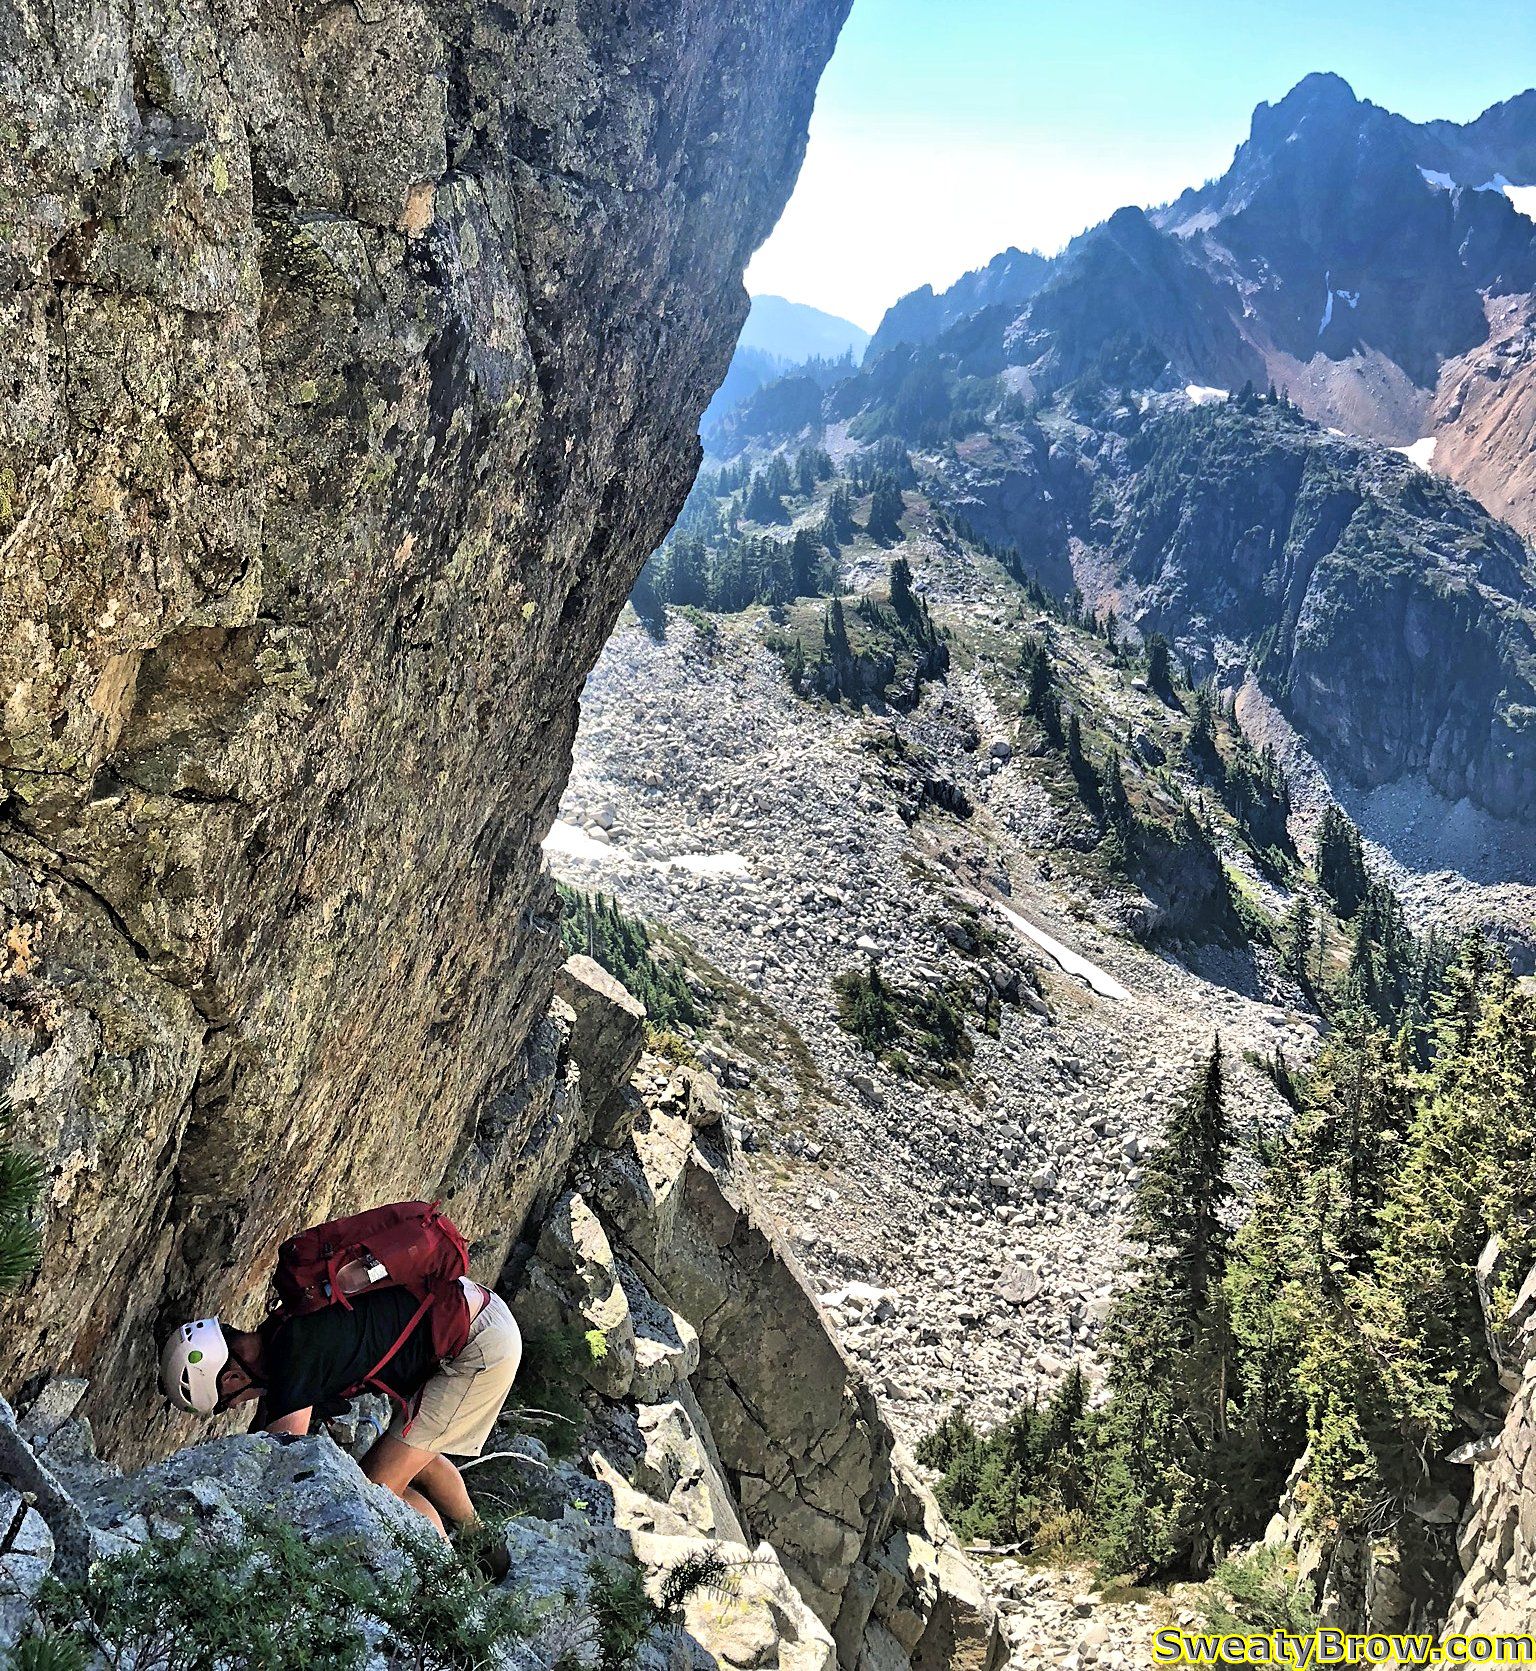
Again, 8:15 was out departure time, and we made quick time heading out of camp up toward Polemonium Ridge. That quick pace didn’t last very long, however, as the route was a long, steady climb up, up, up. Still, we managed to reach the top of the ridge in just over an hour. As we moved up, the views continually improved.
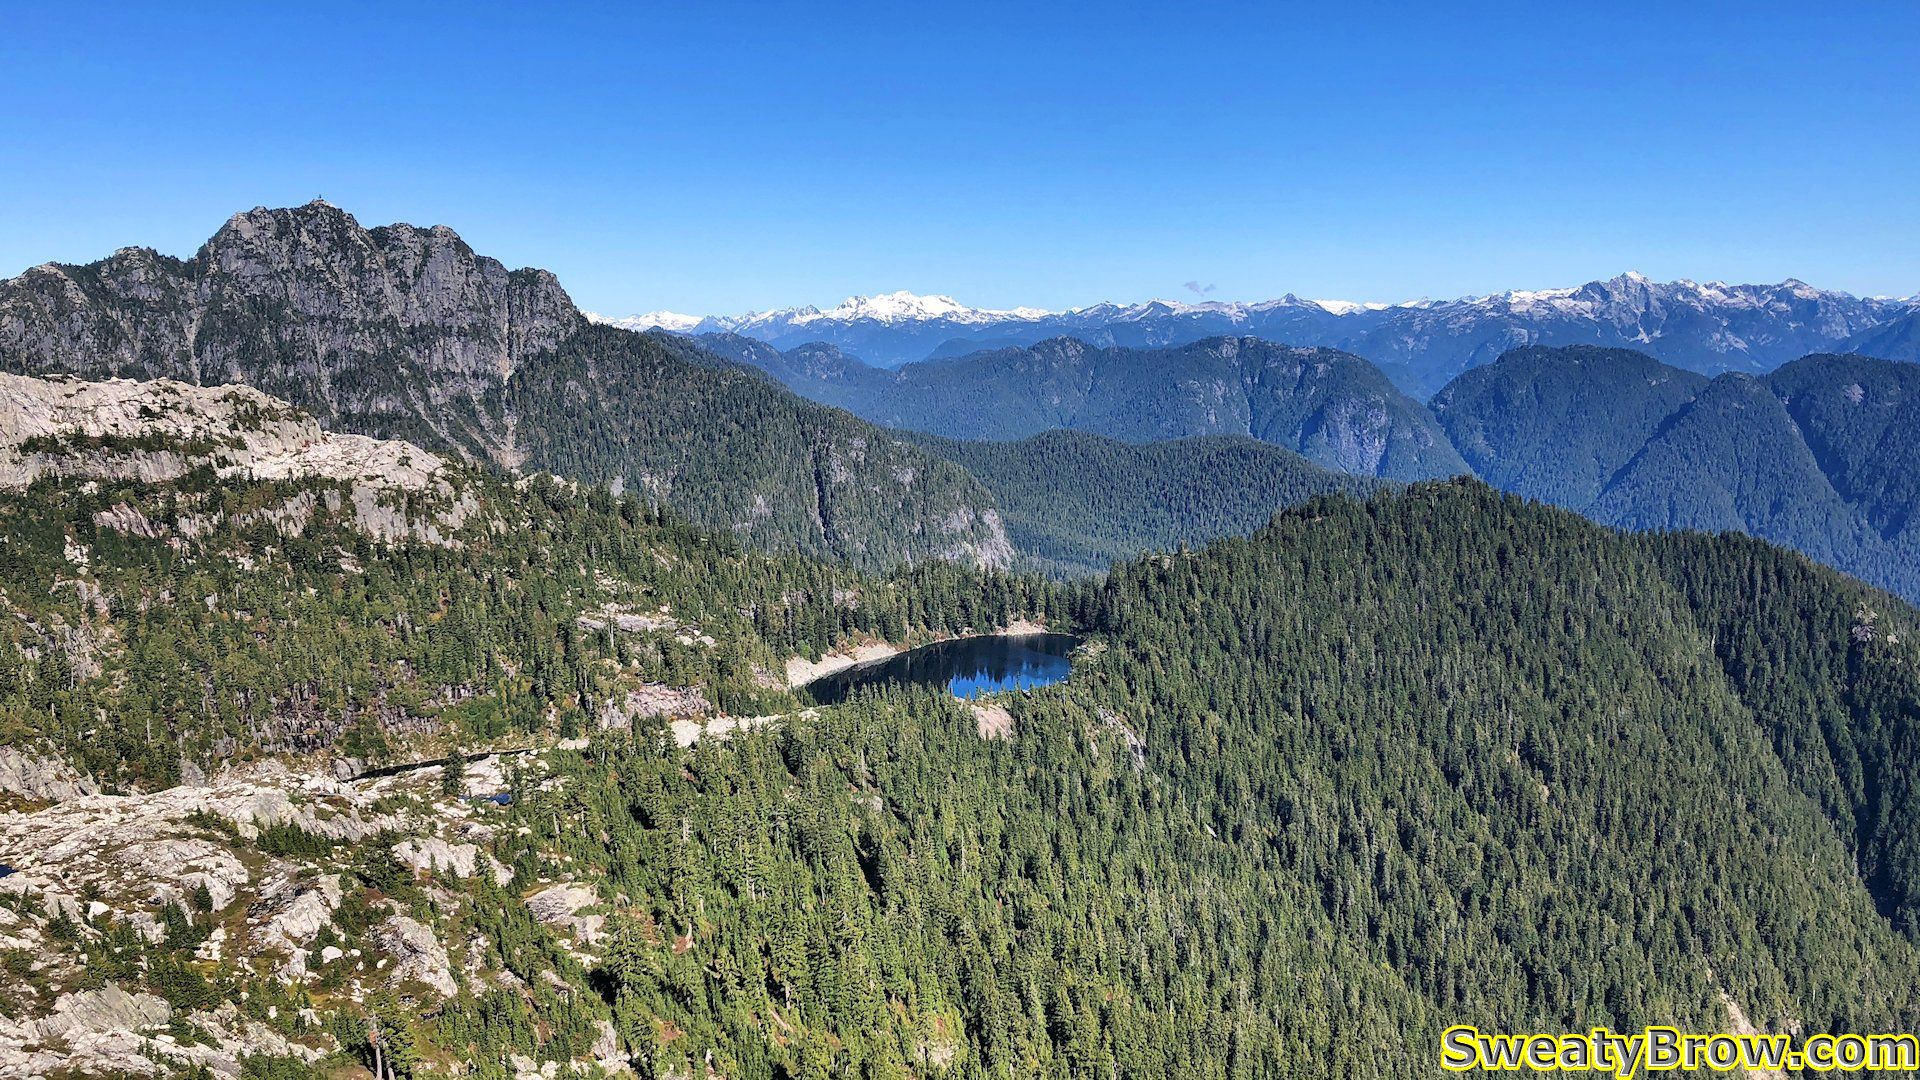
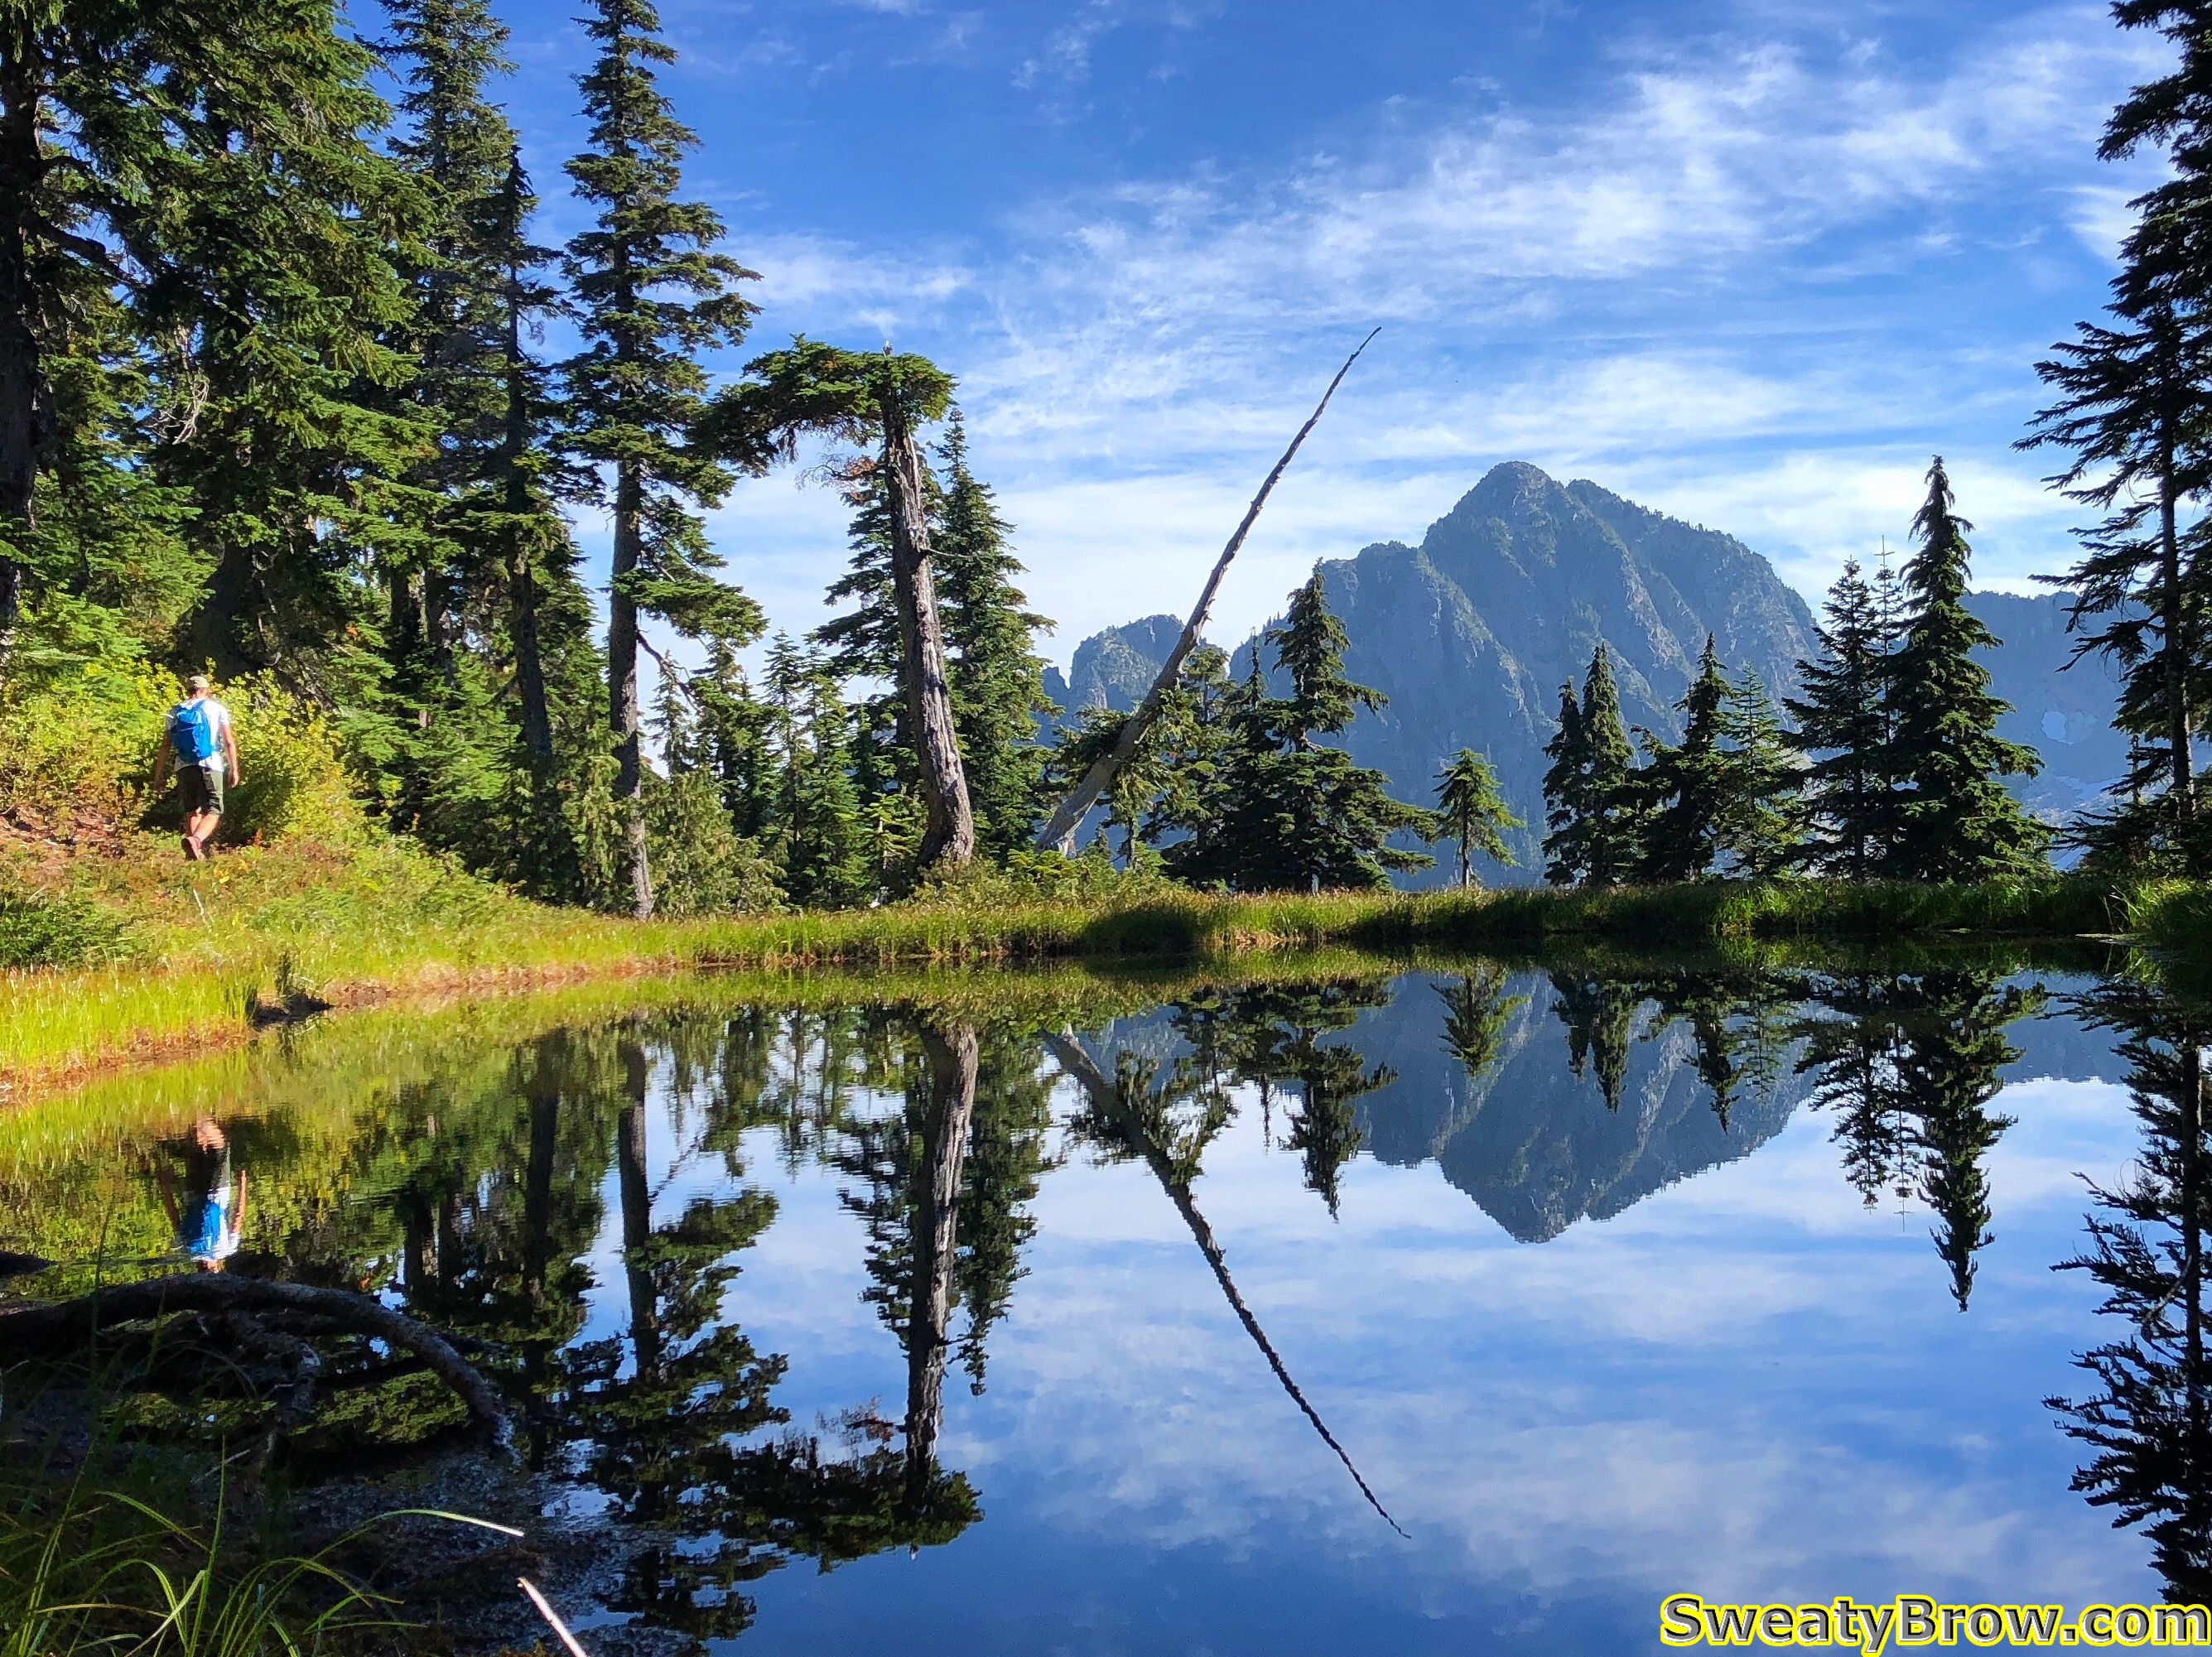
Starting up toward the summit of Gentian Ridge. Castle Towers is the tallest summit just left of centre.The views opening up over Garibaldi Lake. Labels via the Peakfinder App.
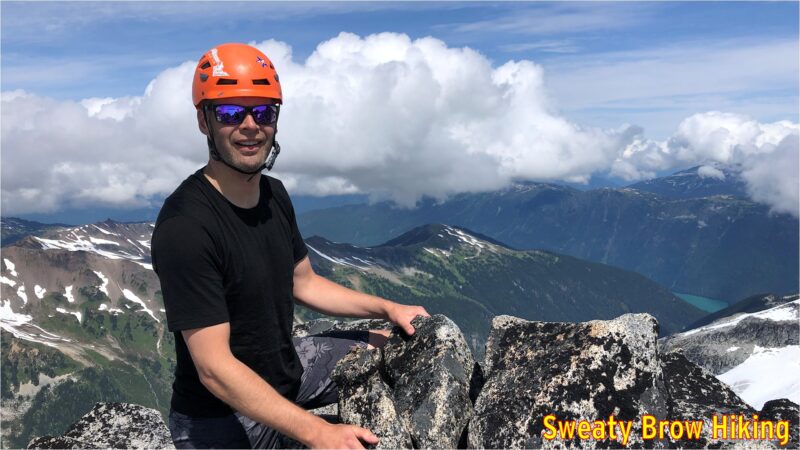
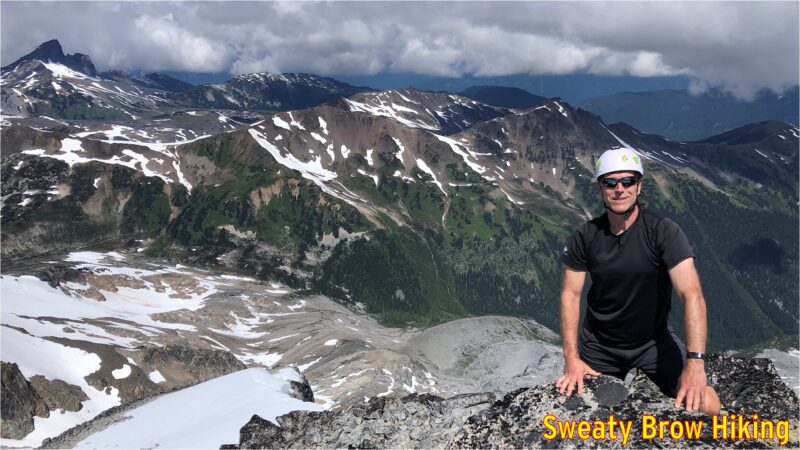
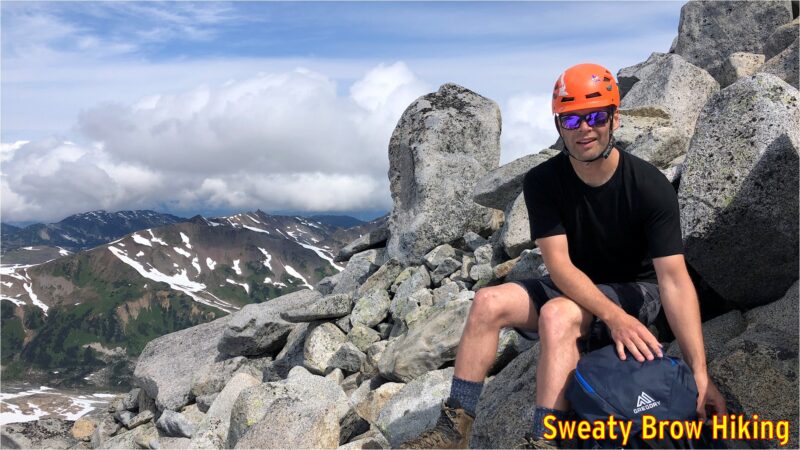
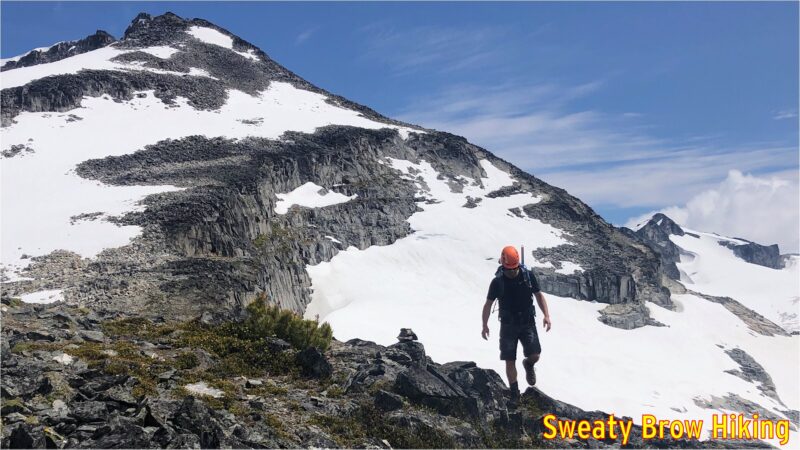
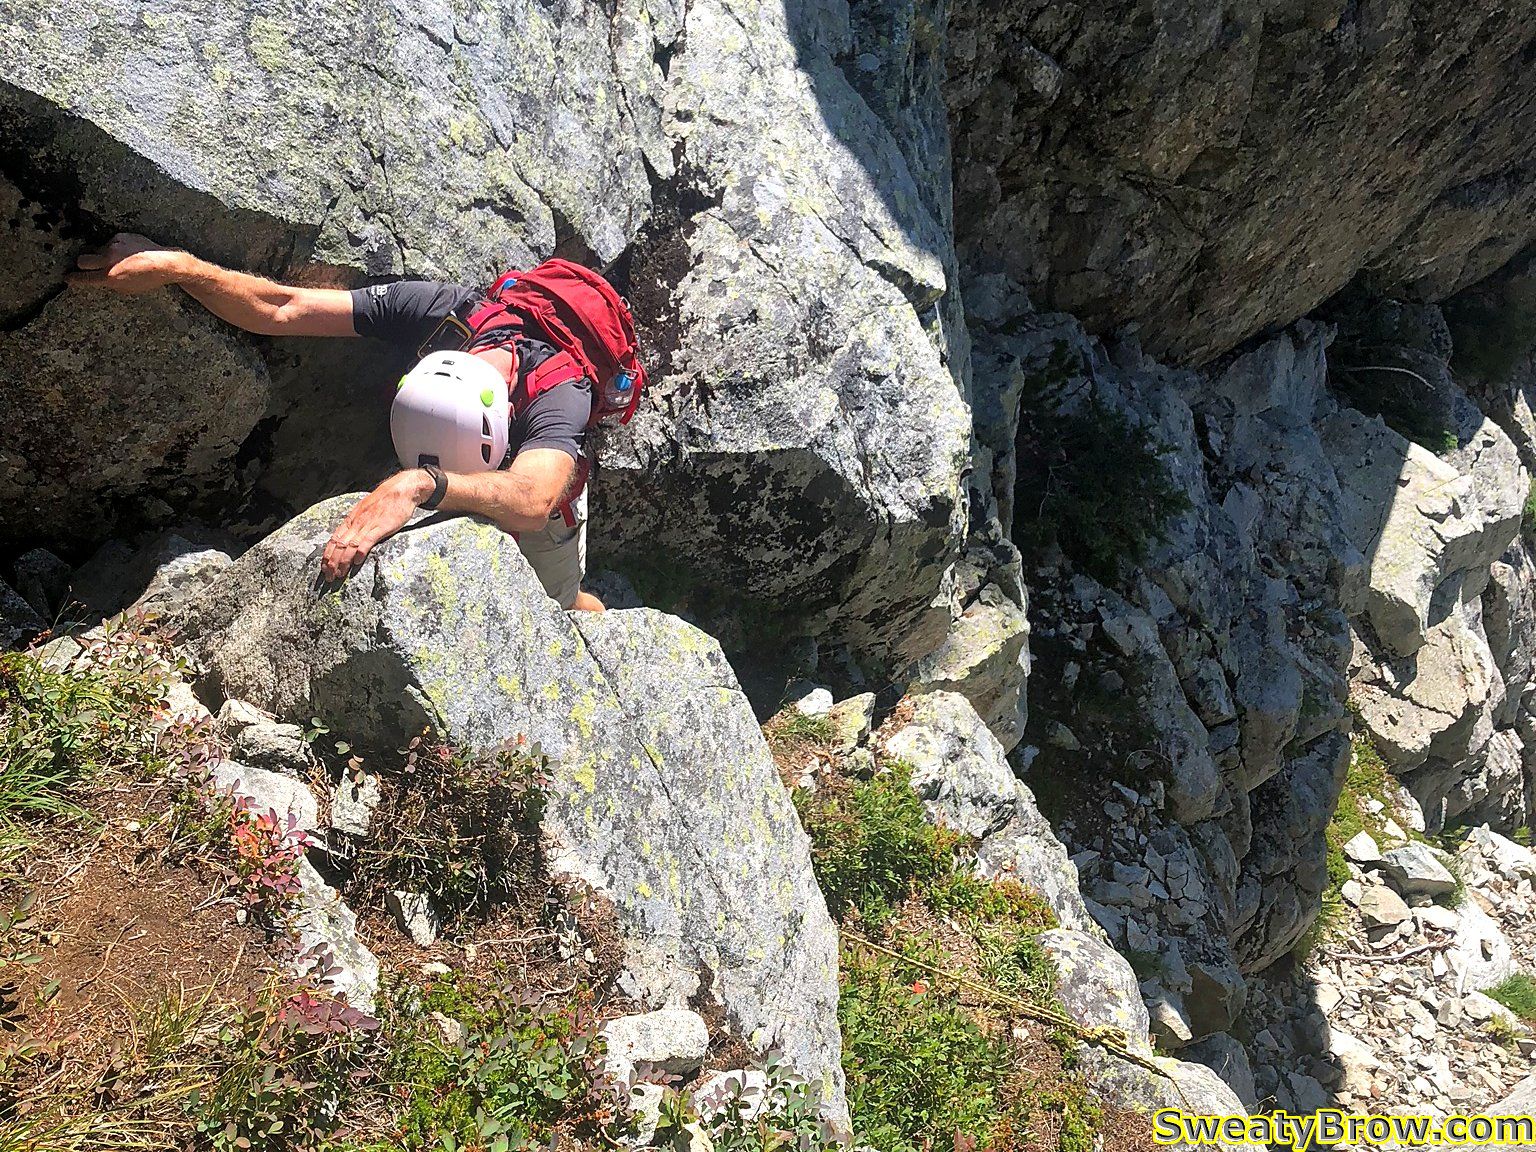
We stopped for a quick snack, and strapped on our helmets before starting a steep, rocky descent down the other end of the ridge. Soon we were out of danger from loose rock, and started up the other side of the pass toward Castle Towers.
The top of Castle Towers (well, not actually the “top” as the route only goes to the lower of two summits – the true summit was beyond our comfort level!) is only about 1 km travel from the pass, but an ascent of over 400 meters. You could call it steep!
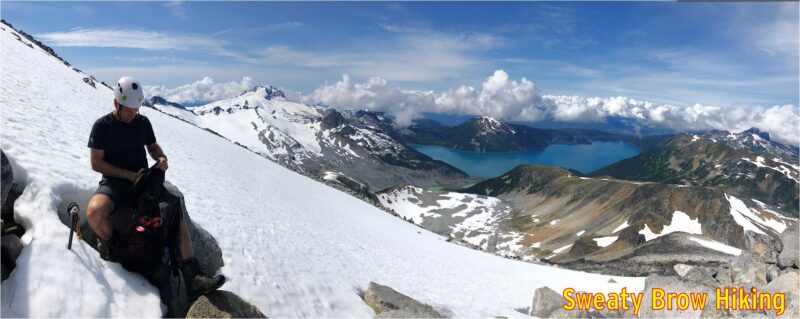
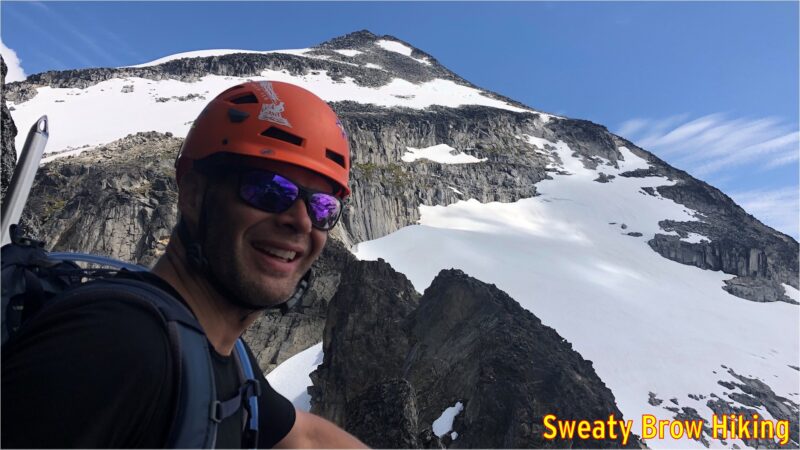
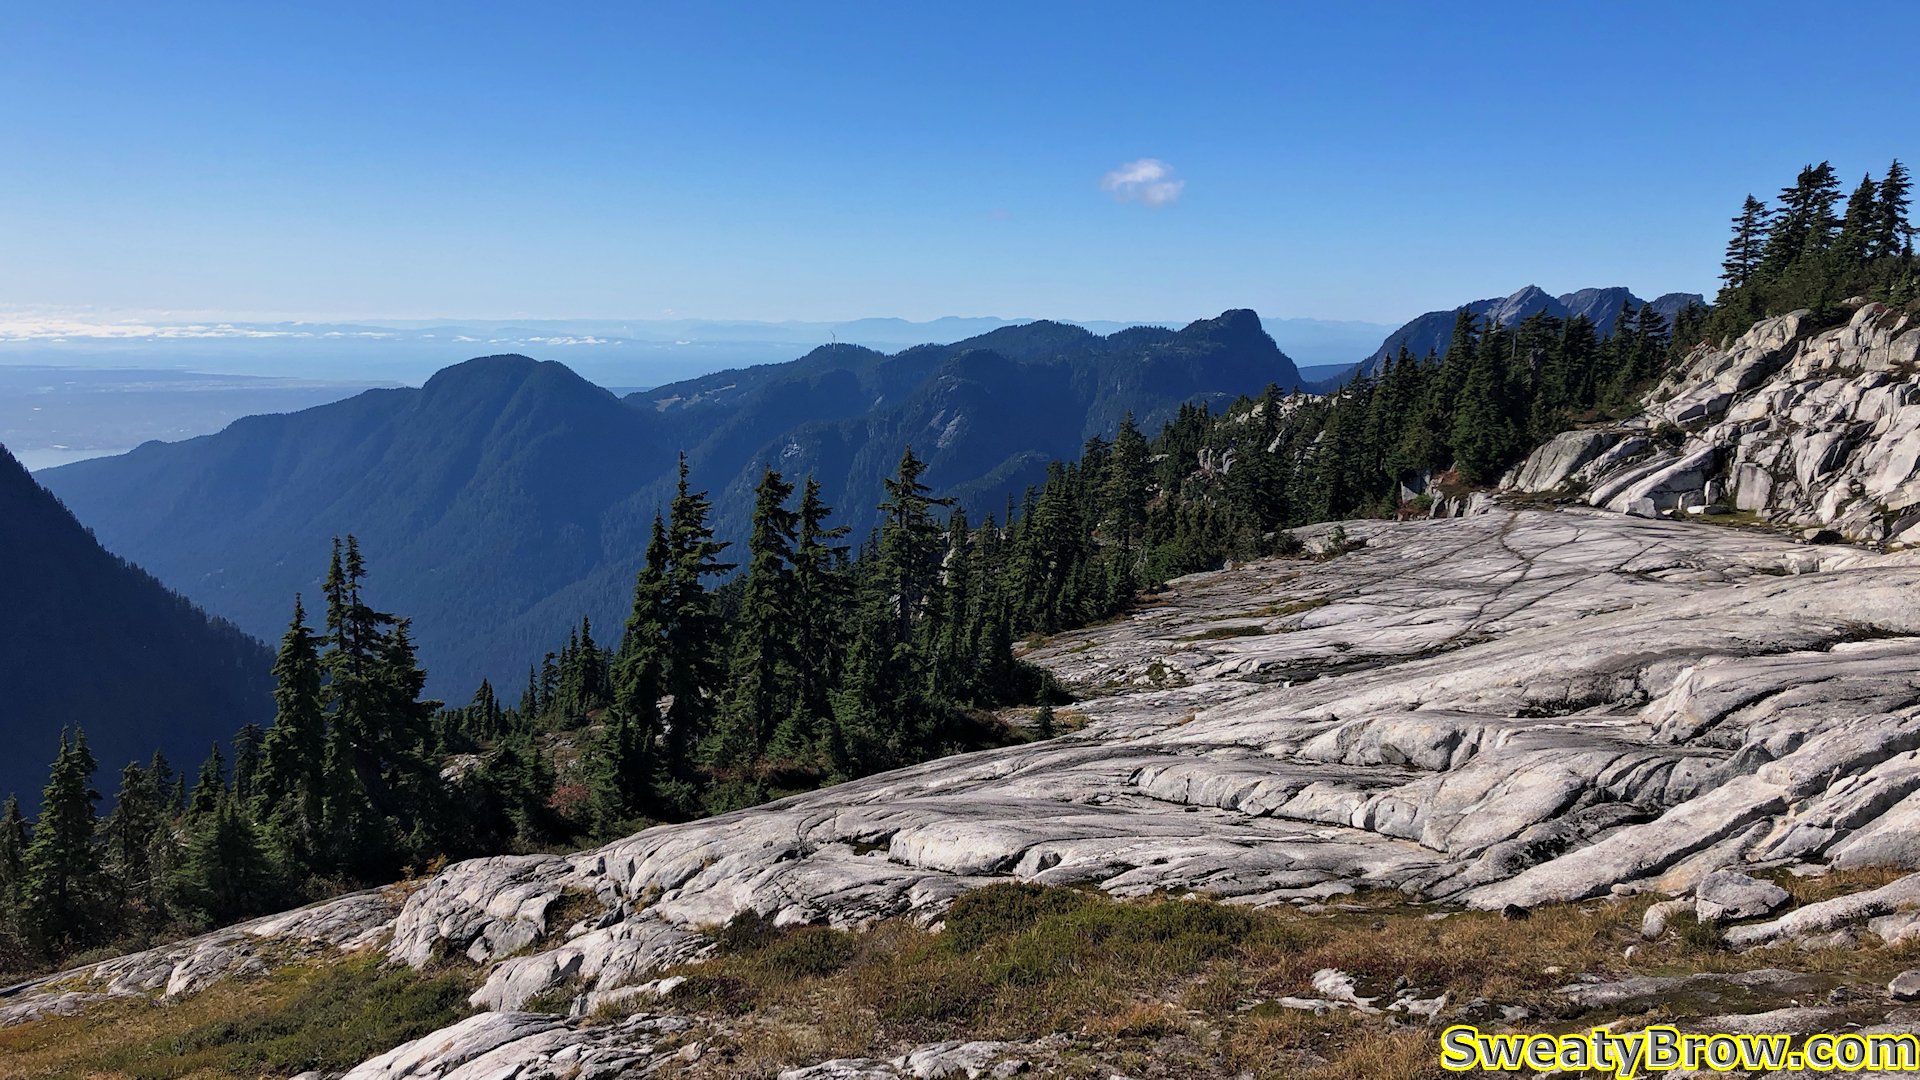
There were a couple of steep snow fields along the way, and we pulled out our helmets, crampons and ice axes to be safe. Again, the views opened up magnificently, particularly over Garibaldi Lake.
Snow time. Ice axe, helmet, and crampons coming out.Great spot for a selfie!Jeff scrambling up some of the rocks close to the summit.
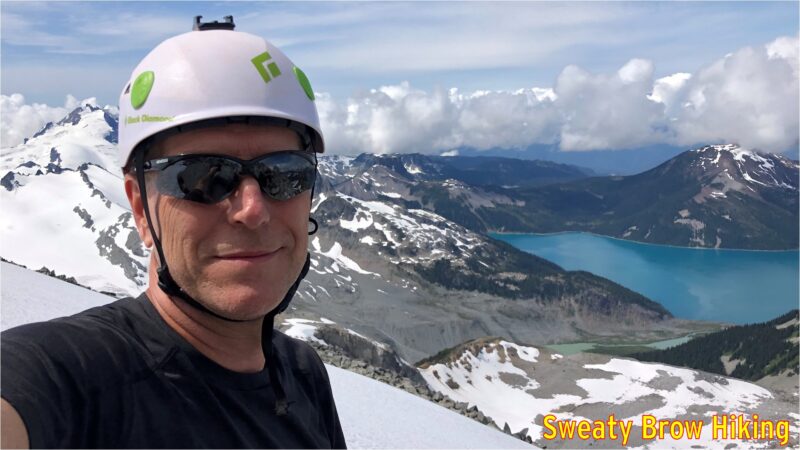
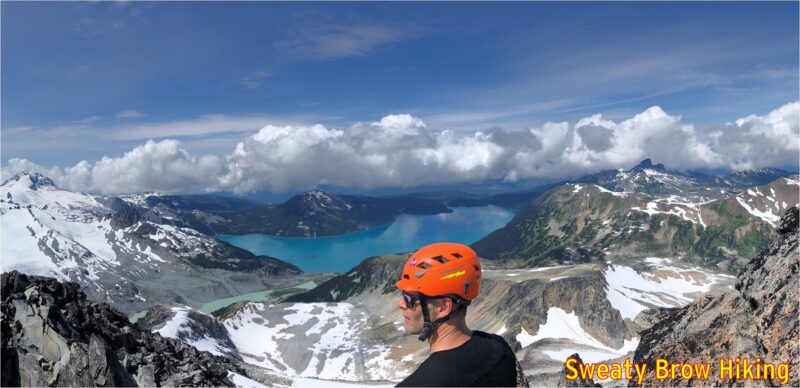
We reached the summit (well, our summit) a few minutes after noon, and took a couple of photos. We then dropped to just below the summit block, and snacked for a little bit.
Looking northeast, with a peek-a-boo view of Cheakamus Lake.Looking northwest, with The Black Tusk dominating the left skyline.Great views as we enjoy a snack.
Looking around, we could see that there were some troubling clouds beginning to gather around the area. The Black Tusk began to play peek-a-boo, and there was a lot of development down towards Squamish, beyond Mount Garibaldi. Soon, we began our descent.
Starting down one of the snow slopes. The Black Tusk is now partly shrouded in cloud.Stopping to pack away our ice axes
Once again, we stopped atop Polemonium Ridge for a bite to eat, and to get a few last photos of the day’s destination. Then, the long, steady trip back down to camp.
Climbing out of the pass toward the summit of Polemonium Ridge, looking back up where we’d been shortly before.Rounding the top of Polemonium Ridge on the way back.
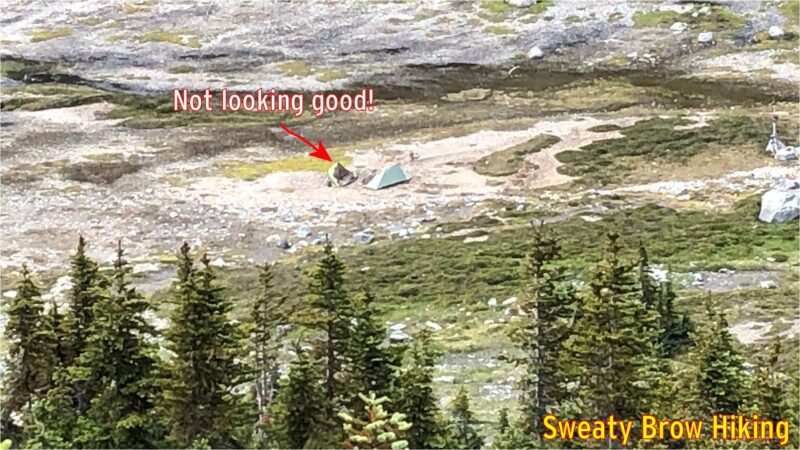
When we were approaching camp, and our tents grew from tiny specks on the gravel into recognizable objects, something didn’t appear right. Jeff’s tent looked… messed up. It appeared to be partly opened, and no longer fully standing. We became very concerned that perhaps a bear had gone for a little look-see in camp.
As we were coming down the ridge, we took this photo to try zoom in and see what was happening with the tent on the left.
When we actually reached the tents, there was a great sense of relief. The gravel that we had set up on had just softened with all the rain the previous day, and one or two of Jeff’s tent pegs had pulled out, causing one side of the tent to collapse in on itself. No bears here!
We had taken quite a while to get to the summit and back. A trip of 3 km each way, so 6 in total, had taken us six hours. Yup, we averaged 1 km/h. Probably one of the slower hikes I’ve done! But we were in no rush, there was a bit of complicated micro-terrain to work through in a couple of places, and we still had a long hike out ahead of us.
We packed up our tents, and began the hike out shortly before 4 PM. We knew that the hike out would take quite a while, and we would be pushing dark by the time we got back, but it was a well established trail, and we had headlamps!
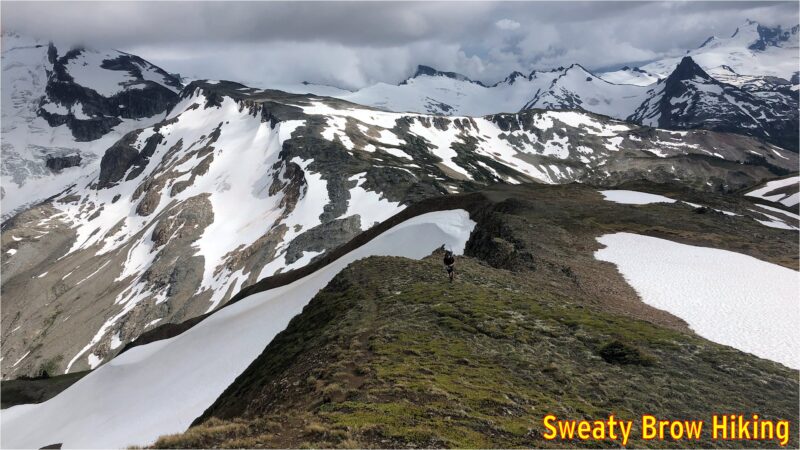
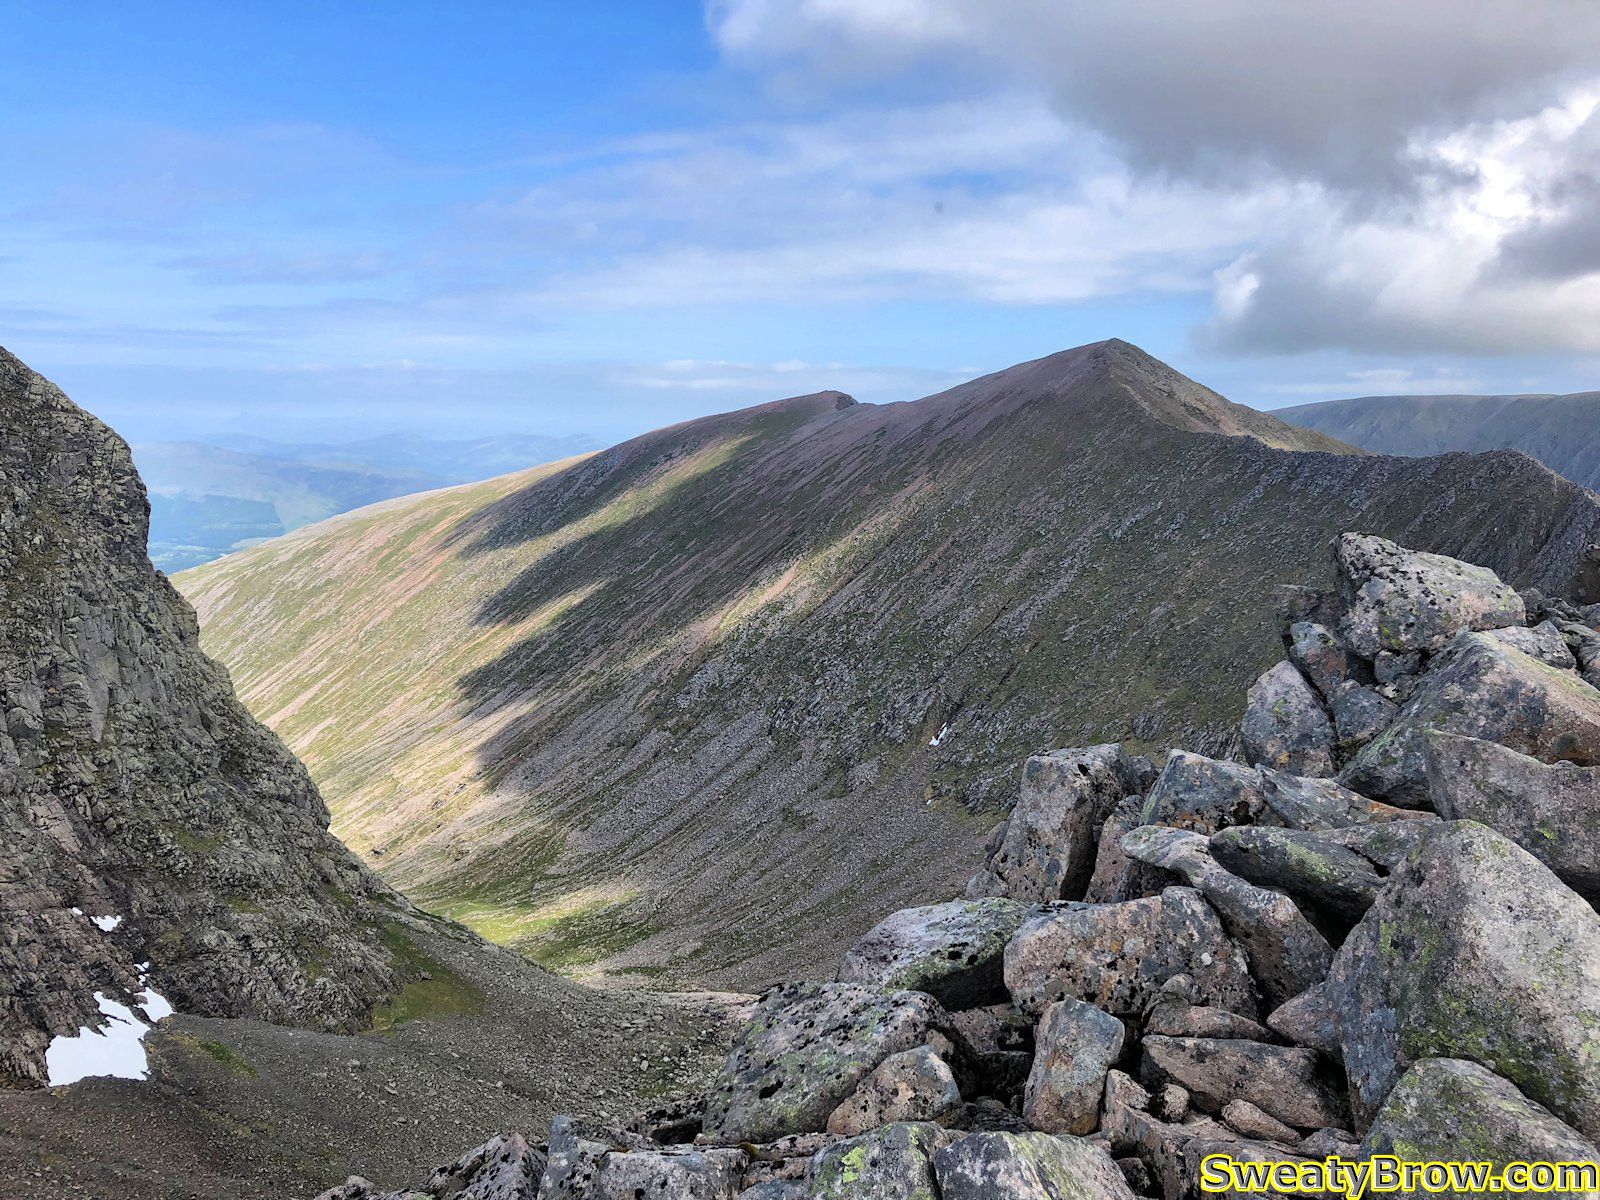
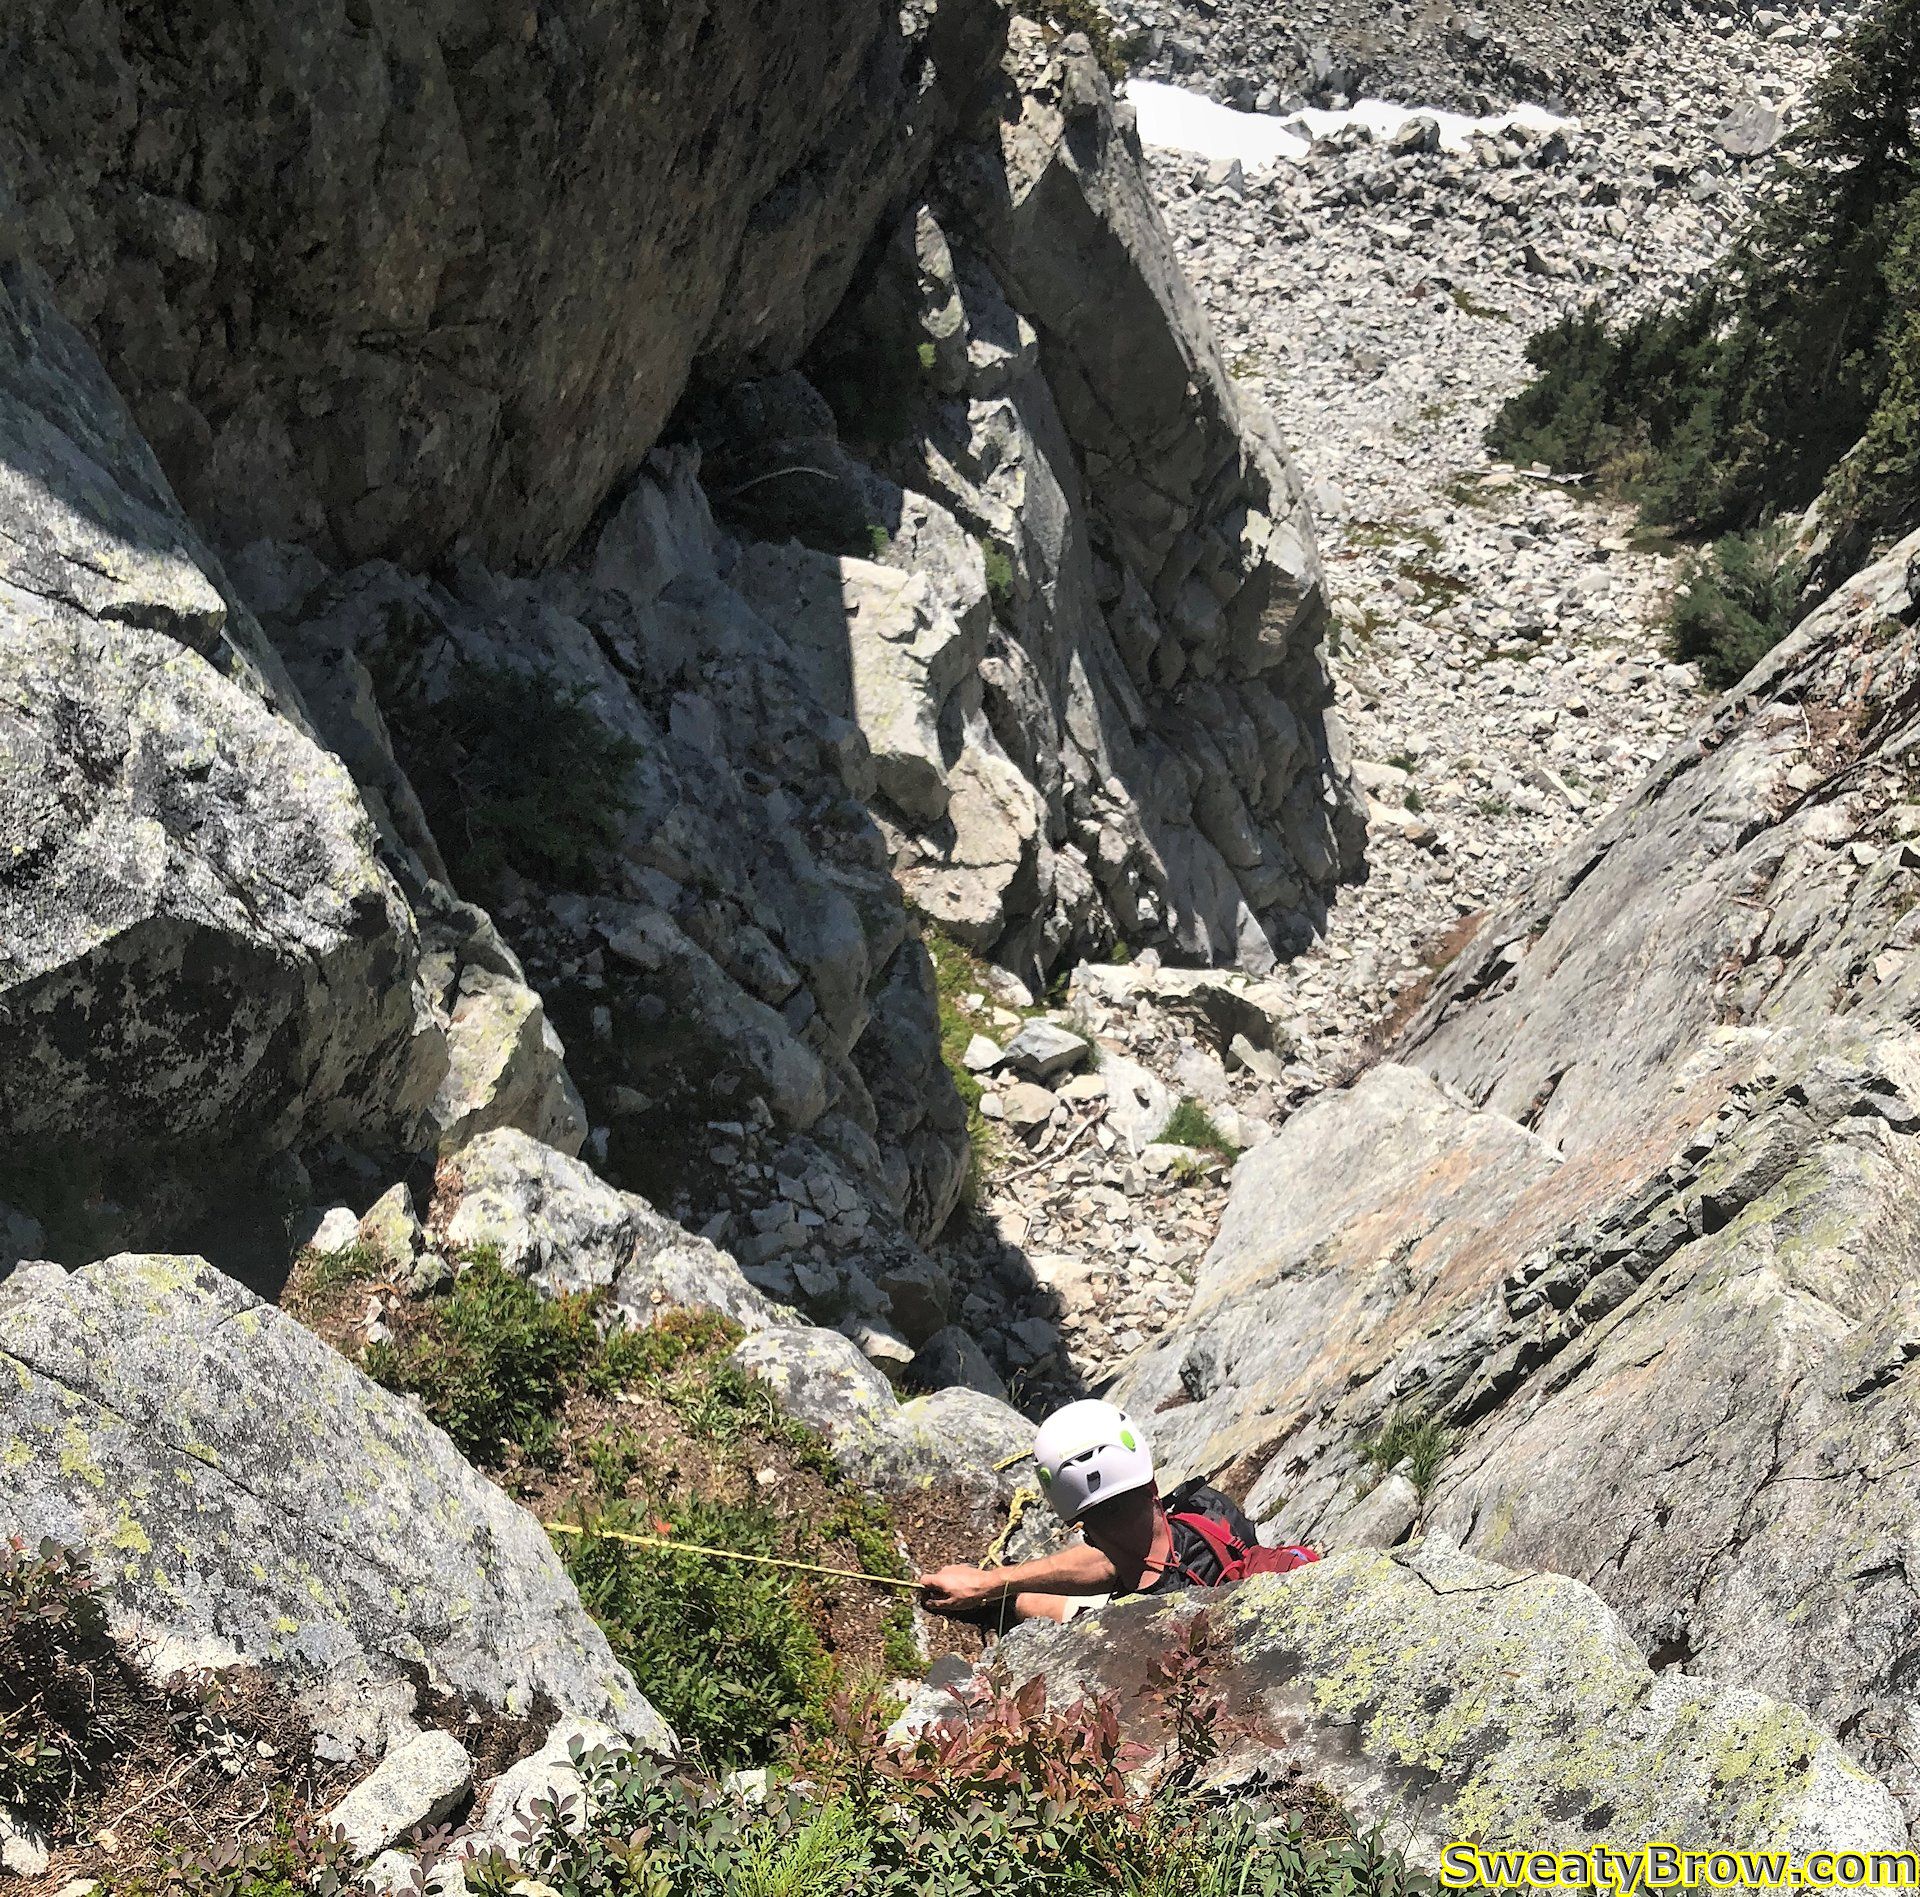
The trip back was much easier than the hike in had been, and the views much more pleasant. Once we climbed up and out of Gentian Pass (up, up, up the slippery grassy meadows), the trip along the ridge toward Helm Peak had much more expansive views. What’s more, we could actually see where we were going, and bypass some of the bumps along the way.
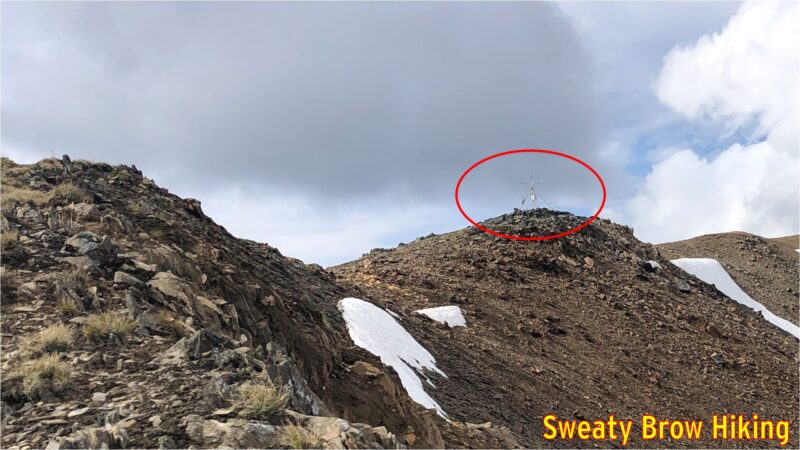
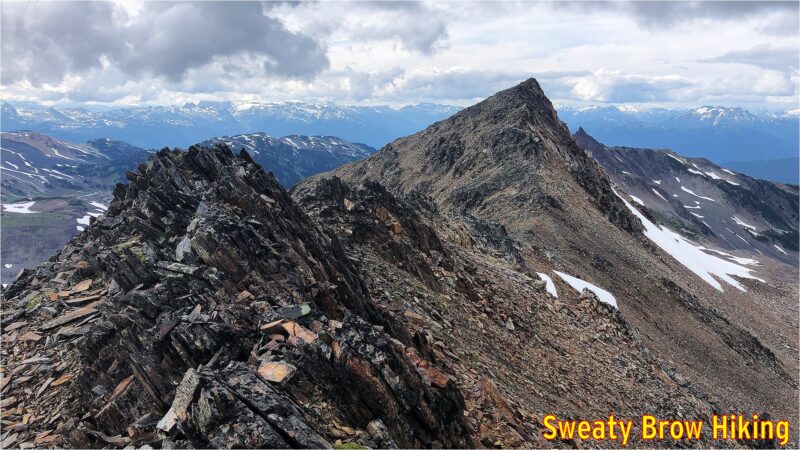
Starting back up Gentian Ridge. Castle Towers is on the left, and starting to get socked in by cloud.Heading up the ridge, we passed this strange, spindly, space probe looking thing. Turns out it was a weather station recording information for a university program.Some of the peaks along Gentian Ridge that we were able to skirt around, because we could see the terrain on the way back!Helm Peak, the evil looking spire just right of centre, looks intimidating, even from here. It’s even scarier close up, as I learned in the summer of 2020.
The route back down to Helm Creek Campground was also more straightforward, following the ridge down almost all the way to the groomed trail, rather than the makeshift route we took up the side of the valley on the way in. The ridge is still brutally steep, coming up or going down, but at least there is a rudimentary trail.
At 7:15, we passed through the campground, and continued down the hill.
Once again, we passed through Helm Creek Campground, and the clouds were starting to clear away. The previous day, there was one party in the campground, and they were on their way out. This time, it was a Friday evening, and there were a lot more people up to enjoy the weekend.
We reached the bridge across Cheakamus Creek at 9:00, and grabbed our chilled beverages on the way by. We cruised back along the trail, and reached the parking lot just around full dark, at 9:35.
Overall, we hiked about 31 km in total, and climbed/descended over 2900 meters of elevation, over the course of two days. The trip was a memorable experience, getting deep into the backcountry of Garibaldi Park.
Part two of my trip along the West Highland Way, from Glasgow to Fort William. Part one can be found here.
Day 3
I had a fairly good night’s sleep at Sallochy Campsite, and woke up shortly after 7:00. I was amazed at the number of midges that were swarming around the outside of the bug mesh of my tent. This would not be the last time – it was a recurring theme on this trip!
Most of the day was spent hiking north along the shoreline of Loch Lomond. Fortunately, the weather stayed nice for most of the day. Unfortunately, it kind of got ugly later in the day…
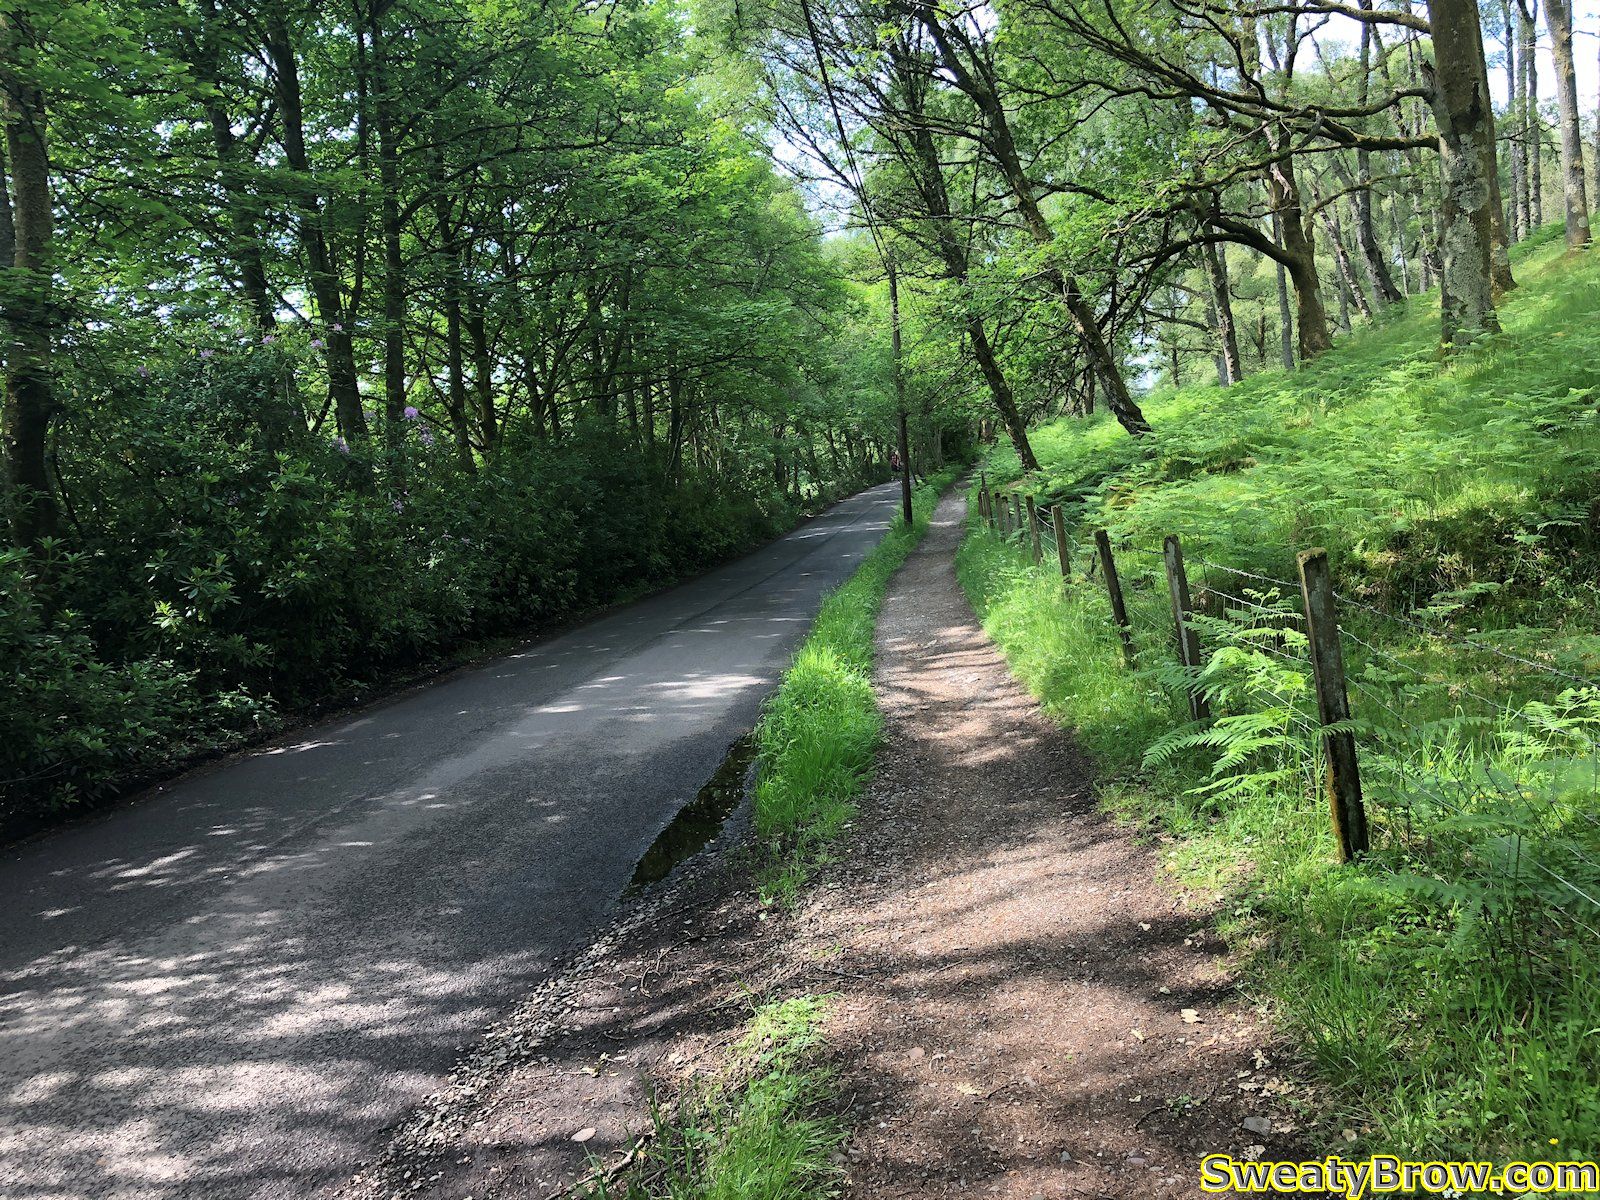
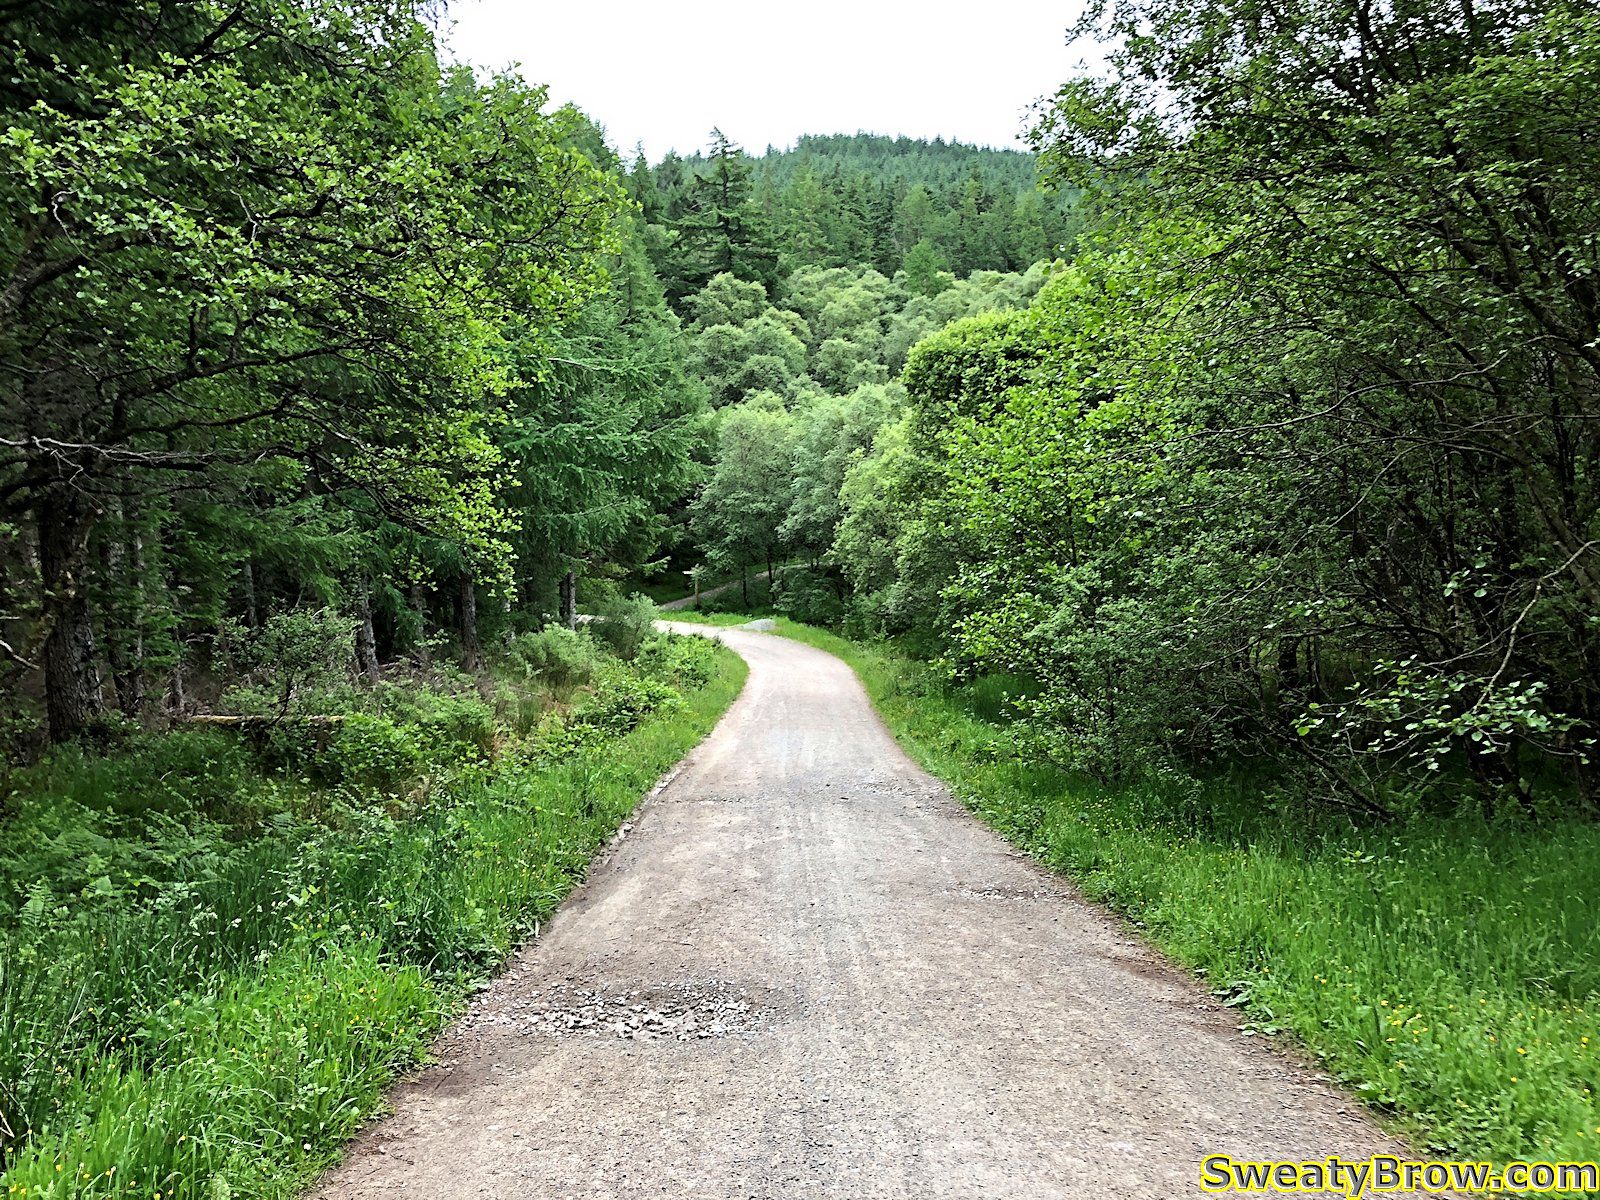
The route had now narrowed into an actual trail. Up to this point, it was mostly either a gravel or dirt road, or a pathway alongside a paved road. Now the trail (very developed, with a groomed gravel surface) wandered along the lochside, through ferny forests, and across lovely babbling brooks.
The trail following a road, the day before.
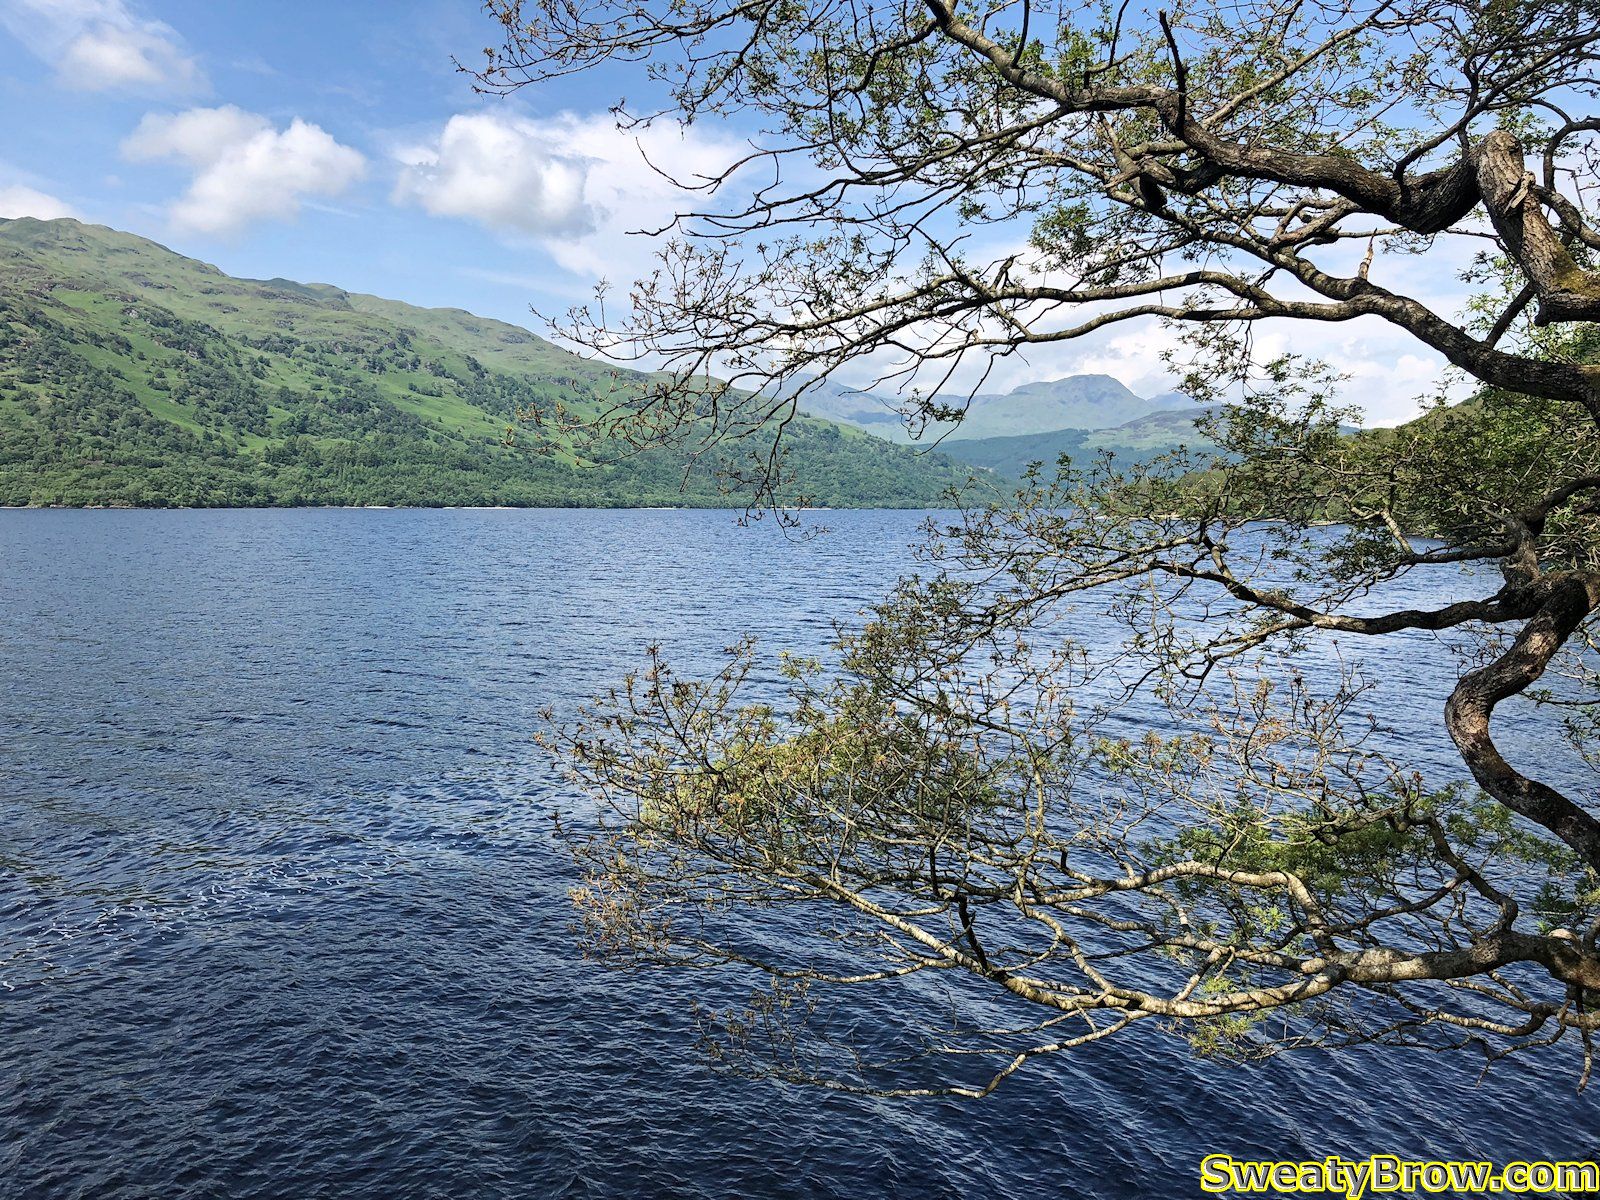
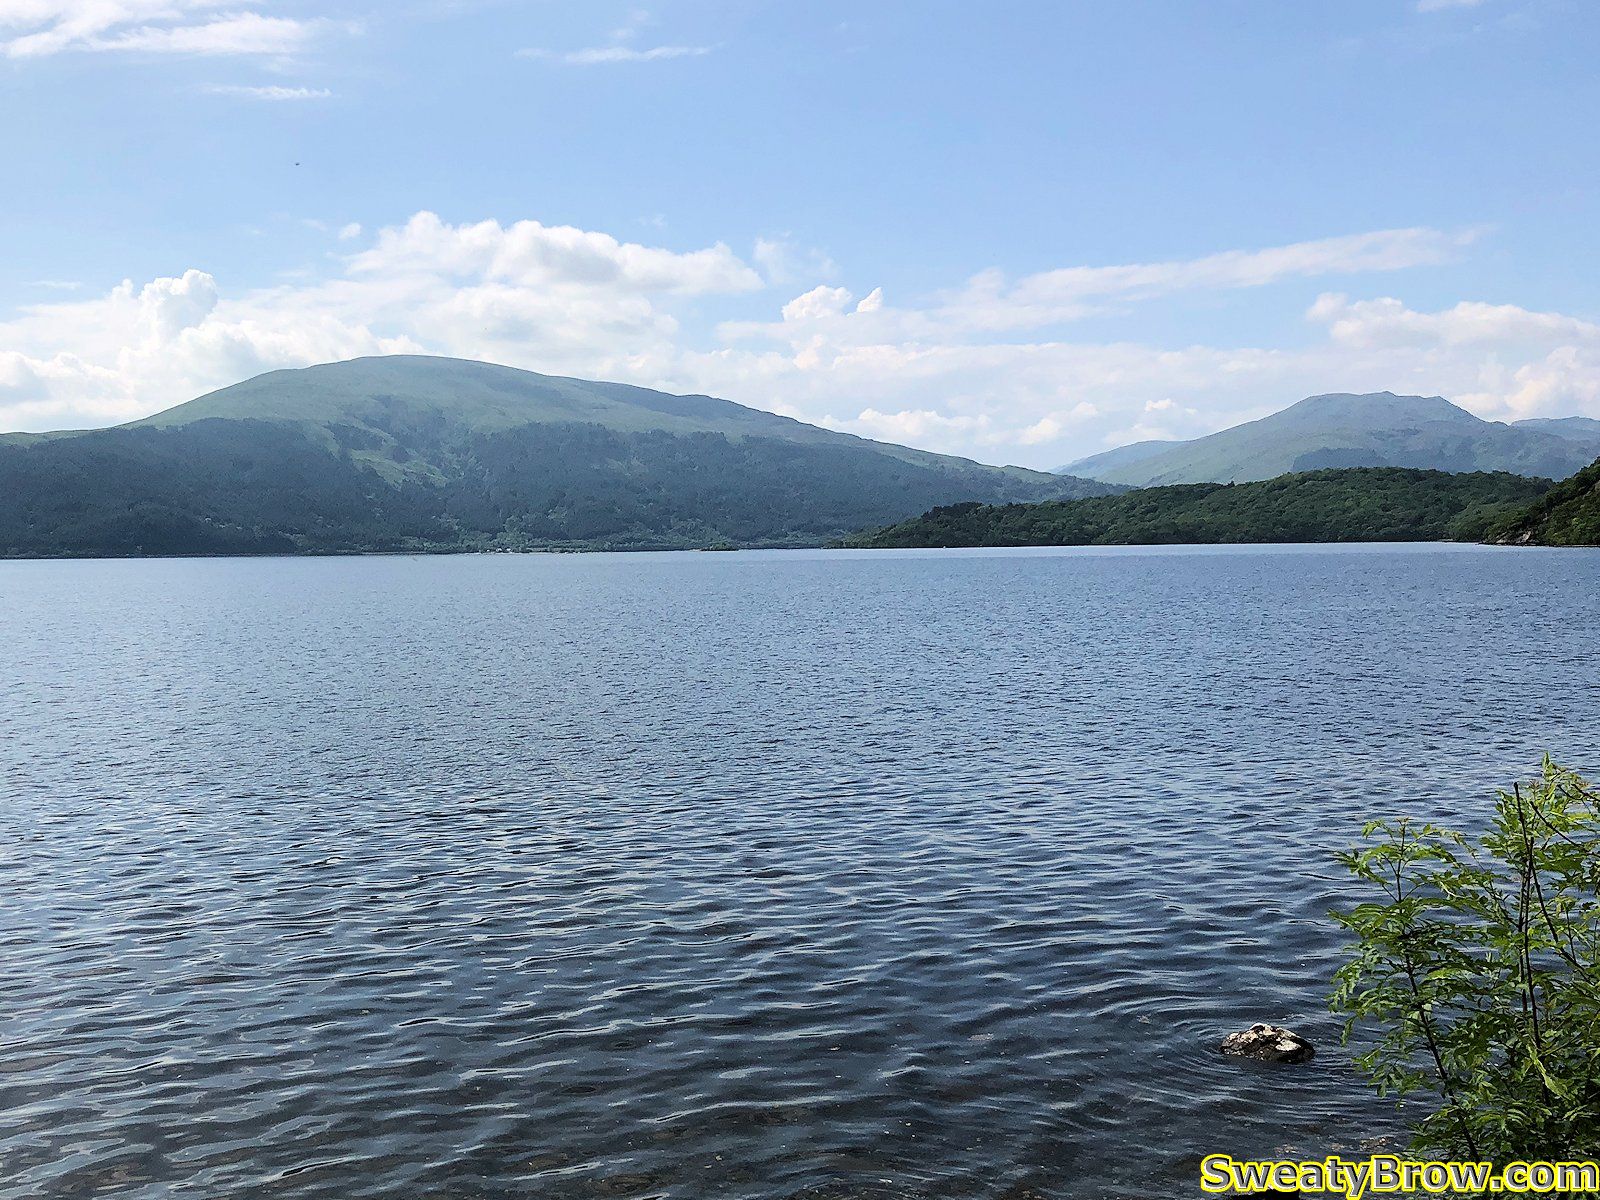
Looking northward, along the edge of Loch Lomond
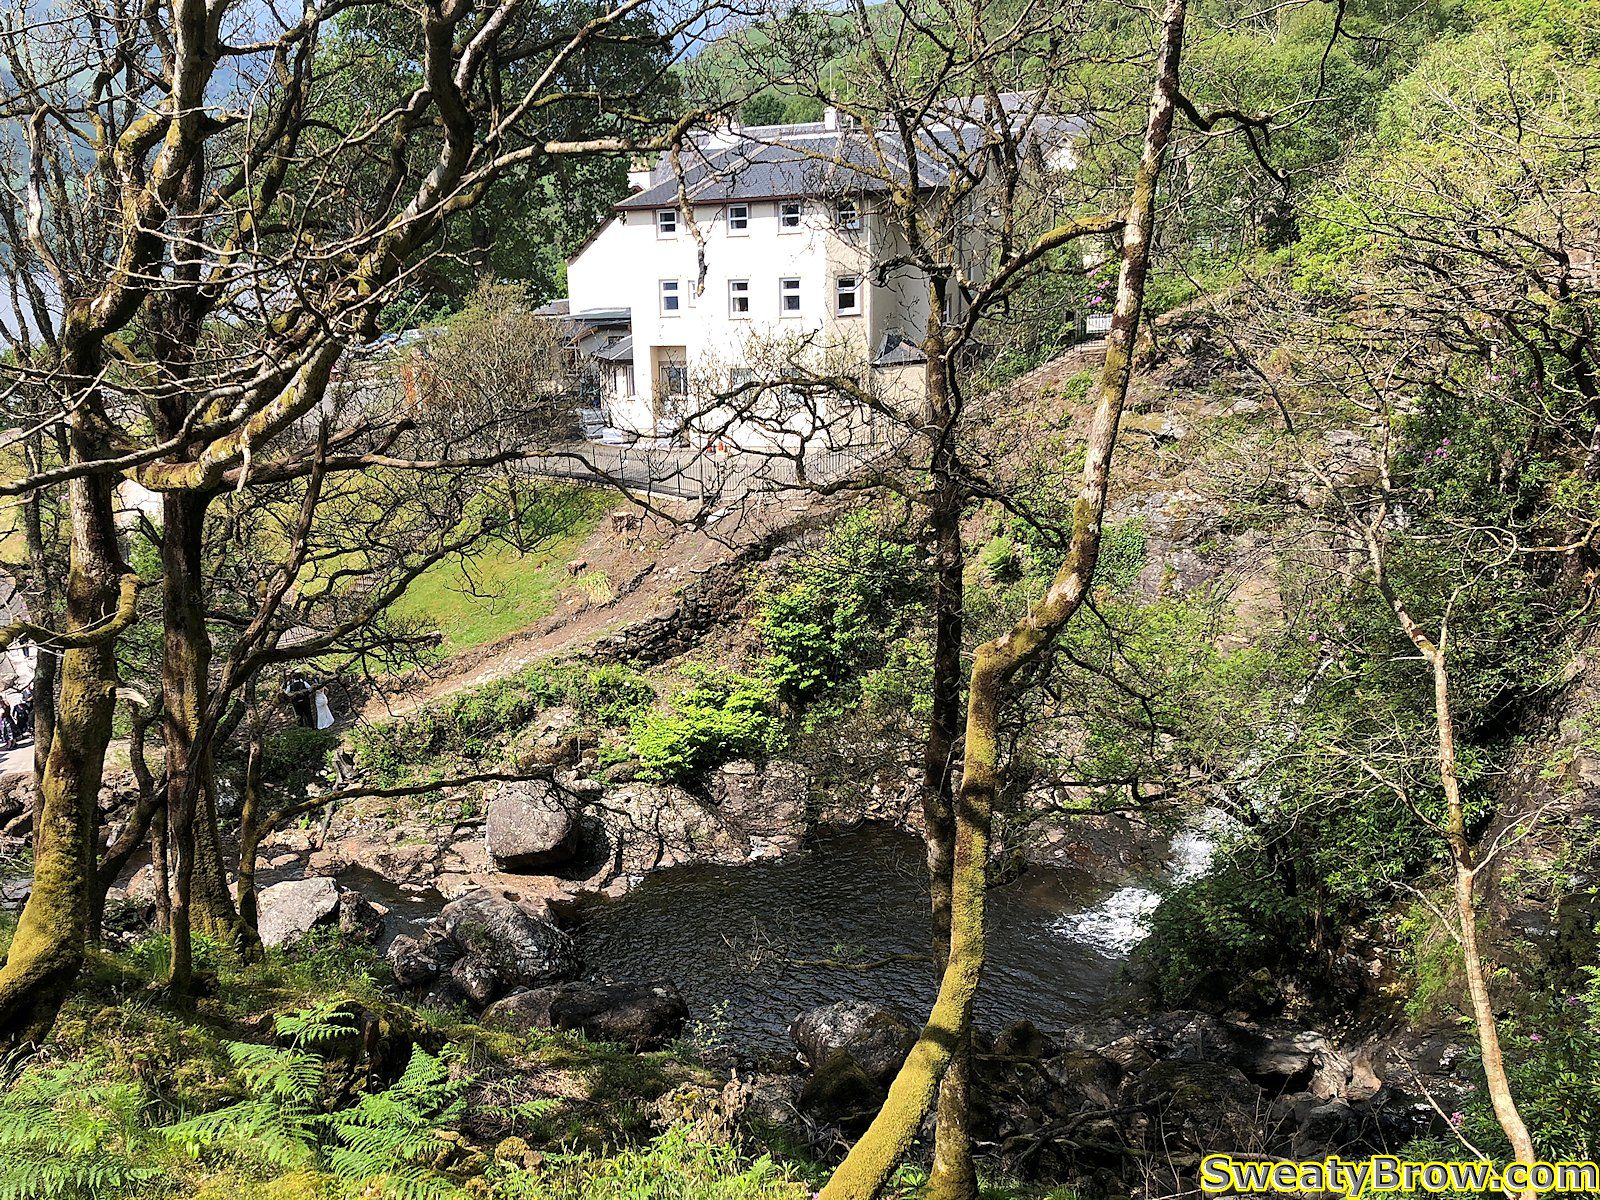
I passed a fairly large hotel, the Inversnaid Hotel, around 2:30 in the afternoon. There appeared to be a wedding going on, and I saw the bride and groom posing for photos near a waterfall below the trail. I made sure I didn’t photobomb them!
A view of the Inversnaid Hotel through the trees
At 3:00, I rounded a point, and had a view up toward the north end of the loch. There were some dark, foreboding clouds up that way, and I began to hear the sounds of distant thunder.
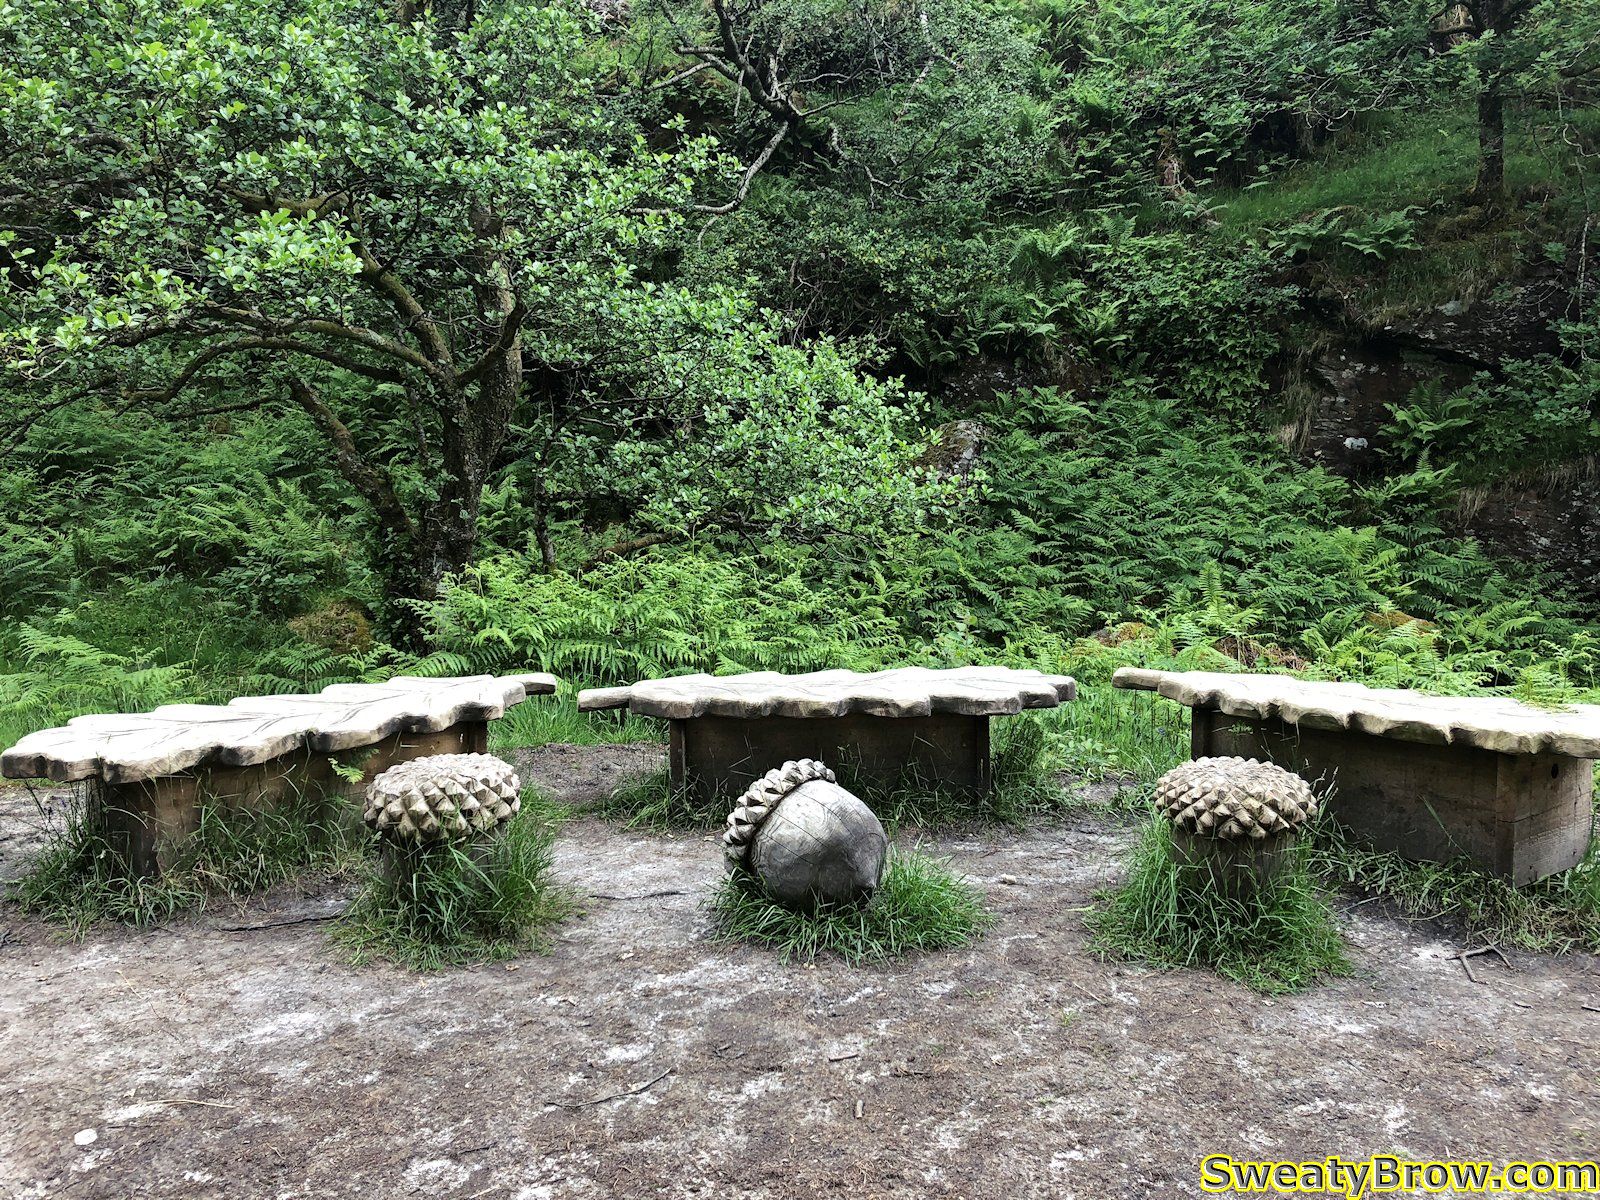
Along this section of trail, I came upon one of the more interesting trail features I saw: a little gathering of three tables and some chairs made of wood, in the form of oak leaves and acorns. Very cute!
Acorn and leaf trail-side accouterments!
Shortly after 4:00, a little bit of rain began. It was just a little light shower activity, but I donned my rain shell, just in case. A little while later, I strolled across a field with an abandoned old house, and a smaller stone building at the far end. This was my first bothy!
What is a bothy, you ask? “A bothy is a basic shelter, usually left unlocked and available for anyone to use free of charge… Most bothies are ruined buildings which have been restored to a basic standard, providing a windproof and watertight shelter. They vary in size from little more than a large box up to two-storey cottages.“ – Wikipedia
The bothy had a trio of people inside already, and I joined them. It began raining much harder outside, as an actual thunderstorm came rolling through. The bothy was a solid stone building, with a couple of raised sleeping platforms. There were just a few small, deep-set windows in the walls, which made the place quite dark inside.
I sat down on one of the sleeping platforms, just below a window, and pulled out my book for a while. A few other people came in and dried out, then carried on. There was a bit of conversation among the occupants, but each group mostly seemed to keep to themselves. As a solo traveller, I didn’t chat much with the others…
Home for the night was going to be a campground at Beinglas Farm, which was a little over three km along the trail. The rain seemed to be pretty much done by about 6:00, so I packed my things back up, and got on my way.
Fifteen minutes before I got to the campground, the skies opened up. Seriously, the rain came down hard! Truly a deluge, for the remaining 20 minutes on the trail. I splashed into the campground, and was thrilled to see that there was a warm, dry pub on offer! I shed my rain layers, paid for a campsite, and sat down to a dinner of cullen skink, bread, and Guinness(es).
After a little while, the rain began to ease, and I went out to set up my tent. With the rain dying off, the midges began to reappear. I set up the tent and got right in. Later in the evening, someone was playing live music in the pub, and it sounded pretty good! Unfortunately, I knew that exiting the tent, and getting back in later, would permit far too many midges inside. I declined to do so…
6 June, 2018. It was about 4 in the afternoon when I arrived back at my campground for the night. I had just spent 8 hours hiking up and over Càrn Mòr Dearg and Ben Nevis, and I was bone tired. More than that, I was incredibly discouraged. The hike had been only about 18.5km, with a cumulative elevation gain and loss of less than 1500m. On top of that, the whole thing began and ended very close to sea level. There was no reason that it should have tired me out the way it did! I was in good shape, and very accustomed to trips of that length and difficulty.
I thought about the general plans I had over the next few days. Nothing really well defined, but the goal was to do a lot of vertical, up and down a bunch of Munros for the next week or so. Feeling the way I did after Day 1, I realized I wasn’t ready for it.
I think the major problem was the jet lag, and lack of sleep from my sleepless 9 hour red-eye flight. An additional issue was that I was a bit anemic – a situation spotted during a platelet donation just a couple of days prior to my trip. I am basically a vegetarian (I do eat some seafood) and had not been keeping up on my supplemental iron recently. It was showing. I wasn’t desperately low on iron, but low enough that I had to be deferred for a couple of months. The low iron count was certainly a factor in the fatigue I felt.
Anyway, long story only veryslightly less long, I didn’t feel up to tons of ascents and descents right away.
I hopped on the internet, and looked into some options. One that jumped out at me right away was the West Highland Way. When I was driving from Glasgow to Fort William, I had seen glimpses of people hiking a trail alongside the road, along this route.
The West Highland Way starts on the outskirts of Glasgow, and winds 154 km to Fort William. The elevation gain was fairly substantial overall (I ended up averaging about 600m of gain/loss per day over six days) but it started slowly over the first couple of days, increasing as the trail went on.
Anyway, with very little preparation, I lay in my tent that evening, and arranged my transportation online. I packed up my backpack, and tried to get some sleep.
Day 1
I woke early on the 7th of June, and packed up. Everything went either into my backpack, or into the trunk of my rental VW Golf. I drove into Fort William, and tried to figure out where to park for a week, where I wouldn’t be towed. The “long term” lots around town were no good for anything over 24 hours. Finally I went and asked in the train station. I was told that I could park around the back of the station, at my own risk. No cost, no time limit, perfect!
I parked the car, and then kept looking back, hoping I had everything I needed. Mostly, I did…
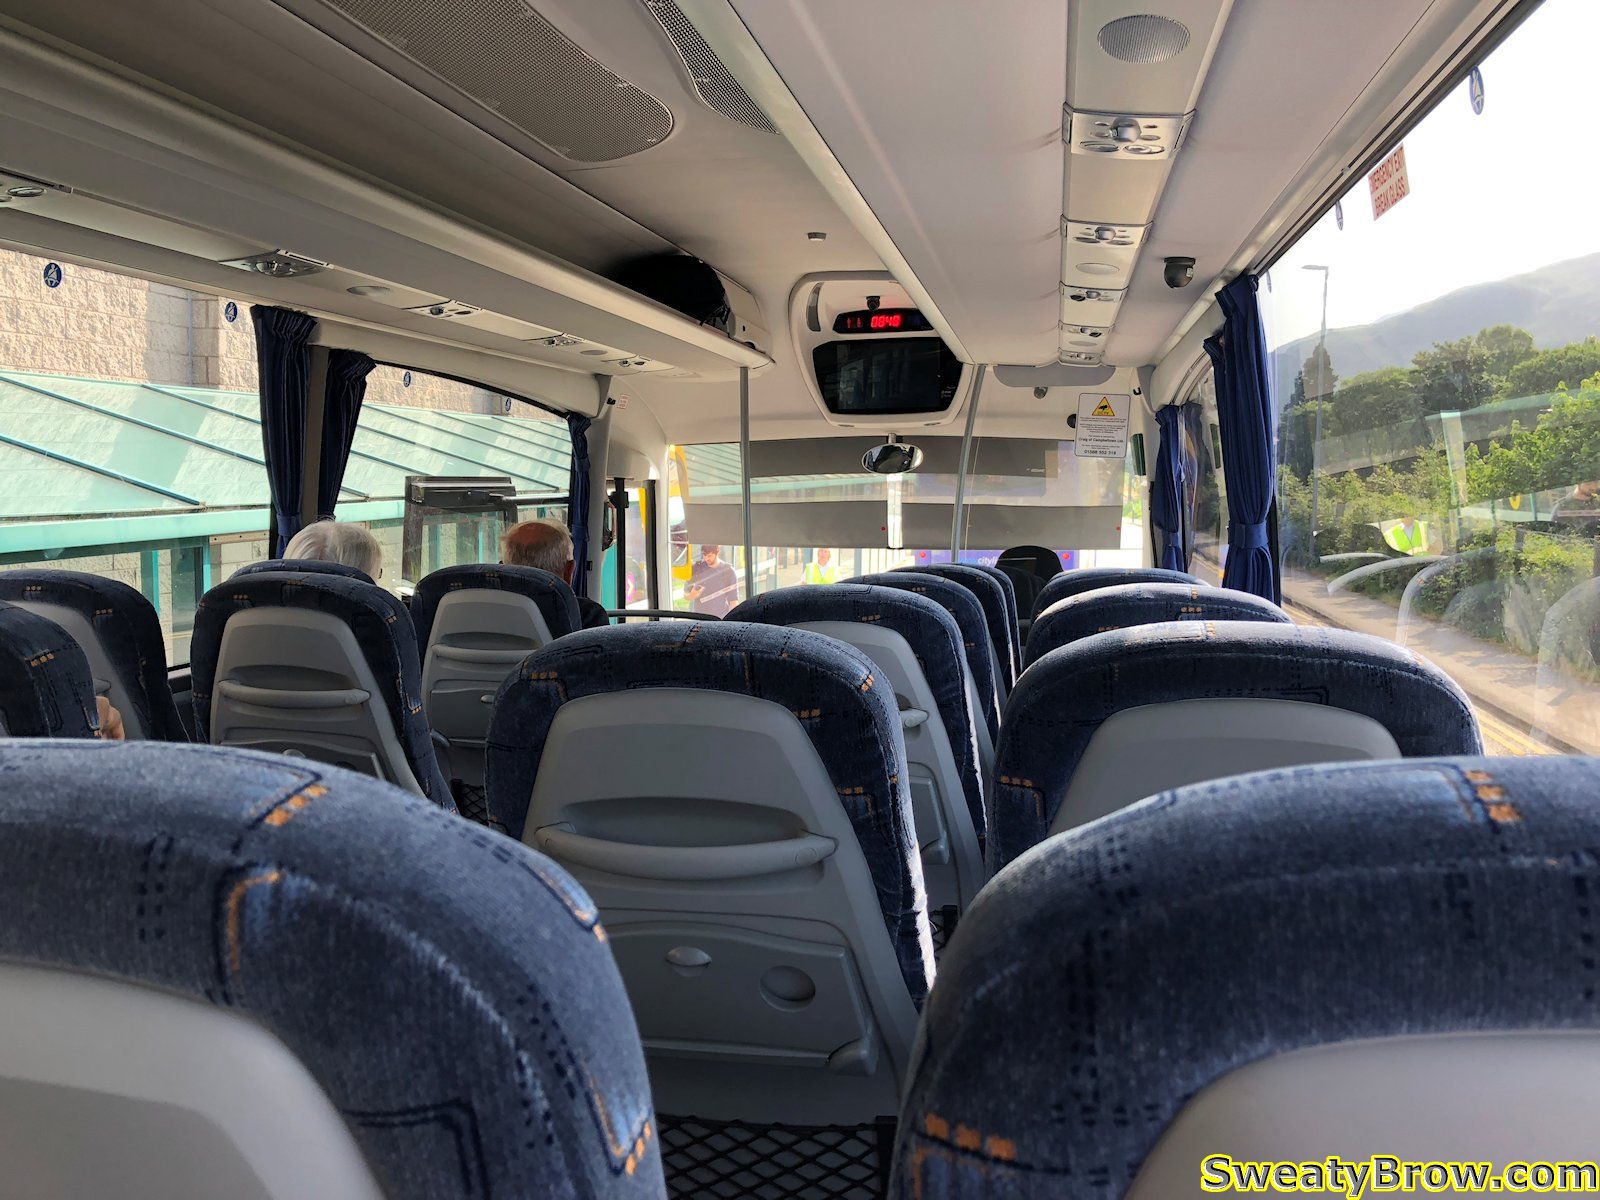
I hopped on the CityLink bus to Glasgow, and we pulled out at 9:00 AM. While we traveled, I tried to figure out (on my phone) where I would stay that first night. I knew that I would be in a national park that had limited opportunities for camping permits. There were none available for that night, however. I did find a hotel in Drymen, though, which would give me a 19 km first day. No problem.
Time to take the bus to Glasgow!
After almost three hours, I arrived at the Anniesland station in Glasgow, and changed onto a train for the 12 minute, £2.80 trip to Milngavie.
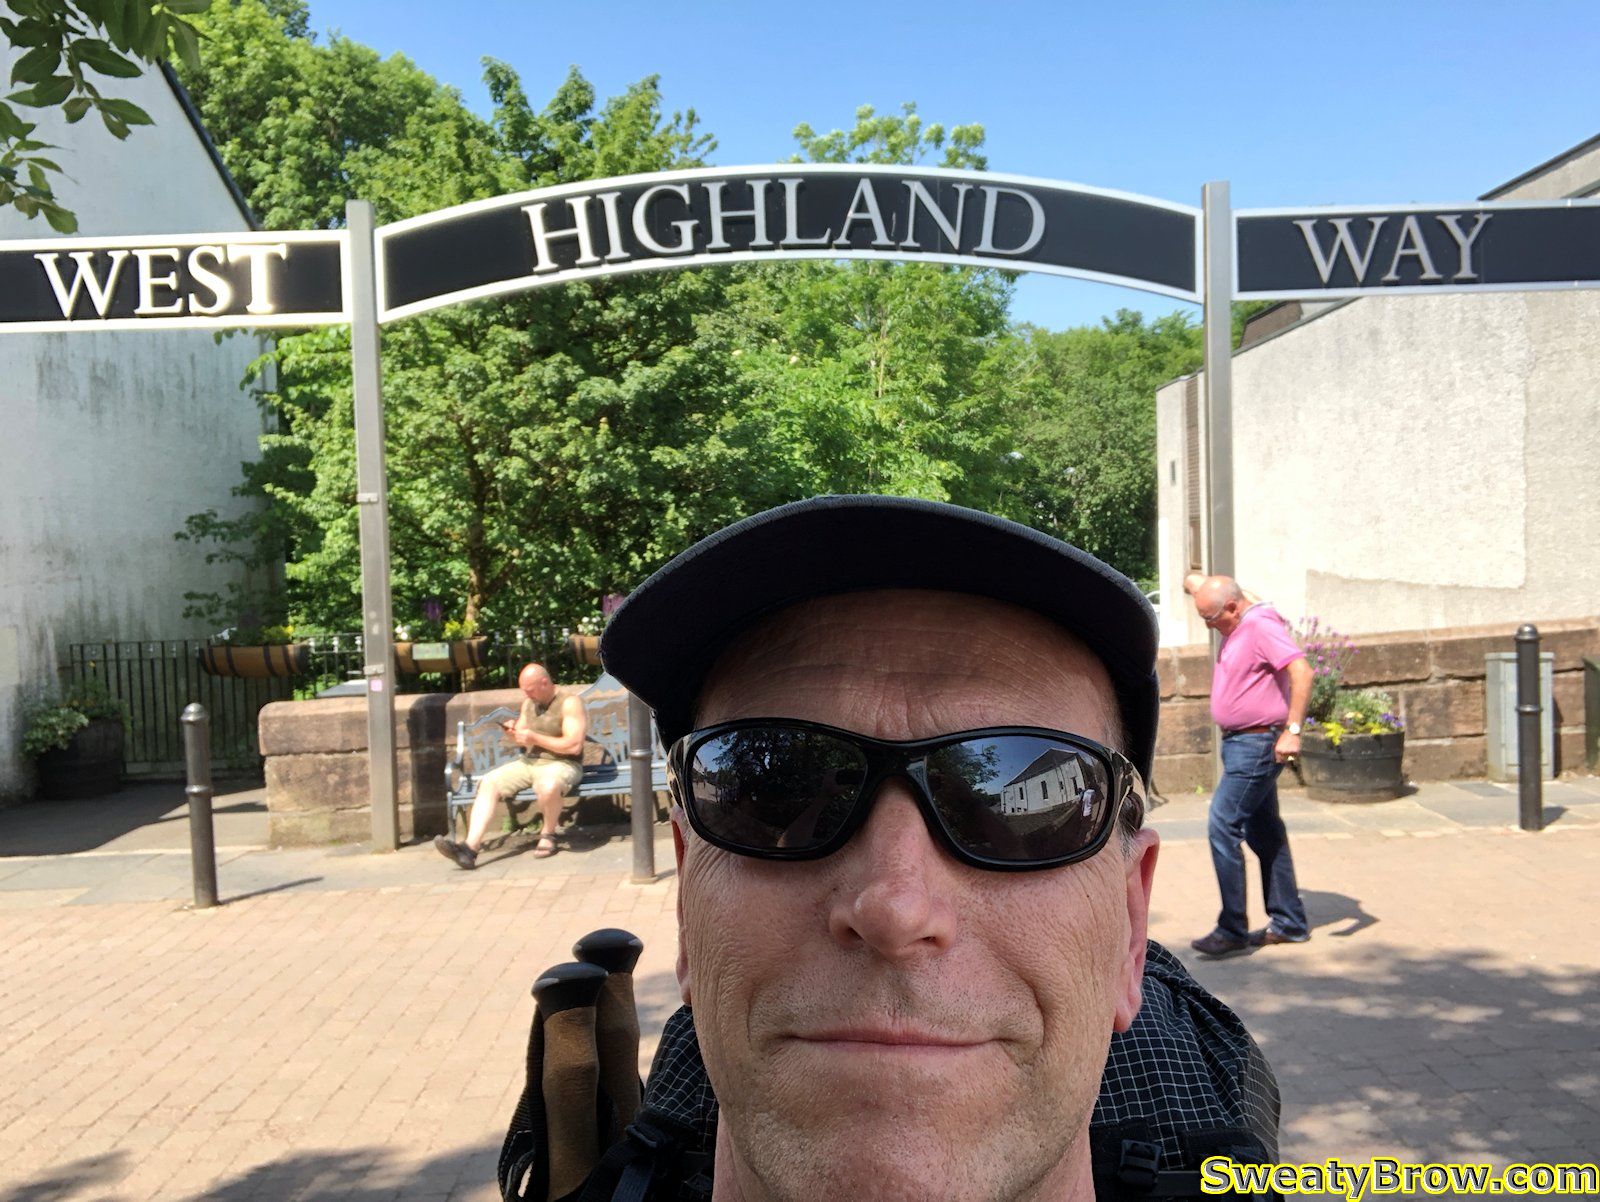
It was just after 12:30 in the afternoon, and I had about 4-5 hours of walking ahead of me. I decided not to linger. I realized that I had left my toothpaste and toothbrush in the car, and made a quick stop in a grocery store to grab those things. At 12:45, I found the start of the walk, and began my trek!
Starting the West Highland Way in Milngavie.
I realized later that I probably should have picked up some sort of guide or map or something near the start of the route. Turns out I never would pick one up, and just got by using Google Maps and my GPS app…
The first day took me through a lot of farmlands on the outskirts of Glasgow. It was more rural than suburban, but definitely was a very settled area. There were a lot of gates that needed opening and closing, to keep livestock from escaping. One thing that I found very cool was all of the cuckoos that I kept hearing! That’s something we don’t have in BC, and it was strange to hear such a familiar sound (of a cuckoo clock) out in nature.
The 19 km trip, with about 250 meters of total elevation gain and loss was utterly exhausting for me. It took almost five hours, and I was really dragging my feet by the time I arrived at my hotel!
When I got checked in, I found it impossible to leave the room. I had thought I might head to a pub for food and a pint, but there was no way. I boiled water in the supplied kettle, and ate one of my dehydrated meals. Then I slept. I slept fitfully, unfortunately, but at least I slept…
That first night, I realized that I’d forgotten a couple of other things in the car. I had no contact lens case with me. That night, I ended up emptying a couple of small cream containers from the complimentary in-room coffee service, giving them a good wash, and filling them with contact lens solutions – which I fortunately had!
I also realized I’d forgotten my travel electrical adapter, so I had no way to plug in my USB charger. I was able to borrow one at some of the places I stayed at night (hotels and campgrounds) but I did have to be careful with my phone usage!
One more important lesson this day: I learned that there are also privatecampgrounds in the area, in addition to the park campgrounds. Turns out I could have stayed in an £8 campsite instead of the £60 hotel…
Day 2
I was up fairly early on the 8th. I found the closest chemist and asked about a contact lens case. Well, the only way I could get one was included in a pack of two travel-sized bottles of solution. So that added to my pack weight…
Once I had that sorted, it was off for a bit of breakfast at Skoosh. This place is a wee tearoom on the Drymen high street, and they make an excellent breakfast! I had a full Scottish breakfast, with all the vegetarian options, and it was an excellent way to start the day!
Back to the hotel, to load up the pack and check out, and I was on the road at the crack of 10:30!
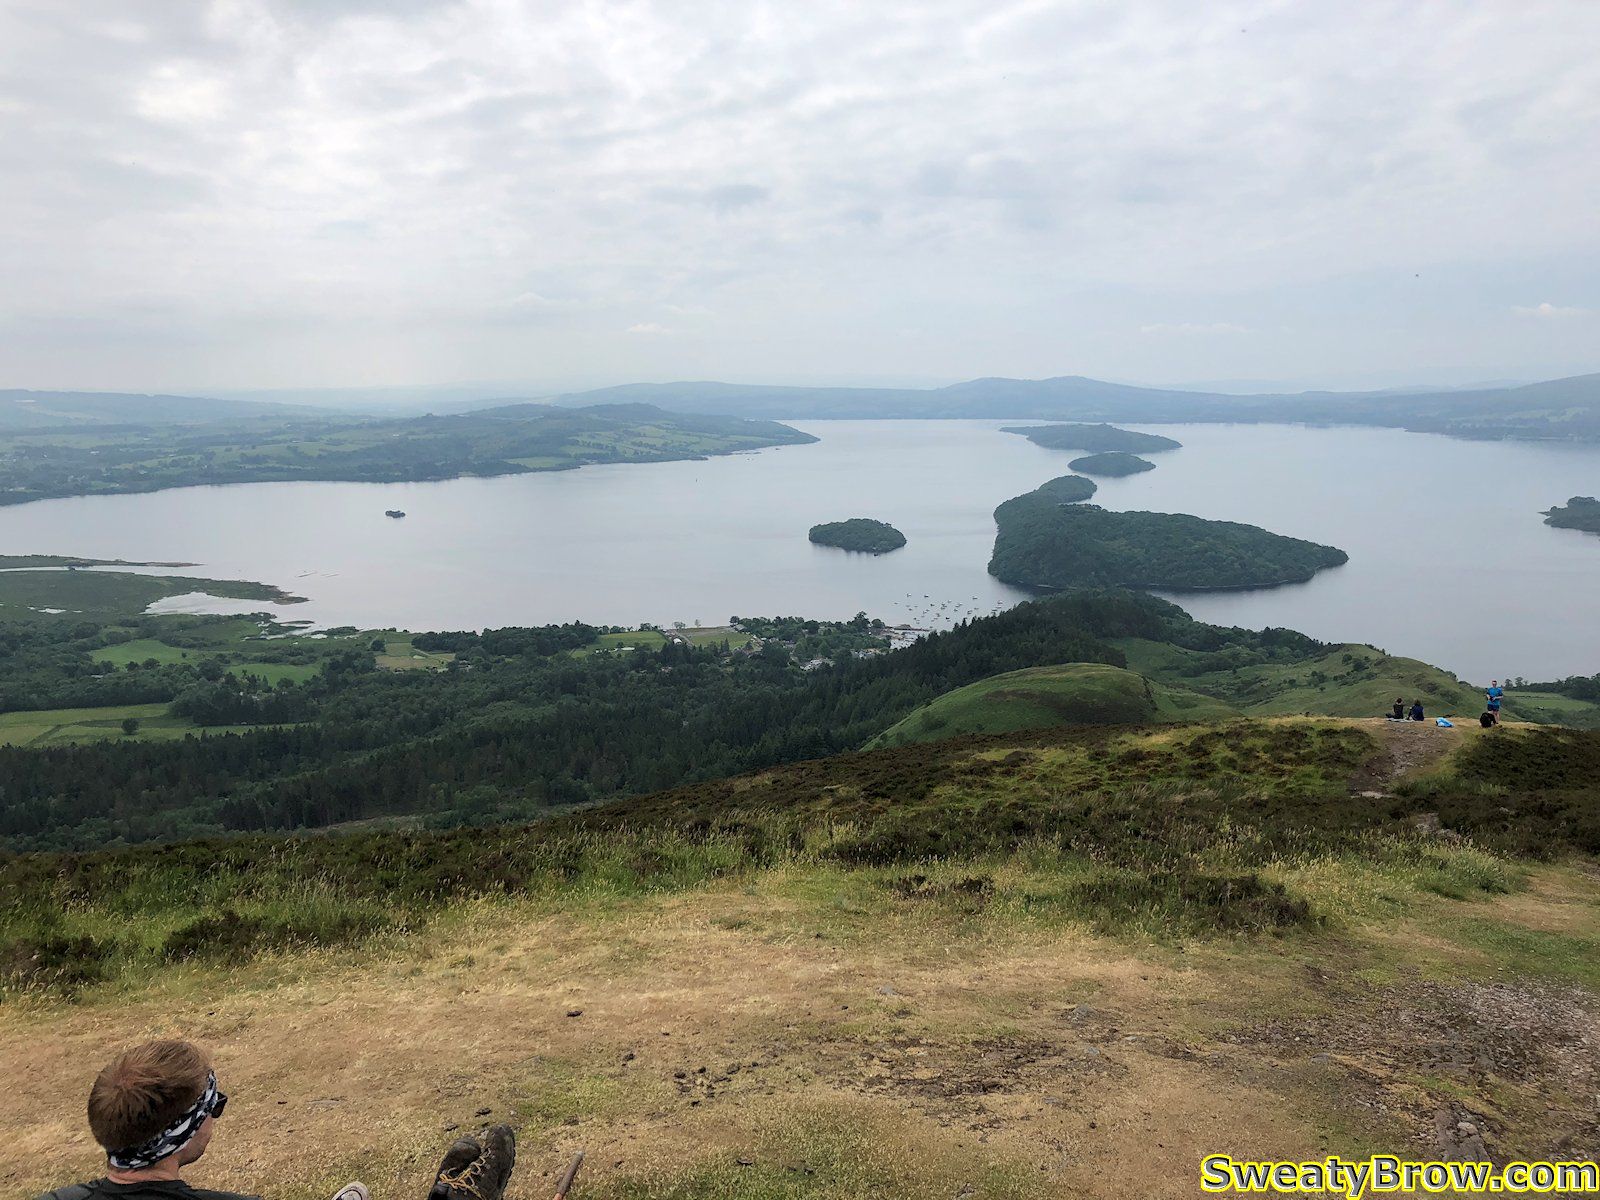
About an hour into the day, I started getting some glimpses of Loch Lomond in the distance. It disappeared again for a while, as the trail climbed up the east side of Conic Hill. Cresting the top of Conic Hill, two and a half hours into the day, there was a lovely view encompassing the southern third of the Loch. Lots of people were on top of the hill, about 350 meters above the lake. Pretty impressive, considering it was early on a Friday afternoon.
Looking over Loch Lomond from Conic Hill
After taking a few photos, I started down the west side of Conic Hill, headed for the wee village of Balmaha. Once there, I popped in to the Oak Tree Inn for a pub lunch – Cullen Skink – and pint of Guinness. Some fine sustenance for the rest of the day.
I continued up the side of Loch Lomond, northbound, and at about 4:00 I reached Sallochy Campground, my home for the night. I had booked it online the night before, and was pleased to get a site in this location. It made for another 20 km day, which was just fine, as I was still very tired and having trouble covering a lot of distance. This second day also included a lot more elevation than the first had – more than twice as much, at around 550 meters total. The weather had been fairly warm through the day, and I drank a lot of water when I arrived!
The campsite was just fantastic! I was in one of the lochside spots (Site 6), and it was quite secluded from the other sites. An idyllic spot with great views over the loch. The campground was quite busy in the large, central common camping field, it being a Friday evening. It was certainly quiet in my site, though.
June 2018. Glasgow. I had just landed, after a miserable flight from Vancouver. I had booked a bulkhead seat, so I had a ton of room to stretch out. I had brought along ear plugs, and a sleep mask (blindfold) to help out on the red-eye flight. I thought I was all prepared. What I wasn’t prepared for was the very young person a few seats over. Approximately every 45 to 60 minutes, this little beastie started to shriek. I mean, I felt sorry for the kid – and his parents – but what really matters is that I didn’t get a wink of sleep on my trip across the pond.
Approaching Glasgow after 8 hours aloft.
I arrived in Glasgow around 10:00 AM local time, which was 2:00 AM by my body’s clock. I picked up my rental (a nice little VW Golf) and set out on my adventures. I had ten days and nights, and a list of at least a couple of dozen mountain peaks that I wanted to hike up.
I started with a trip to the Cotswold Outdoor shop in Glasgow’s West End Retail Park. Picked up a few maps, a book on the Munros of Scotland (all mountain peaks with an elevation of over 3000 feet), and a few supplies, like fuel for my stove, that I couldn’t bring on my flight. I also stopped at a nearby mall, and picked up a local SIM card for my phone. One big plus on this trip was the cell coverage – it was very good, with gobs of cheap and plentiful data.
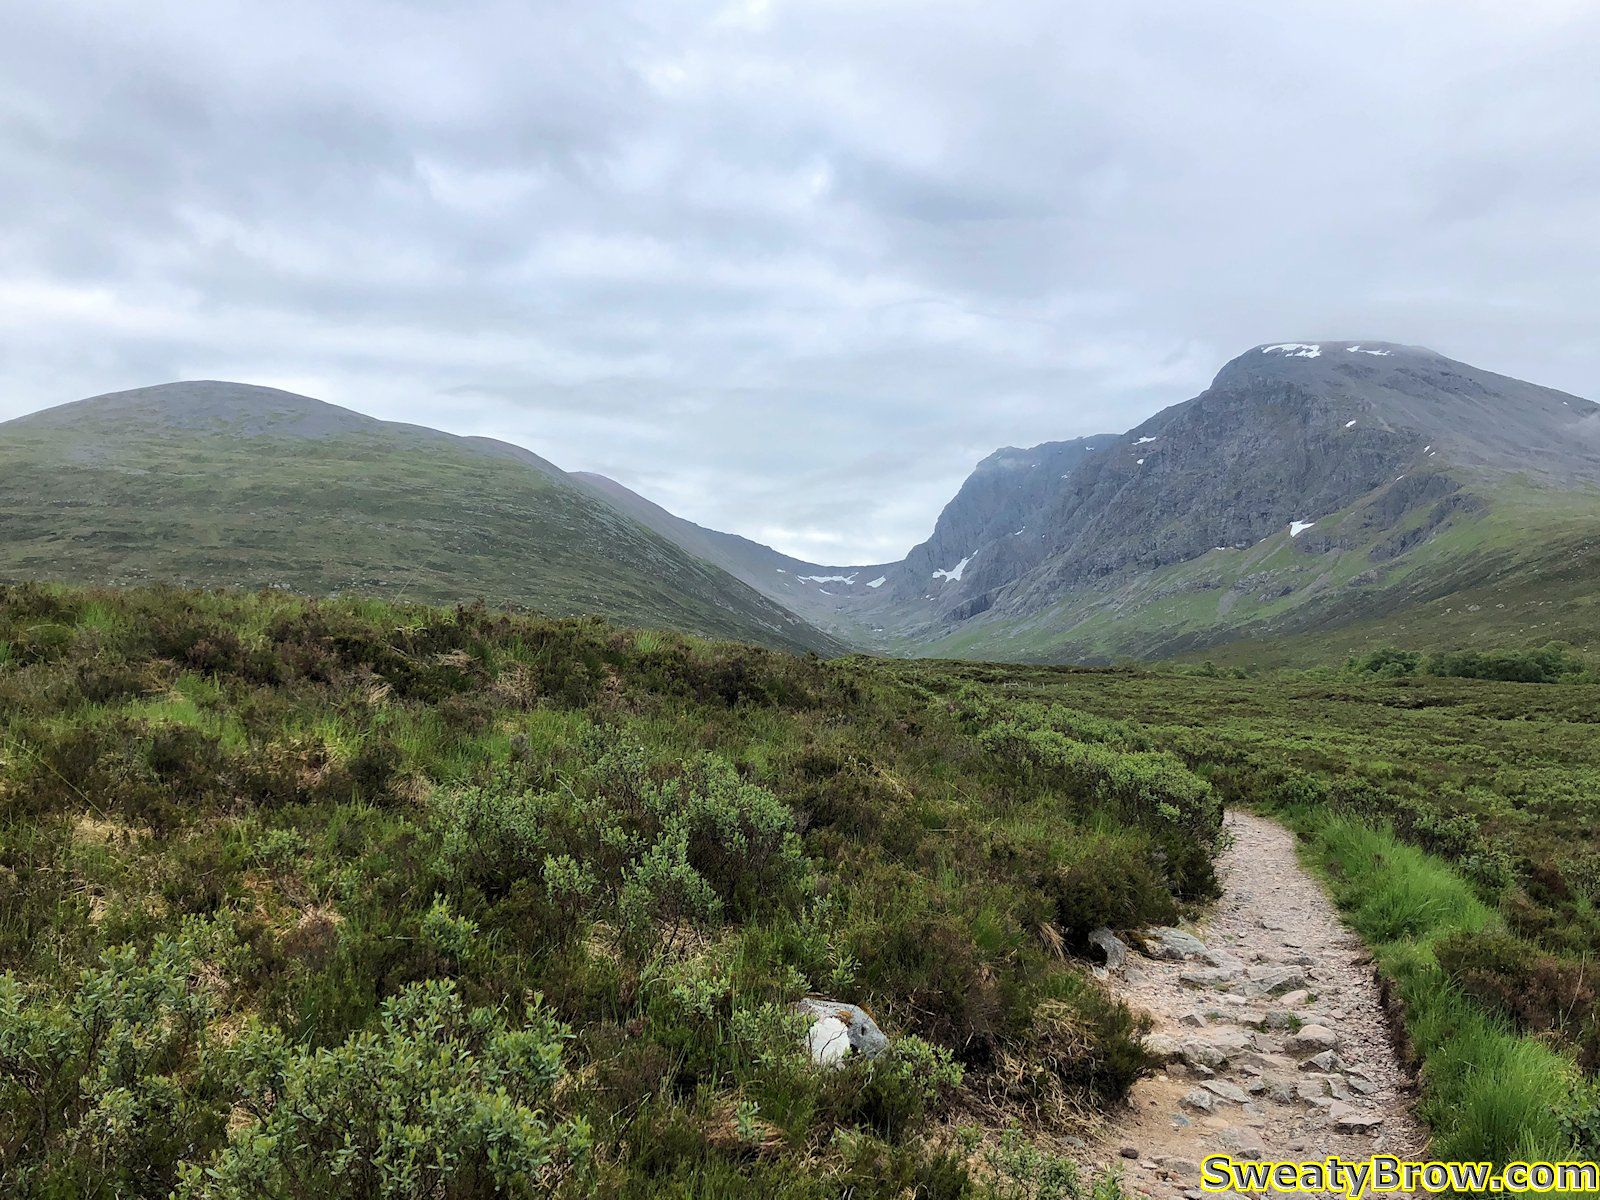
From there, I drove to Fort William, where my adventures would begin! On the way, I looked around Glencoe a little bit, and scoped out the north face car park for Ben Nevis. Ben Nevis (The Ben!) is the tallest mountain in the UK, at 4413 feet (1345 meters). I found a campground nearby, and checked in for the next couple of nights. The plan was to climb Ben Nevis the following day (my first *full* day in Scotland) and return to the same campground that night, and decide on my next objective from there.
I awoke bright and early Wednesday morning, after sleeping very, very poorly – jet lag sucks. I headed to the North Face Car Park, and set out at about 7:45 in the morning. My route was going to take me via what is known as the Càrn Mòr Dearg arête. This avoids the boring “tourist path” or “pony track” that most people take to ascend Ben Nevis – a very mundane trail that follows switchback up a dull, steep hill. The CMD launches you up to the top of a Munro on the east side of Ben Nevis, with stunning views of the North Face of the Ben – a sight that the hikers on the other side of the hill just never get to see. After reaching the summit of Càrn Mòr Dearg (which is the 9th tallest peak in the UK) the route follow a ridge line that heads south then turns west towards Ben Nevis. The ridge then steepens and climbs a long talus slope to the summit.
The first twenty minutes or so was through actual forest. Nice!
Everything started out smoothly. The first 2.5 km were a relatively gentle grade, up a fine trail along the Allt a’Mhuillin. After that, however, I started up a steeper, unrelenting grass and heather covered slope toward Càrn Mòr Dearg.
Heading up the valley between CMD and Ben Nevis.
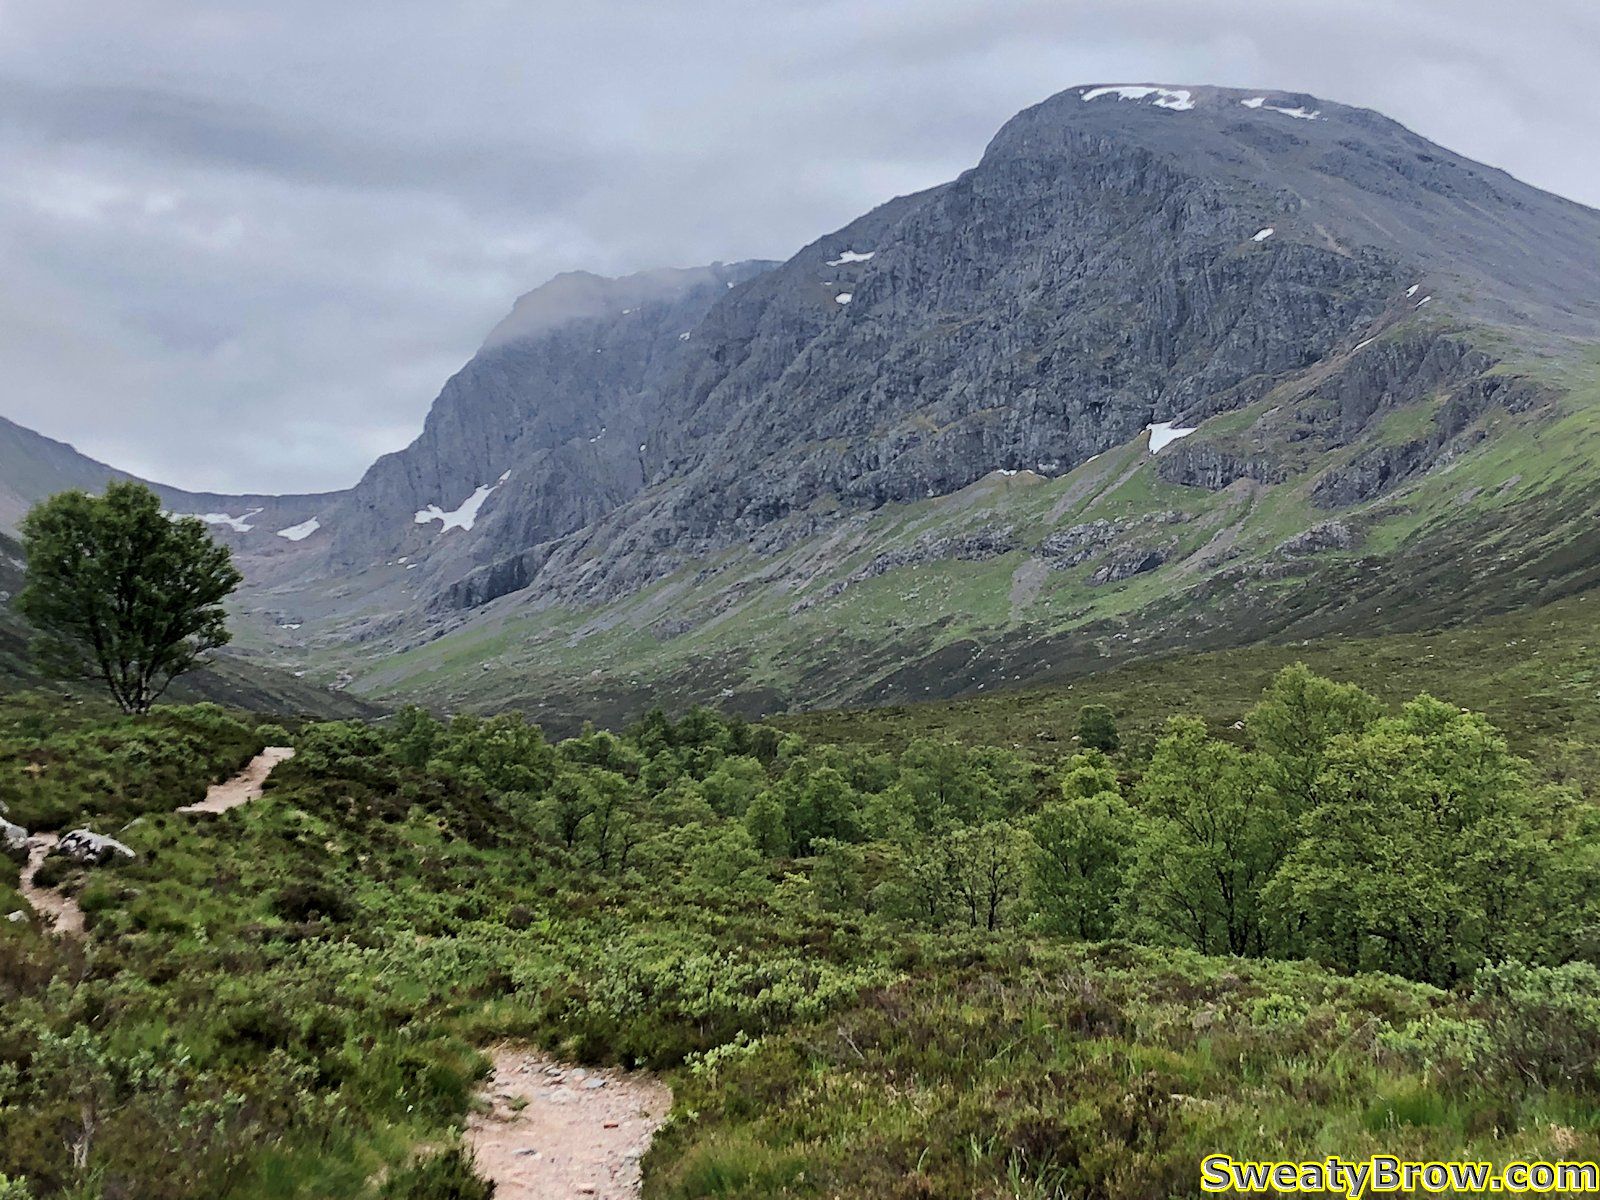
Getting close to the point where I started up and left. The north face of Ben Nevis is looking daunting! The peak was in and out of cloud for the first couple of hours of the hike, but cleared by the end of the day.
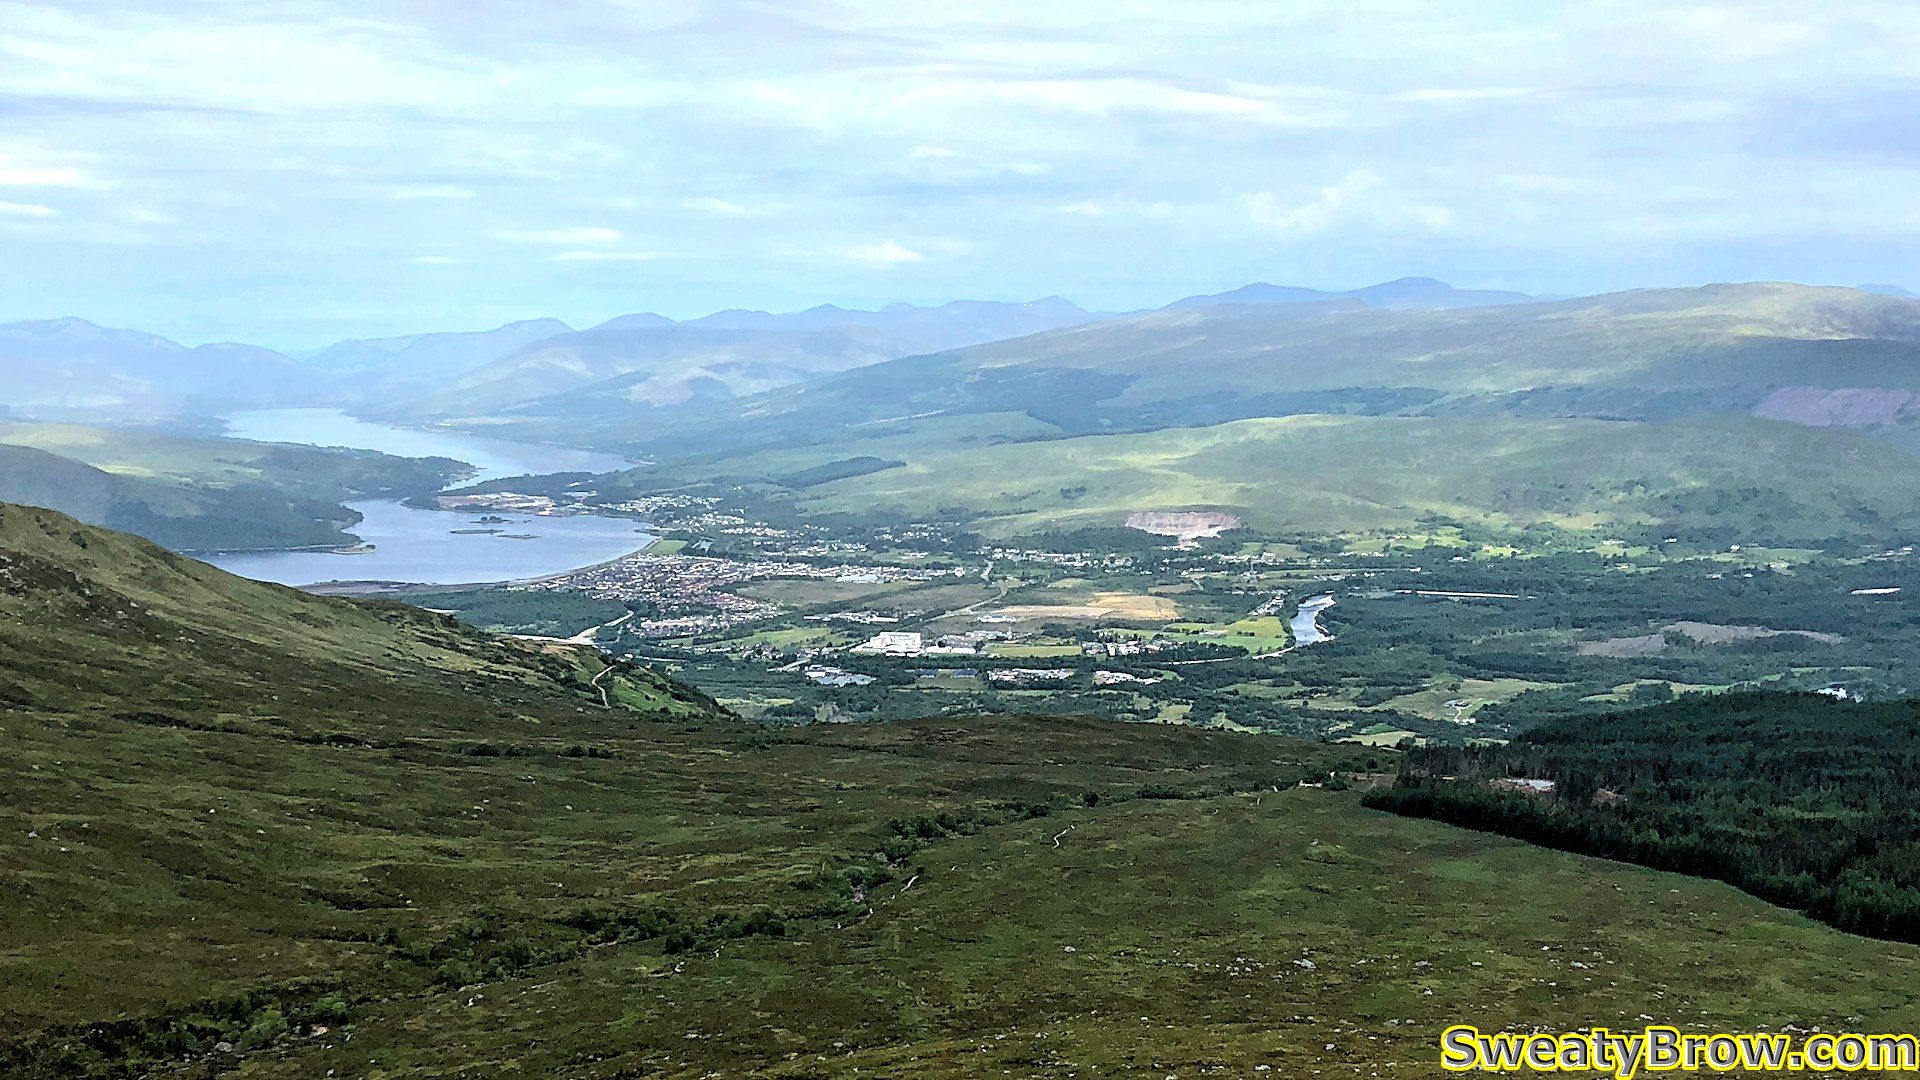
Looking northwest toward Fort William, while hiking up Càrn Mòr Dearg.
The North Face of Ben Nevis from across the valley. Much more interesting than the other side of the mountain! I will be following the left skyline to the top.
Two and a quarter hours from the car, I reached the summit of Càrn Mòr Dearg, my first ever Munro summit!
What is a Munro, you ask? Well, in 1891, a gentleman by the name of Sir Hugh Munro created a list of all mountains higher than 3000 feet (914.4 meters) in Scotland. The list has undergone some amendments since then, and there are currently 282 mountains classified as Munros in Scotland. Some subsidiary summits that are high enough to be Munros, but are closely associated with a main peak, are known as Munro Tops – there are another 227 of those. There is some discussion about how much “prominence” is required to be a Munro, versus a Top, but 282 is where the current number stands.
Anyway, the summit of Càrn Mòr Dearg didn’t present any particular difficulties, apart from a lot of steep slogging uphill, with a bit of looser rock near the top. The most challenging thing on the summit was the cloud of midges that had gathered. I stopped for a bit of food – buns and peanut butter – but didn’t linger, as the midges appeared to want to eat as well.
What are midges, you ask? They are tiny biting flies, and they exist around the world – but those in the Highlands of Scotland are notorious. They are most active at dawn and dusk, but seem to congregate in mountainous areas throughout the day. Fortunately, they can’t handle much more than a light breeze, so a windy day provides a welcome reprieve. Their bites are painful (they saw through the skin with their serrated mouthparts, rather than piercing it like a mosquito) and result in very itchy welts. They are an issue from late in May through September.
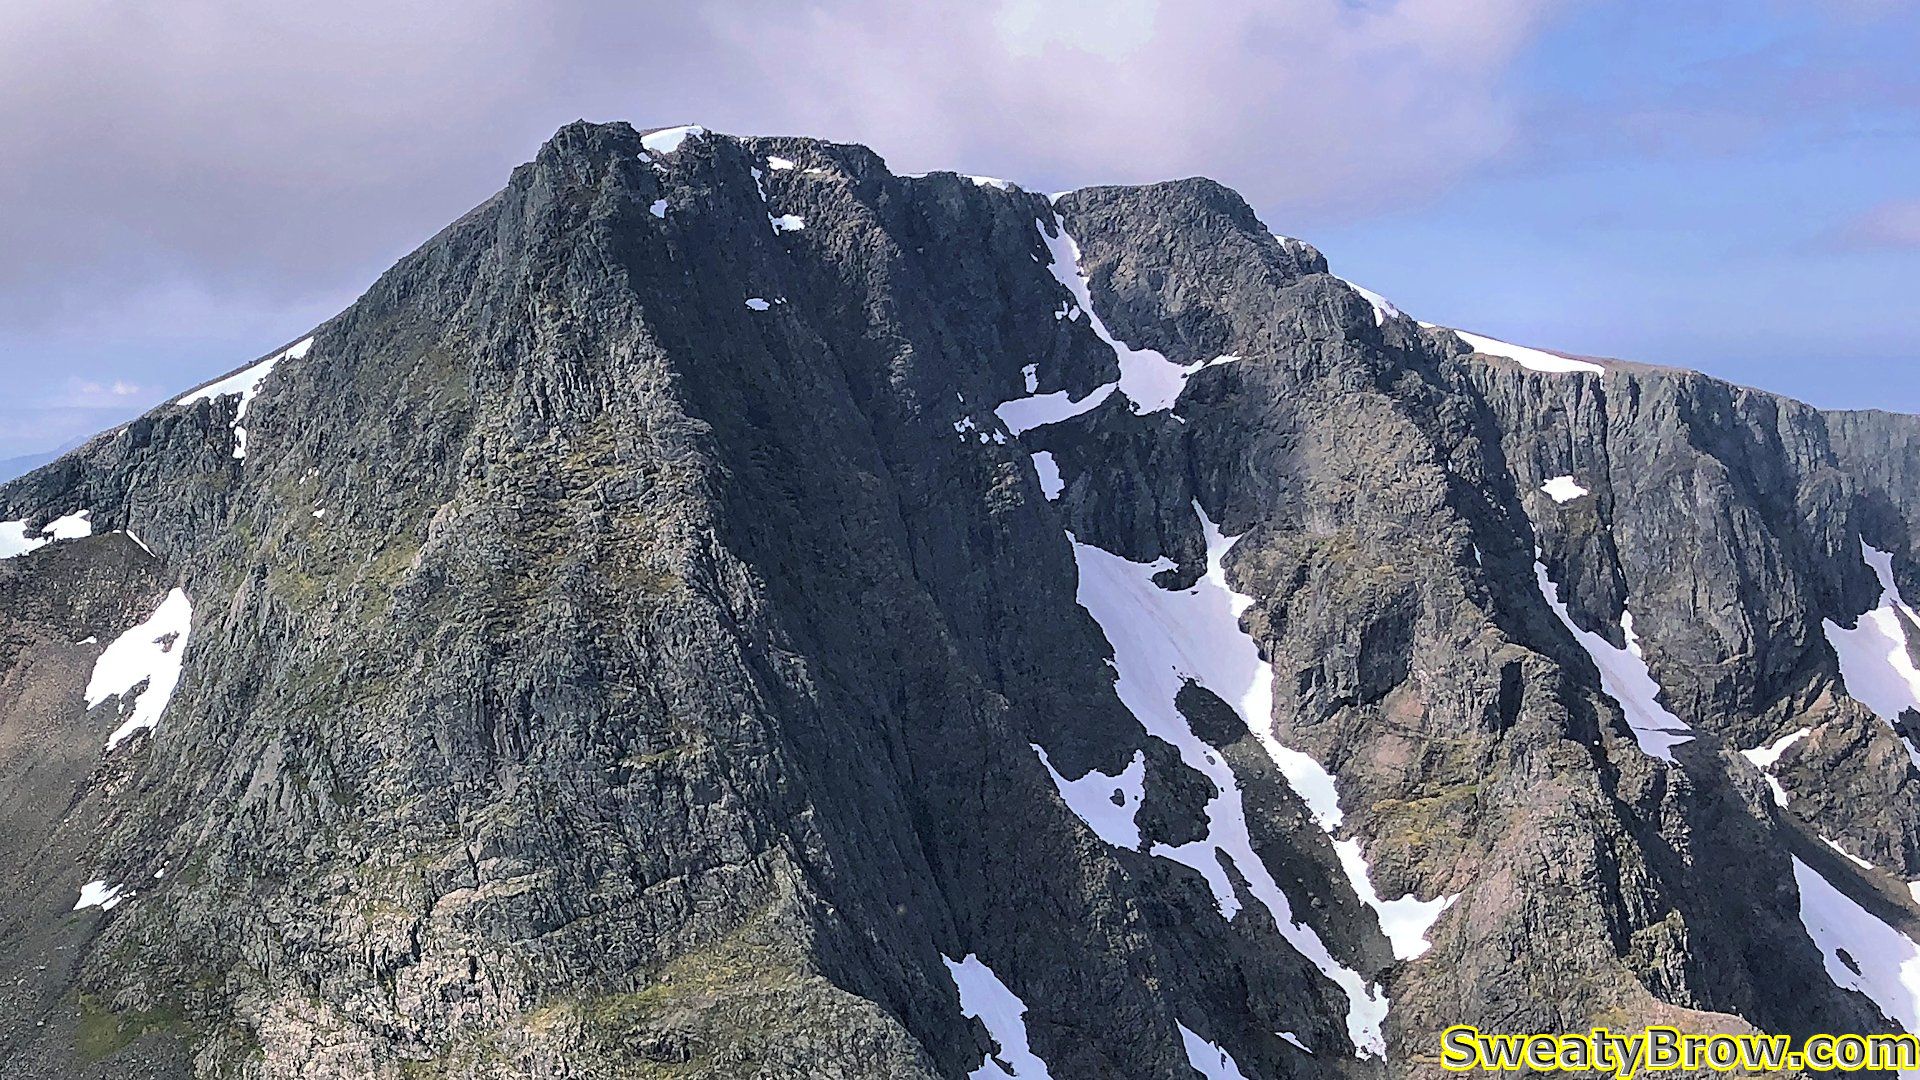
View from the summit of Càrn Mòr Dearg, looking along the CMD Arete toward the final ridge ascending Ben Nevis.
The next section was pretty cool, following the ridge around toward Ben Nevis. There was a bit where it became a bit problematic to remain on top of the ridge, due to some blocky, time-consuming scrambling, so I dropped down to a trail below the ridge-top, off to the left. Unfortunately, it was tough to get back up on the ridge for a little while, so I missed a bit of exciting terrain, but soon I was back on top.
On the ridge, looking up toward the (hidden) summit of Ben Nevis.
On top of the ridge, looking back toward Càrn Mòr Dearg.
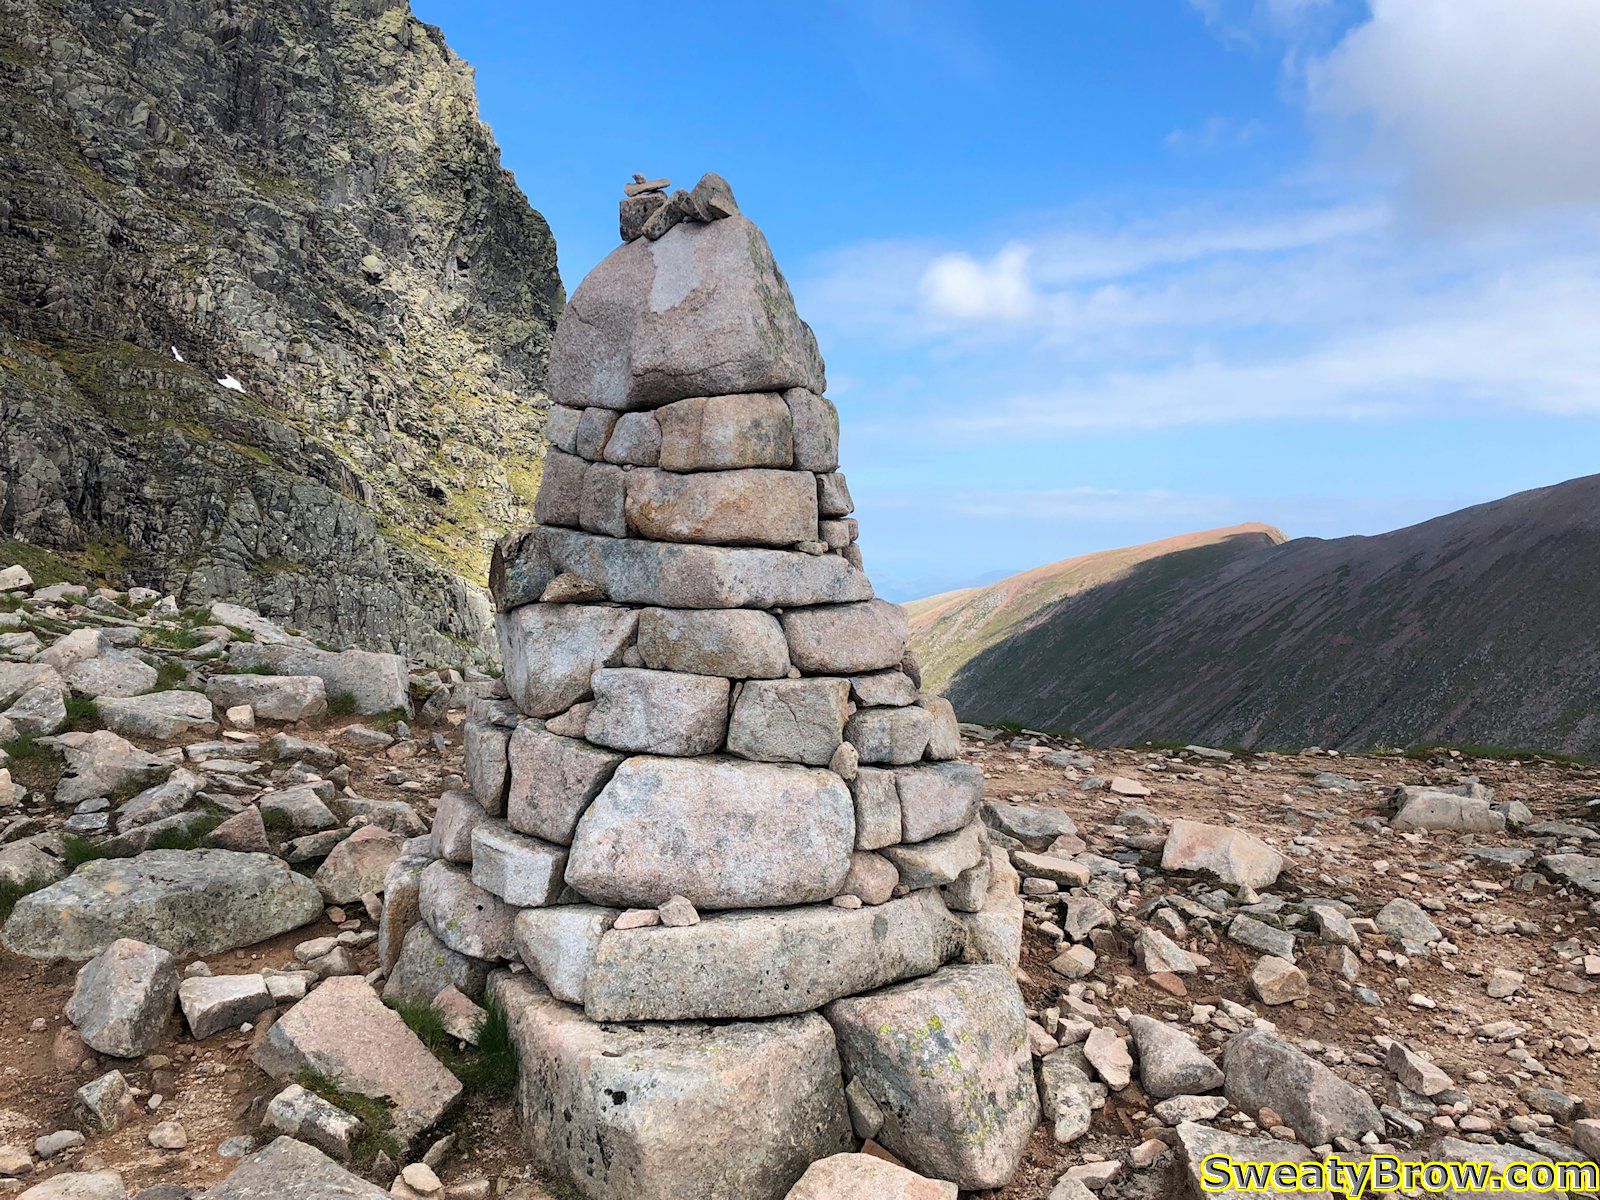
About 45 minutes after the summit of Càrn Mòr Dearg, I was at the low point of the ridge.
Big cairn at the low point on the ridge between Càrn Mòr Dearg and Ben Nevis.
Around this time, the lack of sleep, and jet-lag started to really kick in. According to my body clock, it was around three in the morning, and I hadn’t slept very much, or very well, over the previous 48 hours. My whole body was dragging.
When I began up the final ridge toward the summit of Ben Nevis, a climb of about 300m (1000 feet) I felt like I was in the death zone of Mount Everest. This was a long, steep incline of large boulders, and after every 10 steps or so, I had to sit down and catch my breath. That last 300m, over a distance of about 1 km, took over an hour to cover.
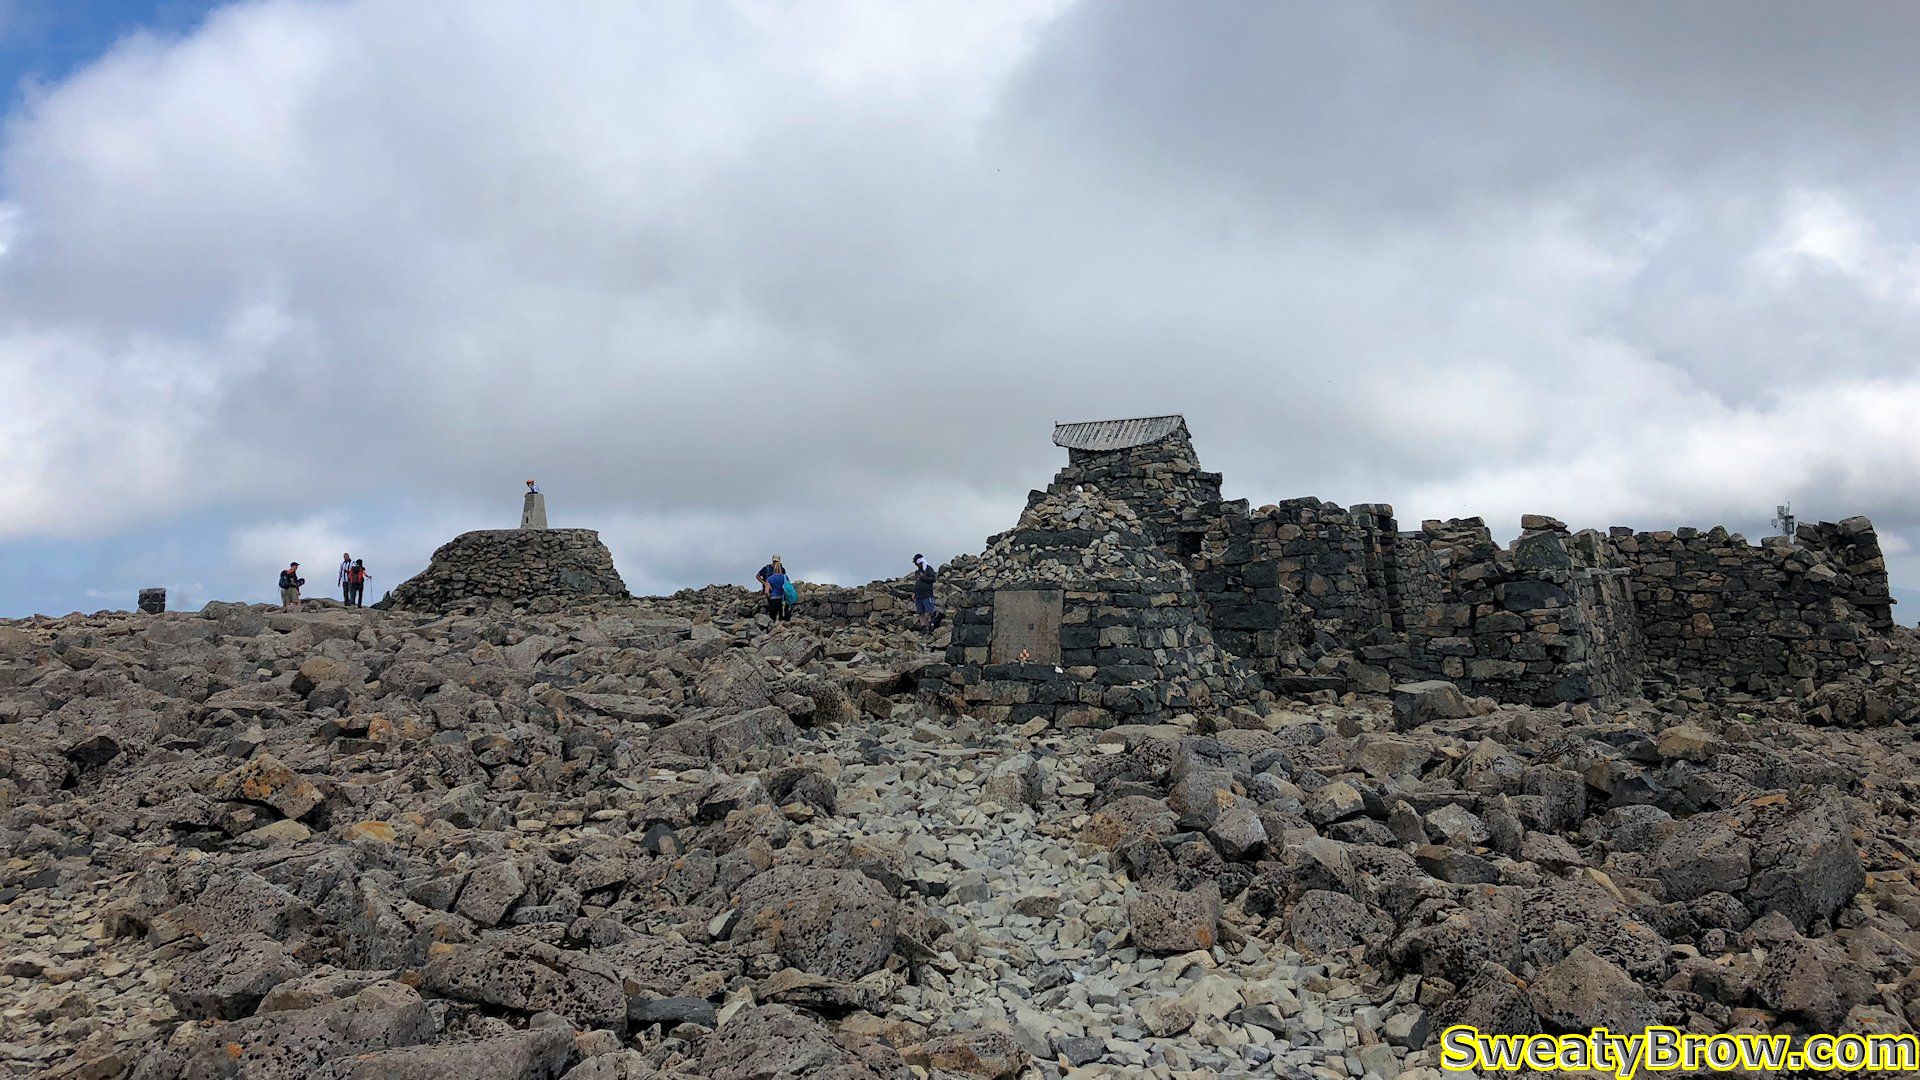
Eventually, around 4 1/2 hours after setting out, I reached the top of the ridge, and the broad – well, huge, really – summit plateau. First I wandered over the the far northeast corner, where I could view the entirety of my route up, then back westward, past the ruins of the old observatory, and various markers.
Some of the summit attractions atop Ben Nevis.
After a while wandering around on the summit, I started down via the “tourist route” on the west side of the mountain. There was pretty much a constant stream of people coming and going along the path, a sharp contrast from the three people I saw on the other end of the mountain – two going the same direction as me, and one the opposite way.
A view down the west side of Ben Nevis.
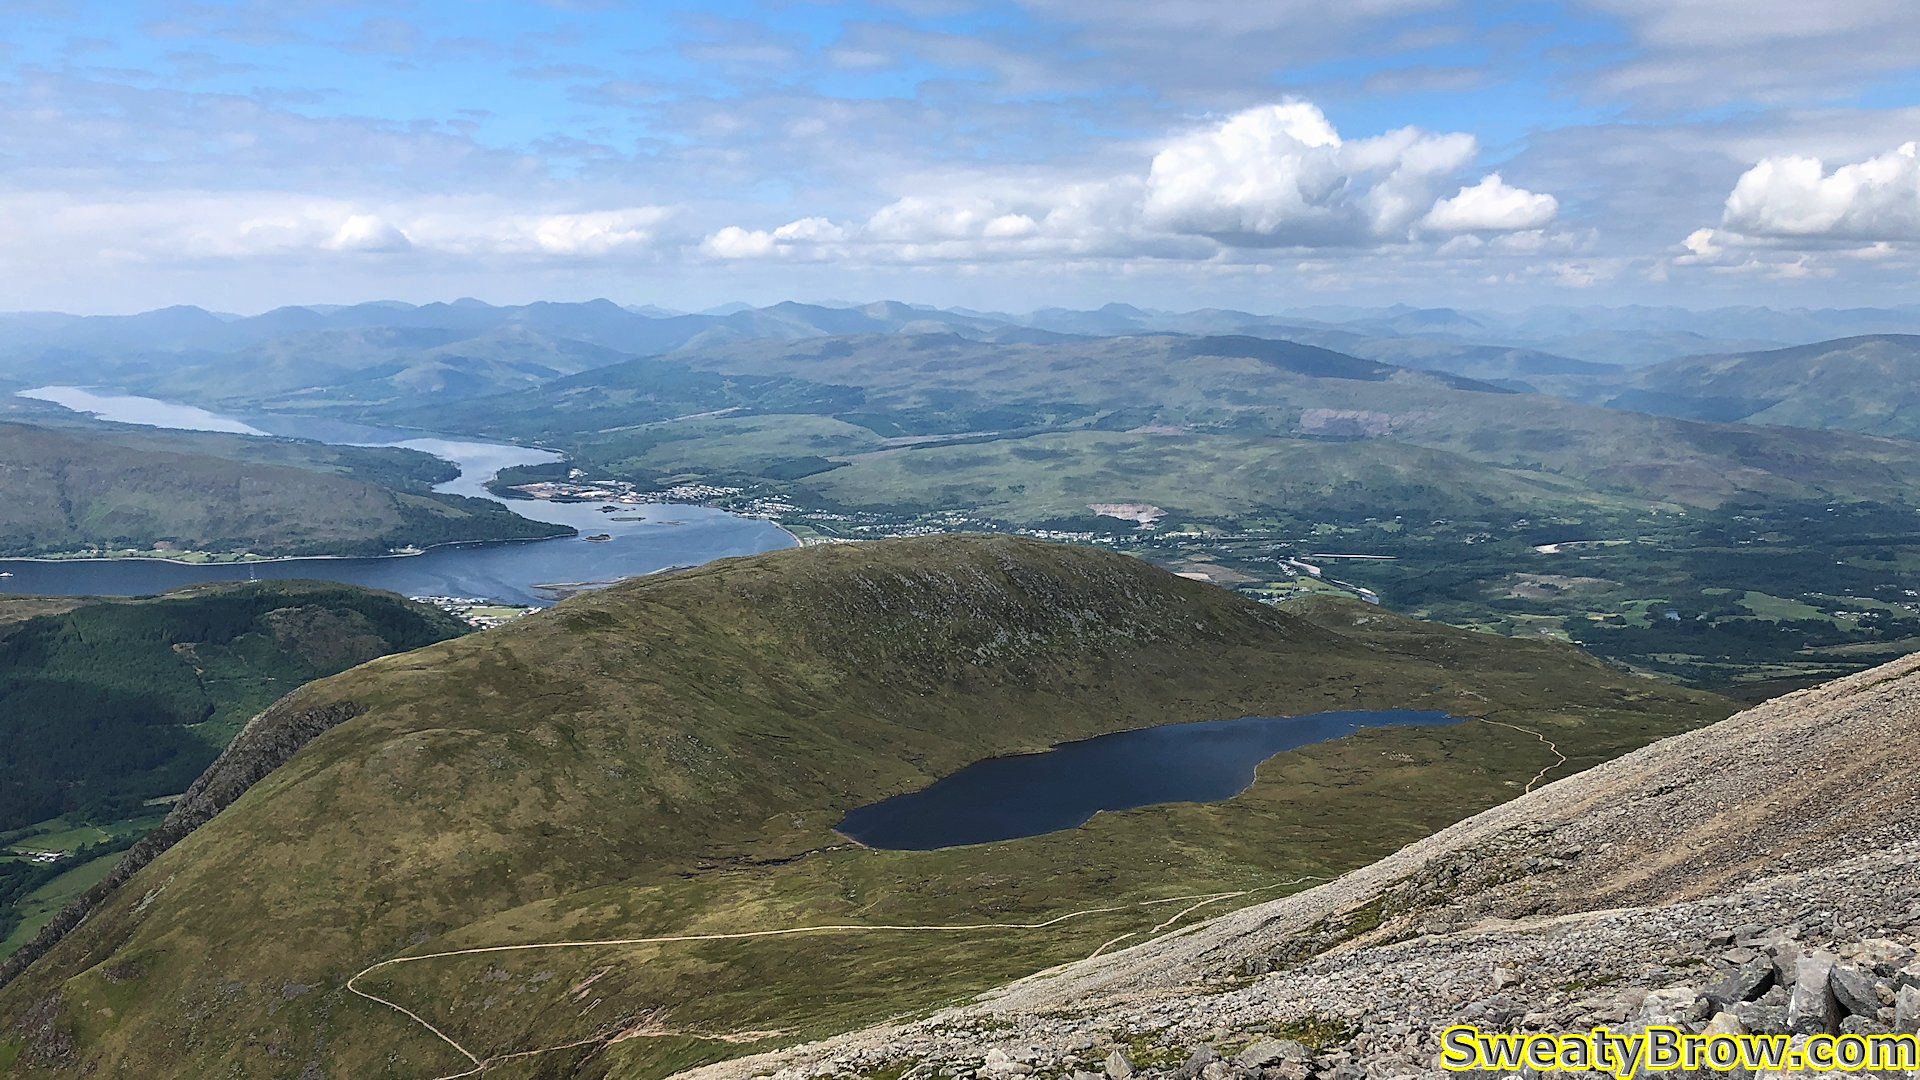
I followed the trail for about an hour, down to Lochan Meall an t-Suidhe. At that point, I broke off toward the outlet on the north end of the lochan, and then across country, to rejoin my route up.
Looking down toward Lochan Meall an t-Suidhe, heading down the hill from the summit of Ben Nevis.
Hiking alongside the lochan, headed back to the car park.
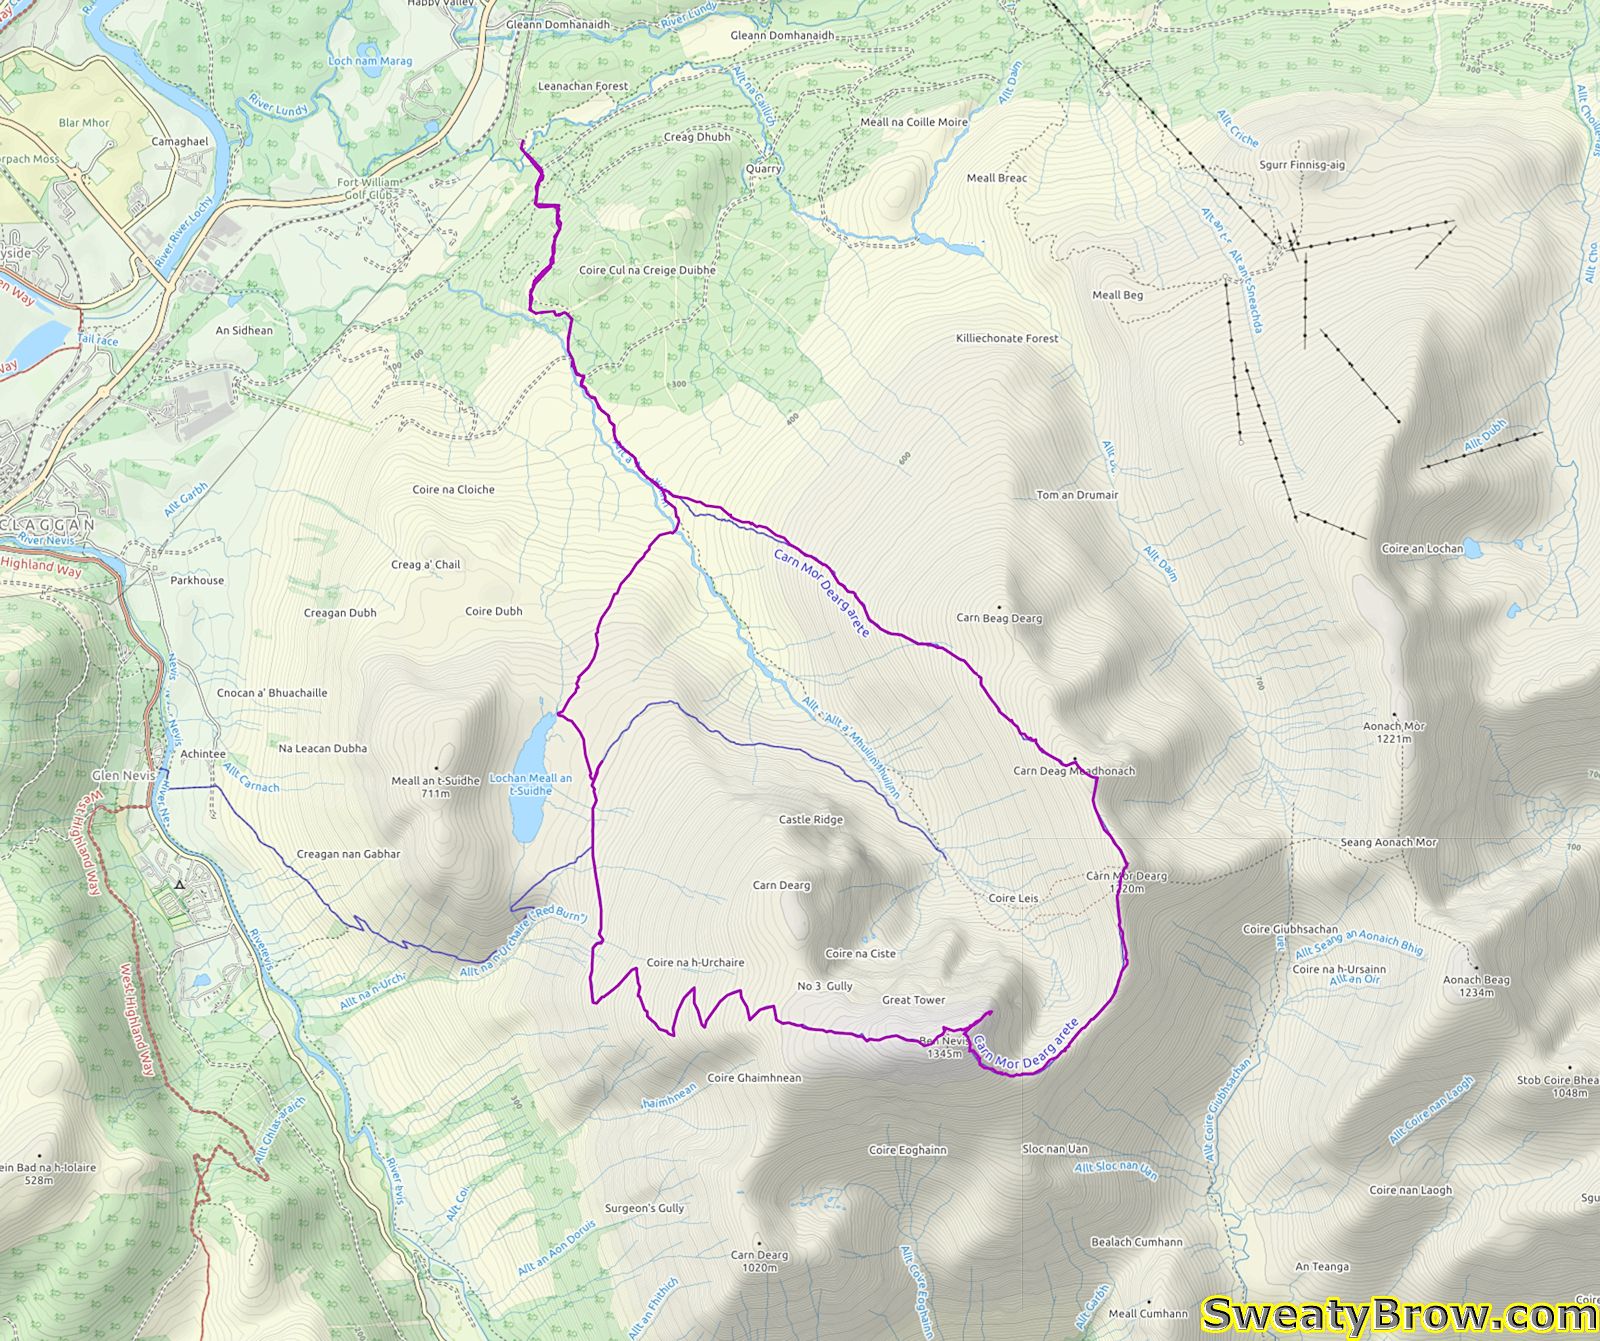
GPS track from my route. The lollipop loop trip started at top left, in the North Face Car Park, and ran clockwise.
Thursday, the 4th of October, started as a cool, crisp morning. When I got in my car at 6:30, there was frost on the roof and the windshield – brrr! I drove to Lynn Headwaters Park, and parked at the lot closest to the trailhead. I was on my way at about 8:05. That gave me just under 11 hours to get back to the car – the gate to the park road would close at 7:00 PM. I decided that my turnaround time would be 2 PM, giving me 6 hours for upward travel, and five hours available back…
The hike up along Lynn Creek is a familiar one to me; I often hike up to Norvan Falls with my dog. This hike would take me almost all the way to the falls, followed by a sharp turn up the Norvan drainage. Straight up to the top of the ridge, and a left turn toward Coliseum Mountain and Mount Burwell.
It was quite chilly as I began the hike, and the gradient for the first 7 km is not very steep. I wore long, zip-off pants, and two top layers. Shortly after I set out, two trail-runners passed me on the way up the valley. As I hiked along, I tried to keep an eye out for mushrooms growing alongside the trail – I’d really like to get into mushroom foraging! My recognition skills will need some serious practice, in order to keep myself alive…
After about an hour and a half, I turned off the Norvan Falls trail for the Coliseum Mountain trail. As soon as I turned up the hill, the (internally produced) heat began to build, and I stopped to remove my outer, long-sleeved, top. About this time, another fellow passed me on his way up – he was really moving!
The trail was quite wet, with a number of muddy sections and running water in places. Along this area, up to the top of the ridge, there were quite a variety of mushrooms to be found!
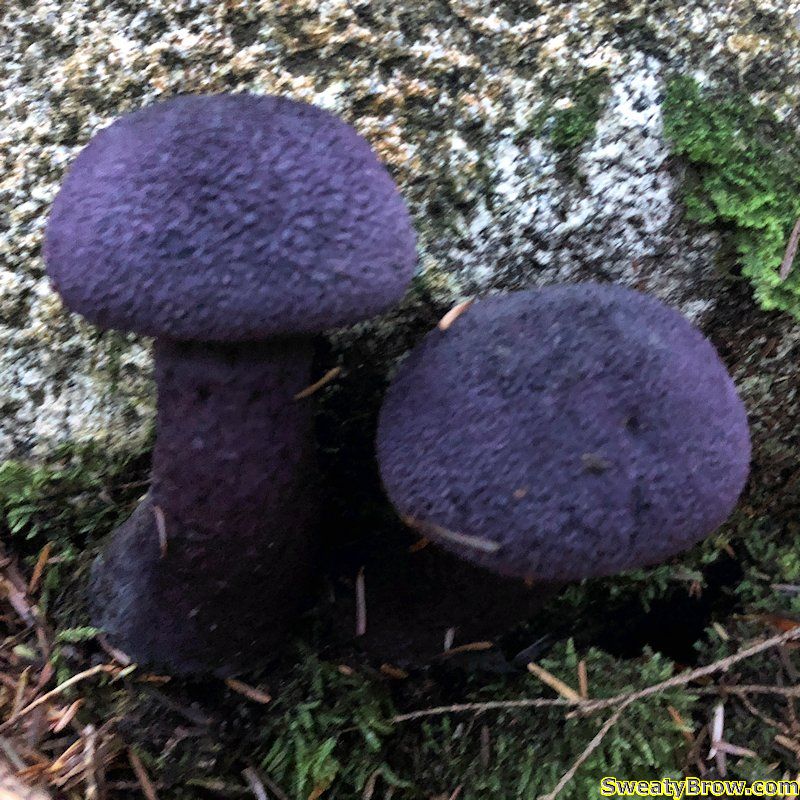
Two of the coolest mushrooms I saw on the way up the hill!
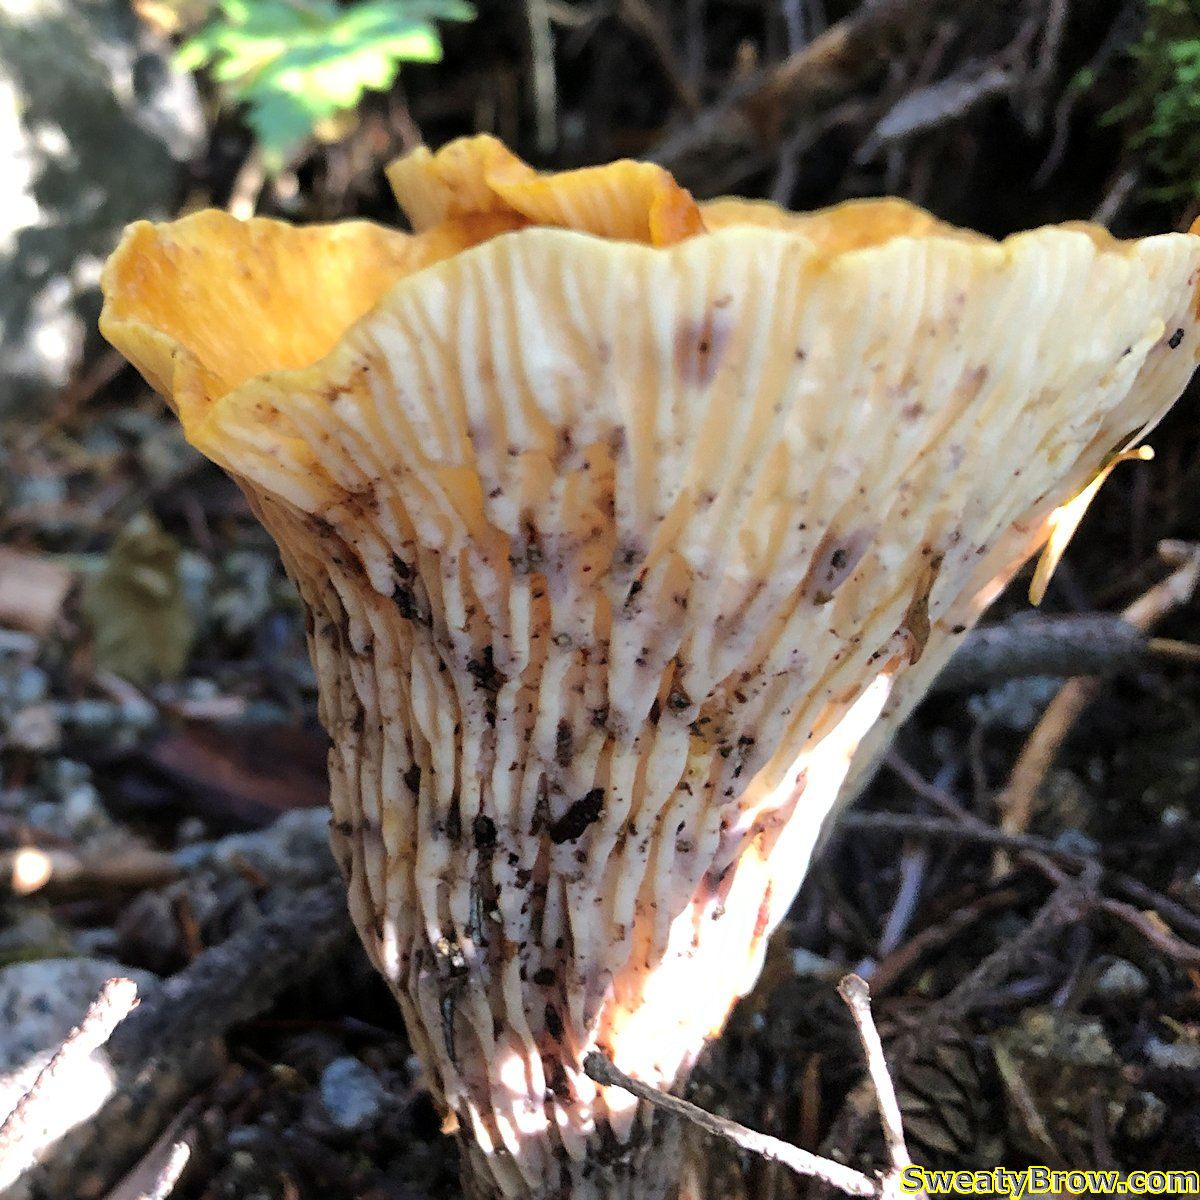
Another pretty crazy mushroom I saw on the way up – I believe it is a Turbinellus Kaufmanii (based on an Instagram post I saw from the same area that looked identical!)
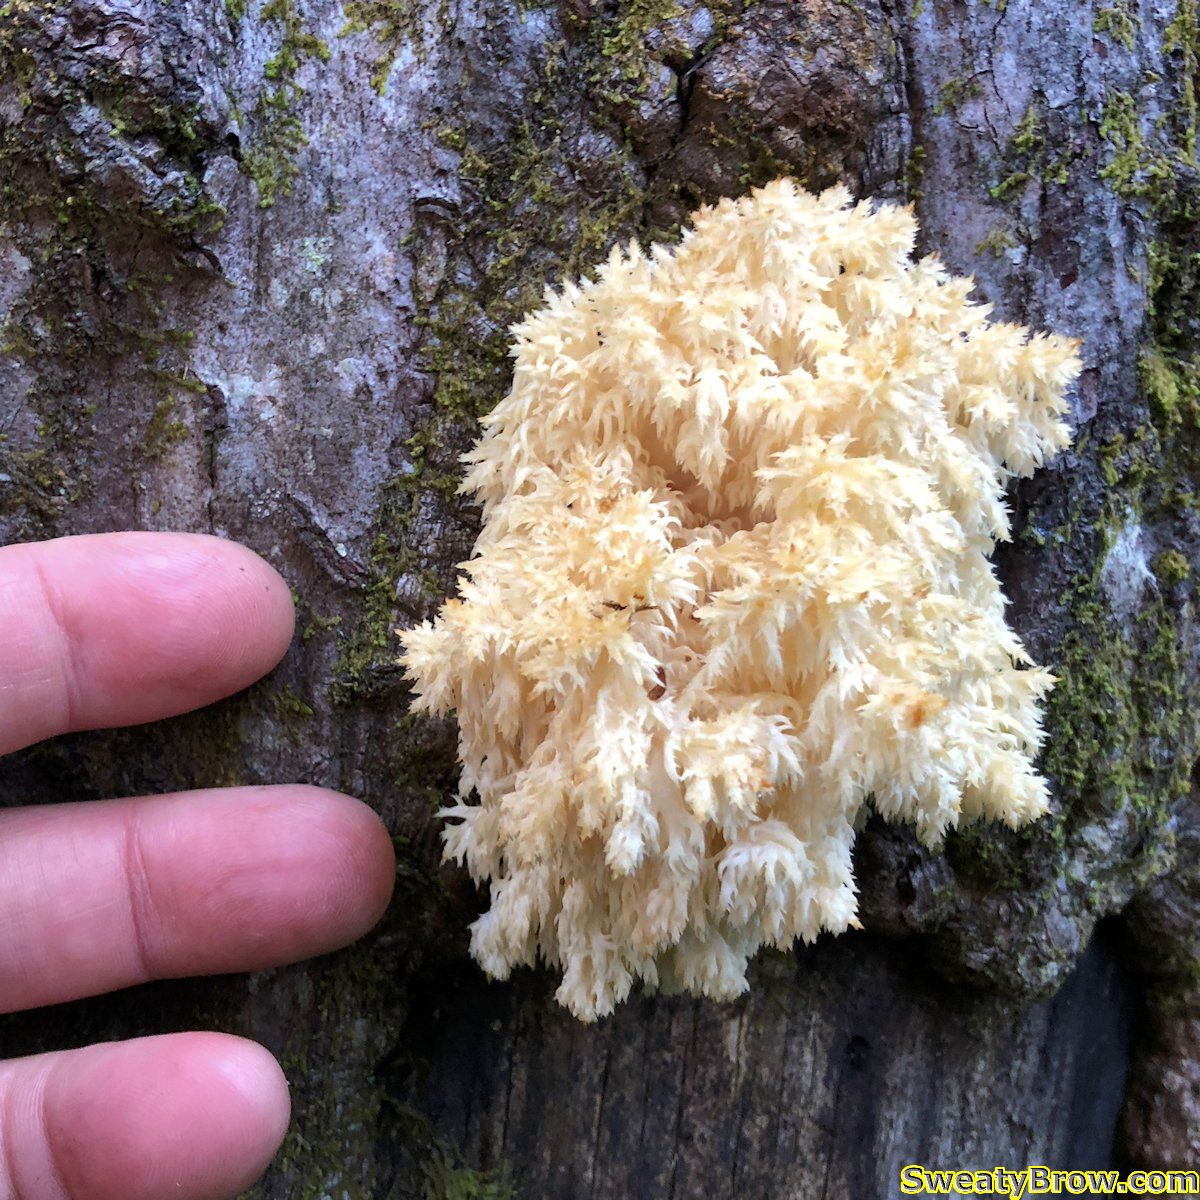
One more fungal pic from my trip…
About three hours after leaving the car, I reached the crest of the ridge, north of The Needles, and turned northwards. This section of trail was a mix of more open forest, and small areas of alpine meadow.
Shortly after reaching the ridge, the fellow who passed me near Norvan Falls came back the other way, from Coliseum Mountain – he was making good time! A short while later, the two trail-runners who had passed me early in the day went by on their way down. I don’t know whether they went to Burwell, or just to Coliseum.
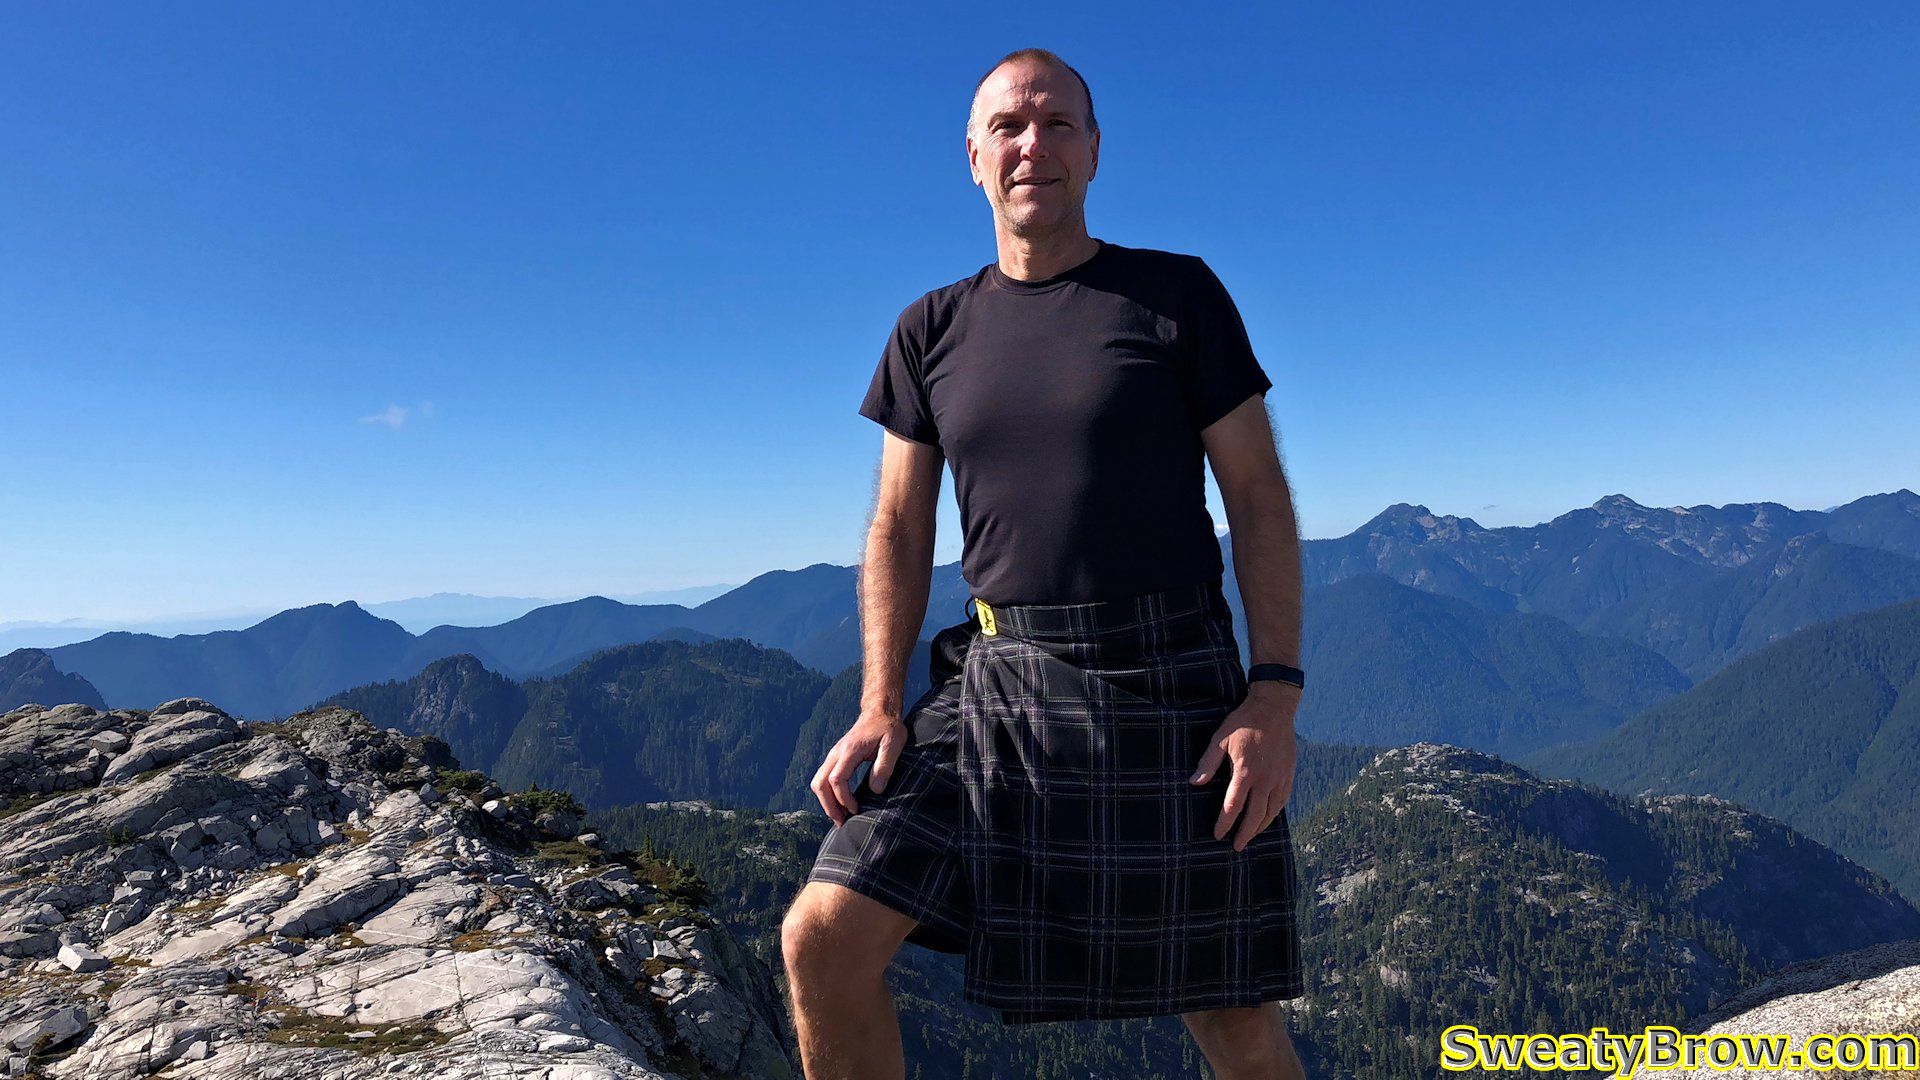
At this point, there began to be much more open rock, and the trees faded away. I decided to ditch my long pants, and donned my kilt instead. Kilted rambling in the alpine – hard to beat!
Shortly after reaching the ridge crest above Norvan Creek’s drainage, open spots began appearing in the forest.
A little open area with a side trail dropping down toward Paton Peak and the Seymour River Valley.
More open patches appearing, with a few fun little scrambly bits.
The last little while before the summit of was spectacular – the expanses of open granite in this area are just beautiful for rambling around. Four hours after I began, I reached the summit of Coliseum Mountain.
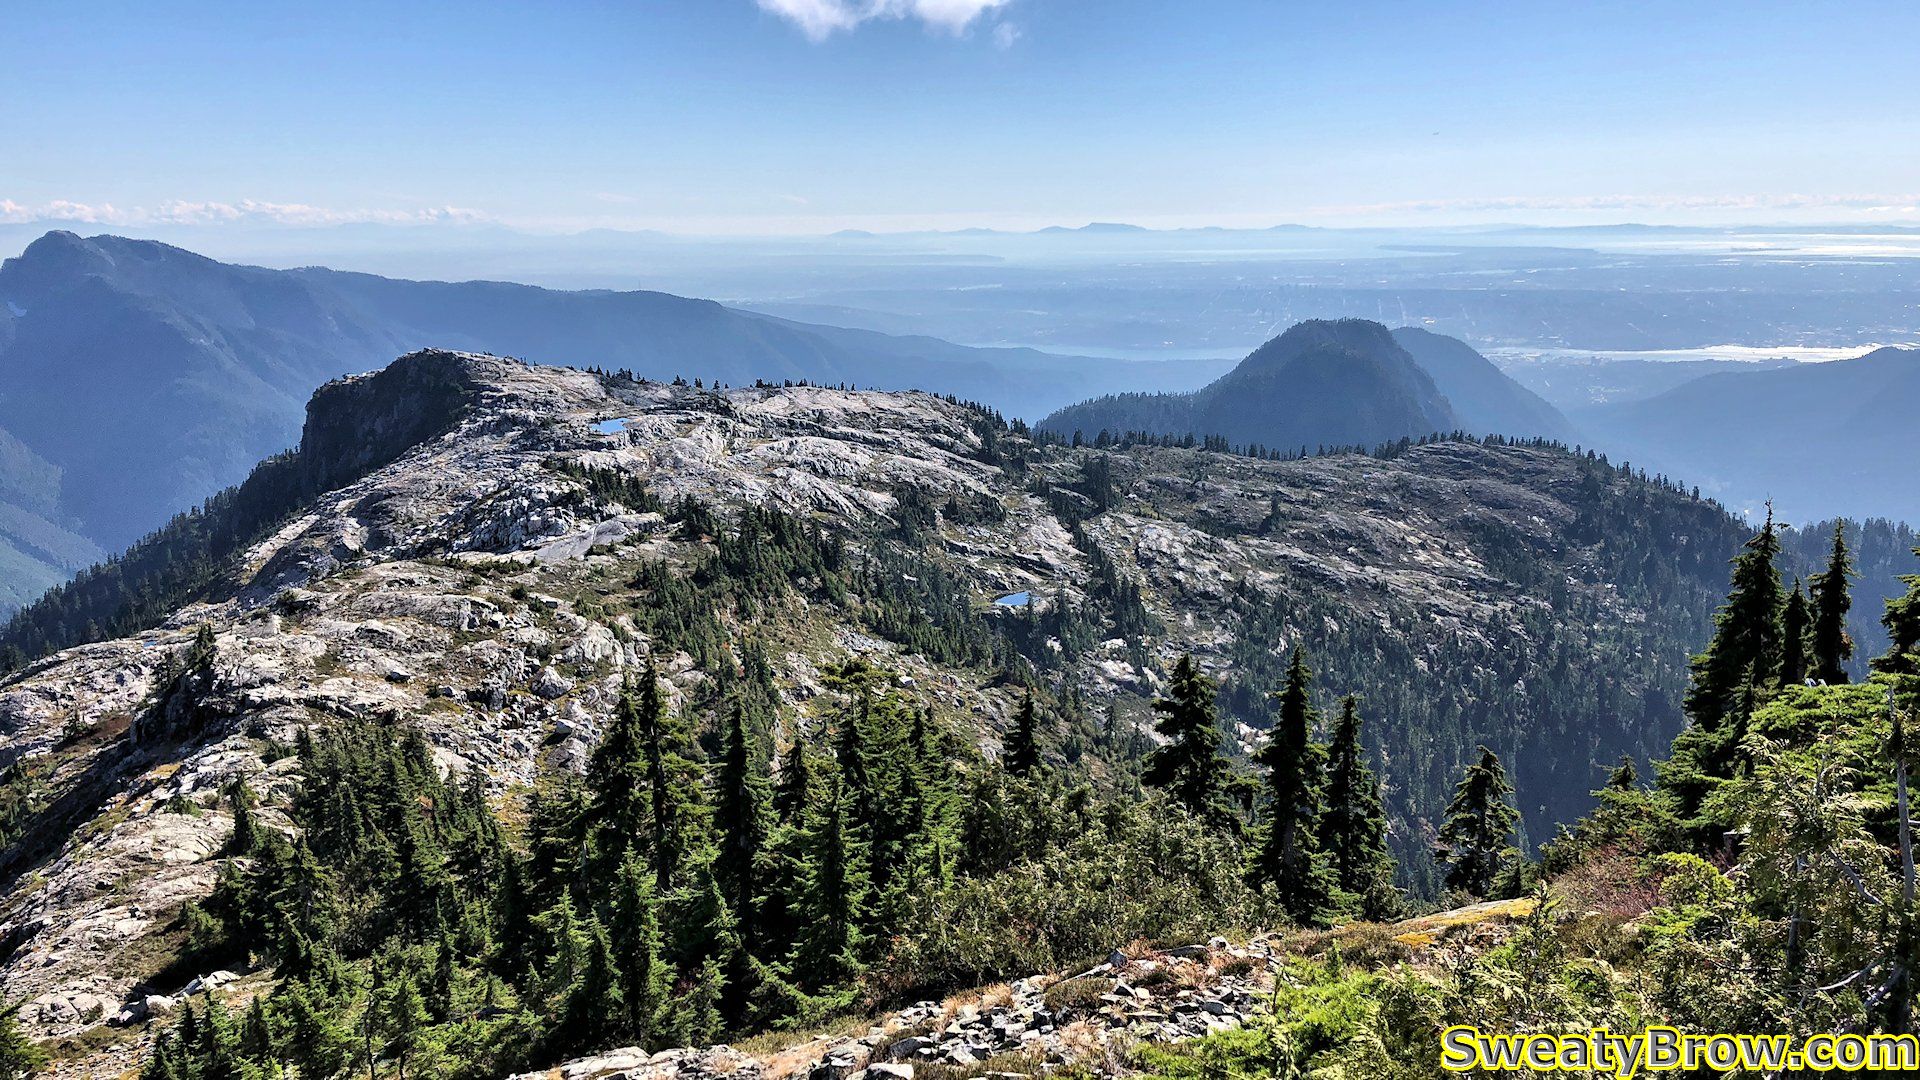
Some of the open granite below Coliseum Mountain. Mount Fromme and Grouse, Dam, Little Goat, and Goat Mountains beyond. The Crown Mountain group peeks over the trees on the right side.
Top of Coliseum Mountain, looking toward Mount Burwell.
I dropped down toward the big tarn north of the summit, and began the traverse toward Mount Burwell. It didn’t look that far away, but it took far longer than I expected it to. The route went up and over a couple of intermediate bumps, and was a bit steeper than I expected.
Looking across at Cornet Lakes, below Mount Burwell, with Cathedral Mountain beyond.
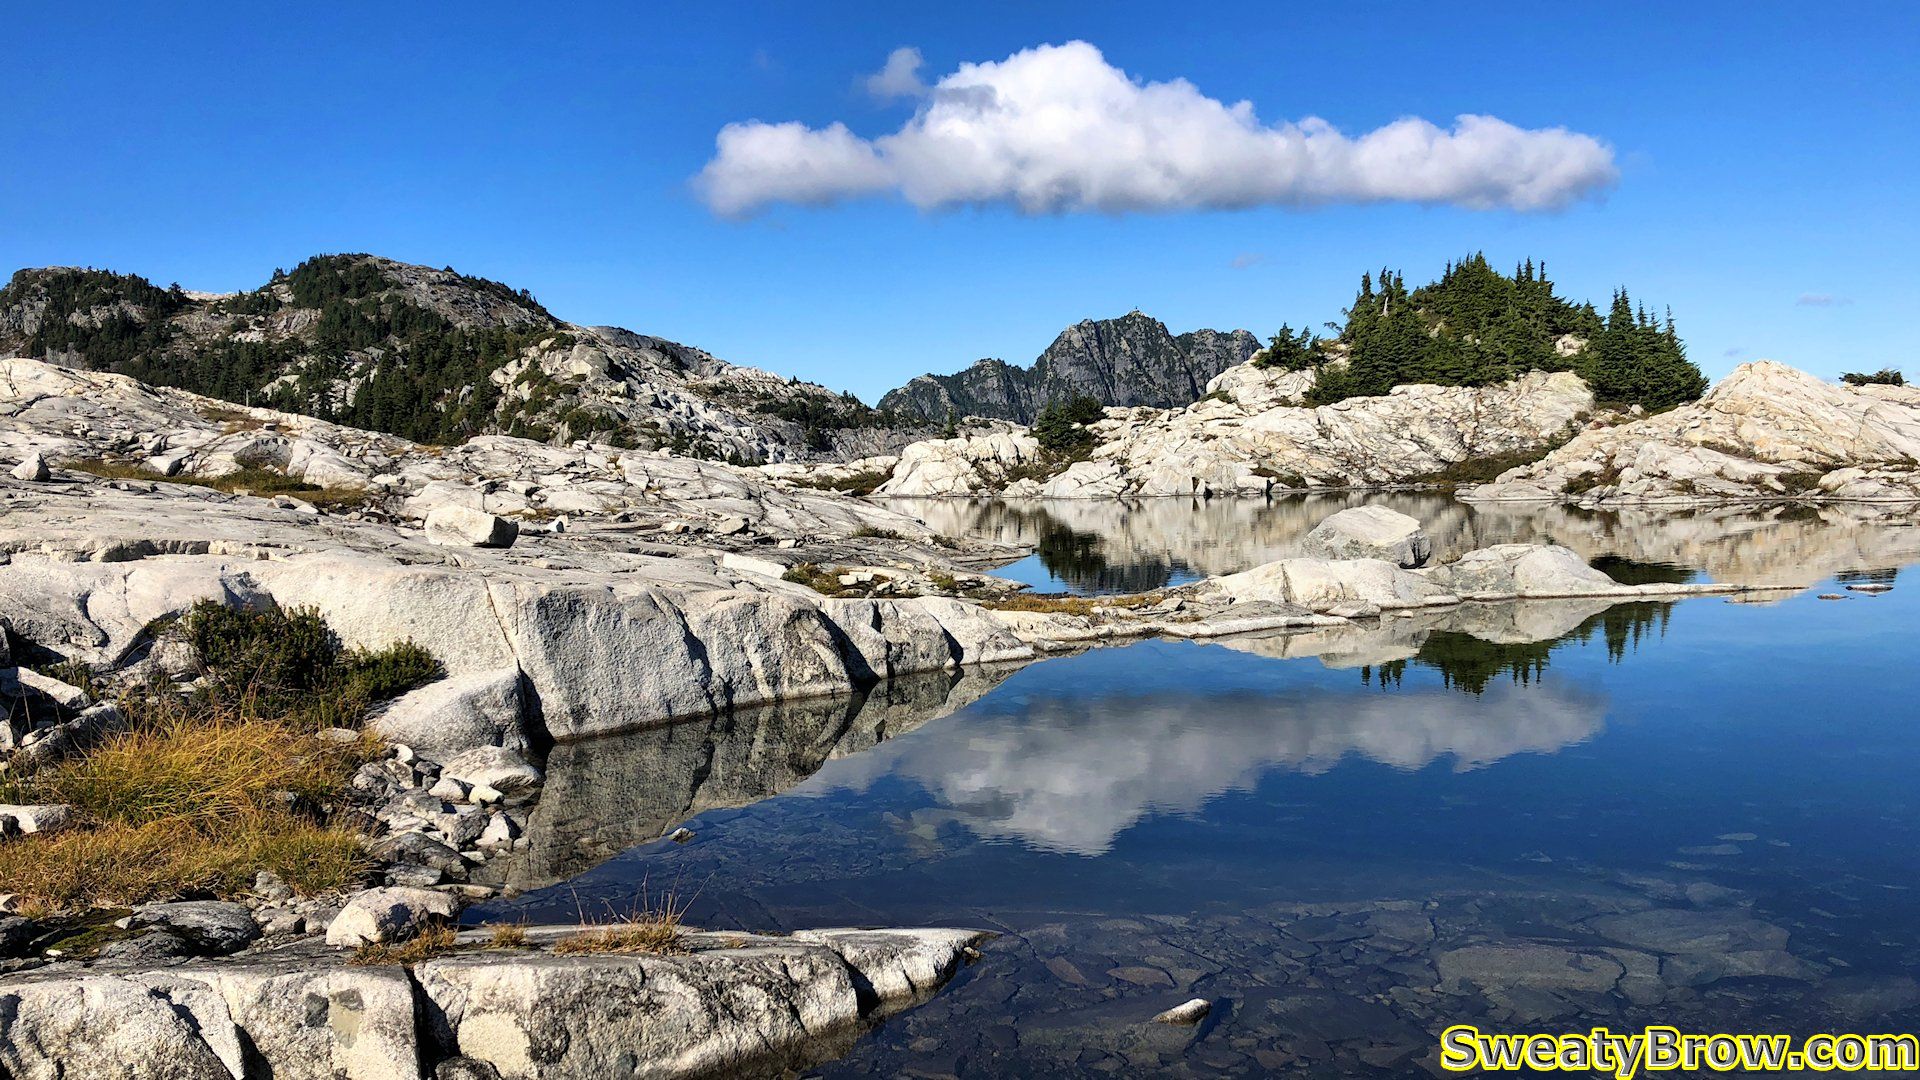
A small tarn below Coliseum Mountain, with some ice still floating on the surface, shortly after noon!
Eventually, five hours after leaving the car, I arrived atop Mount Burwell. I sat down and enjoyed some lunch, and took a bunch of photos.
On the summit of Mount Burwell, with Cathedral Mountain in the distance.
Stylishly attired in my hiking kilt, from Sport Kilt.
Looking back southeastward at Coliseum Mountain. You can see how much open rock there is all around the summit. The three peaks of The Needles are visible to the right of the summit, as well. Actually, I think that the two closest peaks are North and Middle Needles, but the one beyond and slightly right of them is Lynn Peak. South Needle is hidden behind Middle…
I also heard the unmistakable sounds of a De Havilland Beaver’s radial engine approaching; it took just a few seconds to spot it, and I took a bit of video.
After a satisfying lunch and a few selfies, I packed everything back up and started back down, an hour after arriving.
On the way back down from Mount Burwell, I took this photo alongside the large tarn between Burwell and Coliseum, looking north. What a beautiful (but chilly!) day!
The trip down wasn’t much faster than the approach had been. Heading down the upper section of the trail, down the ridge and the Norvan drainage, I had to be careful not to slip on the slightly damp and very steep trail, which slowed me down somewhat. When I reached the flatter section of the trail below Norvan Falls, the trail was a low enough gradient that I had made good time on the way up. It would have been tougher to go much faster without running – something my knee and feet won’t let me do!
What took five hours on the way up took about four and a quarter on the way back down. By this time, the sun was getting pretty low, and the air was getting chilly. The last little while along Lynn Creek, my hands were getting rather cold, and I considered stopping to pull my gloves out of my pack (good to always be prepared!). I decided, however, that it would be best to just keep going and get back to the car. The heated seats sure felt good, when I did get back, though!
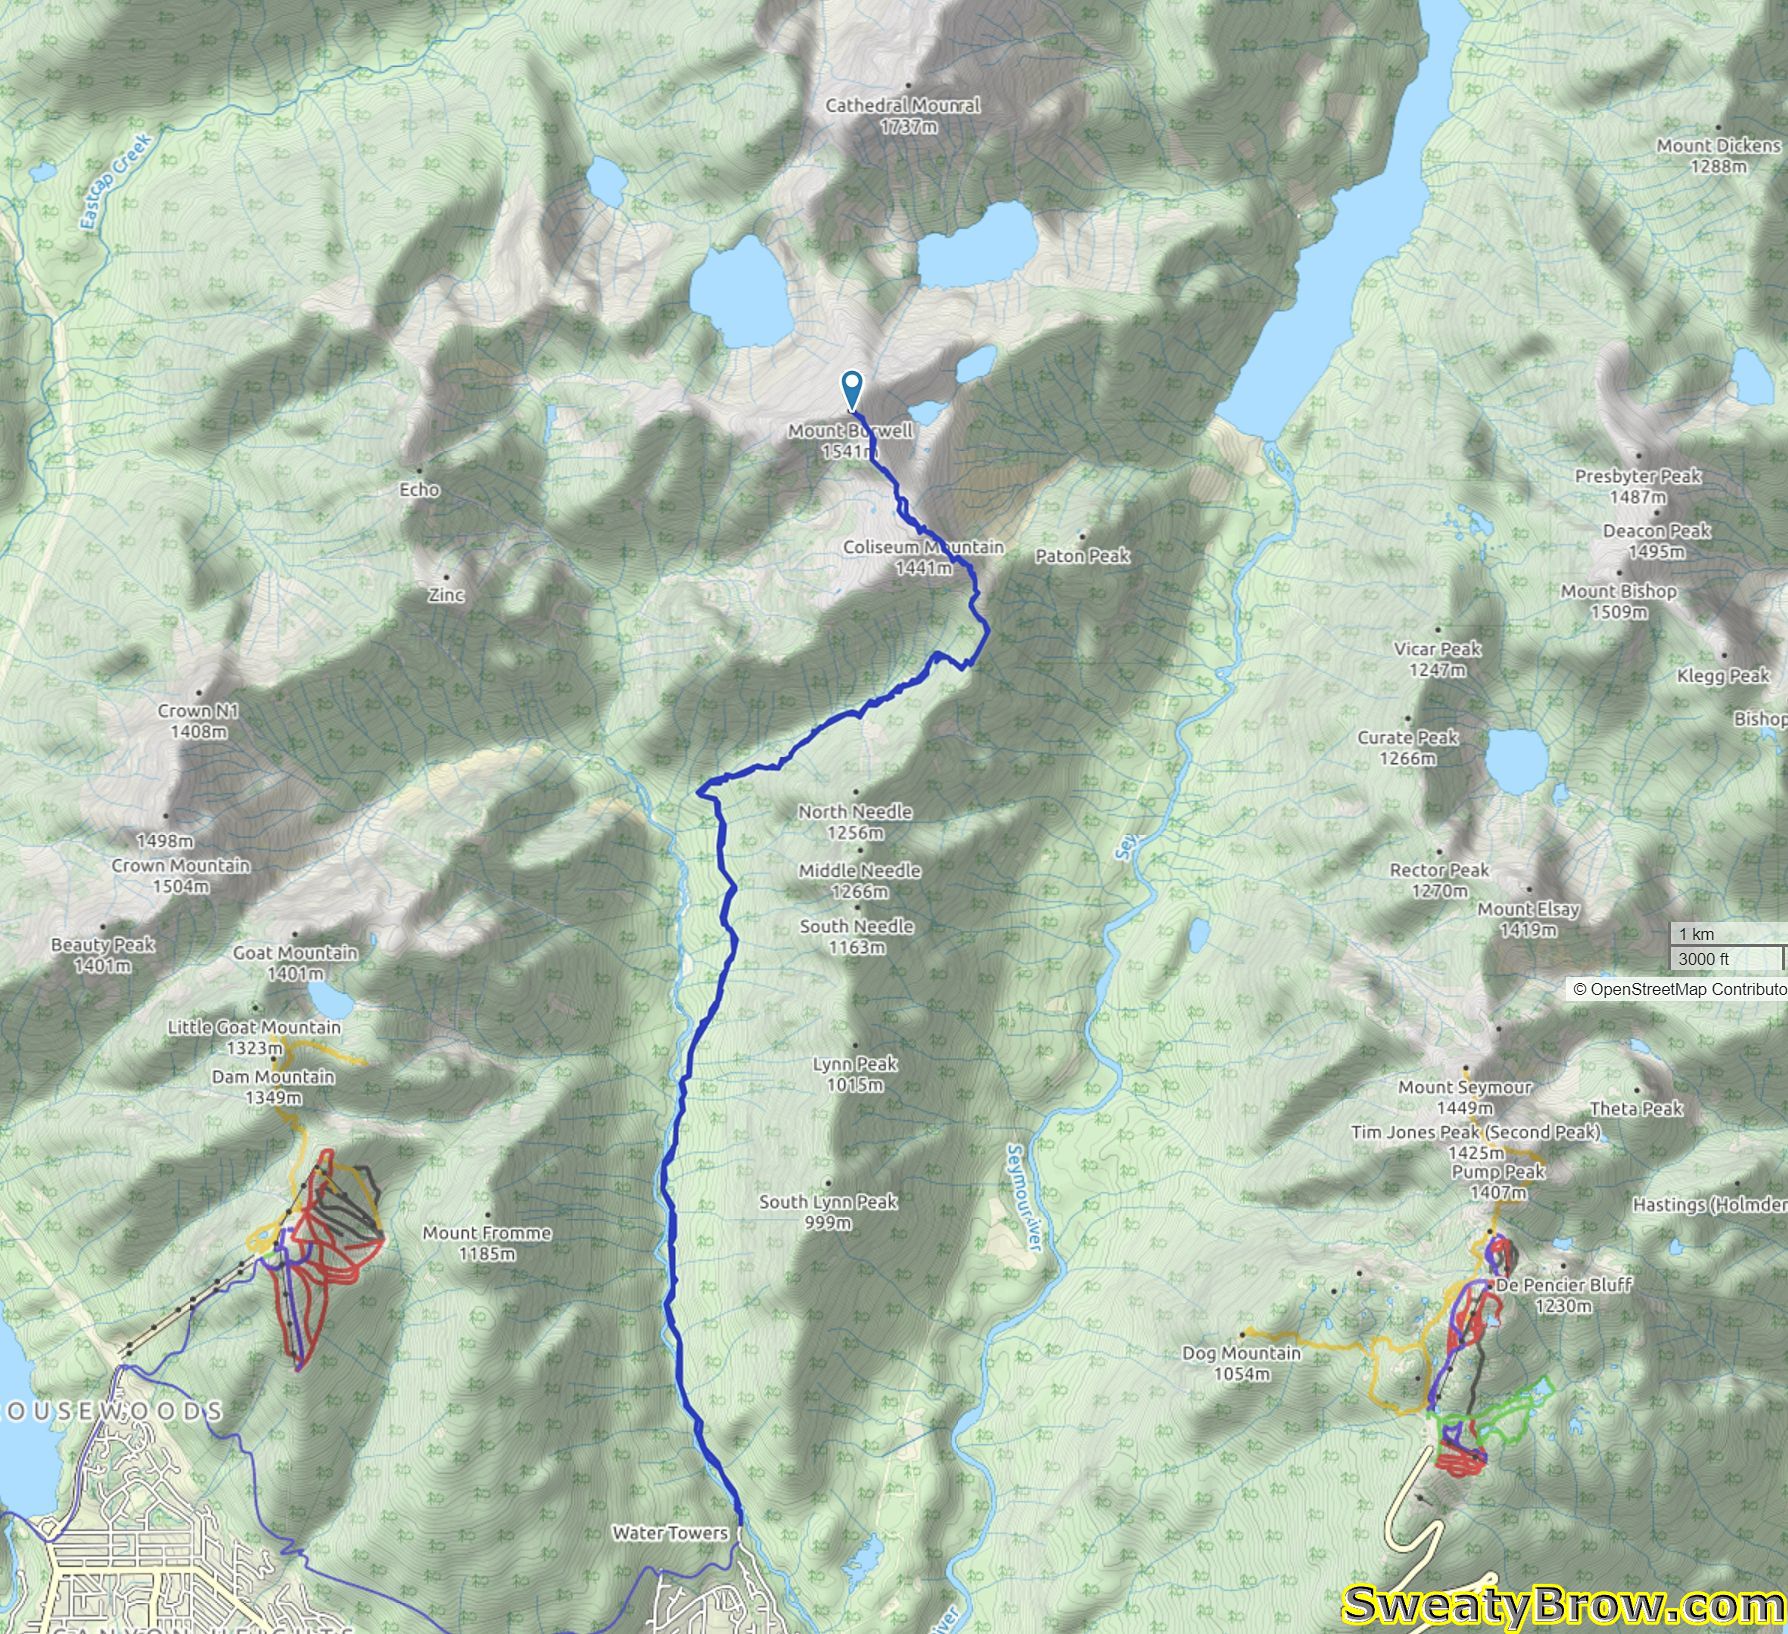
The GPS track for my hike up Coliseum Mountain and Mount Burwell.
The weather had been good for a few days, but I hadn’t had an opportunity to go hiking (aside from a couple of short hikes near Whistler – more on that here).
Saturday the 29th looked like the weather would start out fine, and end up showering by around dinner time – probably earlier in the mountains. So I decided to tackle a couple of peaks on the North Shore that I had never hiked before. They are relatively easy hikes, without any sort of technical difficulties, and very easy routefinding. That way, if the rains came early, I wouldn’t be stuck in a challenging situation.
The only issue with hiking these two peaks (Mount Strachan and Black Mountain) is that they are on the opposite sides of the parking area at Cypress Bowl – which means basically two out-and-back hikes, with no opportunity to traverse from one to the other. So: Gain all the elevation, lose all the elevation, and then gain all the elevation again!
I got a bit of a late start, not arriving at the parking lot until about 11:30. The place was packed! So many vehicles, so many people. Everyone wanted to take what might be one of the last not (yet) rainy weekends of the hiking season.
I started out heading east from the parking lot on the Baden-Powell Trail, and hiked right past the turnoff to head up the Mount Strachan Trail – it was well hidden by some logs and snags. I checked my GPS, and backtracked about 200m to find it; from there it was easy to follow.
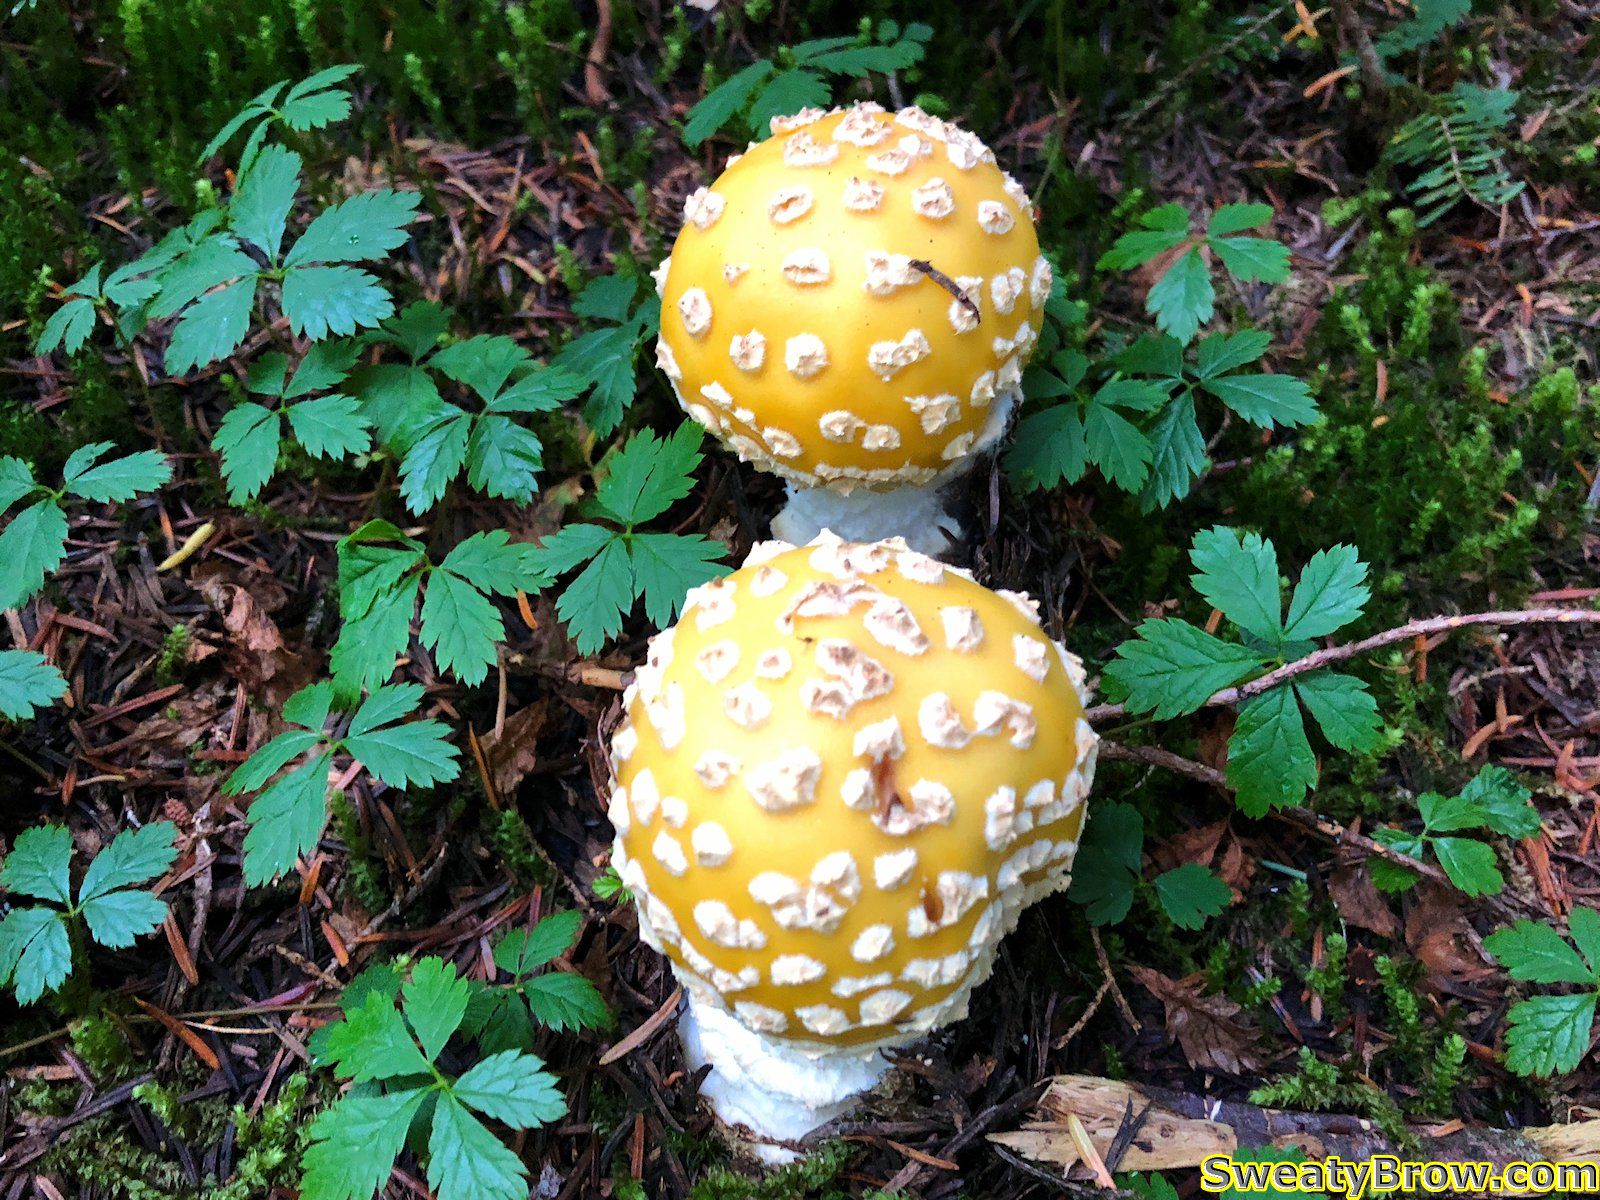
There were a few big, beautiful old growth trees along the way, as I climbed through the forest. Lots of delicious blueberries were on offer as well – I had a few, just to sample them. A few mushrooms were gaudily on display, too.
Some funky looking, but poisonous, mushrooms growing on the way up Mount Strachan. I’m pretty sure these are Fly Agaric (amanita muscaria) mushrooms, though they are usually redder in colour…
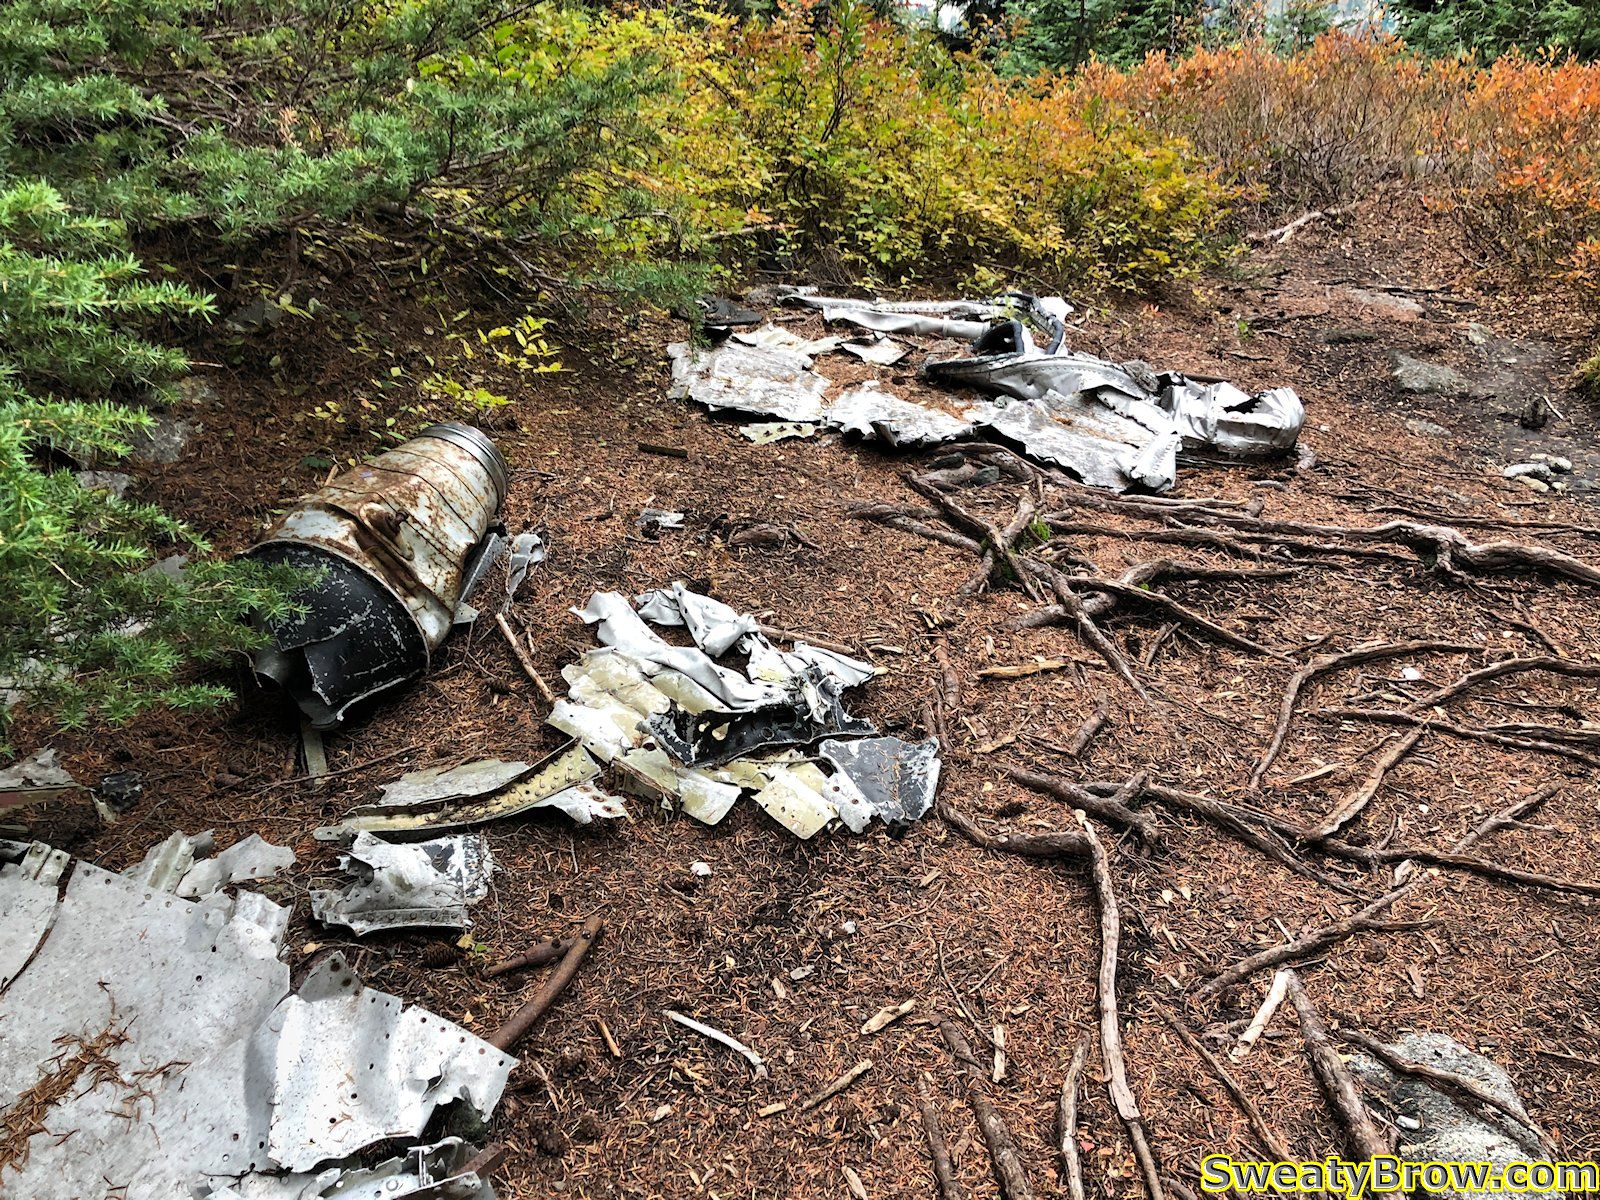
After about an hour on the trail, I reached the site of a 1963 plane crash. Debris from the aircraft, a small two-seater jet training aircraft, is scattered across the trail. Two members of the Royal Canadian Navy died in the crash, which wasn’t found until three days after the accident.
Some of the debris that remains from the Royal Canadian Navy T-33 that crashed on Mount Strachan, 23 November 1963.
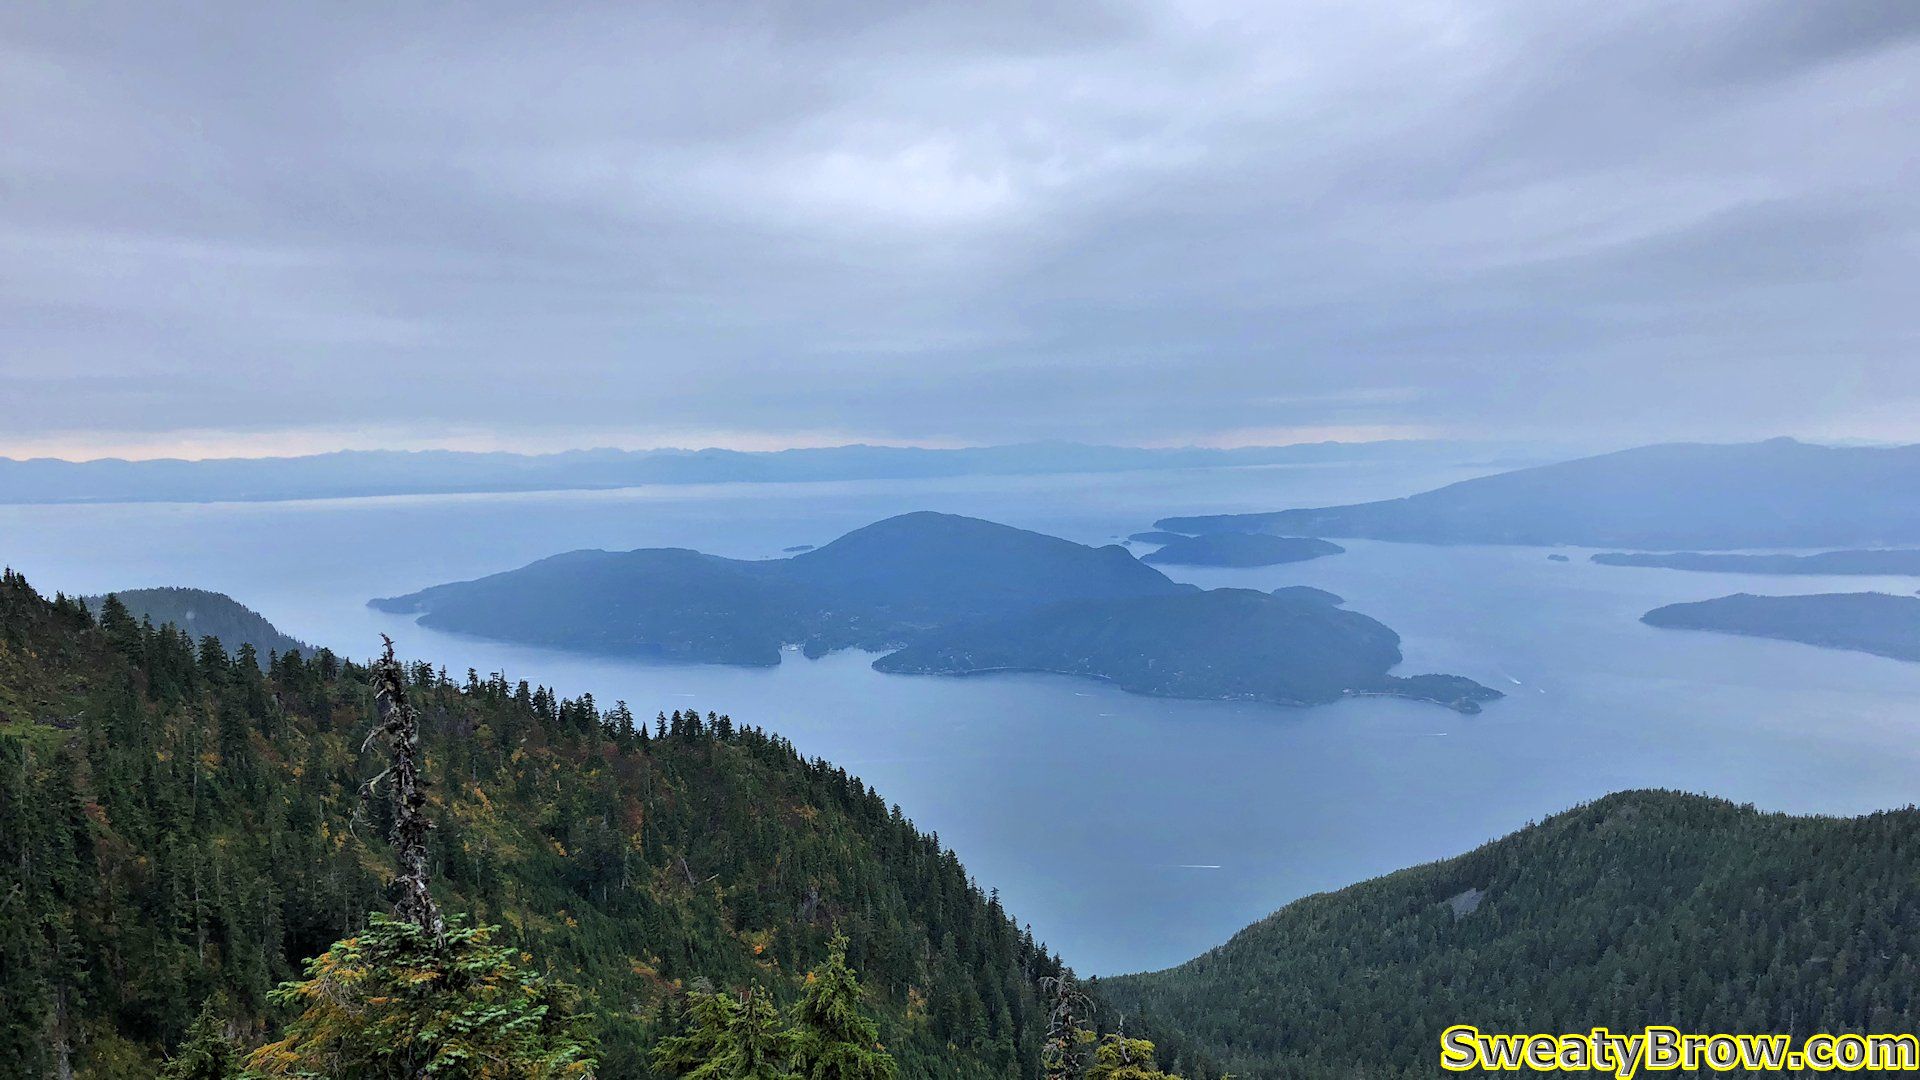
After this point, I began to feel occasional raindrops – the rain was arriving a little bit early! Fortunately, it didn’t come down heavily at all, and was quite intermittent. I reached the south summit after about an hour and a quarter. This is the peak that the Sky Chair ski lift reaches. It was a little windy, with occasional raindrops continuing to fall, but the view was pretty nice toward the southwest, looking over Howe Sound.
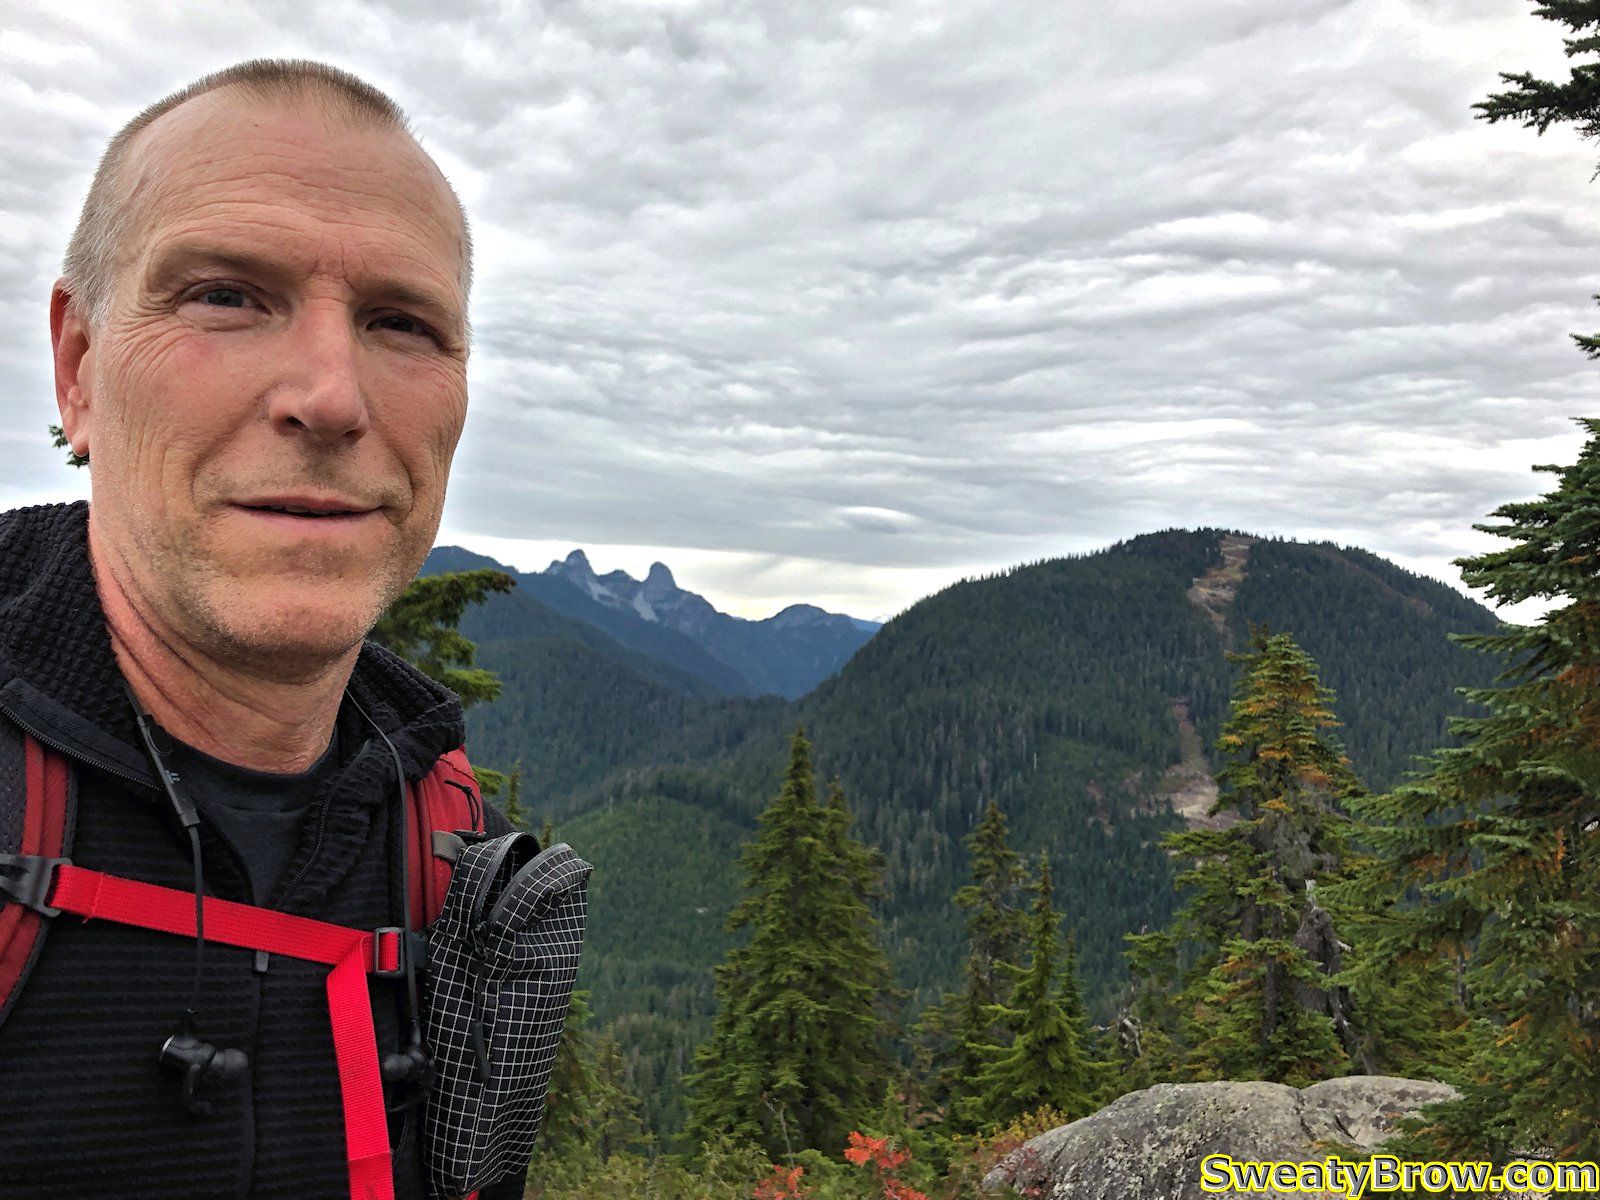
Selfie from the south summit of Mount Strachan, looking down over Howe Sound.
From here, there was a drop of about 30 meters or so, down into a saddle, then up the other side about 35 meters to reach the north, true summit of the mountain. In the saddle there were quite a few people taking a break, and enjoying the whiskey jacks that were flying around, cadging food.
Quickly up the other side of the saddle, up some fun little slightly scrambly steps, and I was on the north summit. Considering the weather conditions, the view north was pretty good – it would be quite lovely in better weather! There were showers visible further to the east, but pretty clear looking toward Brunswick, The Twins (Lions) and the Sky Pilot group (Co-pilot, Sky Pilot, and Ledge).
The view north from Mount Strachan. Unnecessary Mountain, Brunswick beyond, a glimpse of Hanover, the Lions, and the Sky Pilot group way off in the distance.
A couple of minutes to look around, and I set off back down the trail. I still had another mountain to climb, and wanted to do it before the rain struck in earnest! I followed the trail until the vicinity of the T-33 crash site, then moved onto the service road, following it down to make better time. At this point the drizzle was fairly steady, but still light. It faded away before I reached the parking lot.
I was back at the parking lot at 2:05 PM, a little under two-and-a-half hours after setting out, and began to make my way up the Baden-Powell trail in the other direction – toward Black Mountain.
This trail is much more clear, maintained, and well-defined. There were a lot of people going up and down there!
I reached Cabin Lake in about half an hour. Lovely little lake, that!
Cabin Lake, between the North and South summits of Black Mountain.
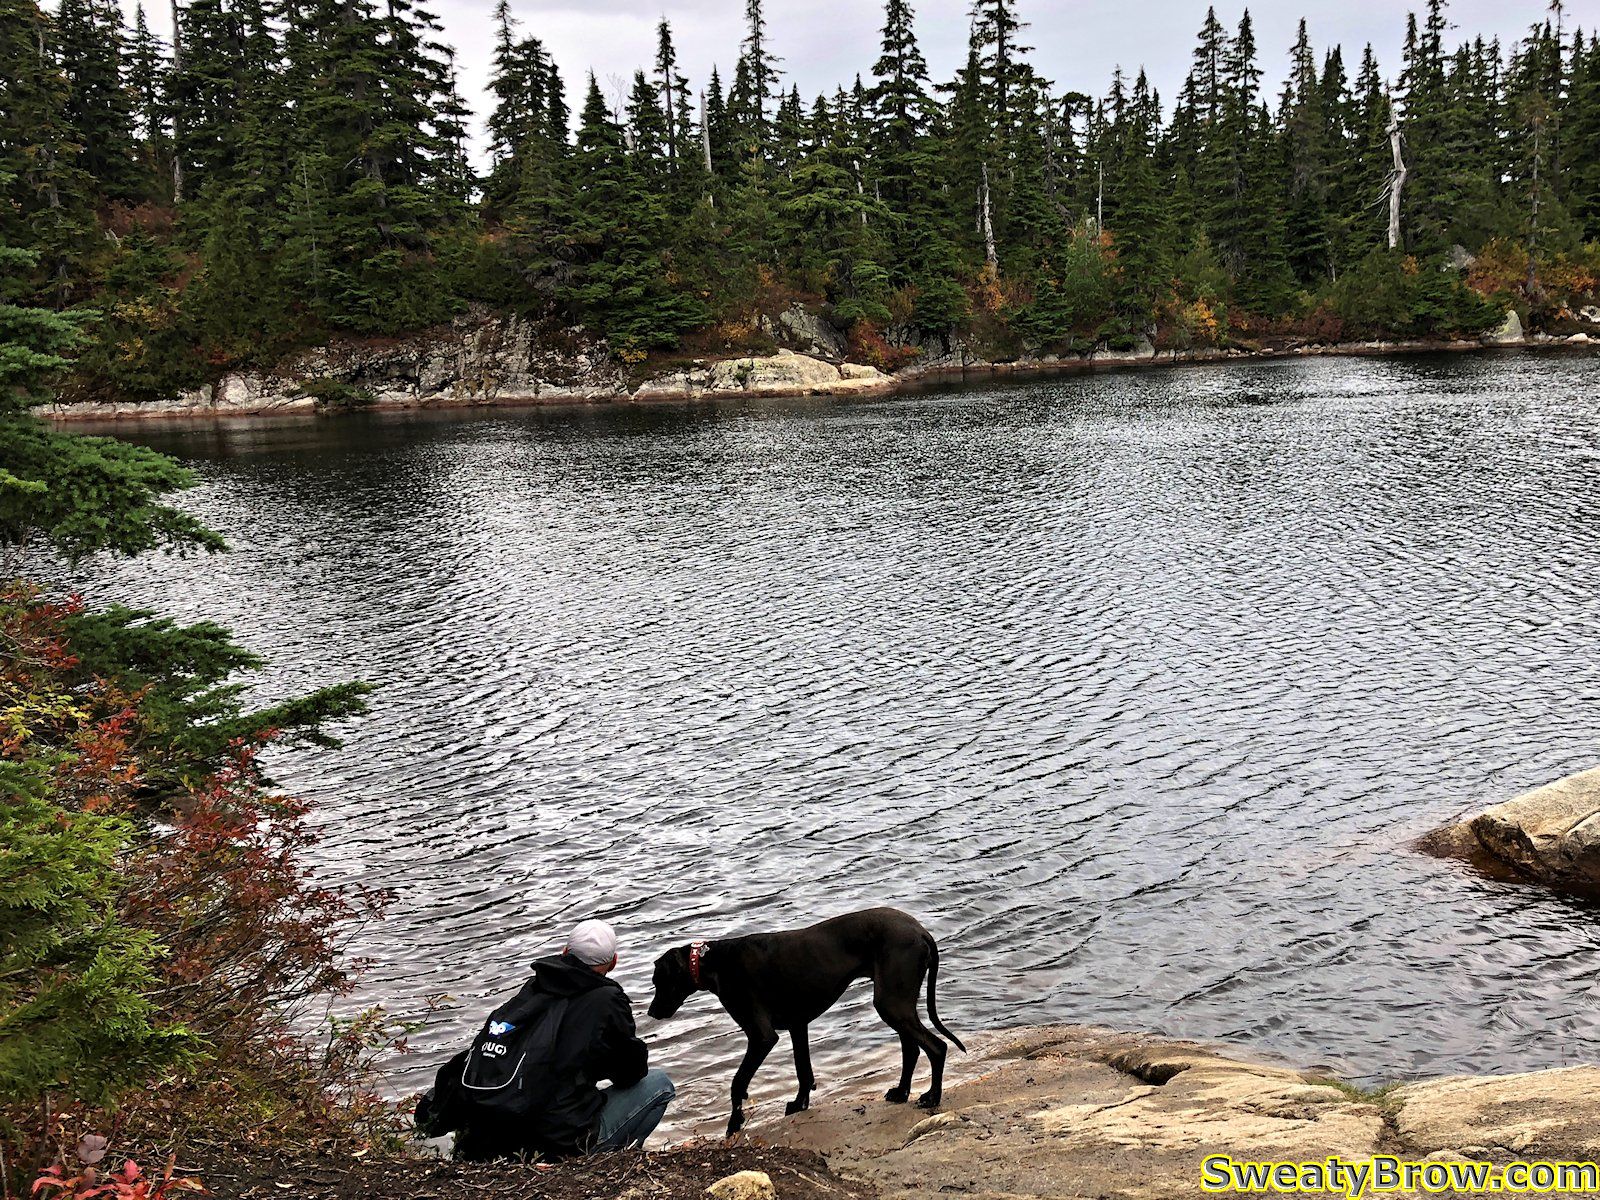
A man and his dog, on the shore of Cabin Lake, Black Mountain.
I turned left and hiked to the south summit of Black Mountain in a few minutes. There were nice views over the city and Howe Sound, but I don’t think I took photos that way…
Dramatic sky north of Black Mountain.
I then returned to Cabin Lake, and set off toward the north summit, via a far less traveled trail, despite the fact that the north summit is actually the higher of the two. The views from the top, however, are not as dramatic as from the south summit.
North summit of Black Mountain, looking toward Mount Strachan (only the lower south summit is visible from here) and The Lions (The Twins) beyond.
After a couple of minutes, I returned the way I came, and was soon back at the car. The rain held off the entire time I went up and down Black Mountain – perfect!
Total of about 12 km hiked, and up/down a total of around 800 meters or so. All in a little less than four hours – and I was home in time for dinner!
Thursday, 6 September was going to be my first of twelve days off, and the weather was looking really promising – to be followed by a rainy Friday. I decided I would get out and do a good, long hike for the day. Looking for ideas, I decided on one of the final mountains I needed to hike along the Howe Sound Crest, north of Cypress Bowl ski resort and the Lions.
I have hiked many of the mountains along this stretch, but still had a few more to hit – one of them being Mount Hanover, a little northeast of Brunswick Mountain. I read up on the mountain, and the route, and decided to give it a try. What I read was that the final ascent, up either of two parallel gullies to the summit, was fairly difficult, with a bit of exposure. I read that some people started up, and decided against it due to difficulty, but that others said it wasn’t so bad… I figured that if I decided to turn back, I would divert on the trip back, and climb Hat Mountain, a non-technical peak that I hadn’t yet climbed. And if things went well, and I felt up to it, I could also do Hat Mountain on the way back!
I arrived in Lions Bay at about 7:15. There were a couple of other vehicles there, and I chatted briefly with a fellow who was planning to climb Mount Brunswick – mostly we talked about the crappy parking machine, which would not connect and accept our credit cards. We both ended up downloading and installing the Whoosh app – of course, not the parking apps already on our phones – to pay for the day…
At 7:30, I was on my way. The route follows the Brunswick Trail up to the crossing of the Howe Sound Crest Trail, at which point I made a left turn and headed north through Hat Pass. The guy I chatted with in the parking lot left just a few minutes before me, and I never caught up to him on the way up – he was making good time.
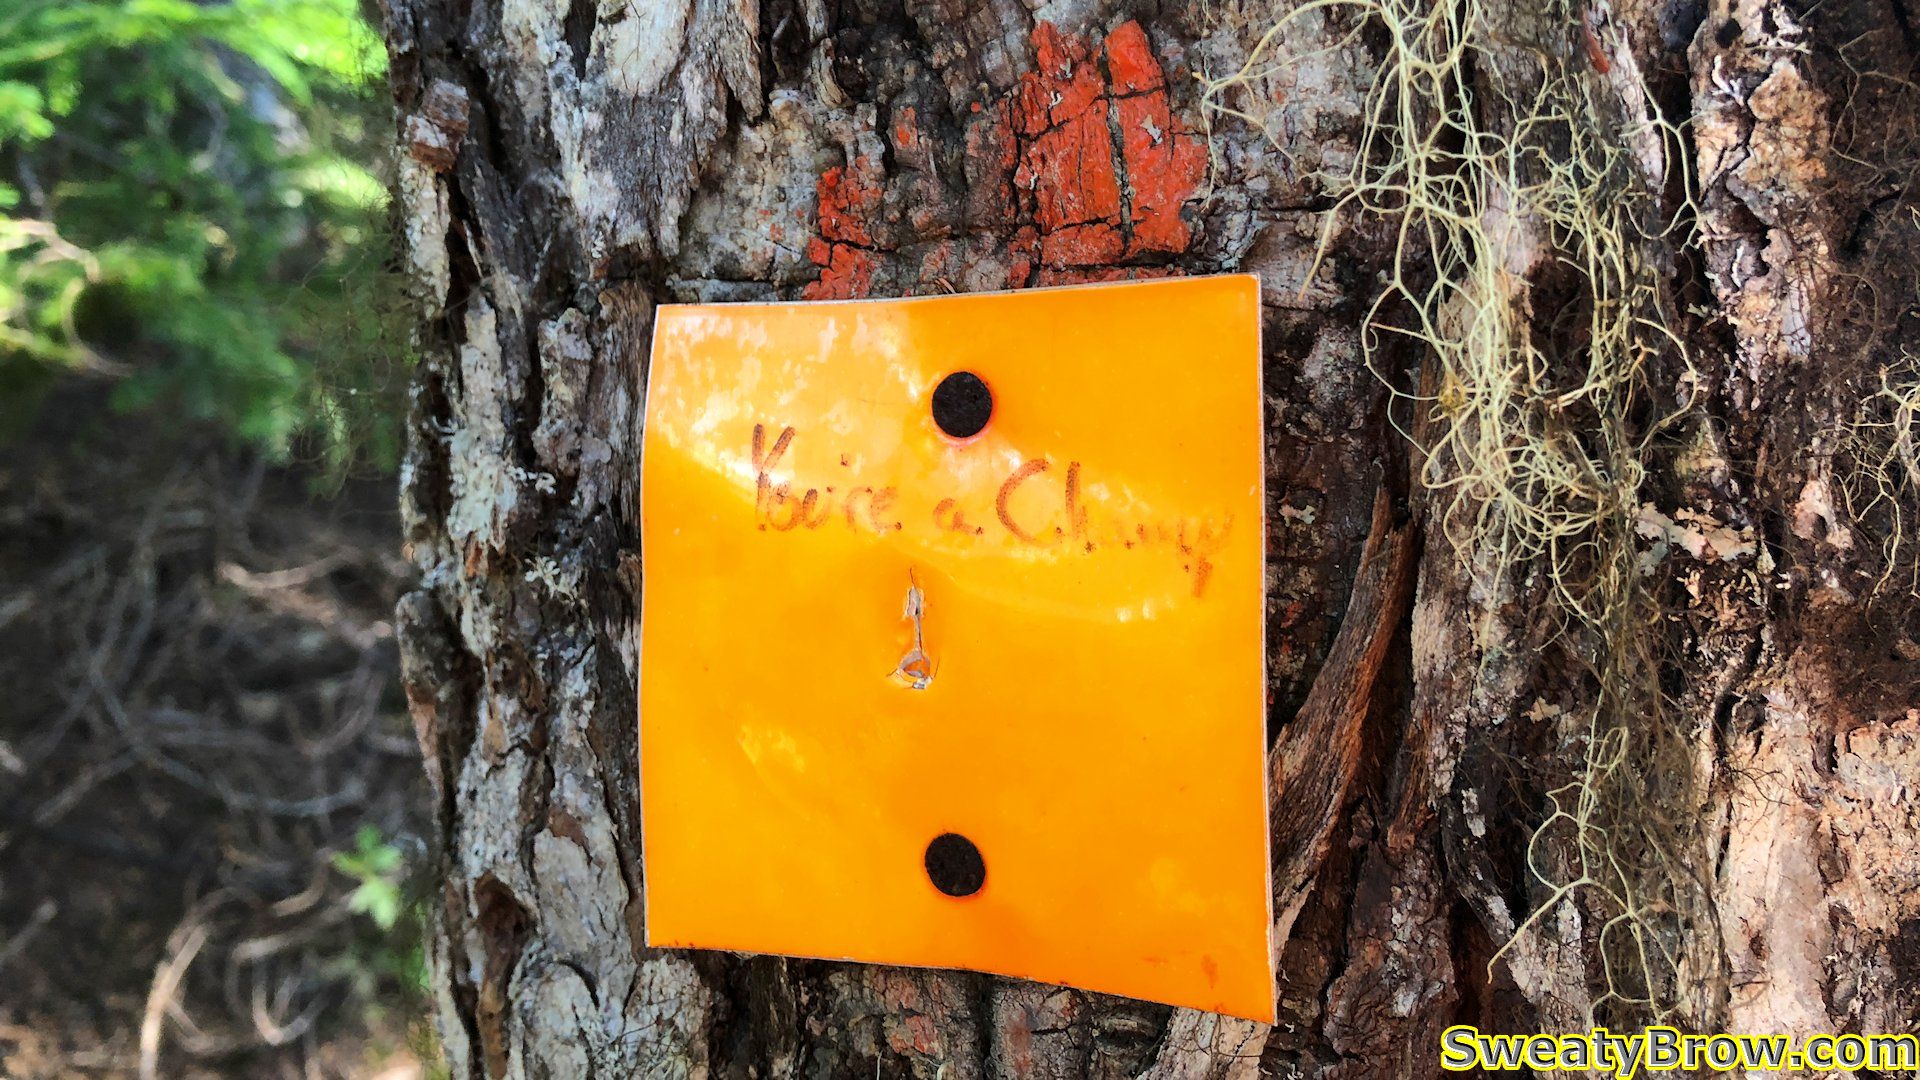
Motivational message on a trail marker: “You’re a champ!”
A view of Howe Sound from one of the few viewpoints on the trail prior to reaching the Howe Sound Crest Trail.
A little glimpse of Hat Mountain on the hike up. If all went well, I would be there later in the day…
I reached the HSCT at about 10:00, having seen no one else on the trail yet. Just as I was heading over Hat Pass, to begin the descent toward Brunswick Lake, I spotted a little tarn with a lovely reflection of my destination across the valley. As I stepped off the trail to take a photo, I was overtaken by a guy headed the same direction as me. We said hello, and he carried on while I took my photos.
(New friend) Jan hiking beside the tarn at Hat Pass.
I stayed just a little behind him for a ways, then lost sight of him. When I broke away from the trail to head across country toward the peak, I spotted him again ahead of me. Aha – so he was heading the same place as me!
A little further on, I caught up with him after he stopped for a drink. We chatted a bit, and decided to carry on together. His name was Jan (pronounced with a “Y” at the start) and we ended up hiking the rest of the day together. A very fine trail companion, although I felt a little bad about holding him up a bit!
Jan had started about an hour before me, and headed up the Mount Harvey trail, over the top of the peak, and down to the HSCT. He then caught me on the way to Mount Hanover. Fit and fast!
We found our way along the rolling terrain to the bottom of a gully that rose to a major boulder field above. We ascended the boulders (oh, I was lagging behind, despite some serious sweating!) to the base of the two parallel gullies rising to the summit. The online and guidebook consensus was that the left gully was easier, but more sustained, while the right side had a couple of harder, more exposed cruxes, combined with some easier terrain.
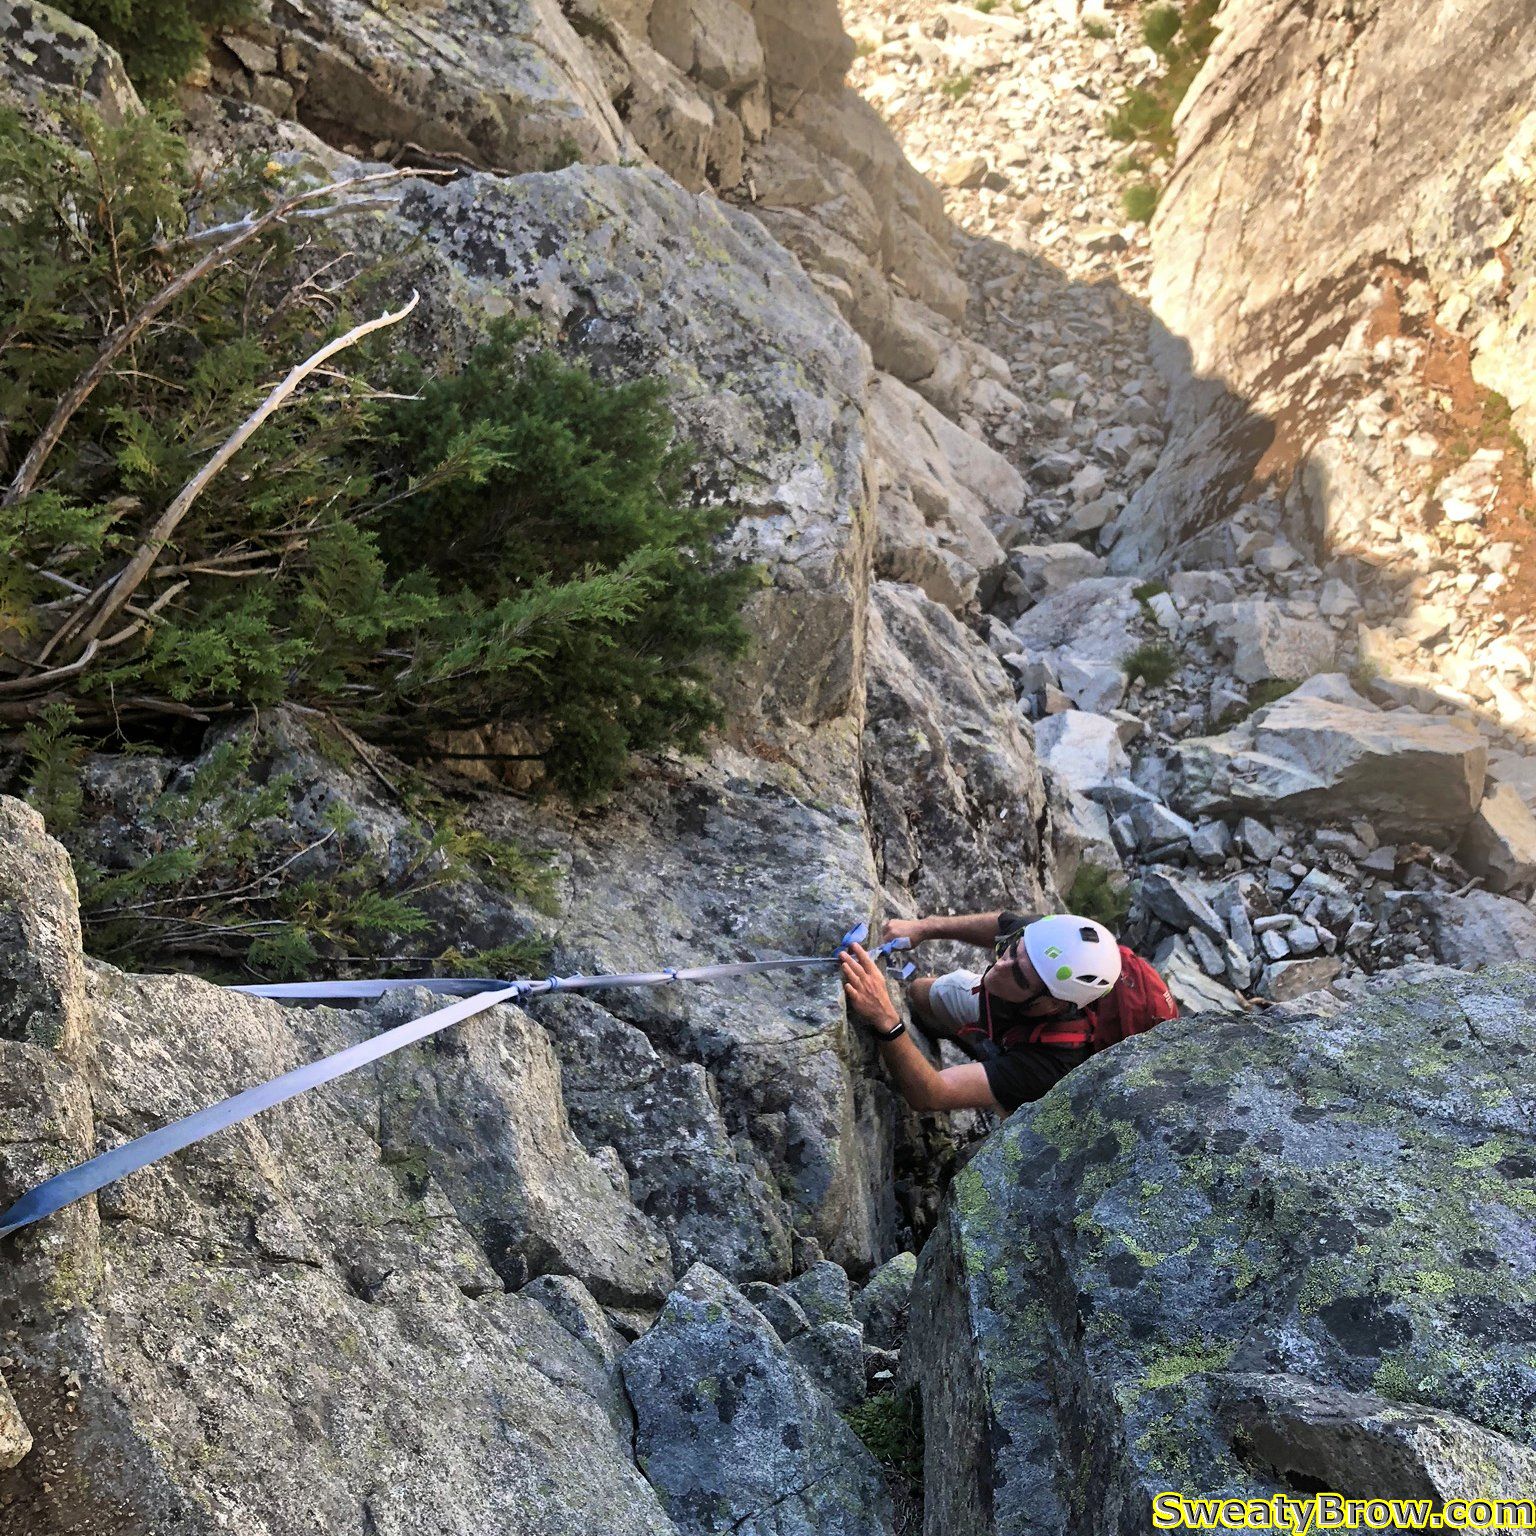
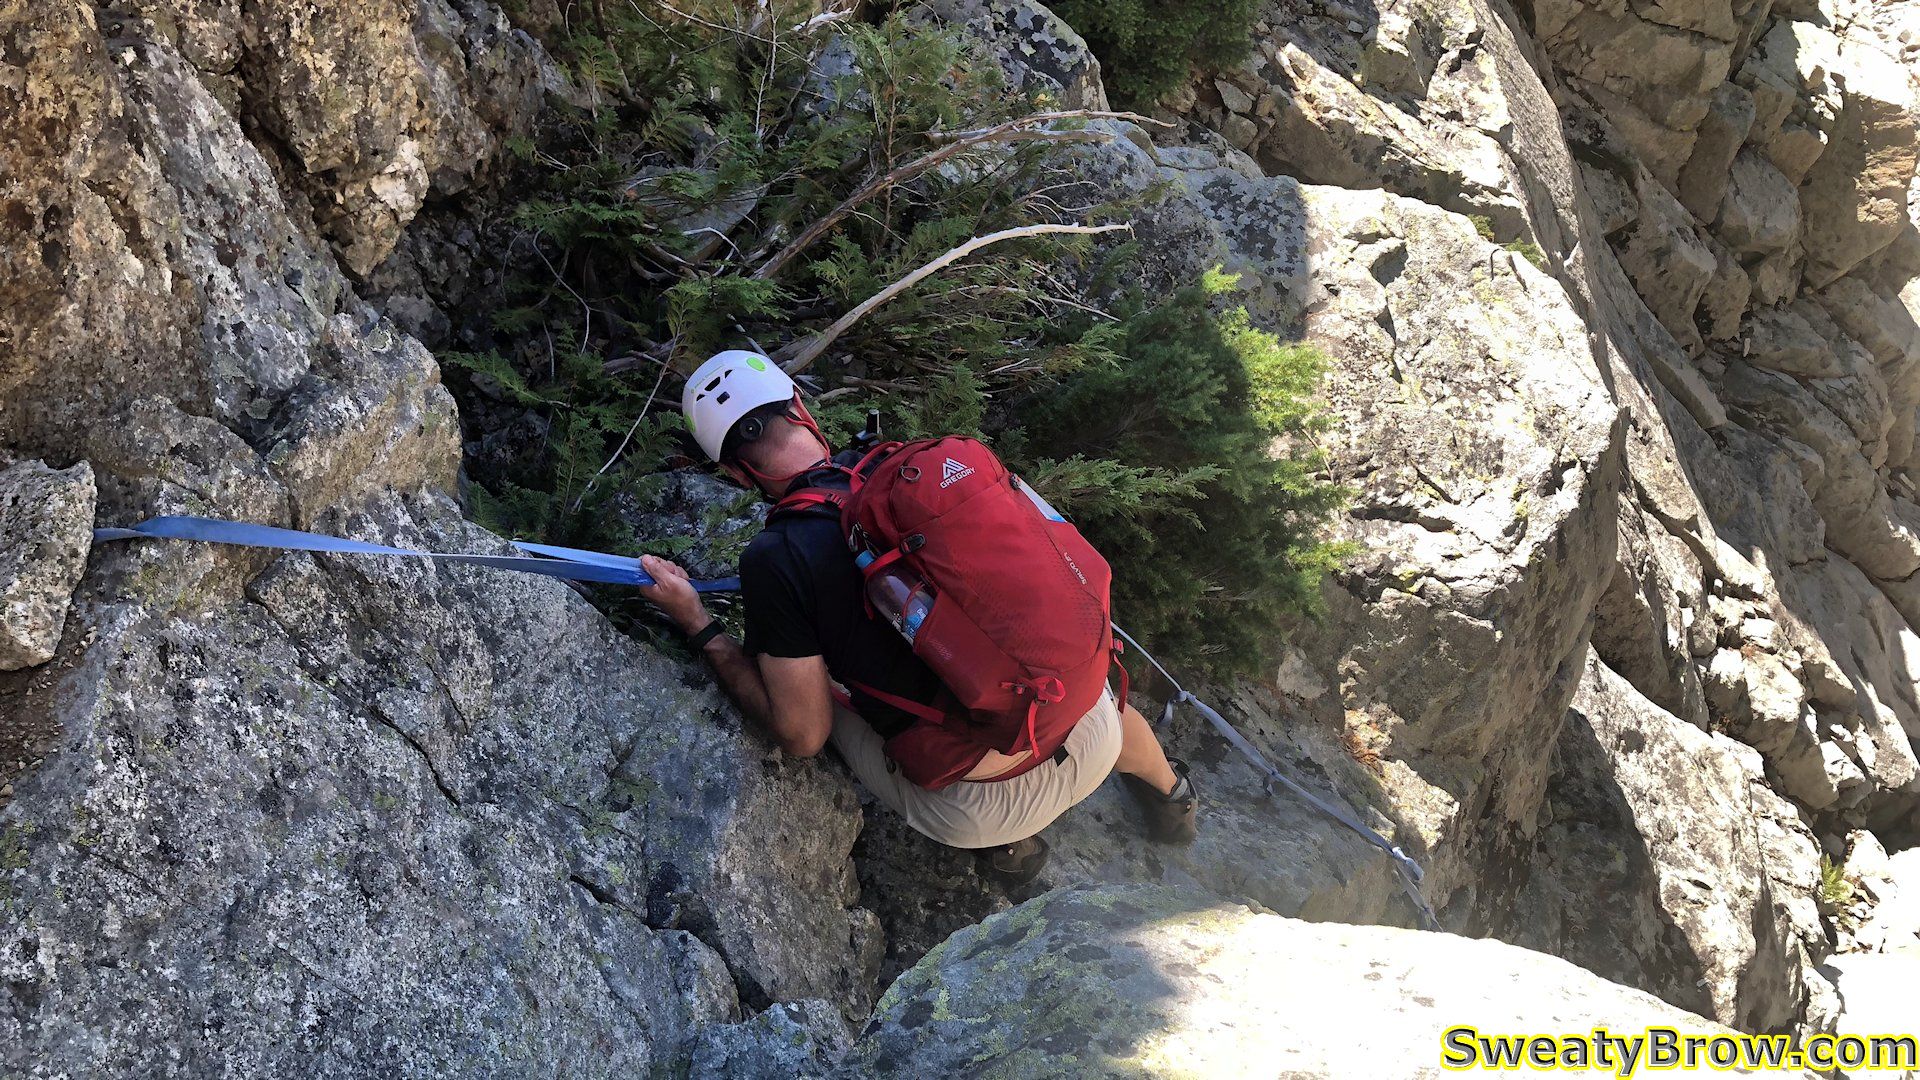
We agreed to take the left gully, and started up. Almost immediately, we reached a length of blue, knotted webbing hanging down from the right wall. Jan went up first, while I donned my helmet – just in case.
Starting up the Left Gully on Mount Hanover. Jan is traversing across to a length of blue webbing hanging from the rocks on the right.
I followed him up, and we were soon at another obstacle, with a length of yellow rope hanging down. This time, I went first. There was a bit of hunting around here and there for the best route as we continued up.
Me following Jan up the fixed blue webbing.
Heading toward the yellow rope just ahead.
There was one spot where I tried to decide the best option – an airy lower-angled slab with a few spaced out footholds, or a cramped, somewhat awkward scramble up a short narrow chimney. I opted for the airy slab, and at the top, we thought that it might be a bit challenging on the descent.
After a bit of bushwhacking near the top of the gully, we made it to the top a couple of minutes after noon. We turned left, to hit the summit, but when we got there, we realized that it was actually slightly lower than a right turn would have taken us!
On the first summit we reached – looking at the *actual* summit.
Me, unaware I’m in a photo, with Goat Ridge and the Sky Pilot group beyond.
The Lions in the distance, and Brunswick Mountain nearby.
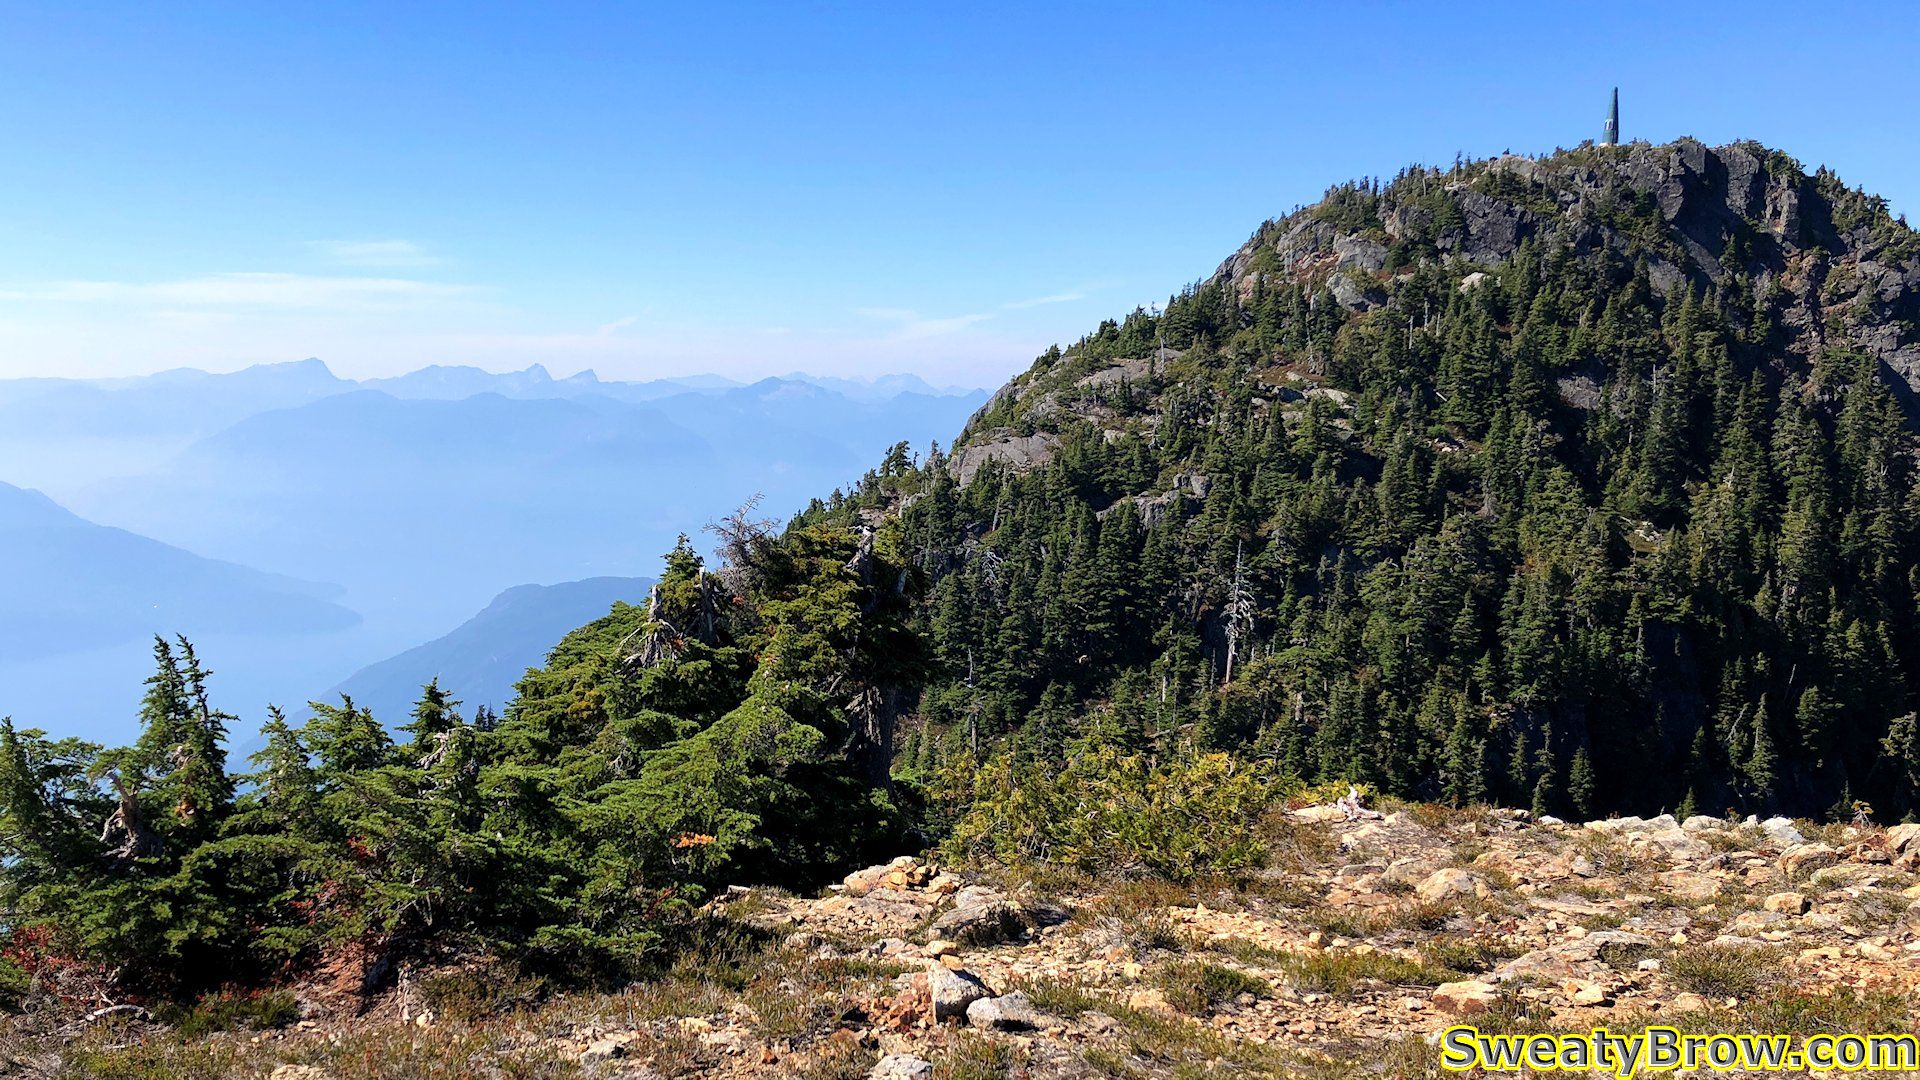
Brunswick, Fat Ass Peak, and Hat Mountain from left to right. The gap between Fat Ass and Hat along the ridge doesn’t look nearly as formidable as it did later in the day… /foreshadowing
The view northwest down to Hanover Lake and Deeks Lake. Brunswick Lake is not quite visible, out of frame at bottom left.
We stayed a few minutes, hydrated, and took photos, then crossed over to the actual peak. After a short time on this summit, we started down around 12:30 or so.
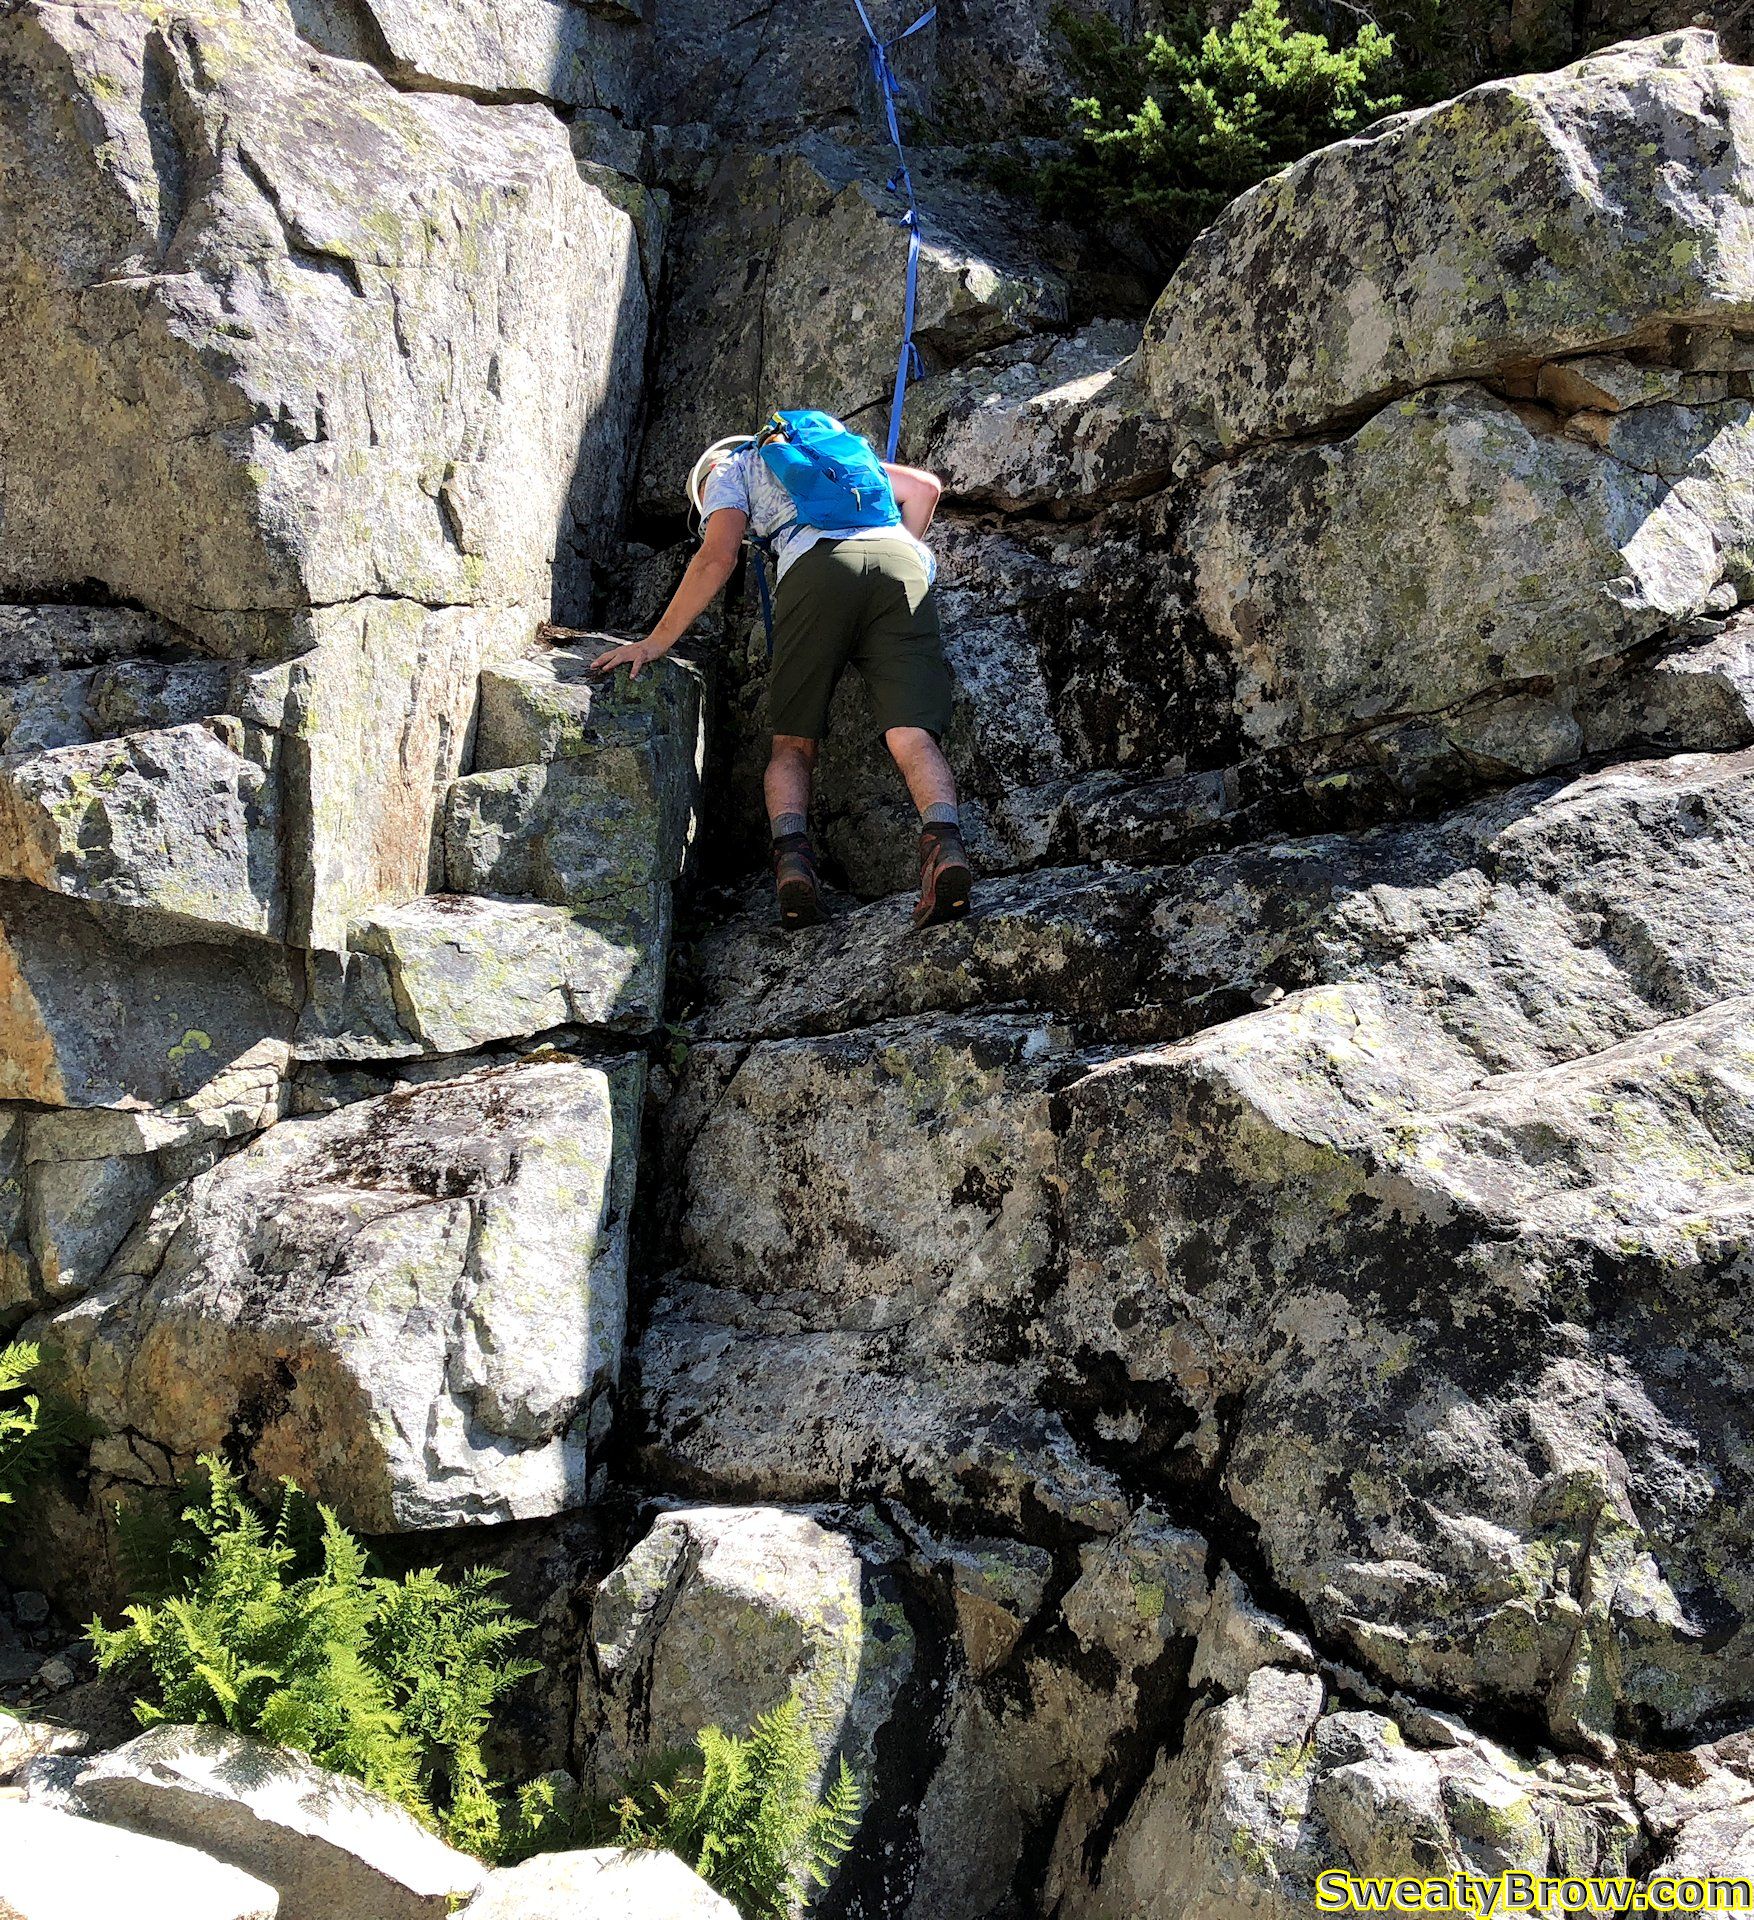
Starting down the Left Gully from Mount Hanover.
Again, we took turns taking the lead, and Jan arrived at the top of the slab/chimney choice. He decided that it would be too difficult heading down the slab, without being able to see any foot placements, and with a lot of air underneath. He moved over to the groove above the chimney and started down. Definitely the right choice. The foot placements and hand holds all appeared in just the right places, with just a little bit of hunting around.
All in all, the scramble portion was a little bit tougher than I had expected. I was very glad to have another person with me, though I don’t think that being solo would have stopped me from continuing.
Jan downclimbing one of the first obstacles on the way back down.
Working my way down through some obstacles.
Dropping down using the yellow rope.
Almost at the bottom of the technical part of the gully.
Heading down the blue webbing near the bottom.
Finishing the last of the scrambling – Jan descending the blue webbing near the bottom of the gully.
It took about half an hour or so to descend the gully, and we were back to descending the big boulder slope. I told Jan that if I was holding him up (and I was – he was definitely faster than me!) that I’d be fine if he wanted to continue on his own, and get back to the parking lot sooner. It was great to have a companion for the challenging scramble section, but I didn’t want to impede his pace.
Jan, however, was fine with continuing together. When I told him that I was also hoping to hit Hat Mountain on the way back, he asked whether it was OK to tag along. Of course!
We got back up to Hat Pass, and found the small trail that leads off, over Fat Ass Peak (hey, I don’t name these things) and then continues down into a gully and back up Hat Mountain.
By this time, I was lagging pretty badly. We got to the top of Fat Ass Peak, and looked down into the gully beyond. It was a lot further down than I had thought – perhaps 75m or more – and I really didn’t feel up descending the gully, climbing the other side, and then doing it again in reverse!
Looking across at Hat Mountain from Fat Ass Peak.
I offered Jan the option of doing it himself – I would be more than happy to stay where I was and wait for him, if he wanted to complete the H trifecta: Harvey, Hanover, and Hat – but he decided that he was fine without it. He checked his GPS and it said he’d already ascended 2500m for the day. That would do! Mine said a shade under 2100m, and I figured that was sufficient. Hat could wait for another day.
We retraced out steps, down Fat Ass, along the HSCT, and finally down the Brunswick Trail.
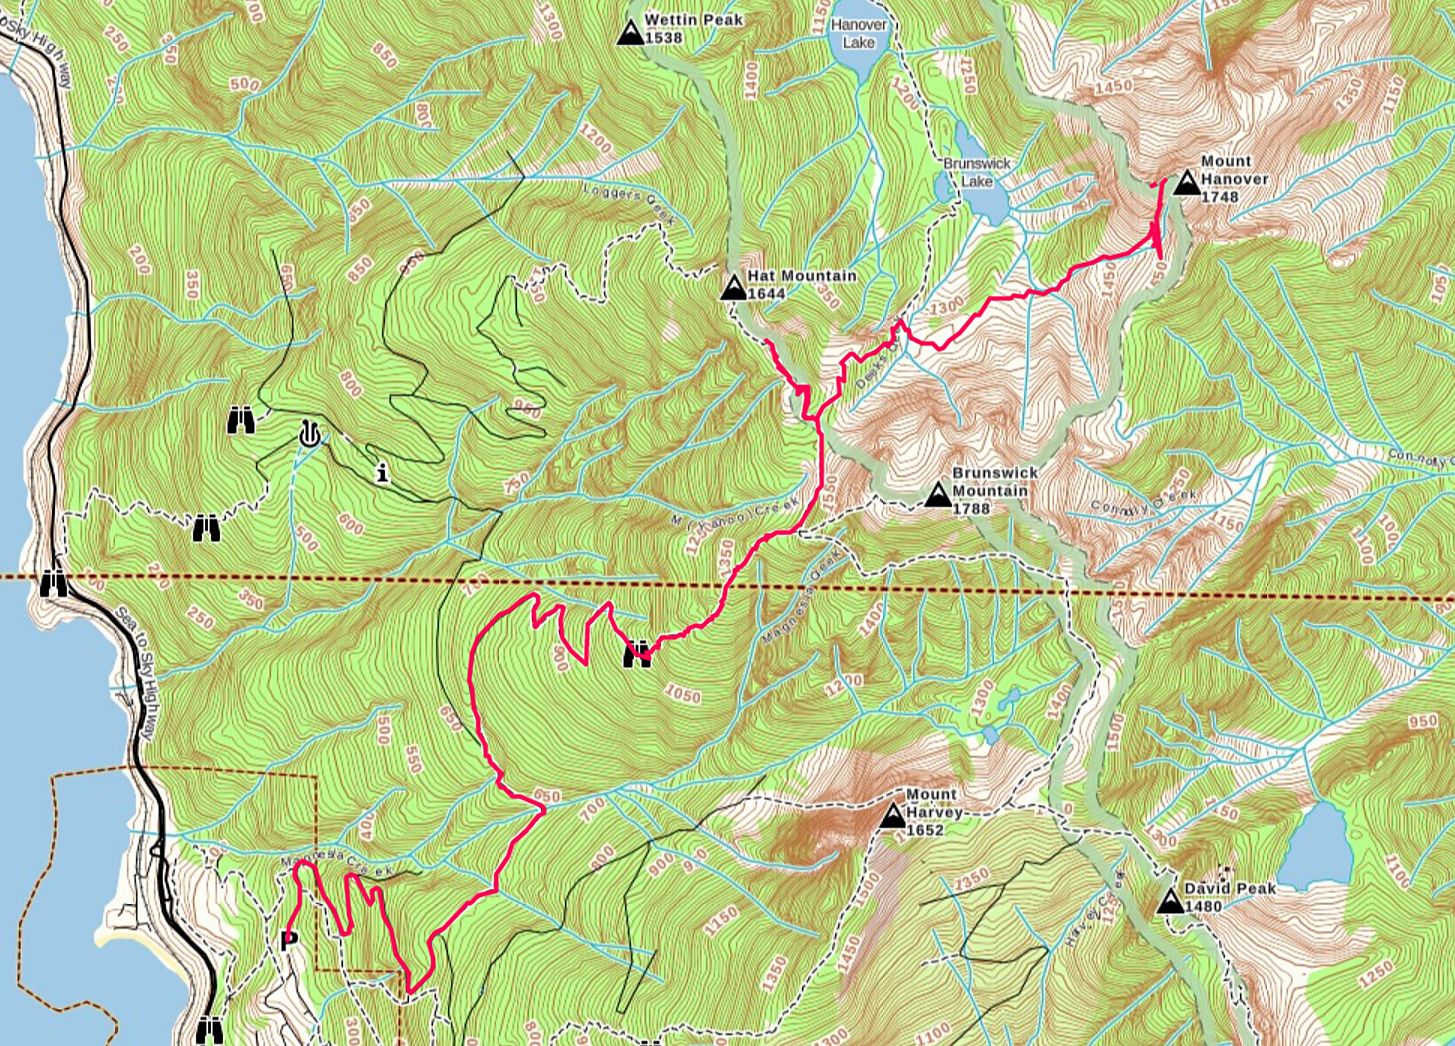
GPS track of the descent from Mount Hanover, showing the diversion toward Hat on the way back. It went a little bit wonky in the gully coming down for a bit, but mostly correct.
After a total of (for me) 9 hours, 21 km, and 2100m of elevation gain/loss, we were back at the parking lot at 4:30. This was a pretty big day for me – I was really hitting the wall on the way back down. The next day I had an appointment to donate platelets in the city, and that was about all I could manage for the whole day – otherwise it was a write-off!
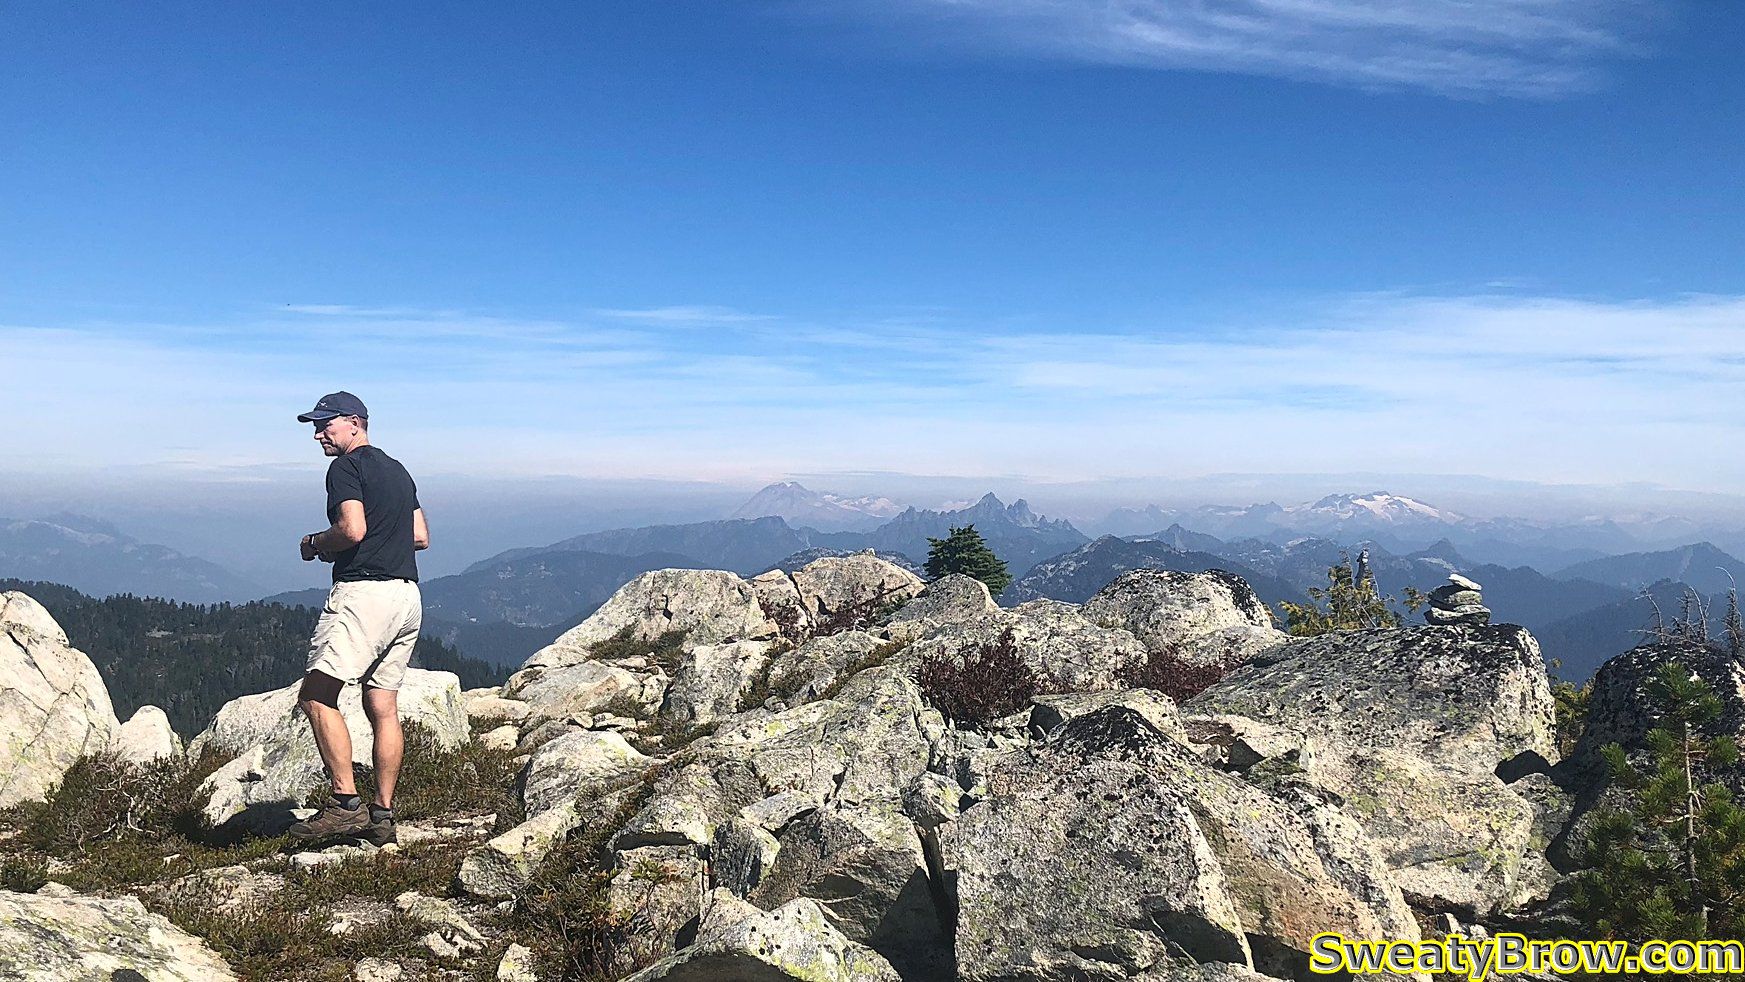
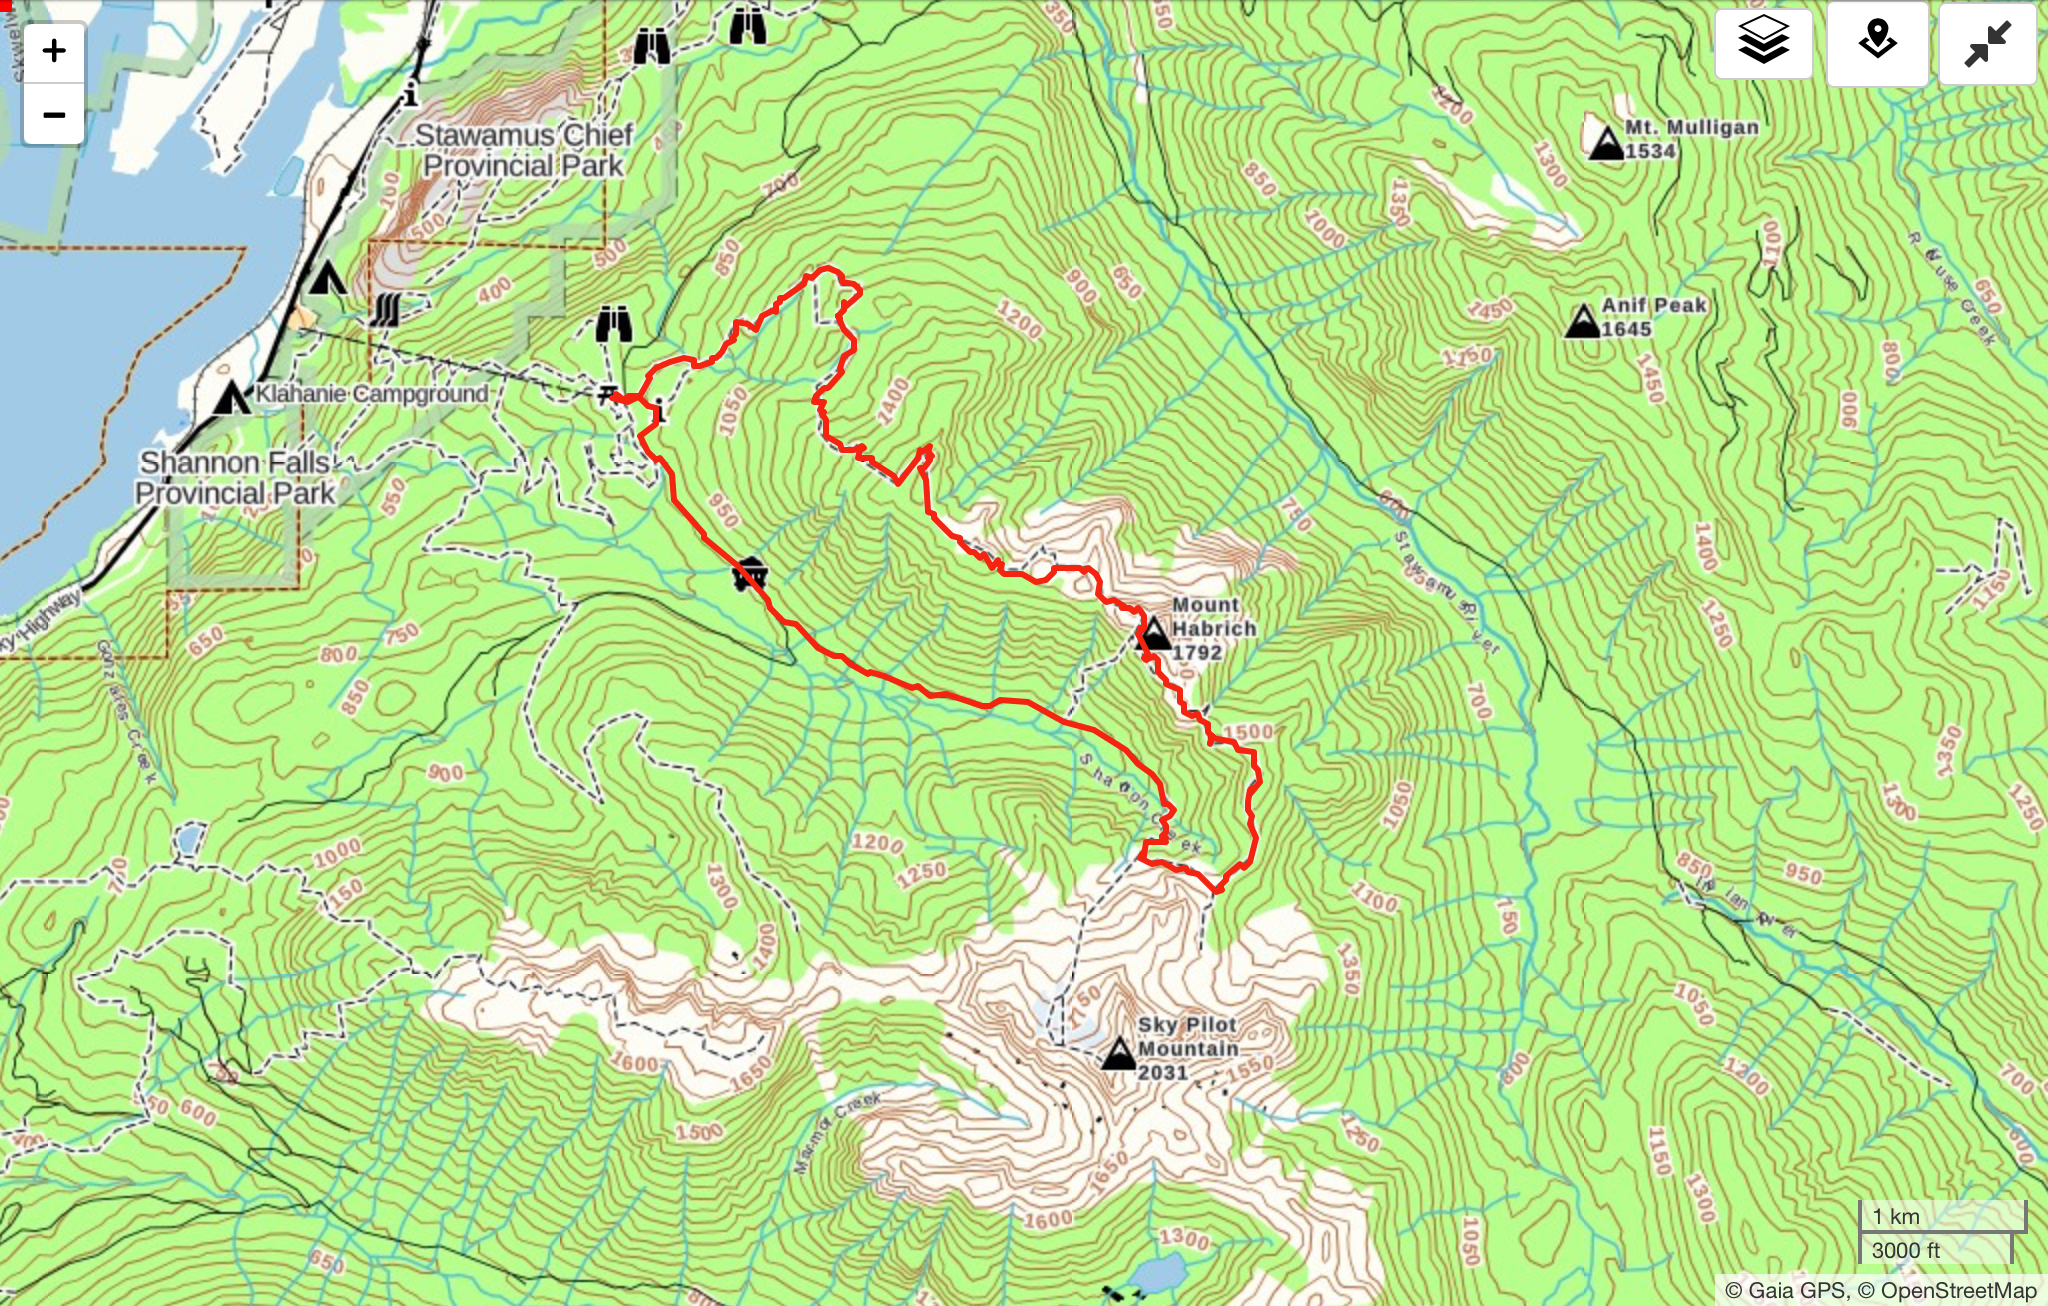
It was Thursday morning, and I had been camping in Squamish at the Chief’s Climber’s Campground since Monday. The last couple of days, I had gotten up fairly early, driven up to Whistler, and headed up the lifts to scramble up some peaks in the area. I decided it was time to do something closer (later start in the morning) via the Sea to Sky Gondola.
I decided that I would begin with what Marc Bourdon calls the “Sky Pilot to Mount Habrich Loop” in his book, “Squamish Hiking” but remain on the top of Habrich Ridge, all the way out to the end, then follow marked trails (Robin’s Connector, and Al’s Habrich Ridge Trail) back to the Gondola. In Marc’s book, the ridge is shown as having an “intermittent, poorly marked” trail west of Mount Habrich. I had also read online that people were occasionally having trouble over the past couple of years with linking up the full ridge.
I figured that the trip would be fairly difficult, and a long day out, but wanted to give it a try!
I was on the gondola fairly early, and began hiking up Sky Pilot Valley shortly before 10:00 AM. Shortly after 11, I broke out into an open talus slope at the top of the valley, and turned off of the Sky Pilot Mountain route.
The route up Sky Pilot continues straight ahead. I turned left about 5 minutes further on.
Here is the spot where I turned off of the Sky Pilot route, looking northwest toward Habrich Ridge. Mount Habrich itself is just visible on the right.
The route then took me through some forest and across some meadows, toward the col between Sky Pilot and Habrich.
A pair of broken skis mark the low point on the Sky Pilot – Habrich col.
Looking back toward Ledge Mountain, Sky Pilot, and the Co-Pilot (L-R).
The low point was about 1440 meters, and then quickly climbed again to about 1600 meters. This was very close to the highest point of the day – there was one minor summit just west of Habrich that was slightly higher, at about 1650 meters. The rest of the day was to be relatively short, but frequent and steep, up- and downhill ridge-walking. Atop the 1600 meter bump, I stopped for about 20 minutes to have some water, and take some photos. The views were getting good!
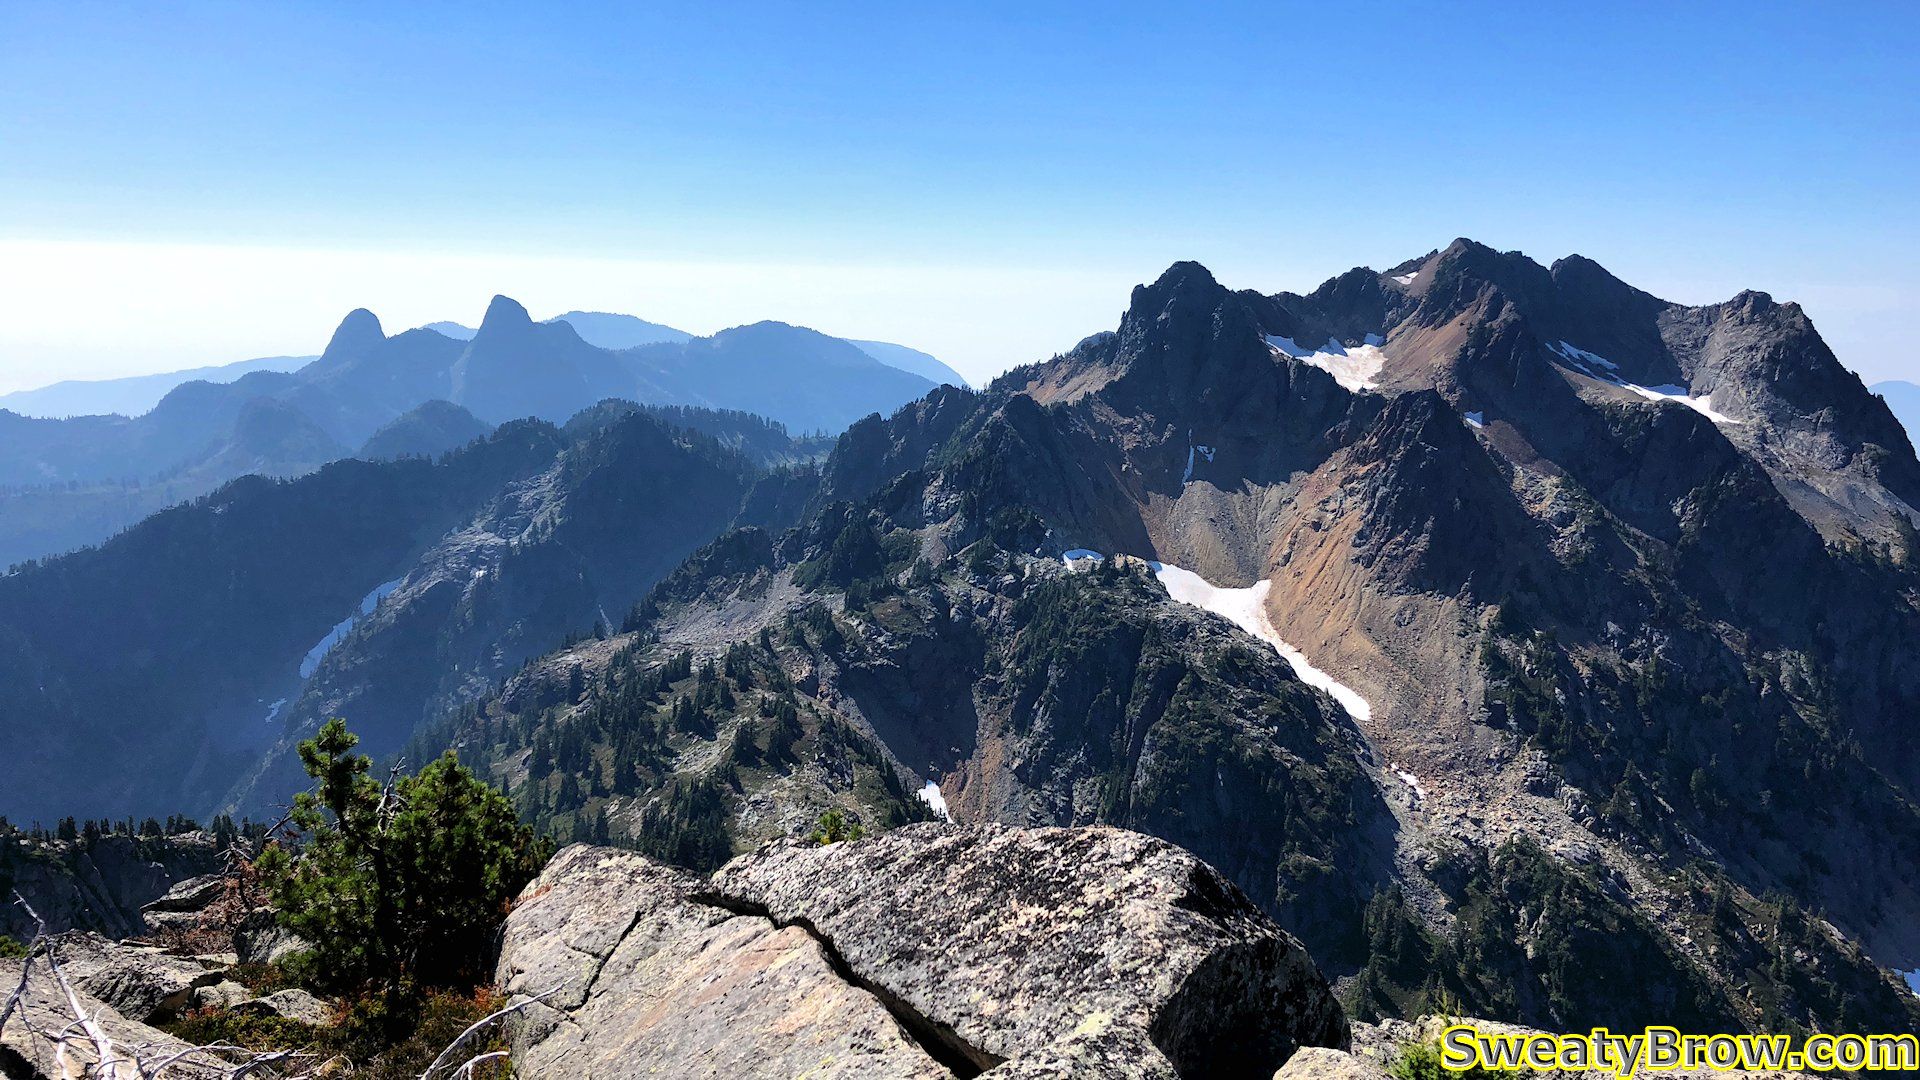
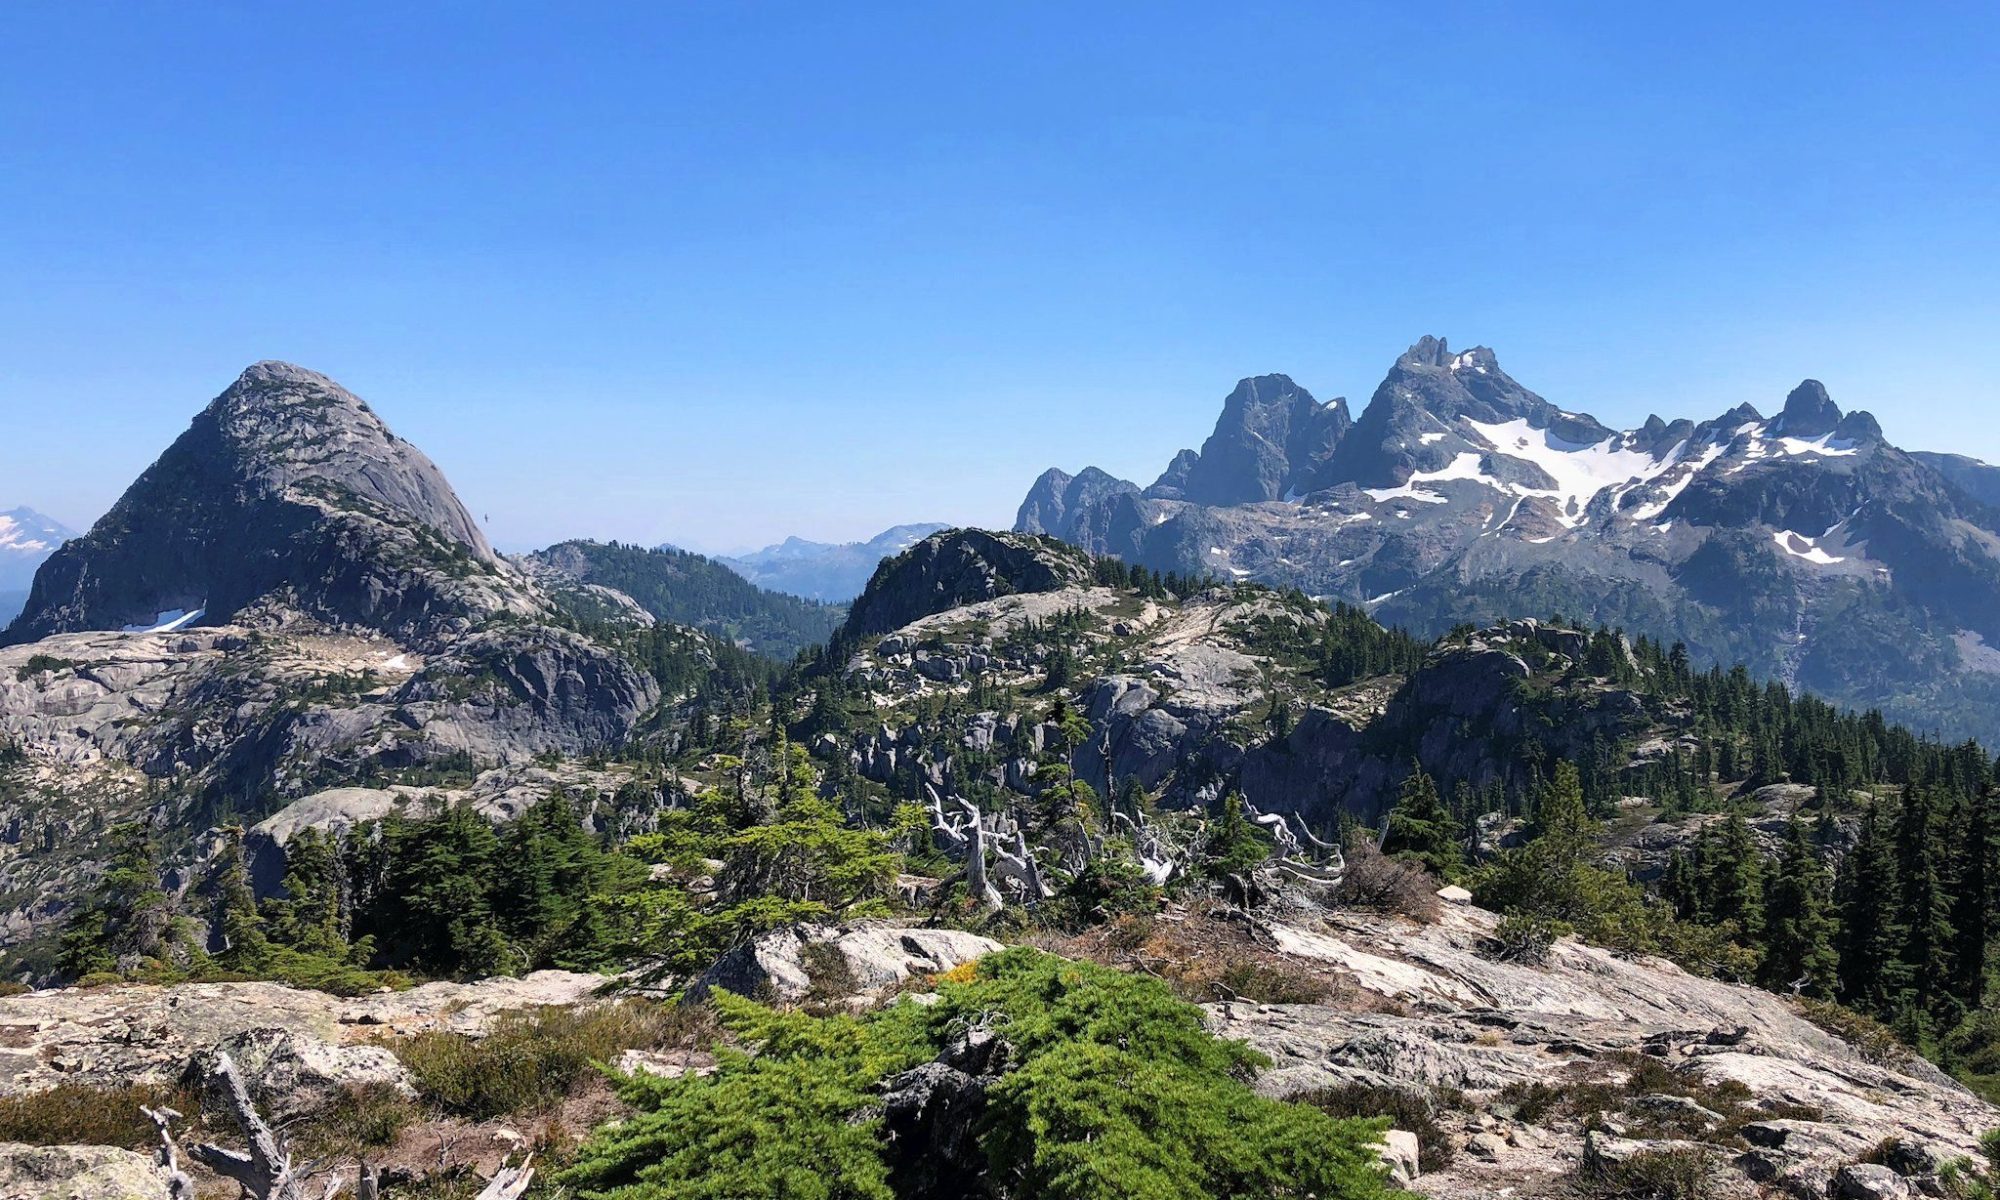
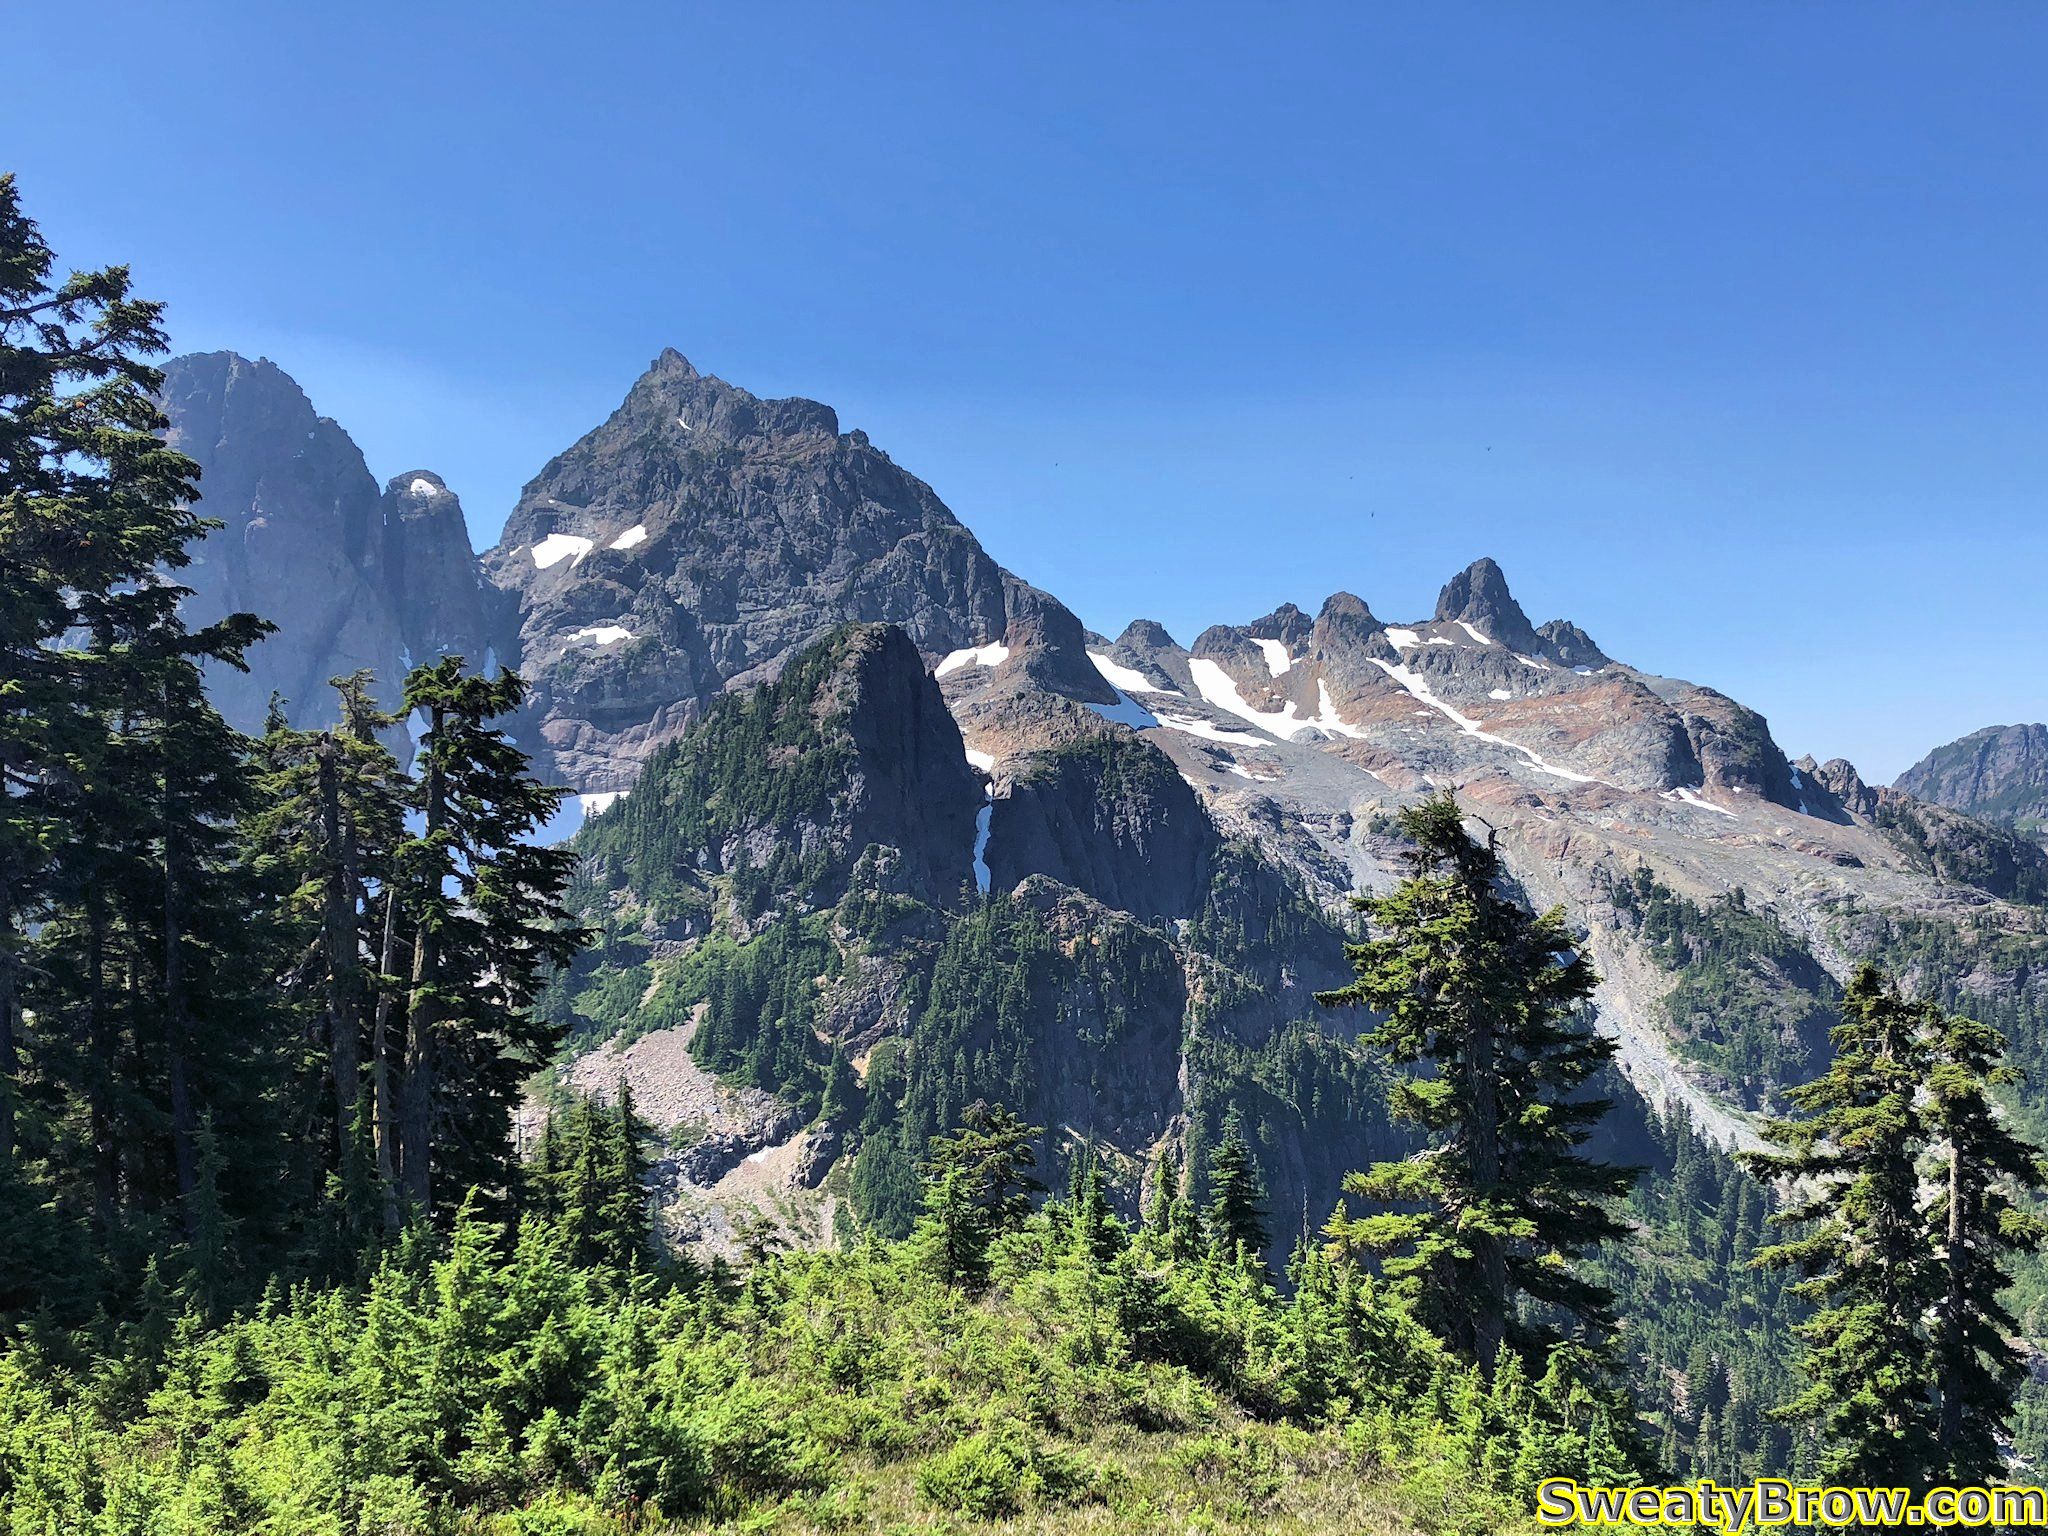
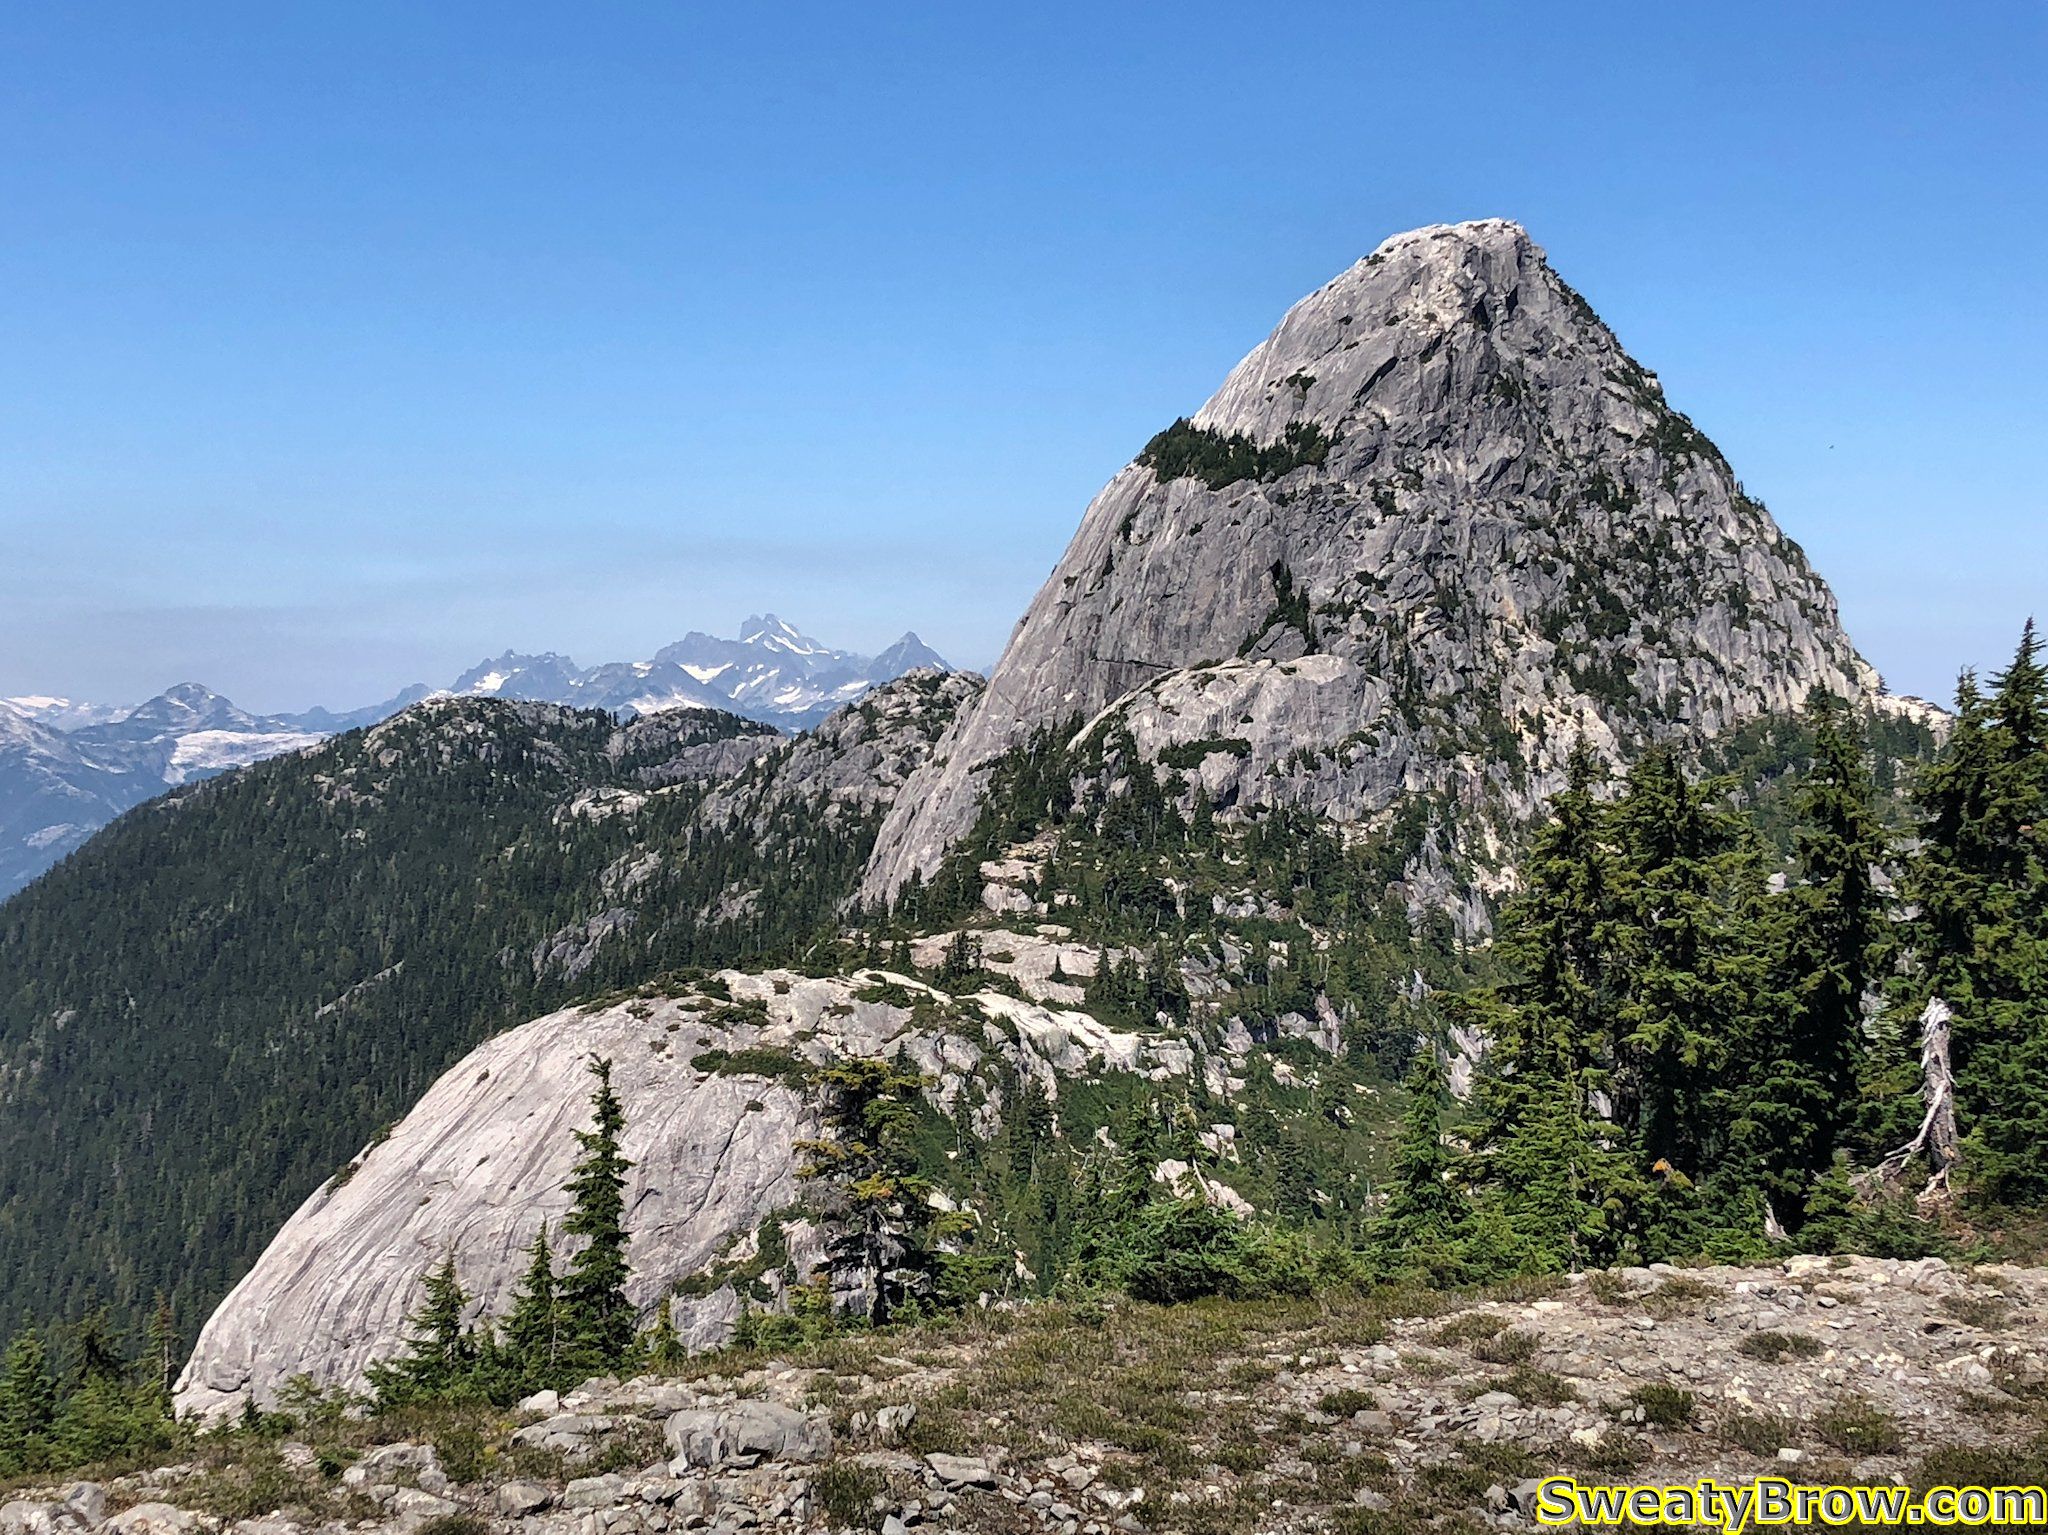
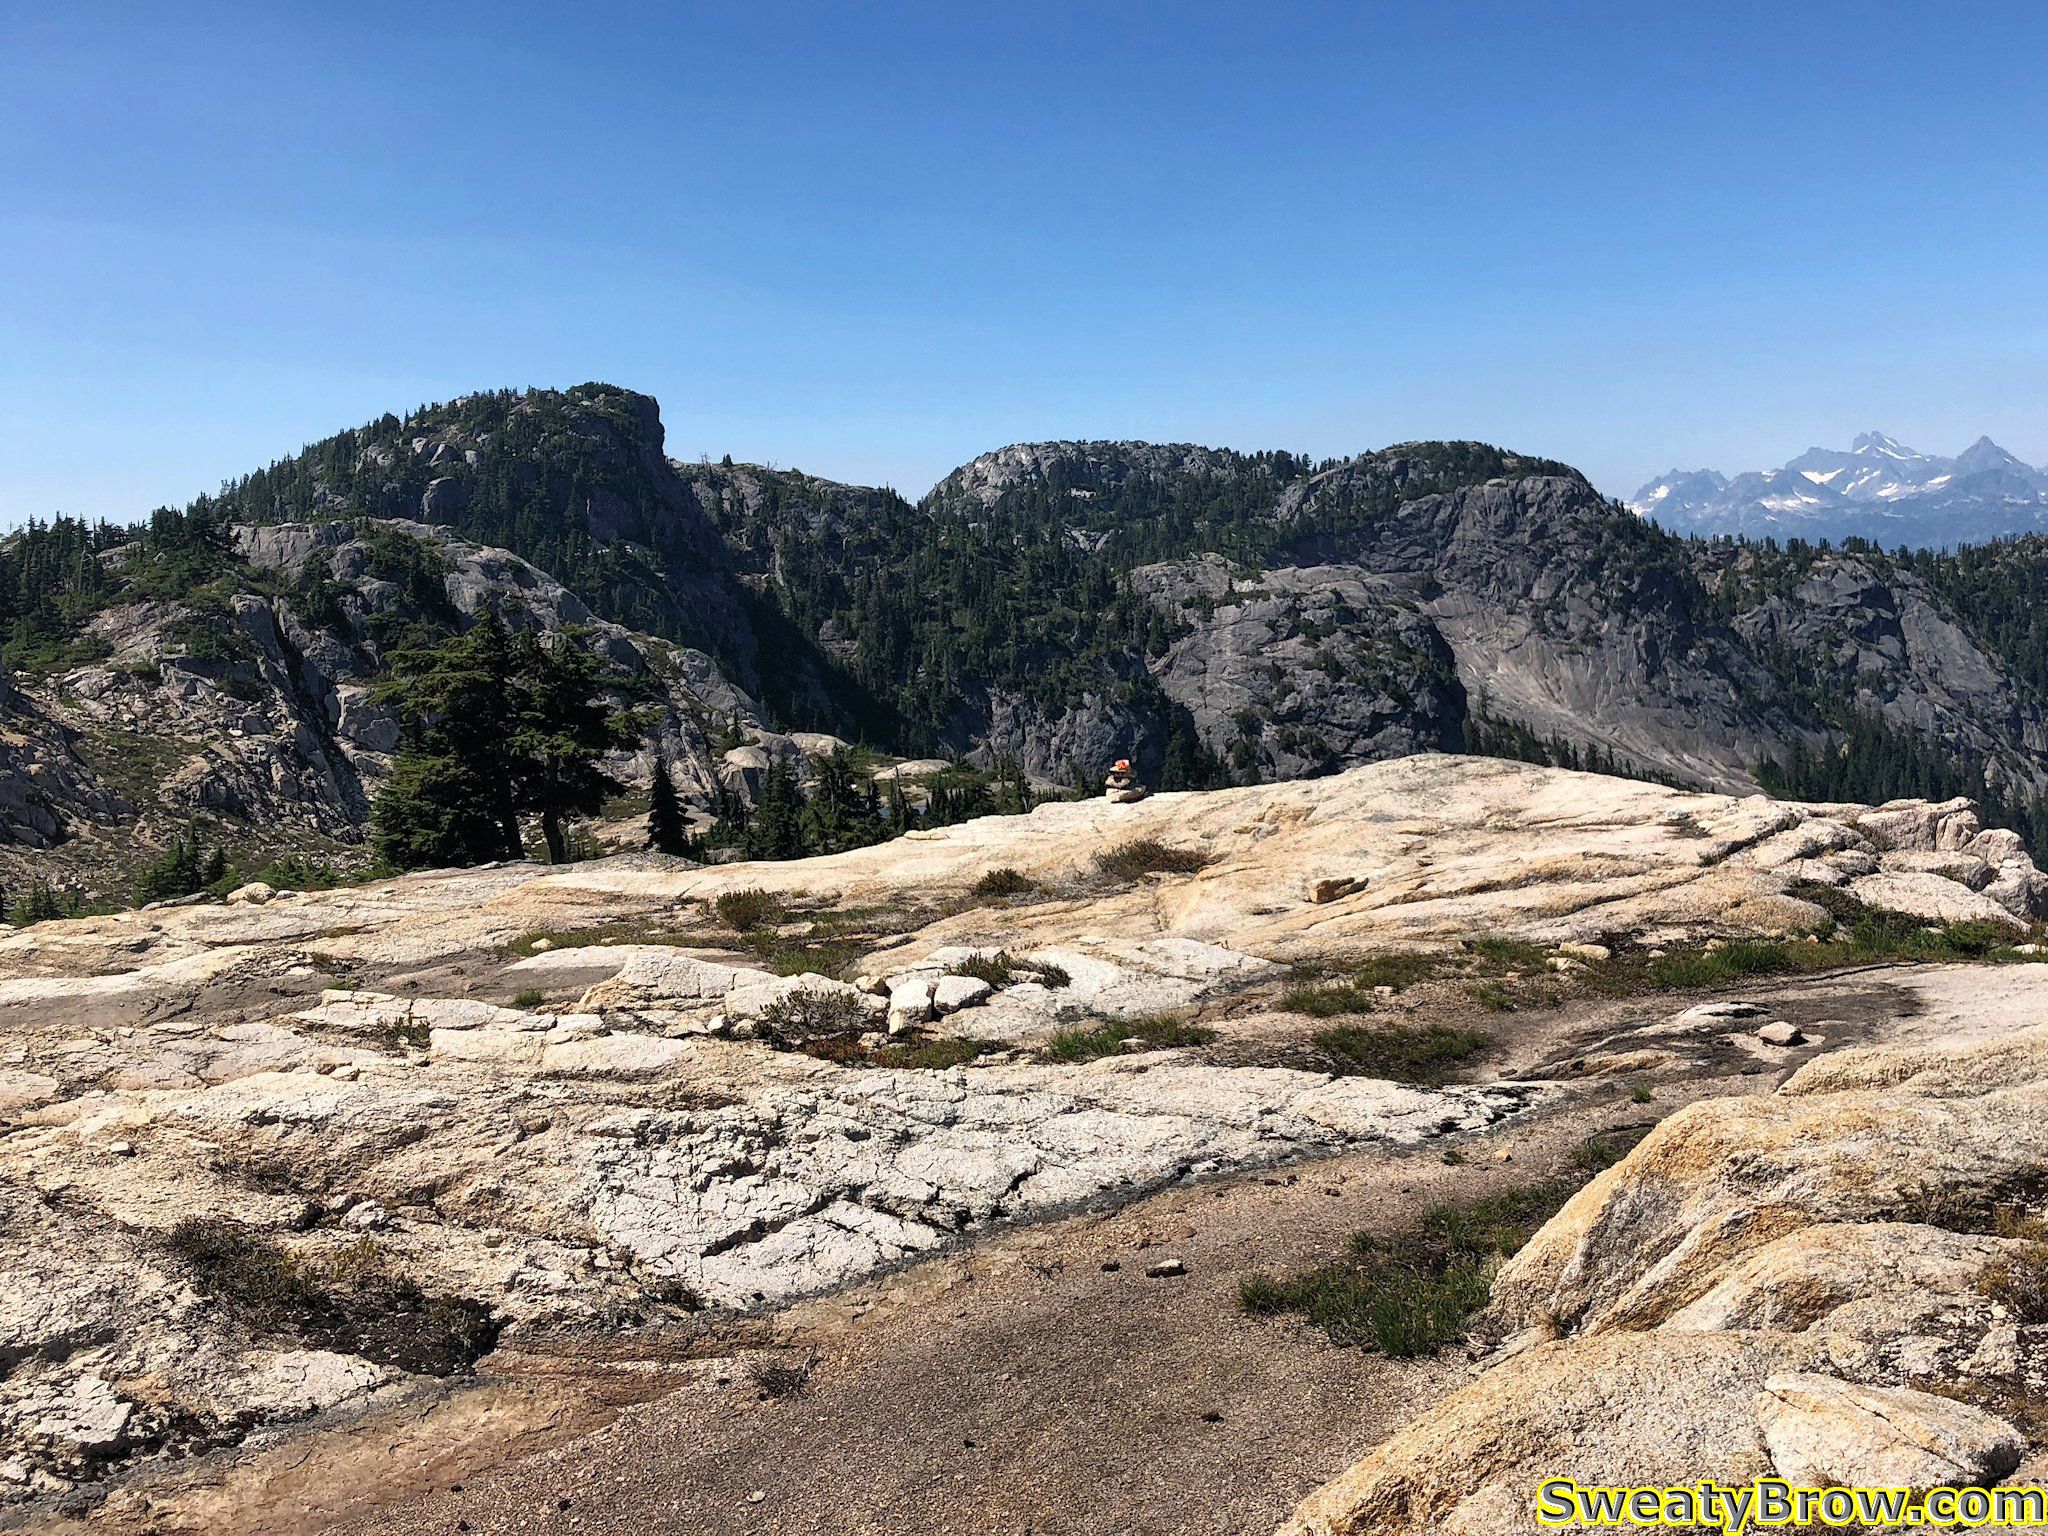
View of Mount Habrich and its ridge from the high point to the east.
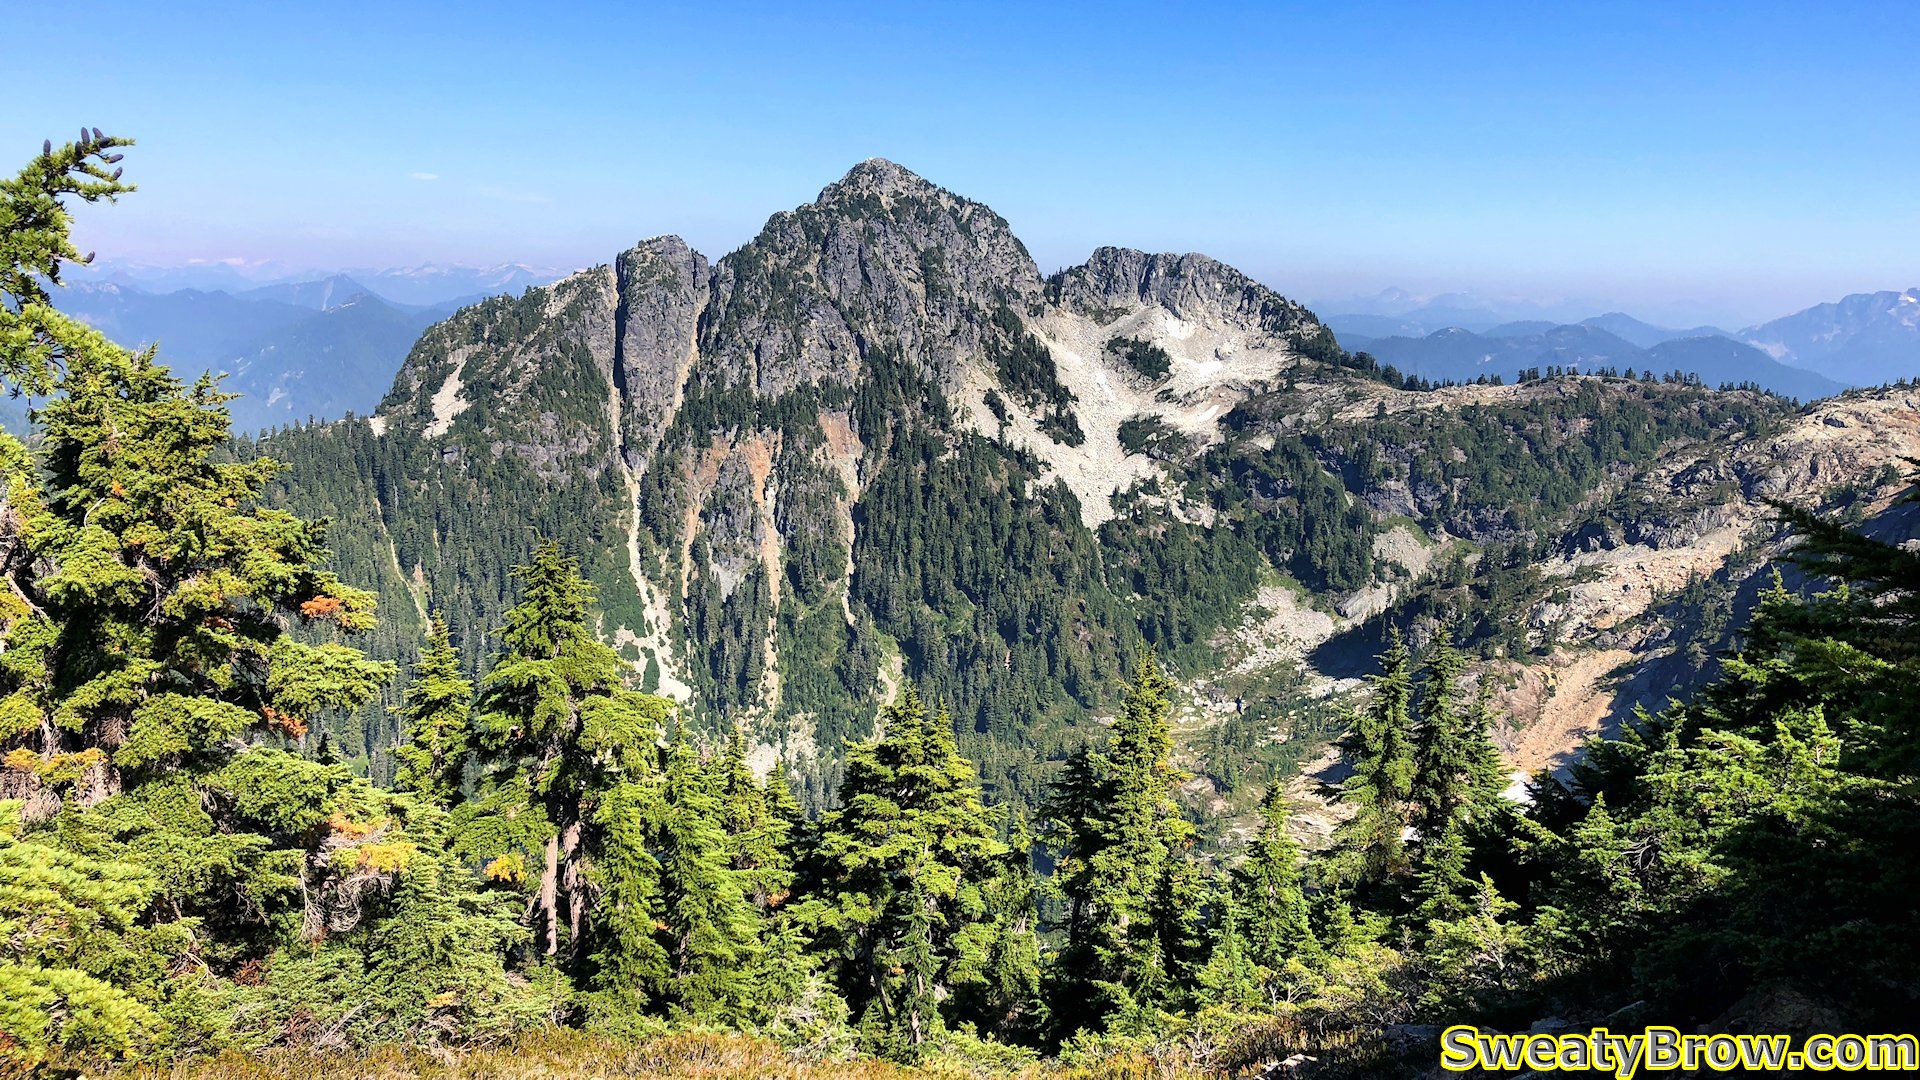
There is a feature on the southeast side of Mount Habrich that was about to become rather important to the progress of my day… The large rounded cliff just below and to the left of the peak is known as “The Brain”.
This big rounded cliff is known as The Brain.
I read through the description of the route in the Squamish Hiking guidebook earlier in the day, and I was aware that I would need to use a fixed rope to ascend the right side of The Brain. The book said that if I had any doubts about my ability to complete the loop (returning to the valley below via a gully on the far side of Mount Habrich), then this high point would be a good point to return the way I came. I was operating under the premise that I would be comfortable completing the loop, so I continued.
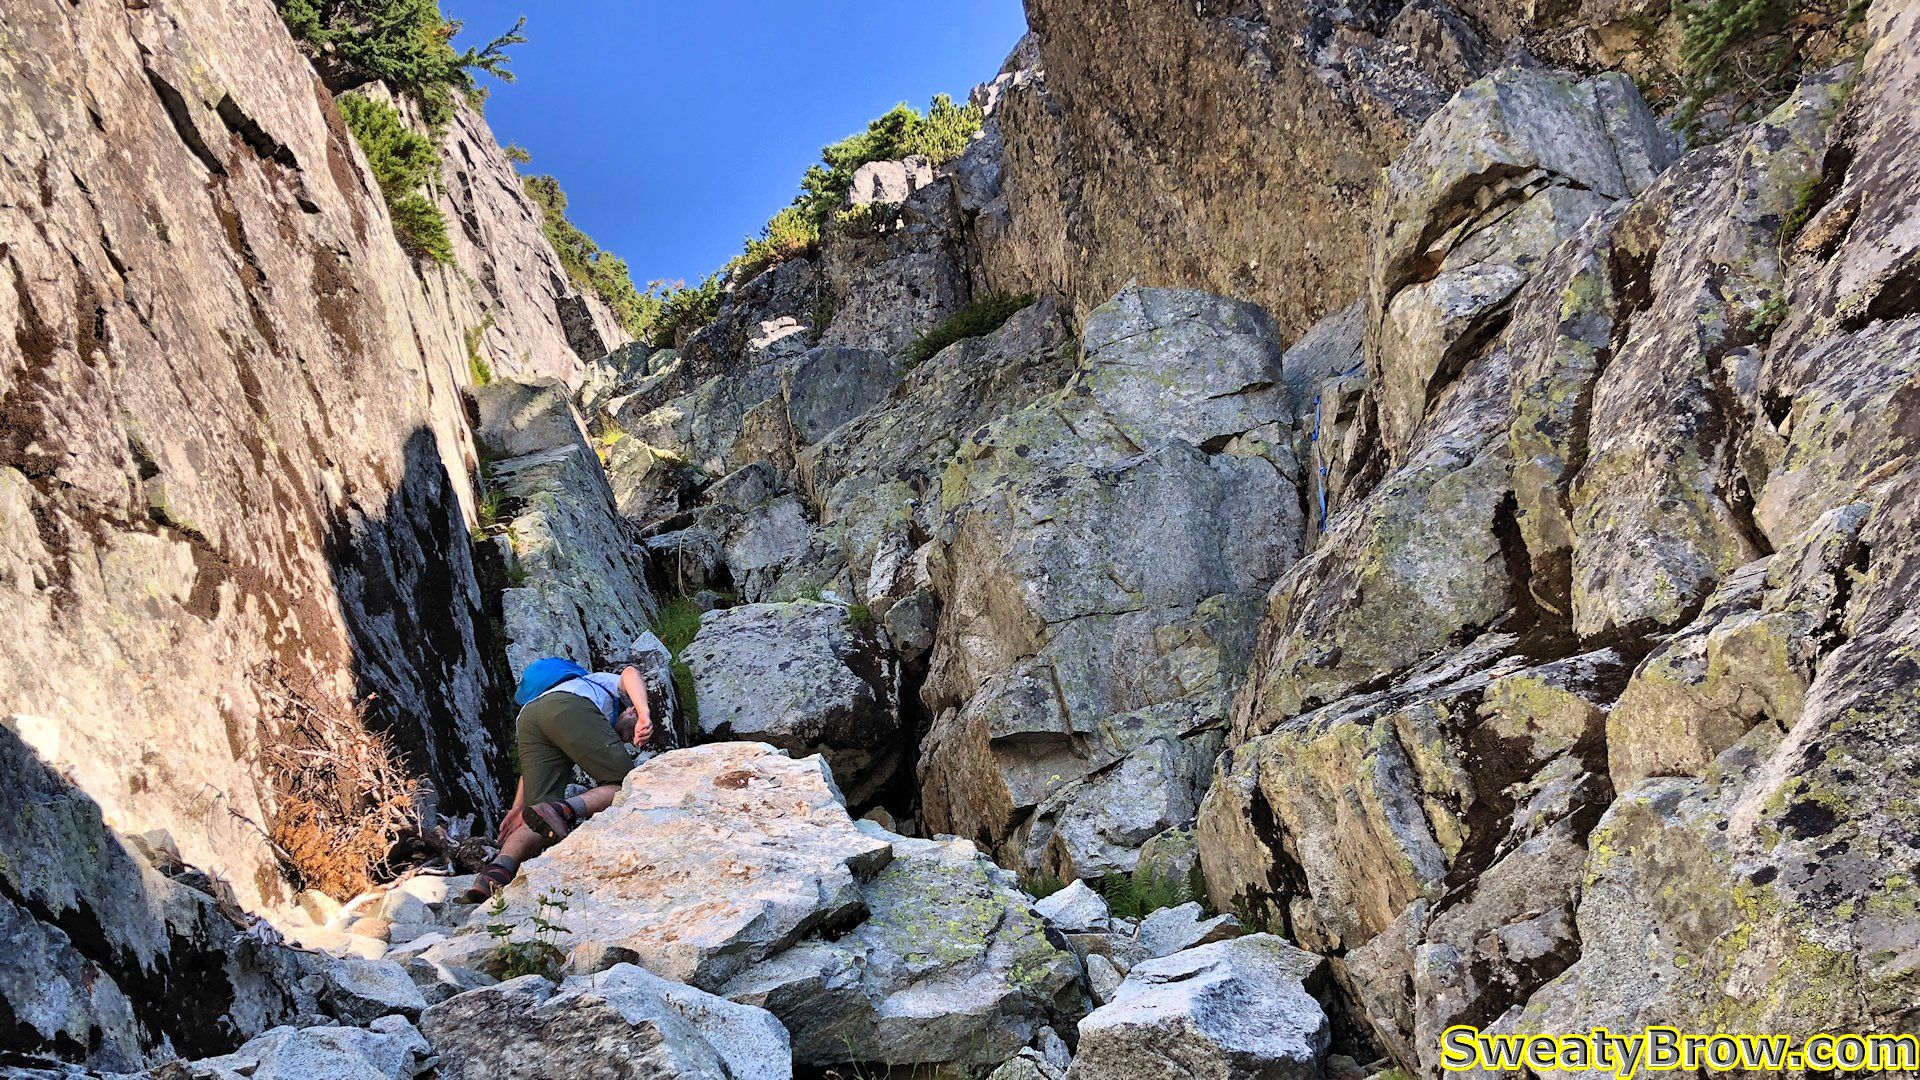
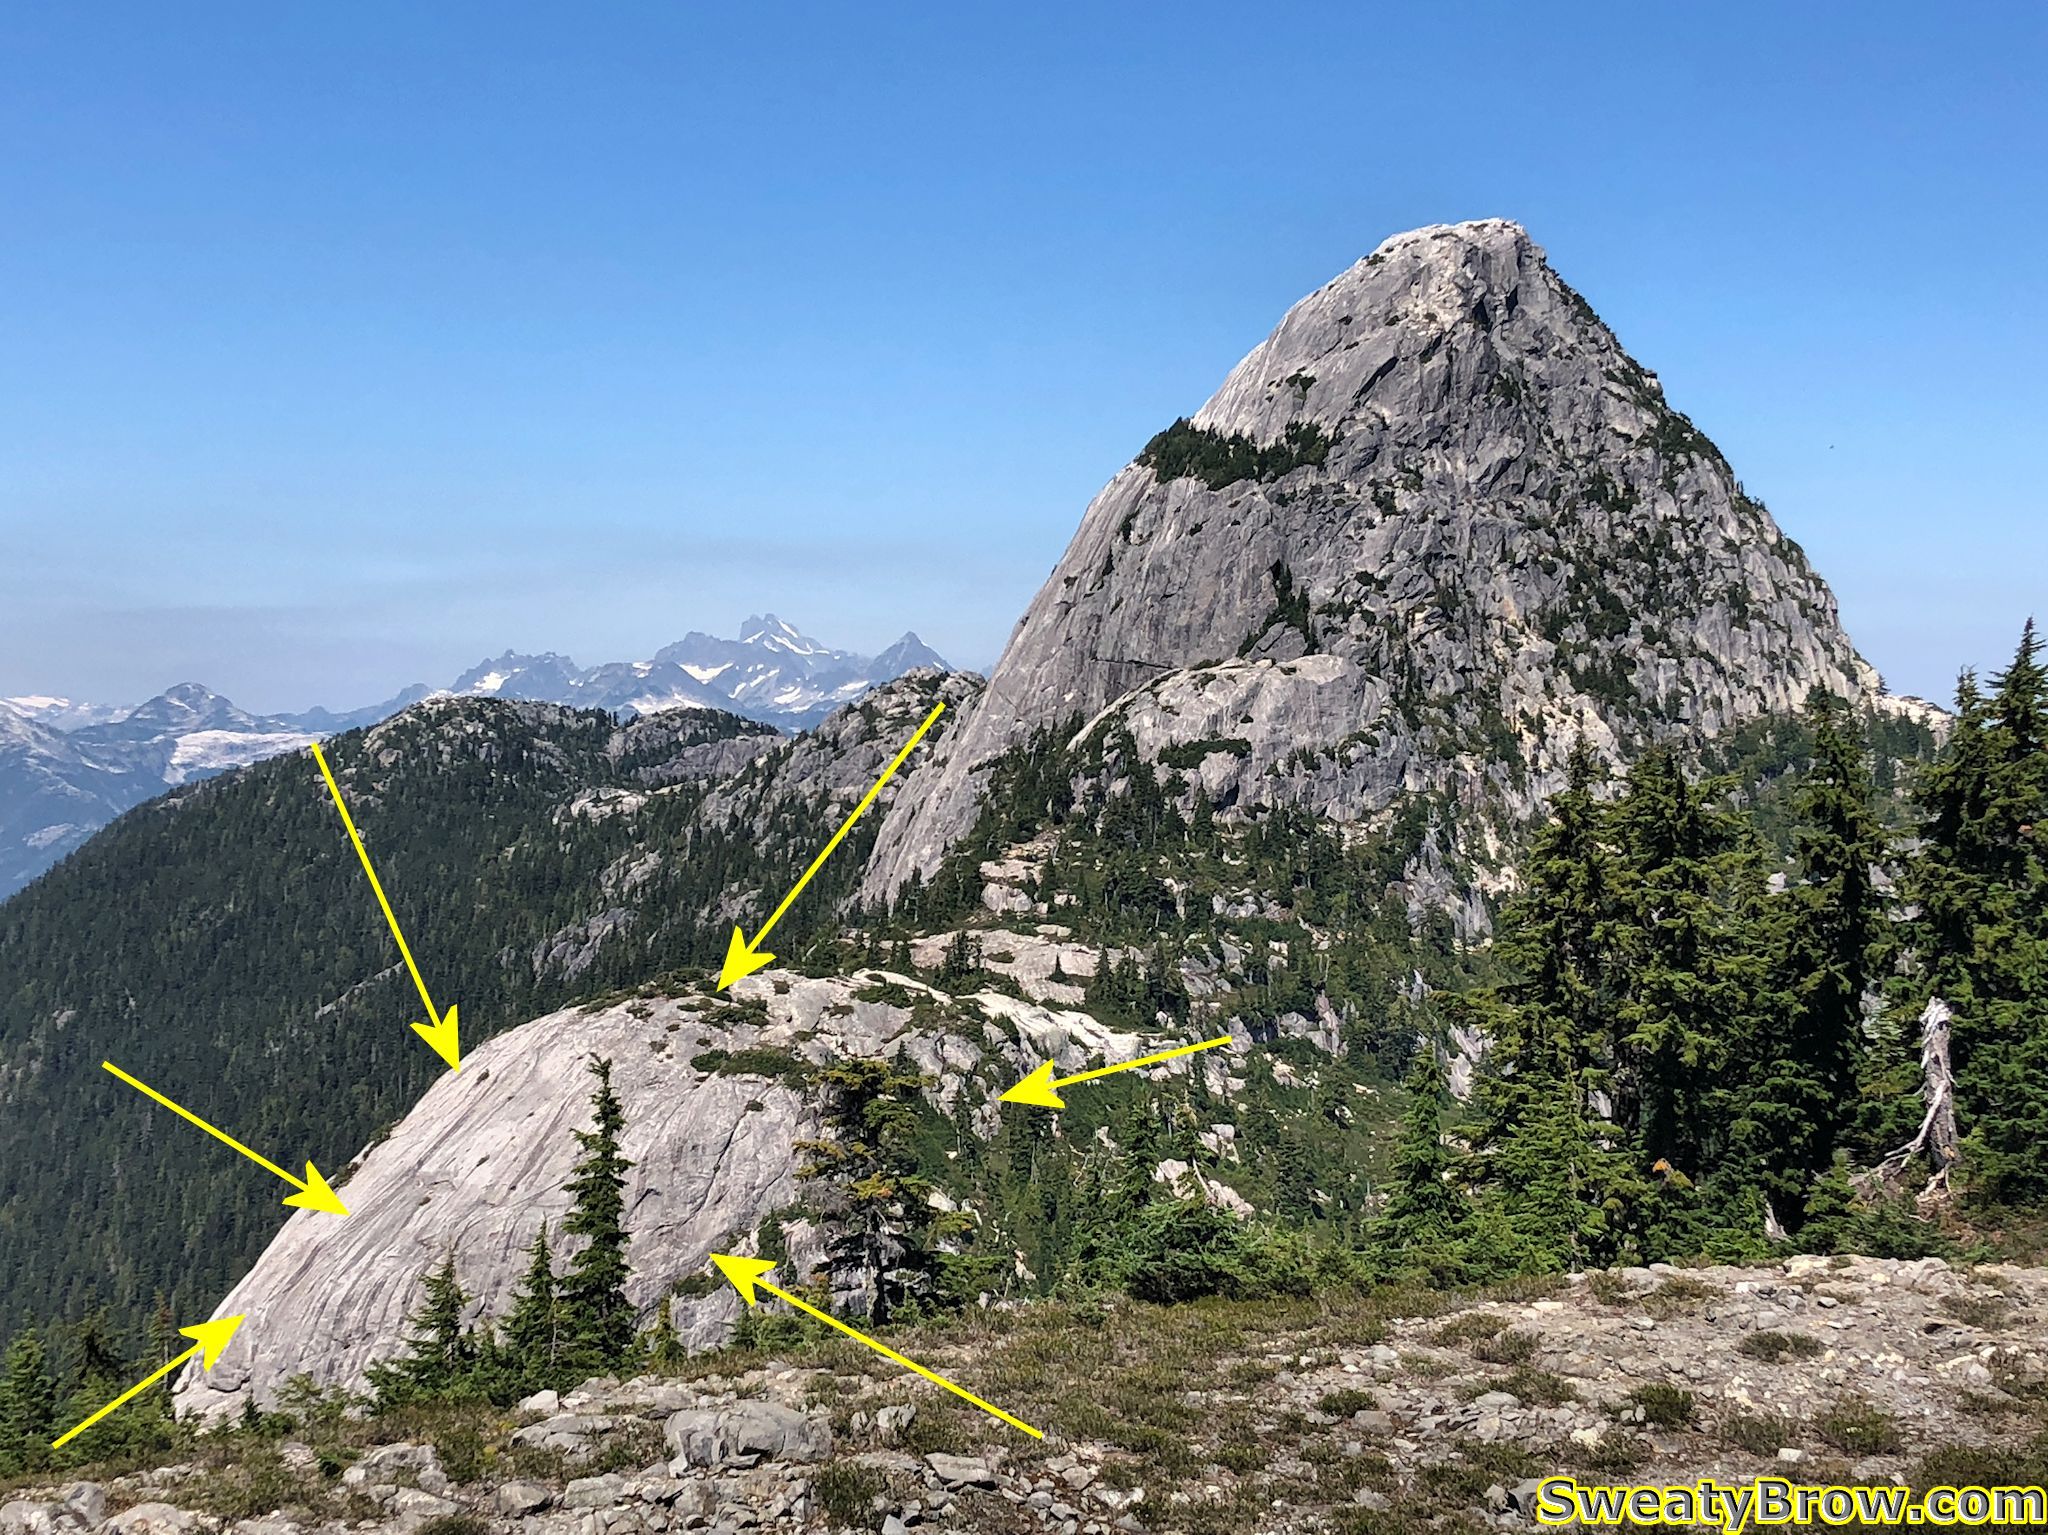
Down a few steep gullies, a couple of semi-exposed steps, etc. and I was soon at another low point on the ridge. The Brain stood before me, mostly to my left, with the right edge of it directly in front of me. A clear path headed straight ahead, leading to a steep cliff with a rock corner and a knotted rope hanging down from a tree about 8 meters up. I could see another rope following a steep ramp above and to the right of it.
My route up the right side of The Brain
Naturally, I saw the ropes, and didn’t need to pull out the guidebook and check the description. It was right in front of me!
Before I knew it, I was batmanning up a super steep (almost vertical) corner, with very sparse footholds, and was about 6-7 meters off the deck. I scrambled my way onto a tiny stance beside a small tree, and gathered my wits. When my heart rate had eased off a bit, I continued up the steep ramp, again protected by a steep rope.
I continued up some steep, much less exposed, ground for a couple of minutes, then reached a bulge extending out from the wall. There was a barely discernible “ledge” traversing to the far side, protected by a couple of ropes (one of which was rather frayed at its attach point on the nearer side), and with a serious drop, probably 25 meters, into a gully below.
Unfortunately, I didn’t take a photo or video prior to traversing it. I gathered my wits, steeled my resolve, hiked up my big boy shorts, and started across…
I survived. I knew that I would, but wow… Being solo, and having forgotten to bring along my InReach satellite communicator, I had no way of telling anyone where I was, or where to look if I were never heard from again. Oops. This was pretty much the most committing move I’d ever made while entirely on my own.
A photo of the spooky traverse I made while solo, after I’d crossed it.
After this traverse, there was a little more travel up steep, rope-protected ramps, then things eased right off. It was about 1:00 PM, so just over three hours into the day. As I walked along a little farther, I spotted a gully coming up from the right, with a rope hanging down it. Of course, I had to then pull out the guidebook and have a look. Turns out, I was not supposed to head straight up the wall – the “hiking” route dropped way down to the right, at that point, and then up a long, steep, grassy gully. In fact, later that evening, I stopped by the guidebook’s webpage, and looked at the latest updates:
When following the route described in the guidebook, I’ve been told that some hikers are missing the handline descent into the gully just prior to reaching the “Brain”. Instead, they are following a well-defined trail which leads directly to the base of the Brain and a very steep rock wall with a rope fixed in place. Ascending this fixed rope leads to very dangerous and exposed fifth-class rock climbing terrain, which gains the top of the Brain. This is not the route described in the book. Look for the descent into the wide gully right (east) of the base of the Brain to stay on route.
Aha! OK, I did that wrong… The rest of this thing should be much easier!
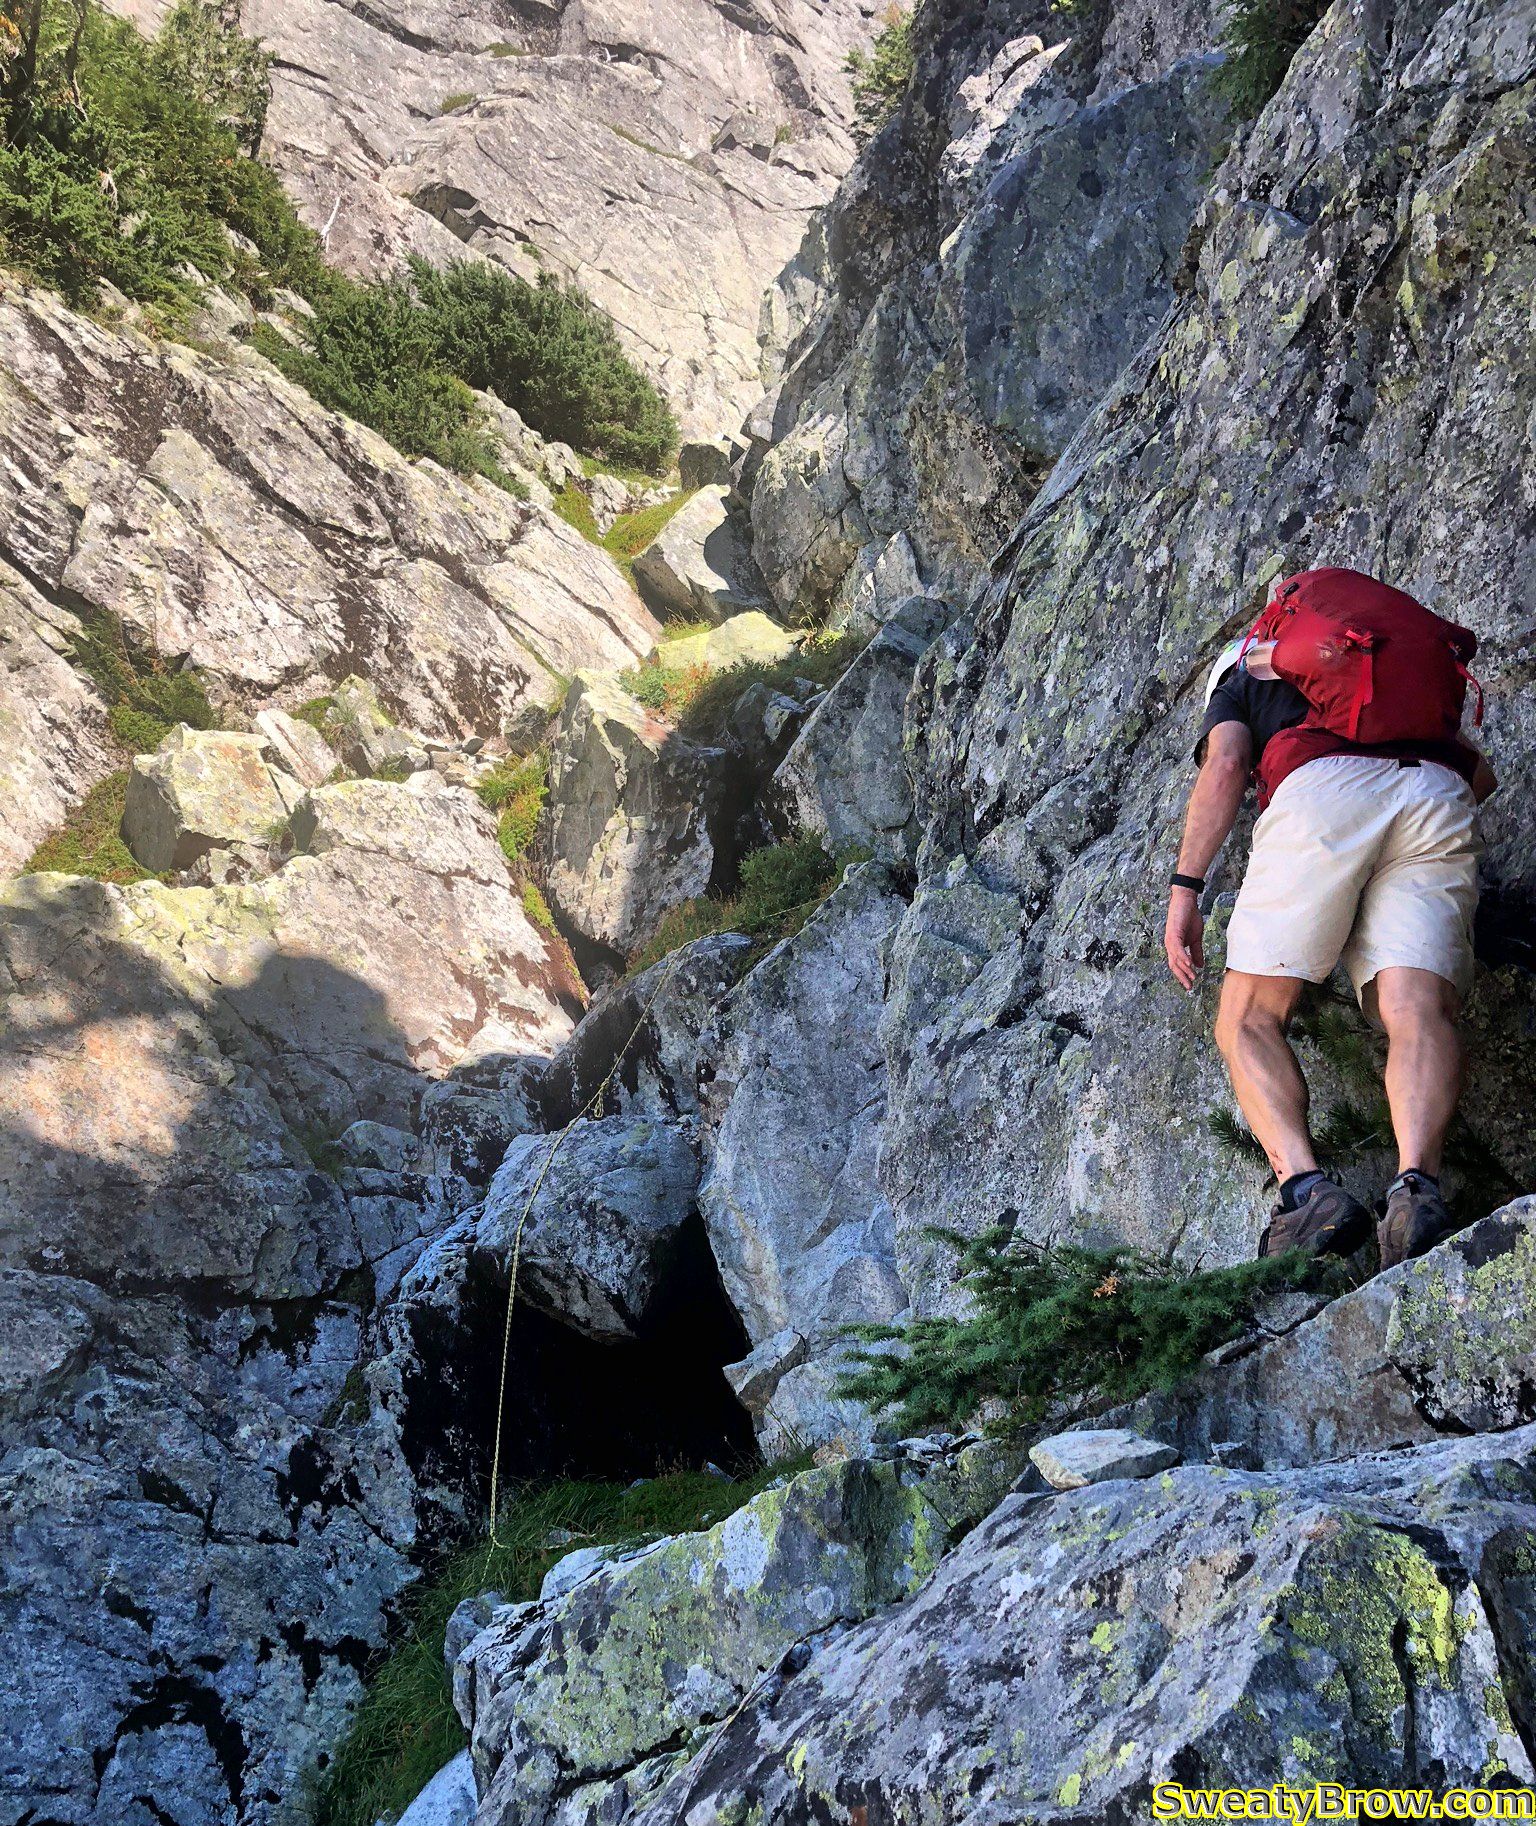
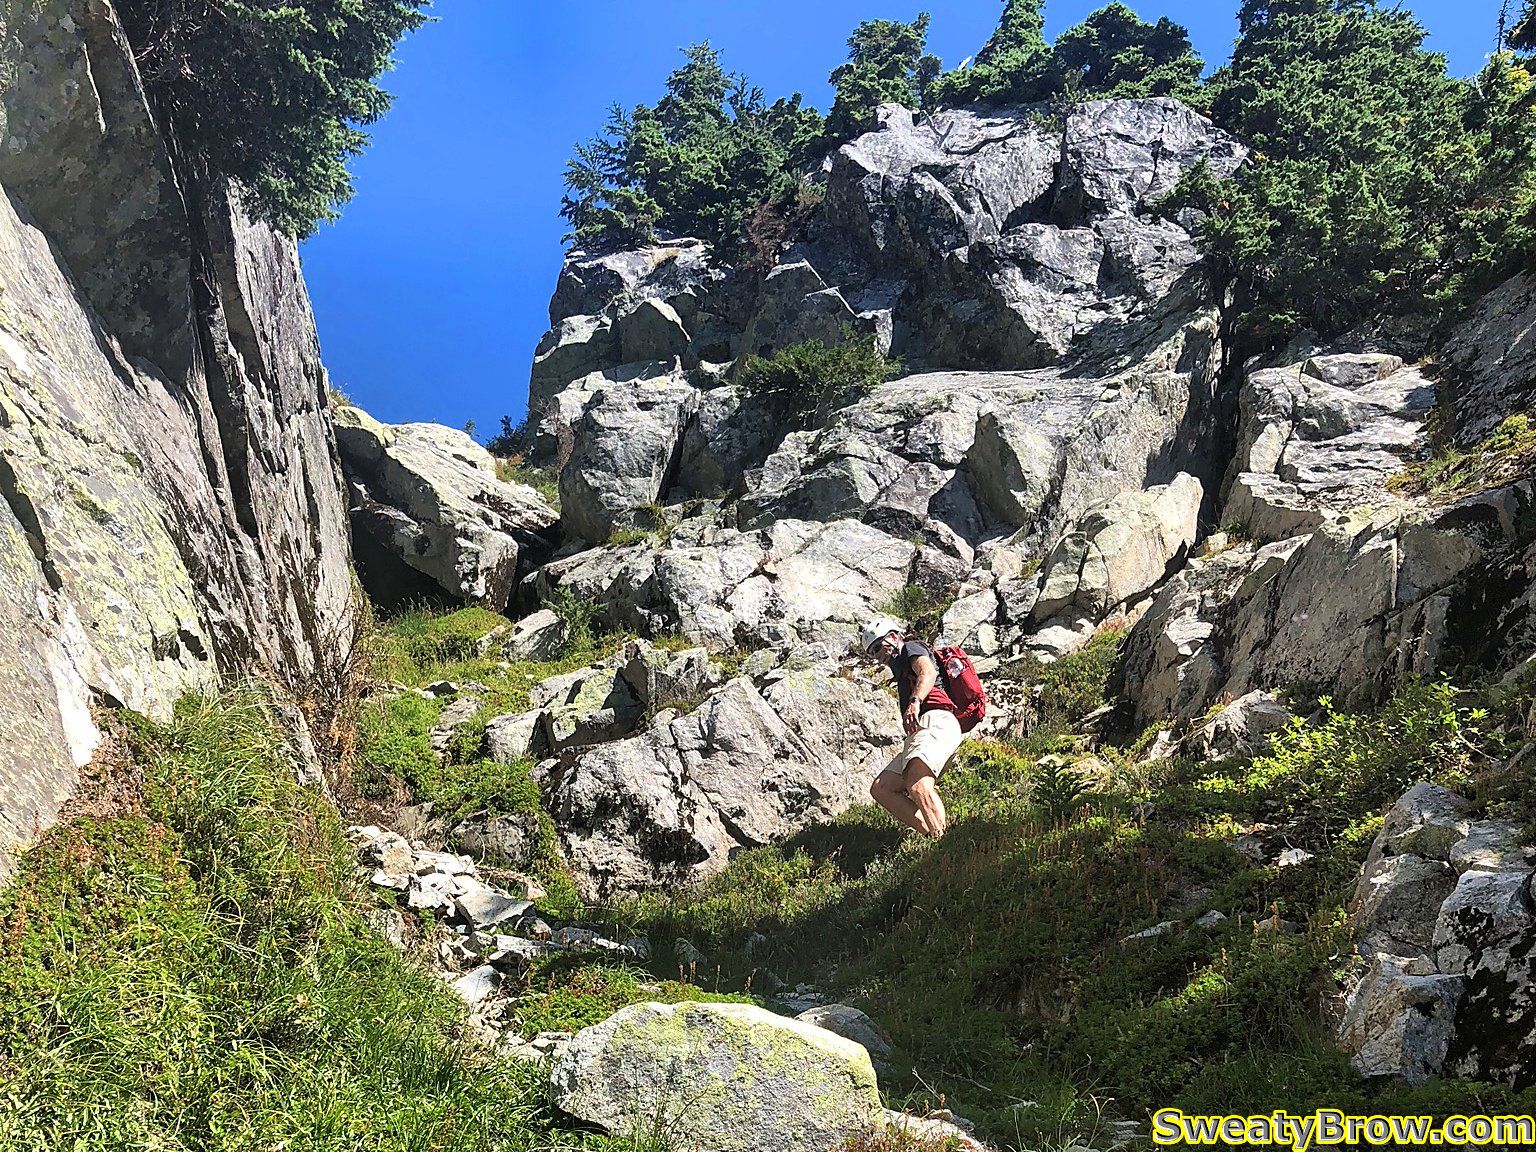
After overcoming The Brain, it was time to traverse below the south face of Mount Habrich. There was a gully to drop down, again with a fixed rope, and a little bit of exposure, then a trail along the bottom of the face. It popped back into the forest, and almost immediately started downhill. There was a fainter, but well flagged, trail that broke off to the right, though, and headed very steeply uphill. I followed this.
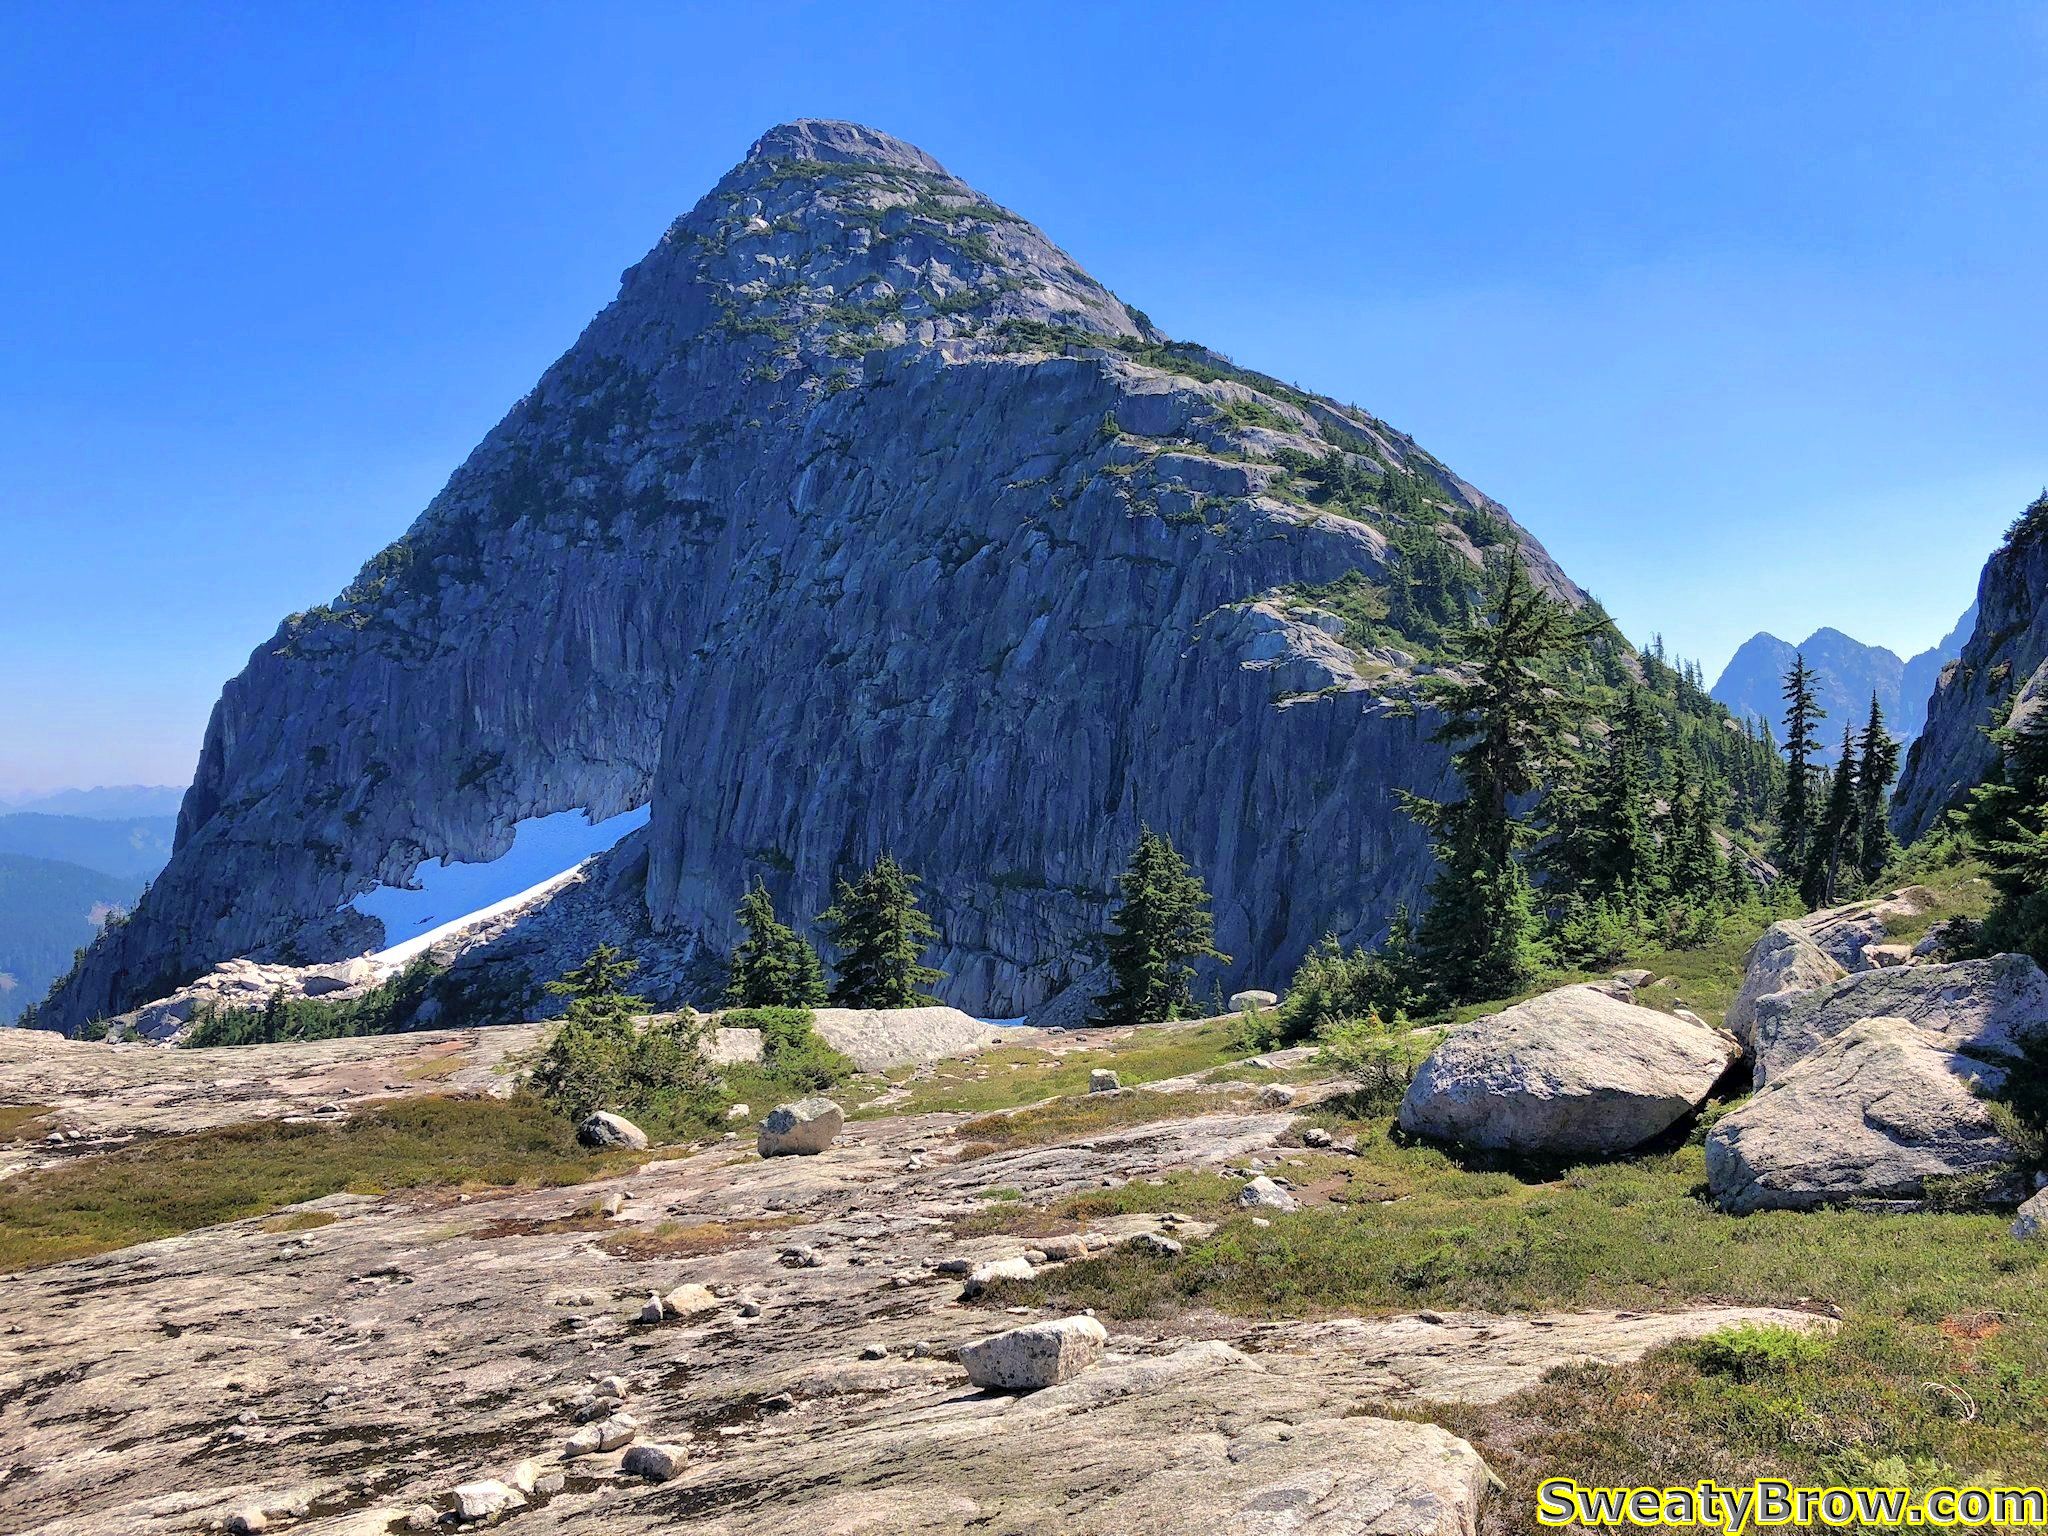
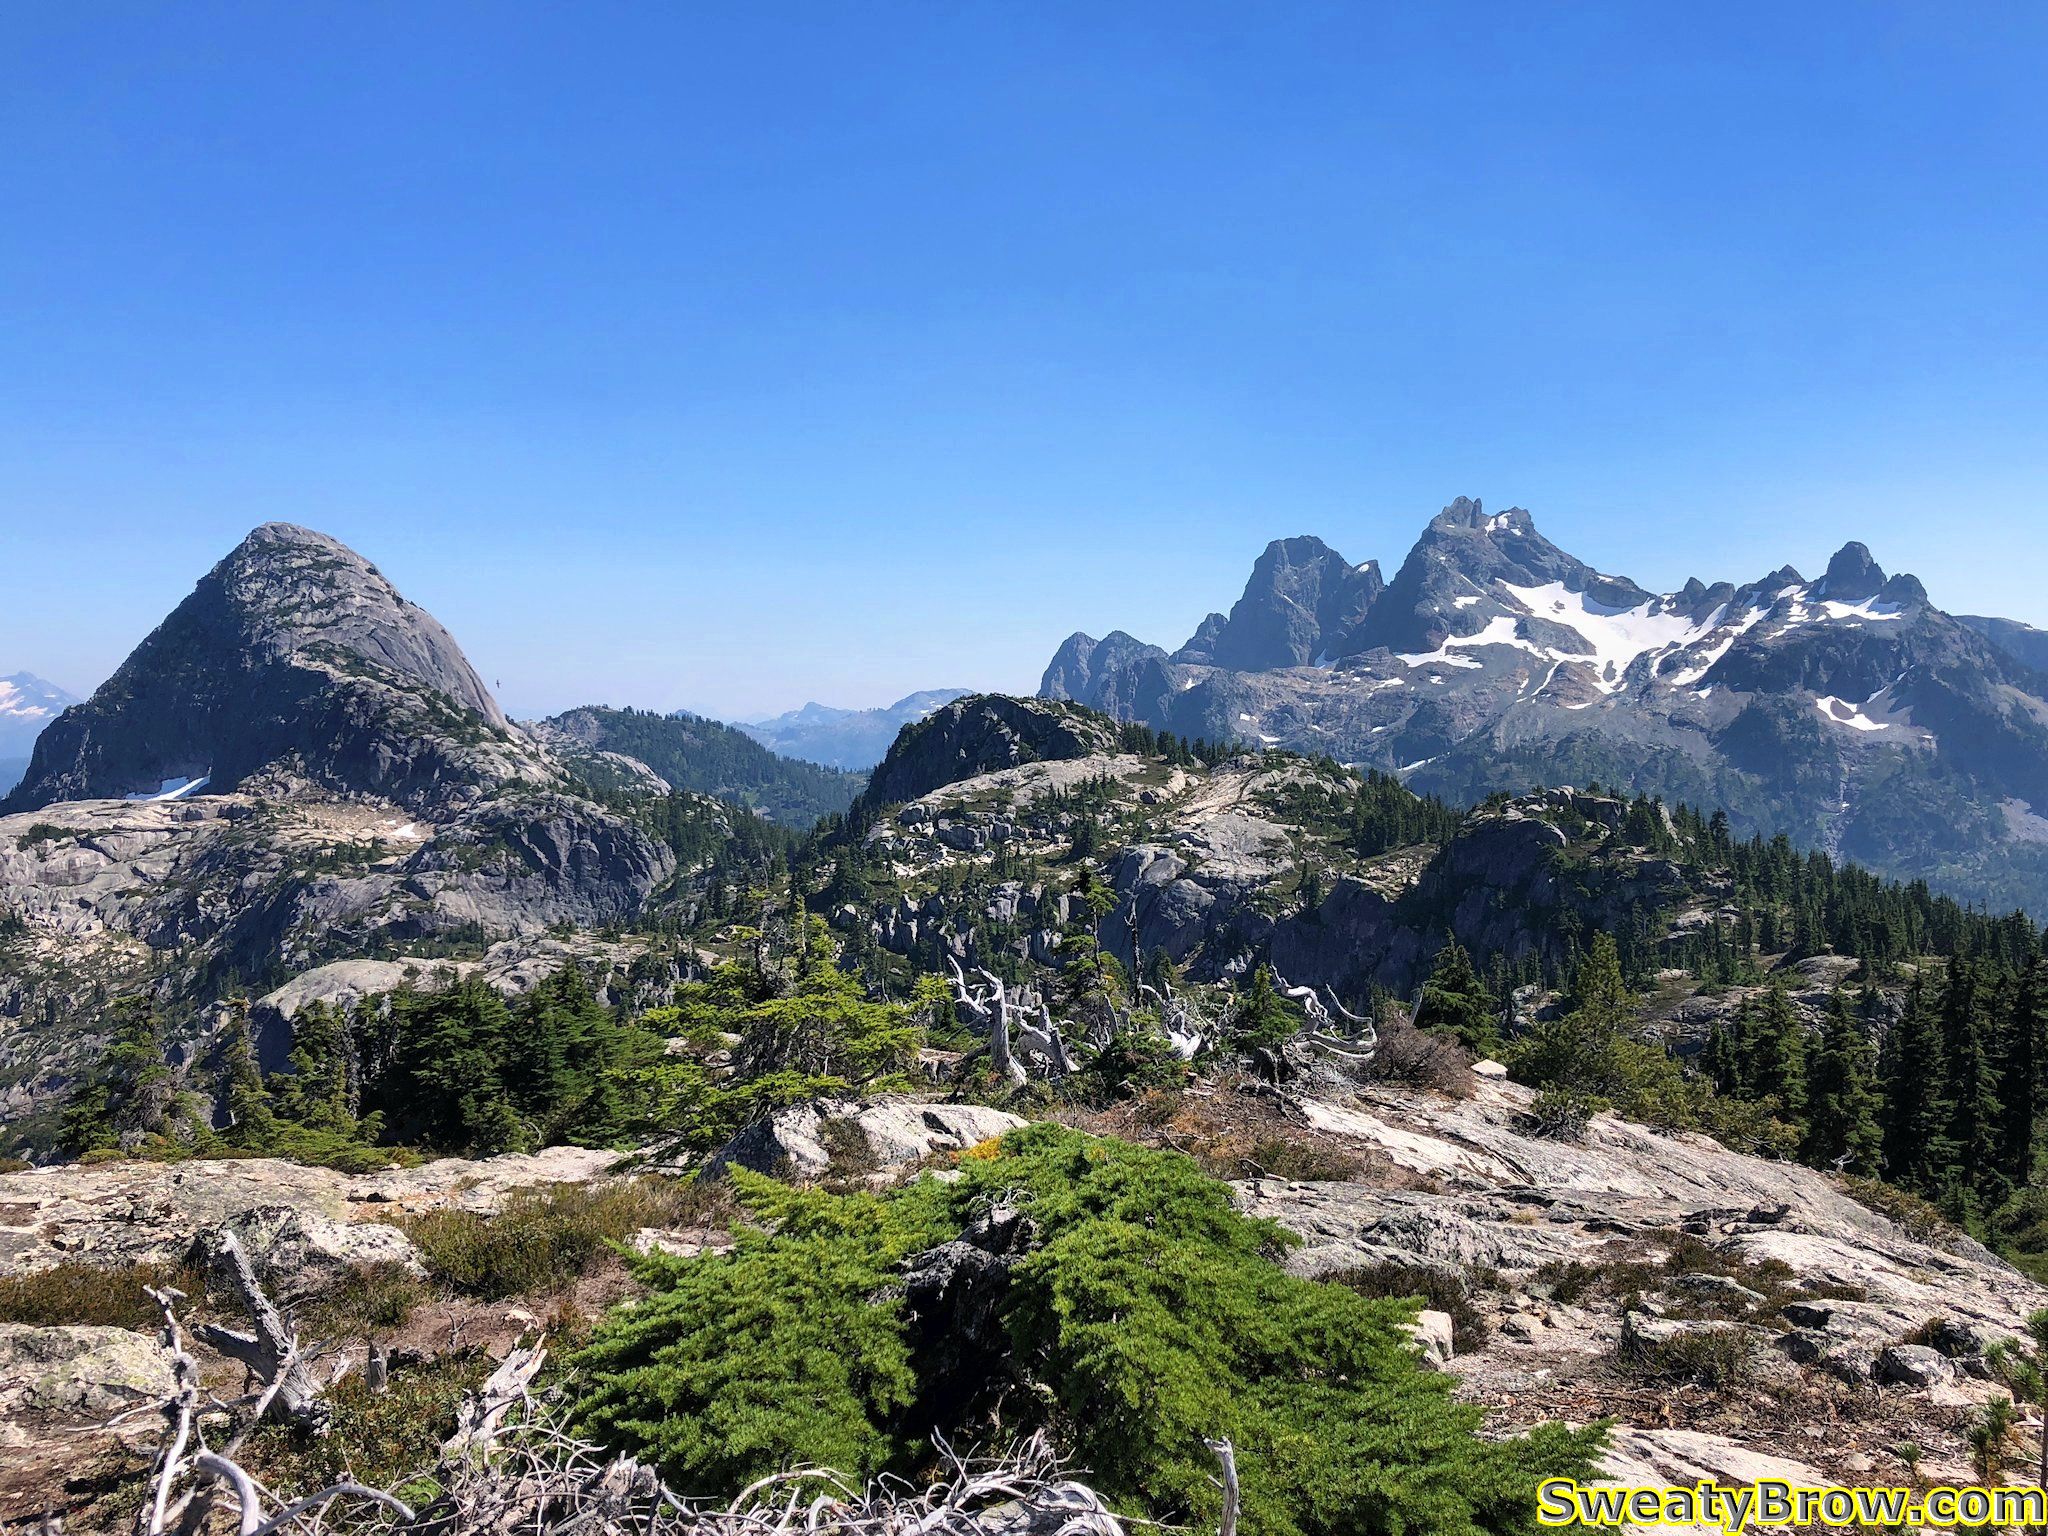
Did I mention steep? Very steeply, up through the trees. The trail popped out into the bottom of a notch between Mount Habrich and the next summit along the ridge. This summit was the highest point reached for the day, at about 1650 meters. The terrain through here was fun, pleasant scrambling, in a glorious location – the views to the north and south were just gorgeous.
Looking back at Mount Habrich from the west. Hard to make out, but there is a summit between me and the peak, directly over the top of which I hiked. The sunlit snow patch on the left is extending out of the gully between the peak and that summit.
After going up and over that first summit on the ridge, I came around the north side of the next summit, along a huge, flat slab system. I then dropped through a little basin area, where I ran into a group of four people coming the other way!
Coming around the nice flat esplanade, and looking beyond to the far end of the ridge.
They were laden with a bunch of climbing equipment, and were off to ascend “Life on Earth” – a 5 pitch, 5.10c-ish rock route up the southwest arete of Mount Habrich. I stopped to have a little snack and some water with them, and chatted briefly. One of the fellows was celebrating his birthday (which was the following day) with this climb. They joked about how they’d picked the hottest day of the year to do it, and that they hoped they’d be able to finish the climb and return to the gondola in time for the last ride down at 9:00 PM. It did seem a little dubious… Hope they made it!
I continued along for a while, up and down along the ridge. There were a couple of descents that had ropes fixed in place, but they were mostly in places where there were steep, dirty hills, which would be slippery in wetter conditions. There was one spot where I had to make a bit of an exposed step around an arete that had no real protection, and I was surprised because there had been some ropes in spots where they seemed unnecessary. Nevertheless, everything was pretty easy after the ascent I made up the side of The Brain!
Finally, shortly before 4:00 I reached the far western end of the ridge, where my GPS and the guidebook showed “Robin’s Connector Trail” reaching the same promontory from the other side – from the gondola.
The far west end of Habrich Ridge, looking back toward Mount Habrich and Sky Pilot.
I stopped here for a while, taking some photos – and chatting/gloating online with a work colleague about what a great spot I was in!
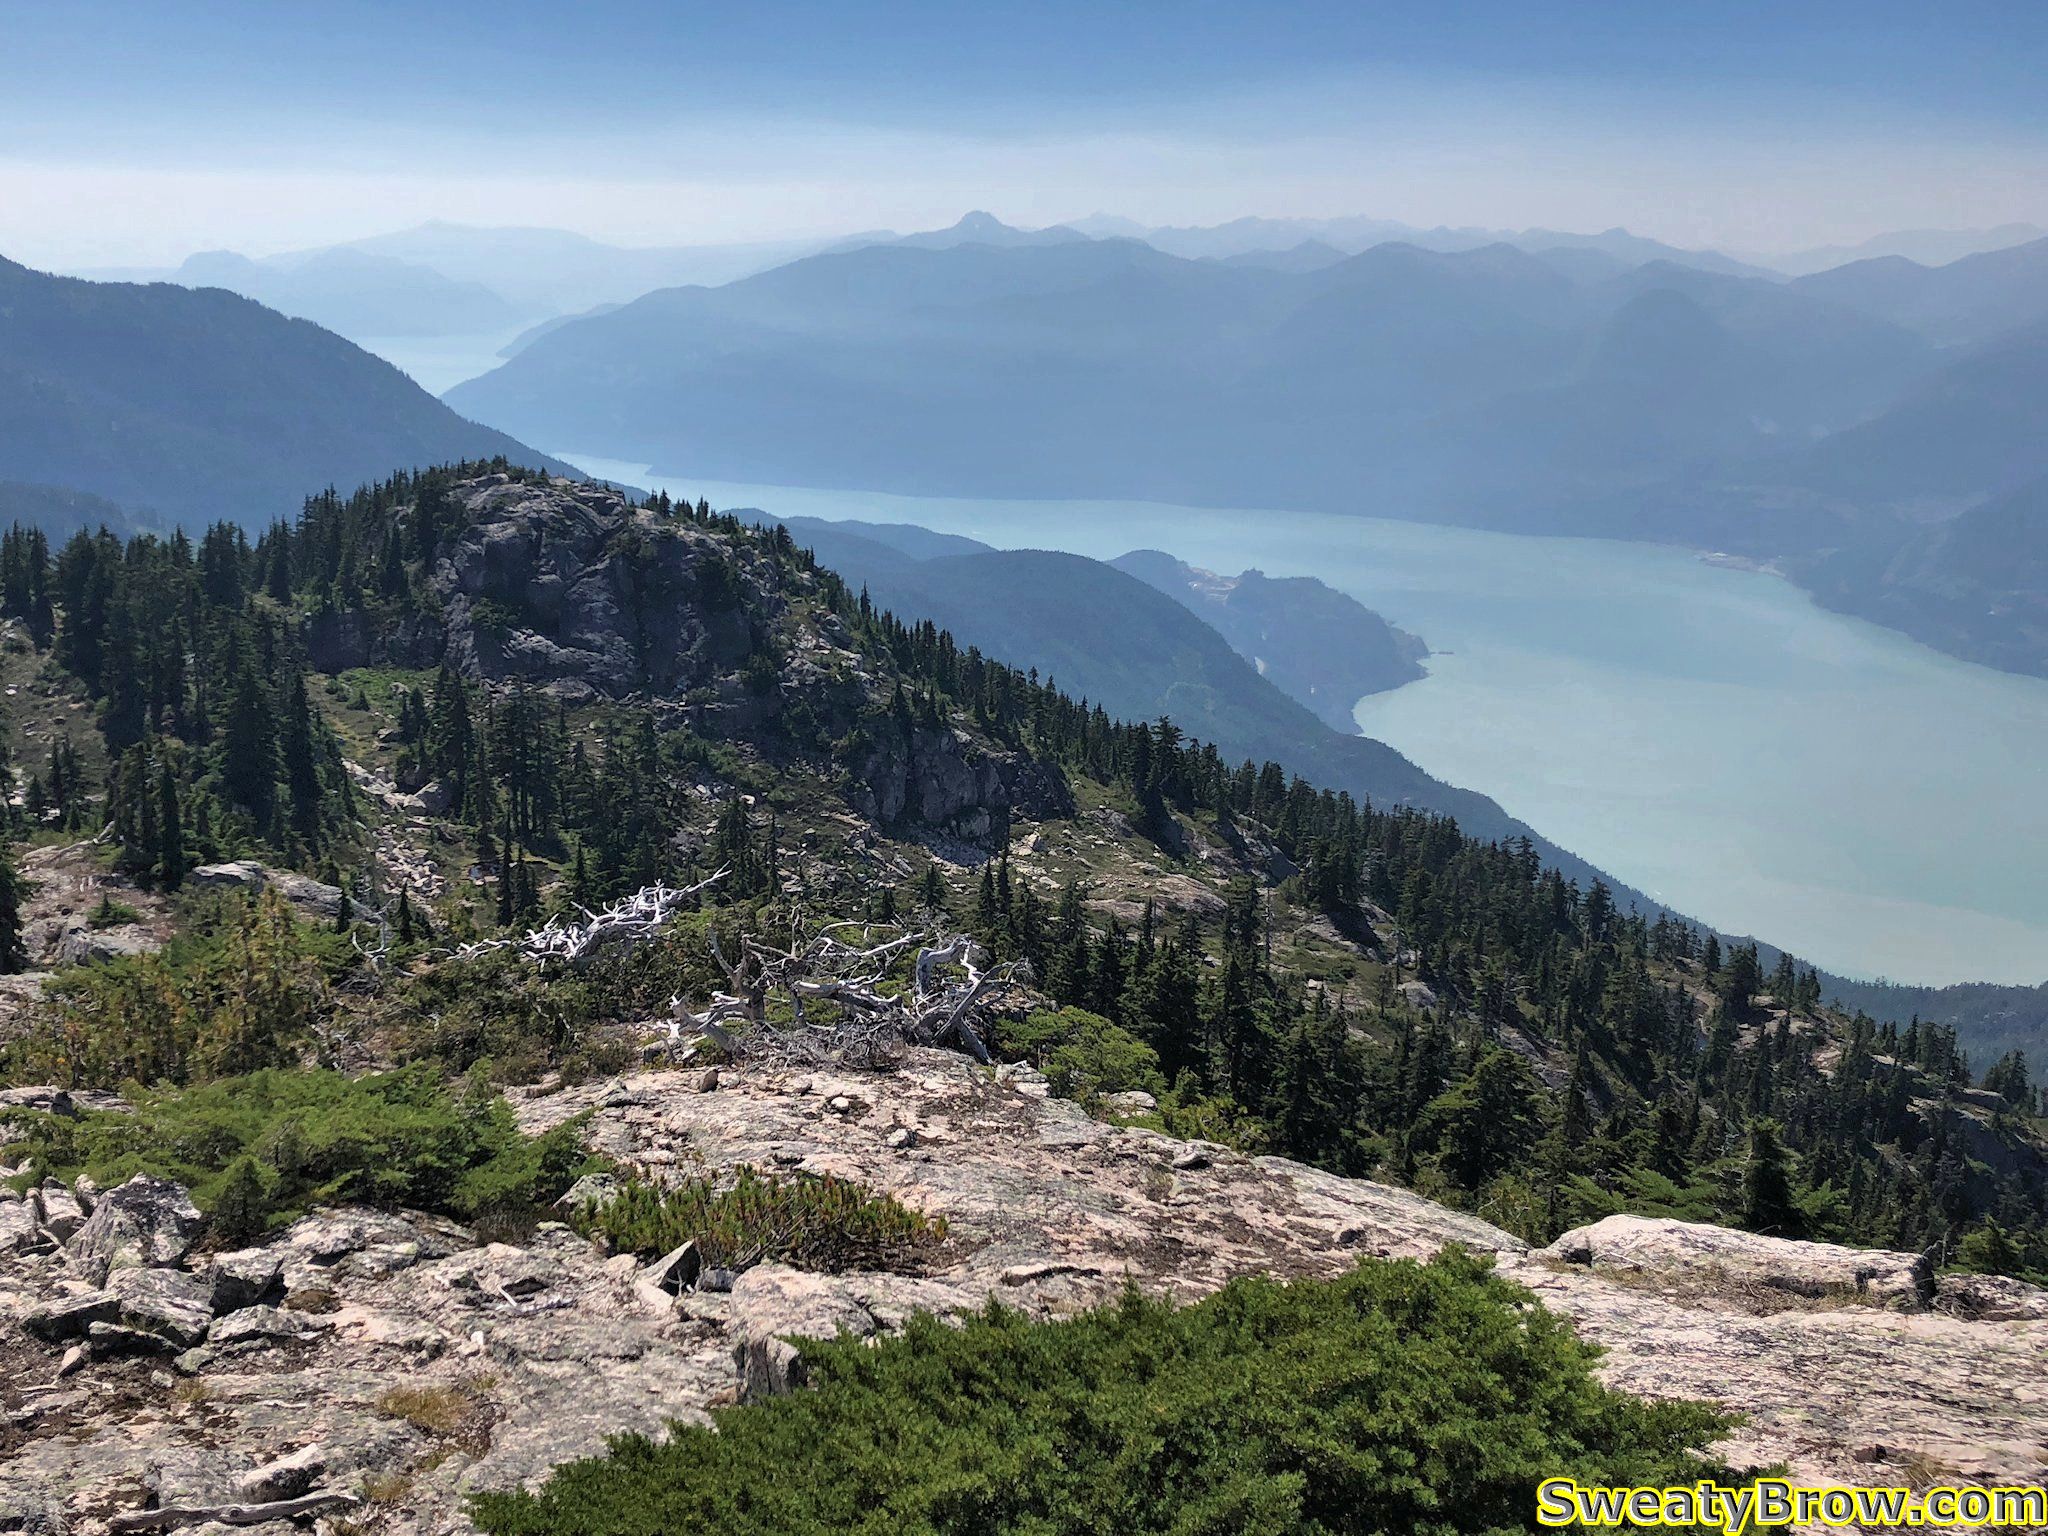
West end of Habrich Ridge, looking down toward Howe Sound.
I started hunting around for the trail, and had some difficulty finding it. Eventually, I found a bit of a footbed, and began following it downhill, but kept losing and finding it again along some rocky, talus filled slopes. I ended up being unable to find the actual “Robin’s Connector Trail”, but was able to follow another trail that is marked in the guidebook. It is a steeper, and apparently less well marked, trail that leads down to Neverland Lake, where it joins “Al’s Habrich Trail”.
Looking down at the three peaks of The Chief from the trail down Habrich Ridge.
I followed this down, down, down, and eventually managed to reach the Gondola shortly after 5:40.
I feasted upon a plate of Victory Fries, and a massive Caesar Salad, washed down with a can of Guinness Stout. Truly, a meal of champions.
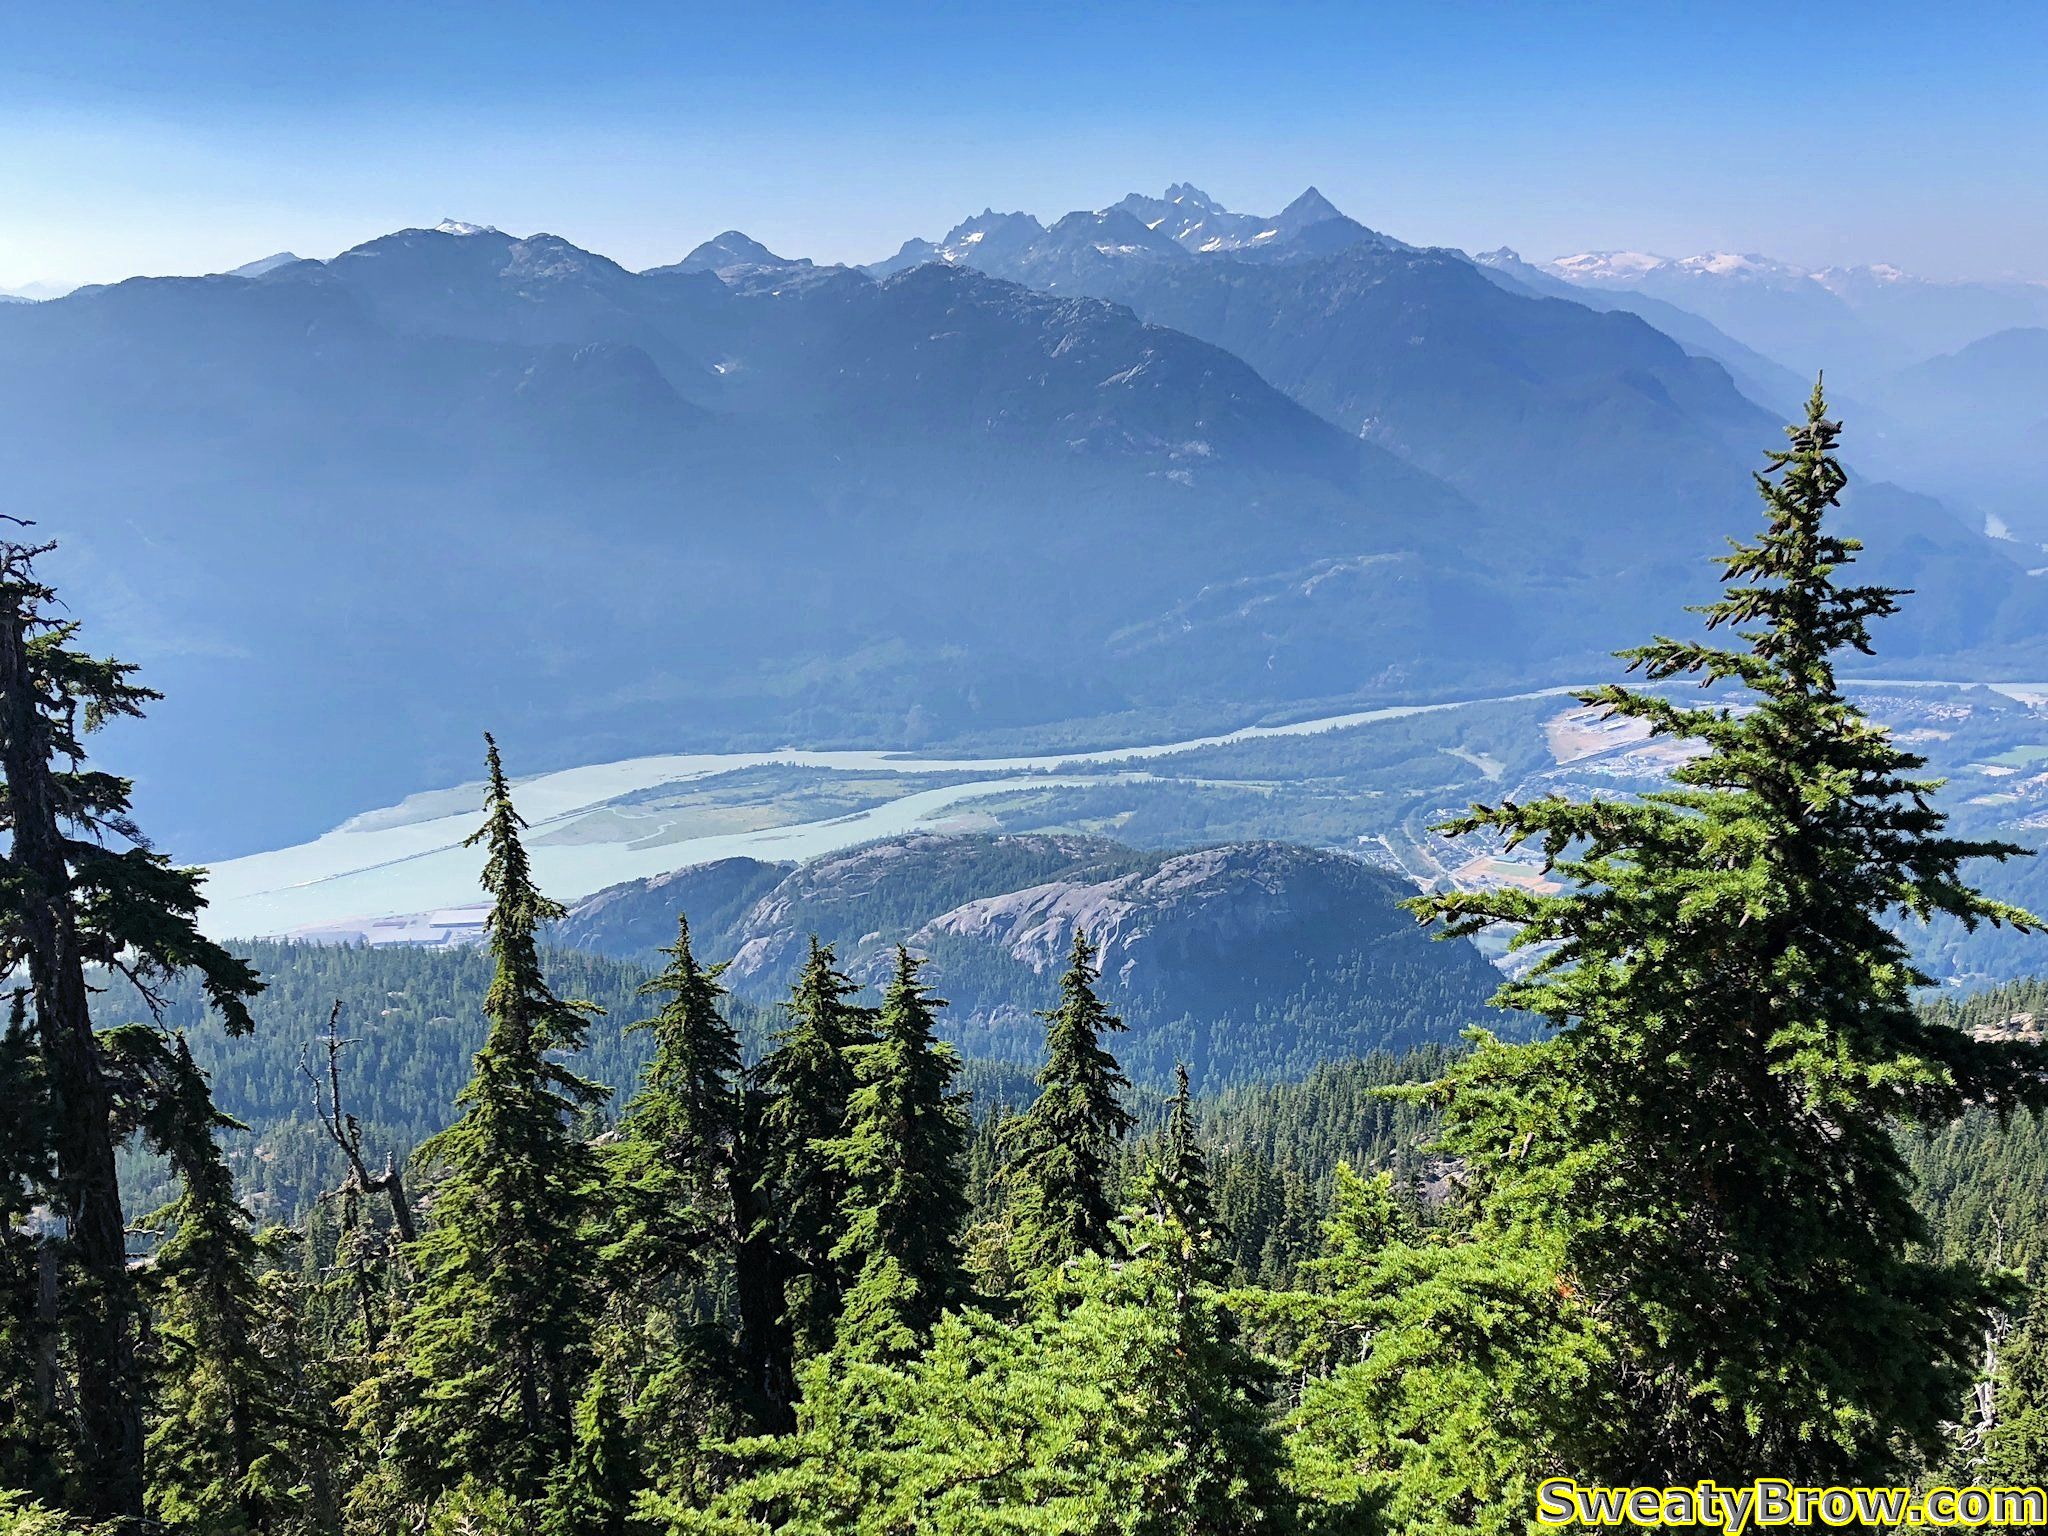
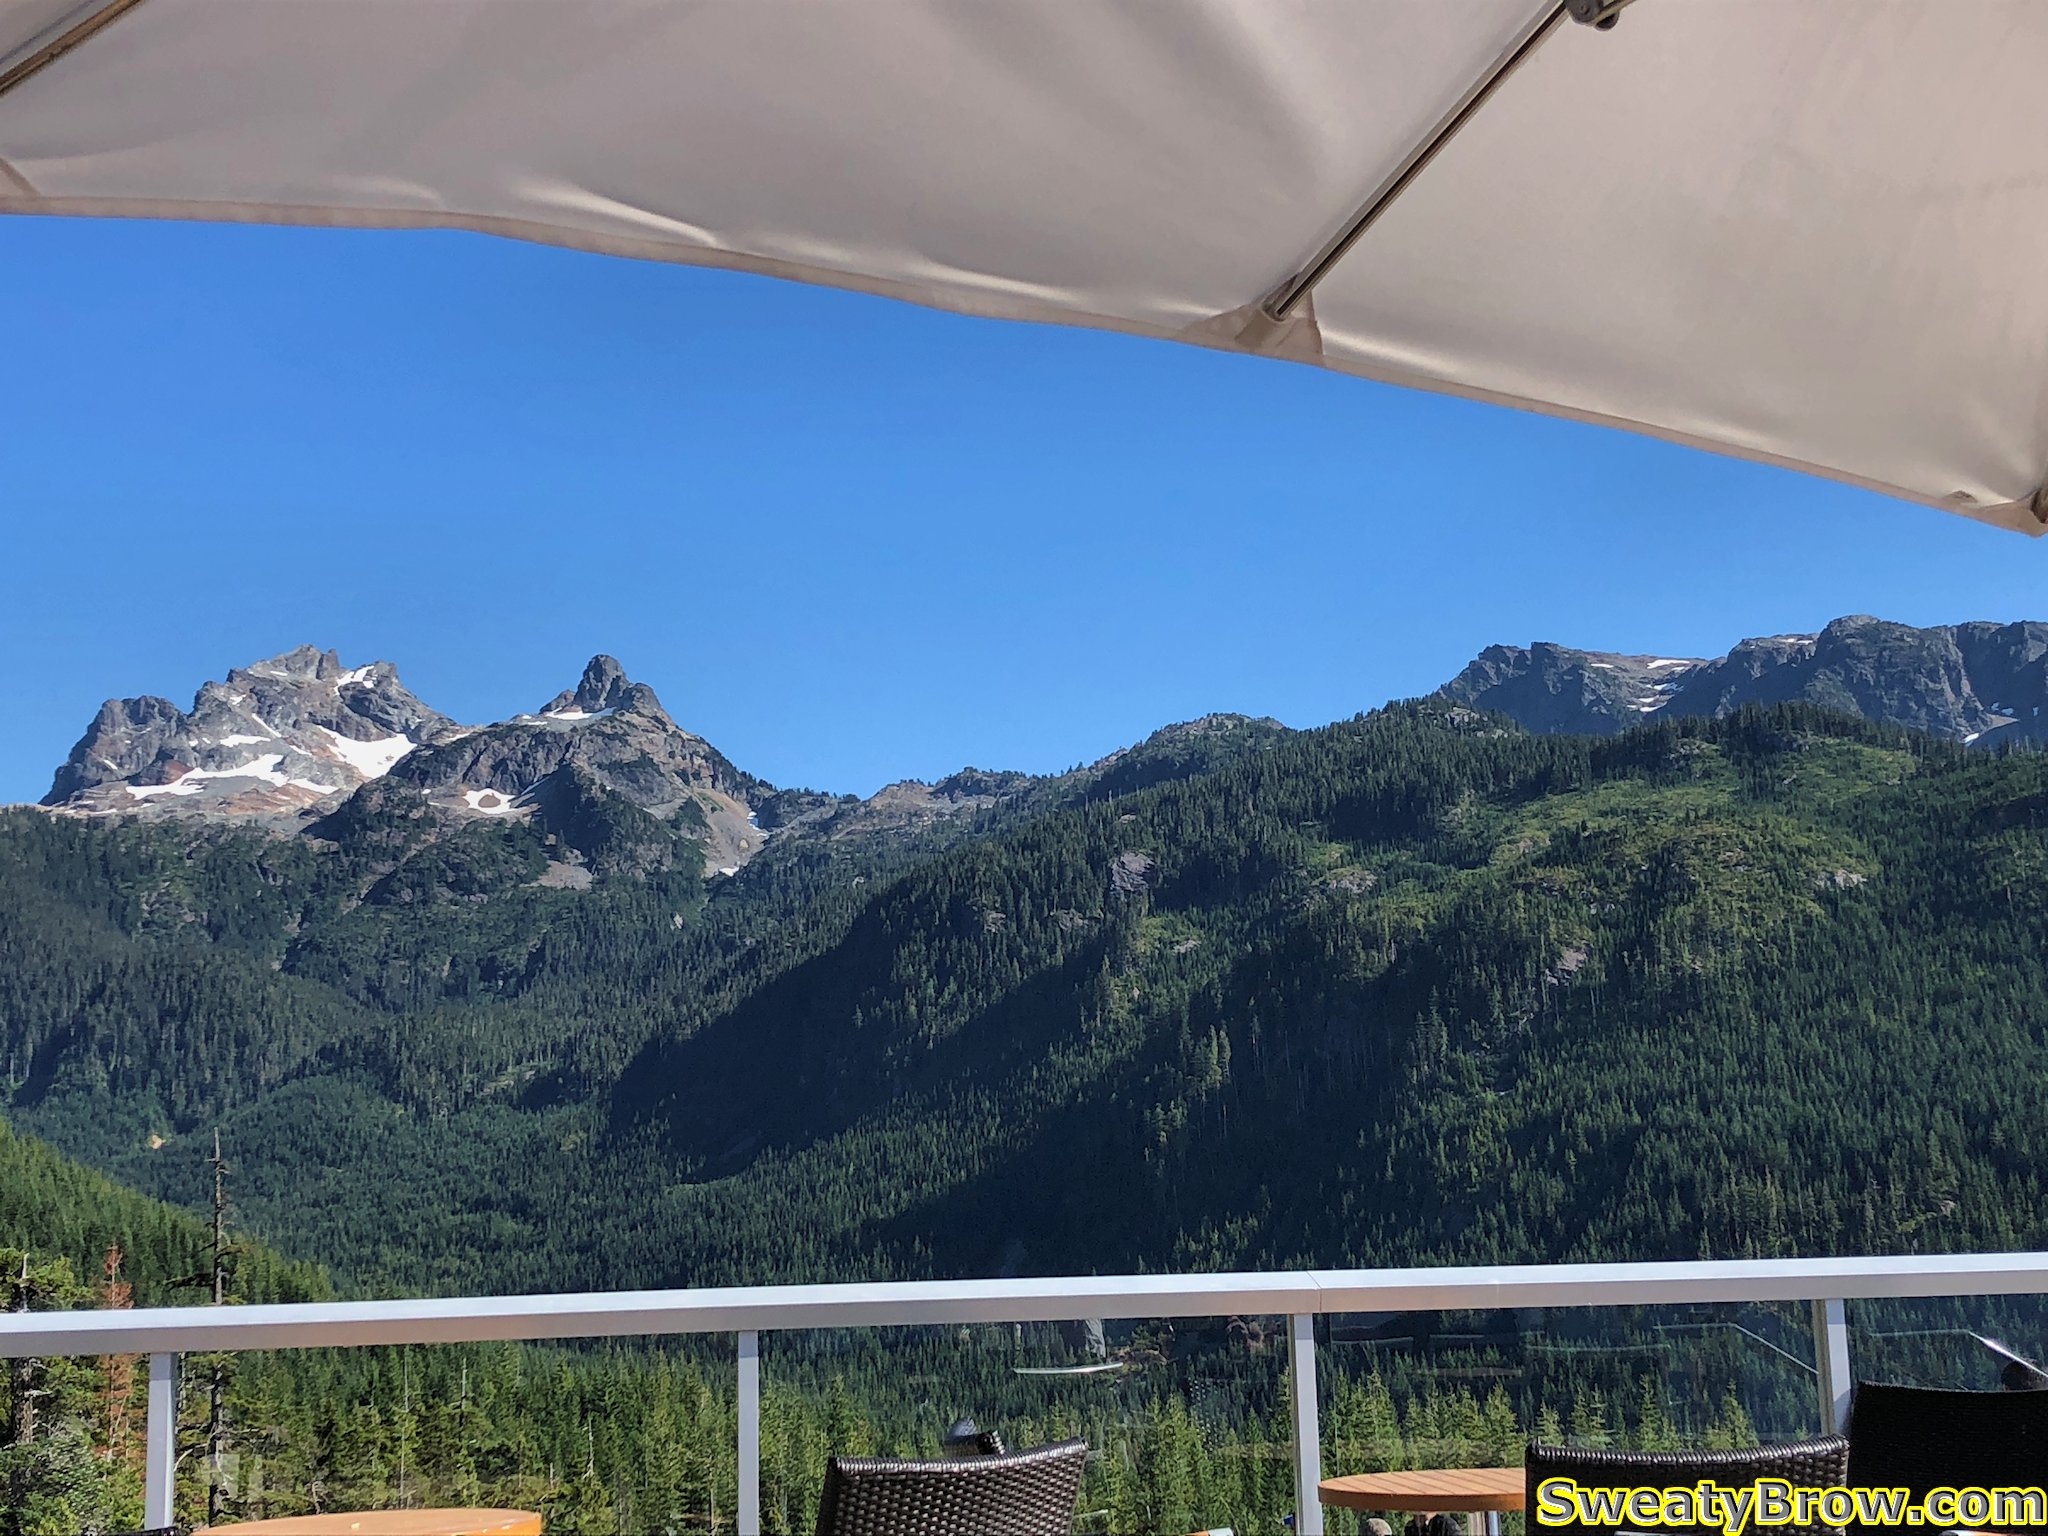
Enjoying a fine meal on the deck at the Sea to Summit Gondola. Looking up the valley toward Sky Pilot Mountain.
As I mentioned at the start, I was camping at the Squamish Chief Climbers Campground, a short 5-10 minute walk from the bottom of the Gondola. This meant that my tent was merely stumbling distance from my ride down the hill. Naturally, more beer was consumed, as I continued to celebrate a wonderful day in the mountains!
A GPS track of my route up and along Habrich Ridge.
Total time: 7:50 (6:10 “moving” – says Gaia GPS)
Distance: 16.9 km
Elevation: 1450 m gain/loss