

So, I learned that the “Big Three” are the quickest and easiest way to slim down the load that you lug around on your back while backpacking. I went to a much lighter, slimmer pack. And I made my own lightweight tent. Time to think about my sleep system.
Why down?
I decided to start with a down quilt, because that is the lightest option available. Living near and backpacking in the mountains of British Columbia, however, means that moisture is frequently part of the equation. What that means, is that this will not be my only quilt.
Down is great when it stays dry, and can keep its loft. A few days (or even hours) in a rainy environment can quickly negate any benefits of using down. You end up with a bag of what feels like damp oatmeal, with zero warmth whatsoever.
Nonetheless! A down quilt is light, warm, and awesome, if you can keep it dry. And backpacking in the summer in BC often provides long stretches of dry, sunny weather!
Why a quilt?
A quilt is a very efficient way to stay warm. When using a sleeping bag, the insulation that is under your body doesn’t actually do anything to keep you warm. Once it is flattened by body weight, there is little insulating value at all, so it is pretty much wasted weight. What is more important is the insulating value of the pad or mat that is used. (More about that later…)
As long as a sufficiently warm pad is used, you really just need enough material to cover your body, and tuck close enough to prevent drafts.
The hood on mummy bags also include a lot of wasted material. Other than in extreme conditions (winter mountaineering, say) it is more efficient to cover yourself to the neck with a quilt, and then put a warm layer on your head. A tuque is usually sufficient, but in very cold conditions, I take along a home made down hood, which I made for use with my quilt. It weighs about 30 grams, and keeps head and neck toasty warm!
Where did the design come from?
I did a bit of looking around on the interweb, and cobbled together ideas from a couple of different places. The most important is from the same guy I based my tent on – he goes by “dubber” on YouTube. Here is a link to his down quilt construction video. Another useful source was Joe, at Backcountry Banter, who had less of the “nitty gritty” than dubber, but good design thoughts.
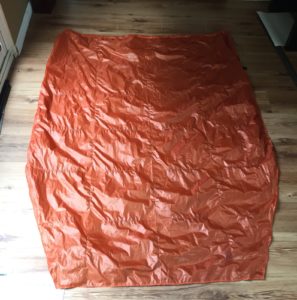
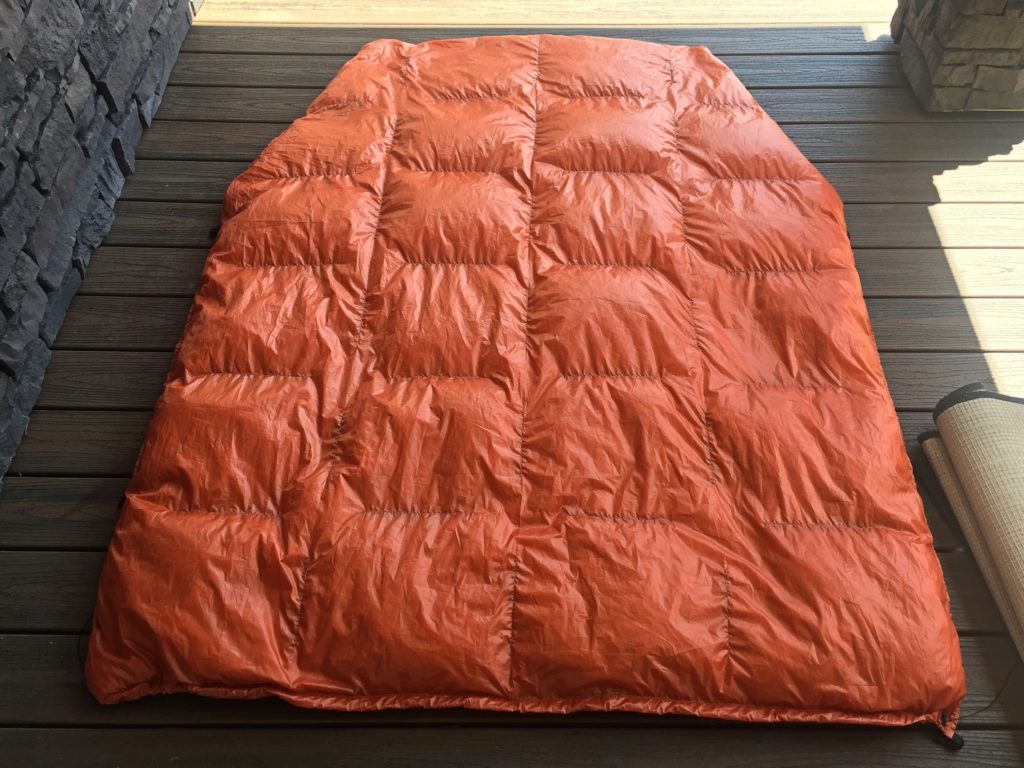
I ended up making a Karo Step quilt, which has partially open baffling, permitting the down to be shifted when required, and greatly simplifying the stuffing process. All the down gets placed in at once, and spread throughout, rather than having to measure out the down, and place it into different chambers.
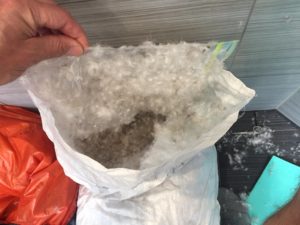
The fabric all came from Ripstop by the Roll, and the down from DownLinens.com. Both have been great to purchase from!
What is the quilt like?
I’m not going to go into full details about the making of the quilt, or the materials, but here are some highlights:
- The fill is one pound (454g) 850 FP grey, water resistant treated down.
- Total weight is 540 grams.
- Length: 66″ (168 cm) Width: 49″ (124 cm) tapering to 34″ ( 86 cm) at the feet.
- I made a velcro-in down footbox panel, which can be taken along if it will be cold.
- The tapered leg section has snaps to wrap the legs.
- The top has an elastic cinch and a snap buckle to click behind the neck and tighten.
- The sides have two additional buckles to join onto adjustable straps on the sleeping pad, allowing the user to hold the sides down and cinch them in close, preventing drafts.
My thoughts:
I have been comfortable under the quilt down to temperatures just below freezing, while wearing long underwear, top and bottom, and my down hood. I’m not sure how much lower I can take it than that, because I am kind of a cold sleeper – I get cold easily, and it can really disturb my sleep if any part of me is chilly.
The only issue I have had with the quilt is that the openings in the baffles seem to be a little bit too big. That is, the down moves just a little bit too easily between the chambers. I move around a fair bit in the night, and the down shifts downward, following gravity and puffing out the edges of the quilt that are laying on either side of me. It takes a while, but once or twice during the night, I find that I have to smack the quilt around a little, to spread the down evenly over the top of my body.
Unfortunately, it is very difficult to change this, once the quilt is complete. It would require removing all the down, and re-opening the seams, then sewing in short sections of baffle material into the gaps. I will think about whether I want to take such an extreme step.
In the meantime, the quilt is super lightweight, and very comfortable – with just a little care-taking during the night – at temperatures around and above freezing. It is great for summer trips, and shoulder season trips at lower elevations.